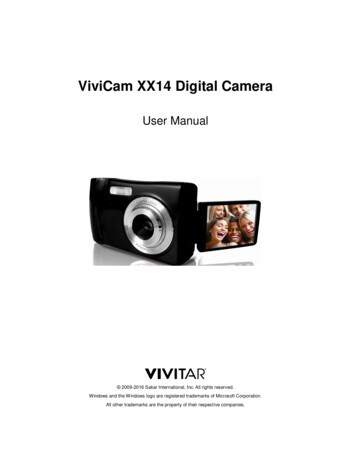
Transcription
ViviCam XX14 Digital CameraUser Manual 2009-2016 Sakar International, Inc. All rights reserved.Windows and the Windows logo are registered trademarks of Microsoft Corporation.All other trademarks are the property of their respective companies.
TABLE OF CONTENTSIntroduction . 2Getting to Know Your Camera . 2What’s Included . 3Parts of the Camera . 4Initial Camera Setup . 5Main Camera Modes . 9Camera Technical Specifications . 10Computer System Requirements . 11Powering the Camera On/Off . 12Changing Camera Mode . 13Navigating the Menus. 14Camera Features: ViviLink, Macro, Flash, Display . 15Photo Capture Mode . 19Photo Playback Mode . 35Video Capture Mode . 43Video Playback Mode. 56Installing the Software . 62Connecting the Camcorder to the Computer . 64Getting Videos and Photos from the Camcorder to the Computer . 65Getting Started! . 66Transferring Images from my Camera to my Computer Manually . 66Camera Maintenance . 68Sakar Warranty Card . 68Technical Support . 69Troubleshooting. 691
IntroductionThank you for purchasing this camera. Everything you need to take quality digital photos andvideos is included with your camera.Vivitar makes capturing those special moments as easy as possible.Please read this manual carefully first in order to get the most out of your digital camera.NOTE: Your camera requires a Micro SD Memory card (up to 32GB) for normal use.Micro SD Memory cards are not included and need to be purchased separately. This camera is a Plug and Play device. You can download the pictures and videos capturedby your camera without the software by directly accessing the camera’s memory card fromyour computer. It is recommended however that you install the Vivitar Experience ImageManager Software to enjoy the full Vivitar experience.Getting to Know Your Camera Take Selfies 1.8” Preview Screen Rotates 180 Digital Still Camera Digital Video Recorder Built-in Flash 4x Digital Zoom SD Memory Card Support 3x AAA Alkaline Batteries2
What’s Included1. Digital Camera2. USB cable3. Vivitar Experience Image Manager Software Installation CD4. Wrist Strap Note: SD Memory Card and batteries not included.3
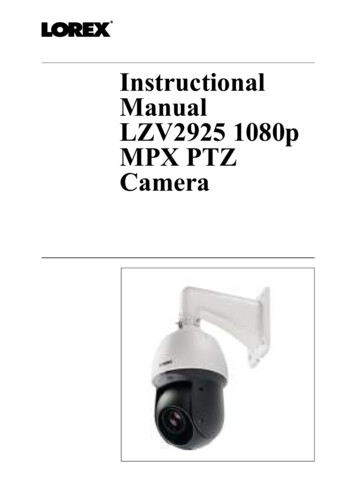
Parts of the Camera1. Power Button12. ViviLink / Down Button2. Shutter Button13. Microphone3. LCD Screen14. Flash Light4. LED15. USB Slot5. Zoom Out16. Tripod Socket6. Zoom In17. Digital Lens7. MODE button18. Battery Compartment8. SET button19. SD Memory Card Slot9. Scene / Left Button20. MACRO Switch10. Flash / Up / Slide Show21. Wrist Strap Connector11. Delete / Right Button22. Speaker (Buzzer)23. Self-Timer LED4
Initial Camera SetupINSTALLING THE BATTERIES INSTALLING THE MEMORY CARDInsert 3 AAA (1.5V) batteries.Alkaline batteries recommended (not included).SD Memory card (up to 32GB) needed fornormal use.TURNING ON THE CAMERAUSING THE CAMERA5
POWERING THE CAMERA ON1)BatteriesMake sure the batteries have been inserted properly into your digital camera, according tothe polarity shown inside the battery compartment.Use 3x AAA (1.5v) batteries. Alkaline batteries are recommended. Batteries not included.Note: Remove the batteries from the camera when not in use for an extended period. Do not mix alkaline and non-alkaline batteries. Some features, such as Flash, will not work if the battery power level is low. When the battery power is low the battery icon turns red and the camera willautomatically turn off a few seconds later. The energy status of the power is displayed on LCD as shown below:Full battery power2)Medium battery powerLow battery powerSD Memory CardMake sure an SD card has been properly inserted into your camera. (SD card not included.)To properly insert the SD Card:Push the SD card into the slot in the direction shown on the camera (see SD icon by the SDcard slot). Push the SD card until you hear a slight clicking sound. This indicates the SDcard has been inserted correctly.6
Note: After the camera is powered on, an SD icon will appear on the LCD display. If you donot see the SD icon on the display, please check if the card was inserted properly. Make sure the SD card is not locked (check the lock switch on the side of the SD card). Ifthe SD card is locked this will prevent the camera from saving captured photos to theSD card.3)Power OnPress thePOWER button to turn on the camera.FIRST TIME INITIAL SETUPWhen powering the camera ON for the first time the camera will take you through the INITIALCAMERA SETUP.Setting the Camera Language1) You will first be prompted to select a language for the camera. The Language selectionmenu will appear. Select the language of your choice by pressing the UP/DOWN directioncontrol button. Then press the SET button to confirm the selection.2)After selecting a language, you will be asked if you would like to continue with the initialcamera setup. A message will appear: “Continue with Camera Setup?”Select “Yes” to continue or “No” to exit the setup.Note: If you select “No” and decide to leave the camera setup, the camera will be set to itsdefault settings. These settings can be adjusted at any time manually through the menus inthe camera.7
Setting the Date and TimeThe next step in the initial camera setup is to set the date and time on the camera.1)Press the UP/DOWN button to change and set the specific time/date settings.2)Press the RIGHT/LEFT button to move/toggle to a different part of the time/date settingoptions.3)Once you have set the date and time as desired press the SET button to confirm the settingand move to the next part of the camera setup.Setting the ViviLink Default OptionOnce the Date and Time have been set, you will be asked to set the default ViviLink destinationfor photos and videos taken with your camera.The ViviLink technology allows you to quickly and easily upload your camera’s photos and videosto the social networks of your choice with the accompanying software application.1)First you will be asked to choose the default ViviLink social network for Photos. Press theUP/ DOWN button to highlight the desired default social network and press the SET buttonto confirm the selection.2)Next you will be asked to choose the default ViviLink social network for Videos. Press theUP/ DOWN button to highlight the desired default social network and press the SET buttonto confirm the selection.Congratulations! Your camera is now ready to use.8
Main Camera ModesYour camera has different modes for the various camera functions.You can switch modes by pressing the MODE button on your camera after the camera has beenpowered ON.PHOTO CAPTURE MODEUse this mode to capture pictures with your camera.This is the default mode when the camera is powered ON.To take a picture, aim your camera as desired and press the Shutter button.The picture will be automatically saved to your camera’s memory card.To access the various menus for the Photo Capture Mode, press the SET button while inthe Photo Capture Mode.VIDEO CAPTURE MODEUse this mode to capture videos with your digital camera.After turning on your camera, press the MODE button once to open the Video CaptureMode. To take a video, aim your camera as desired and press the Shutter button to startthe record. A red record indicator will appear on the LCD screen while record is in progress.To stop the record, press the Shutter button again. The video will be automatically saved toyour camera’s memory card.To access the various menus for the Video Capture Mode, press the SET button while in theVideo Capture Mode.PLAYBACK MODE (PHOTOS & VIDEOS)Use this mode to view and manage the photos and videos on your camera.After turning on your camera, press the MODE button twice to open the Playback mode forphotos and videos. You can scroll through the photos and videos that you’ve previouslytaken to view, edit or delete them as desired.To access the various menus for the Playback Mode for photos and videos, press the SETbutton while in the Playback Mode.9
Camera Technical SpecificationsImage SensorImage ResolutionCMOS Sensor20MP (5200X3900), 18MP (4896X3672), 16MP (4608X3456),14MP (4416X3312), 12MP (4000X3000), 10MP (3648X2736),8MP (3264X2448), 7MHD (3648X2048), 5MP (2592X1944), 3M(2048X1536), 2MHD (1920X1080), VGA (640X480)Video ResolutionHD (1280X720), VGA (640X480), QVGA (320X240)File FormatJPEG (Photo) /AVI (Video)Internal Memory1 Test Photo Use Only (3M)External MemorySD Memory Card (up to 32GB)LCD Display1.8 Inch TFT, Rotates 180 Lensf 7 mm F3.0Zoom4X Digital ZoomExposure-3.0EV 3.0EVWhite BalanceAuto, Daylight, Cloudy, Fluorescent, IncandescentISOAuto, 100, 200, 400SceneAuto, Scenery, Portrait, Night Scenery, Night Portrait, HighSensitivity, BeachFlashNo Flash, Forced On, Auto Flash, Red Eye ReductionSelf-Timer2, 5 or 10 second delayAnti-ShakeYesPrint PhotosYesMicrophoneYesMacroYes, Manual SwitchLanguagesEnglish, French, Spanish, Portuguese, German, Dutch,Italian, Polish, GreekInterfaceUSB 2.0System Requirements(Photo Capture Mode)WINDOWS XP (SP3), Vista (SP1) and WINDOWS 7 andabove; MACINTOSH OSX v10.5.x and aboveBattery3 * AAA (1.5V) batteriesWorking Temperature0 40 C10
Computer System RequirementsTo be able to download photos and videos to your computer using the Vivitar Experience ImageManager Software, you will need the following minimum configuration:WINDOWS OS MICROSOFT Windows XP with Service Pack 3, Windows Vista with Service Pack 1 orMICROSOFT Windows 7 or above Pentium 4 processor (or above) 1 GB RAM, 250 MB available hard disk space 16-bit Color monitor, 1024 X 768 recommended screen resolution CD-ROM Drive QuickTime 6 or higher MICROSOFT Internet Explorer 7 or higher Windows Media Player 10 or higher DirectX 9 or higher Internet connection requiredMACINTOSH OS Intel Processor running MACINTOSH OS X v10.5.x or later 1 GB RAM, 250 MB available hard disk space Display: 1024 x 768 or higher-resolution monitor QuickTime 6 or higher CD-ROM Drive Internet connection requiredNote: Make sure the latest compatible Adobe Flash Player is installed on your computer.11
Powering the Camera On/Off Make sure the batteries have been inserted properly into your digital camera. If your cameracomes with a rechargeable lithium battery, make sure it is fully charged before the first use. Make sure an SD card has been inserted into your camera.(SD card up to 32GB - SD Card not included)Please see Initial Camera Setup for more information.POWERING THE CAMERA ONPress thePower button to turn your camera ON. After powering on, the camera emits a sound and the LED light turns on briefly. The LCD screen turns on with your camera in Photo Capture mode to start.POWERING THE CAMERA OFFWhile the camera is on, you can press thePower button again at any point to turn yourcamera OFF. A “Goodbye” screen appears and then the camera will power off completely.Note: Your digital camera also has an Auto Power Off feature that will automatically turn off yourcamera after a specific period of time that your camera is left idle. The Auto Power Off settingscan be set from the Auto Power Off settings menu (in either Photo Capture Mode or VideoCapture Mode).12
Changing Camera ModeYour camera has three main modes:1)Photo Capture Mode - Use this mode to capture photos with your camera.2)Video Capture Mode - Use this mode to capture videos with your camera.3)Playback Mode (for photos and videos) - Use this mode to view the photos and videosyou have already taken with your camera. When the camera is first powered ON, the Photo Capture Mode is automatically active. The icons that appear on the LCD screen are the best default settings so that you can begin tocapture and enjoy clear quality photos.To change the active camera mode, make sure the camera is powered ON and press the MODEbutton.When in Photo Capture Mode, this icon will display on the top-left corner of the LCD display.When in Video Capture Mode, this icon will display on the top-left corner of the LCD display.When in Playback Mode, this icon will display on the top-left corner of the LCD display.13
Navigating the MenusEach camera mode has a set of menus specific to that mode.1)Press the SET button to open the menus for the current mode.2)Press the LEFT or RIGHT button to scroll between the various menus for the current mode.3)Press the UP or DOWN button to highlight the desired menu selection.4)Press the SET button to confirm and save the highlighted menu option.5)If the selection can be remembered by the camera, aselection icon appears to the rightof the selected menu option. Changes made to these options remain until you decide tochange them again at a later time.Some menu options are single-use functions that are not remembered by the camera anddo not display the selection icon.6)At any time you can press the MODE button to exit the menus and return to the previousscreen.Note: For most menu settings, an icon reflecting your selection displays on the LCD screen. The settings are saved by your digital camera until you manually change the setting orrestore the camera’s default factory settings.14
Camera Features: ViviLink, Macro, Flash, DisplayVIVILINK OPTIONThe ViviLink technology allows you to quickly and easily upload your camera’s photos and videosto the social networks of your choice with the accompanying Vivitar Experience ImageManager application. A ViviLink destination can be assigned to a photo or video in Capture modeprior to capturing your image or in Playback Mode.ViviLink: Video or Photo Capture ModePress theDOWN Quick Function Button to open the ViviLink options. Select a ViviLink optionand press SET to save your selection and return to Photo/Video Capture Mode. Your selectedViviLink destination appears as an icon on the LCD screen and your camera is now ready tocapture your photo or video with the selected ViviLink destination.Note: The ViviLink feature is deactivated by default and needs to be activated prior to capturingeach photo or video.ViviLink: Playback ModeA ViviLink destination can be added to a captured image or changed by accessing the ViviLinkmenu in Playback Mode. Simply select an image, press theselect the ViviLink destination and press the SET button.15DOWN Quick Function Button,
FLASH OPTIONSThere are several Flash options available on your camera. The options appear in sequence onthe LCD screen in the Photo Capture Mode.To change the Flash mode, press theUP Quick Function button until you arrive at your desiredsettings.Important: Please make sure the MACRO mode is turned OFF when you want to use the Flash.When the camera is in MACRO mode (ON), the camera will not fire a flash, as MACRO modeis suitable for close-up photography. When using Flash, stand between 8 to 10 feet away from the scene you would like to capture.Flash TypeForced Off (Default)Description No flash will appear. Use this when you do not want to activate Flash.NOTE: A ‘Turn On Flash’ message appears when the cameradetects a need for flash. When this message appears, it isrecommended to press the Flash/Up button and select one of theflash options: Auto Flash, Forced On or Red-Eye Reduction. The flash is enabled for each photo.Note: If you use this option in a well-lit environment, your photoForced Onmay be appear too bright/light (overexposed).A When you want the camera to determine if Flash is needed, selectAuto Flash.Auto Flash The flash will automatically turn on according to the lightingconditions. When the LED light stops blinking, the Flash is ready for use.Note: In some cameras, an initial flash appears to test yourlighting conditions. If flash is needed, a second flash will appearupon taking the photo. Eliminates the red-eye effect in a photo caused by flash.Red Eye Reduction16
MACRO SWITCH/MACRO ON:Your camera contains a MACRO Switch that allows you to manually enable or disable theMACRO mode on your camera. While using the MACRO mode, you can capture images at closerange (30 45cm). To turn the MACRO mode ON, slide the Macro Switch located on the side ofyour camera UP to the flower icon .When enabled, the MACRO mode allows your camera to focus on an object that is close tothe camera. The flower iconappears on the LCD and indicates that the Macro mode is ON.MACRO OFF:To turn the MACRO mode OFF Slide the MACRO Switch on the side of the camera DOWN to the mountainThe mountain icon appears on the LCD display.When MACRO mode is off, images can be captured from 1.5m - (infinity).17icon.
Note: The MACRO mode must be turned OFF when you want to use the following feature ofyour camera: Flash.To Turn the MACRO mode OFF: Slide the MACRO Switch down to the mountain iconto turn Macro mode OFF.The mountainicon will appear on the LCD display.HIDE/SHOW THE LCD ICONSThe display of the icons on the LCD screen can be hidden or visible as desired.1)Hold the MODE button for 2 seconds to hide the display of the icons on the screen.2)Press the MODE button again to redisplay the icons on the screen.18
Photo Capture ModeThe Photo Capture mode allows you to capture pictures with your digital camera.TAKING A PICTURE1)Selecting the Scene with the LCD Display:While in Photo Capture mode, use the LCD display on the back of the camera to direct thecamera at the scene you would like to capture.Note: Make sure the MACRO mode is set to your desired mode: Standard photo captureusing MACRO OFF2), or close up photo capture using MACRO ON.Zoom Options:Press the T/Zoom In and W/Zoom Out buttons to zoom in/out if desired.You can magnify your subject up to 4 times using the Digital Zoom.The following Digital Zoom Indicator appears on the right side of the LCD screen:3)Capturing the Photo:Press theShutter button to take the picture.The picture is automatically saved to the camera’s internal memory (limit one photo) or SDmemory card.19
SELFIE / SELF PORTRAIT PHOTO CAPTUREYou can also include yourself in your photos by using the Selfie / Self Portrait capability.1)Push the Macro switch lever up (Macro On) for theflower icon to appear.2)Make sure the LCD screen is rotated out 180 .3)Hold the camera steady out facing towards you at arm’s length (about 10 30cm).The LCD screen should be out facing towards you so that you can see yourself on the LCDscreen.4)Look at the camera lens.5)Press the Shutter button to take the picture.20
PHOTO CAPTURE MODE QUICK FUNCTION BUTTONSYour digital camera has a four-directional pad that functions as Quick Function buttons:Quick FunctionFunctionButtonLEFTUPSCENE SELECTION – Opens the ‘Scene’ menu.FLASH OPTIONS – Toggles between the following Flash options:Forced Off,RIGHTForced On,A Auto Flash,Red Eye ReductionDELETE – Opens the ‘Delete This Photo’ option and allows you to view anddelete the last photo taken.DOWNVIVILINK – Opens the ‘ViviLink for Photos’ menu.OtherShutterSETCaptures the photo. MENU - Opens the menu options for Photo Capture Mode. SAVE SELECTION - Saves your selected menu option.To navigate through the Menus, use the UP/DOWN/LEFT/RIGHTdirection control buttons. MODEMODE SELECTION - Toggles between the Photo Capture Mode, VideoCapture Mode and Playback Mode. Exits the menu screen.TZooms InWZooms Out21
PHOTO CAPTURE MODE MENUSThe following are the menus that appear in your camera’s Photo Capture Mode. Theselection icon appears by the default settings. Once you change a setting, the setting is saved by your camera until you manually change thesetting or restore the camera’s default factory settings.22
Scene MenuThe ‘Scene’ menu allows you to choose scene settings that let your camera to adapt properly toyour current environment.Note: When selecting the HIGH SENSITIVITY Option, by default the camera switches off theFLASH automatically (if it’s ON) to optimize the picture quality. If however, you would like tooverride it and manually turn ON the flash – you can do so. Remember: The ‘Scene’ menu is also accessible by pressing the LEFT Quick Function Buttonwhile in Capture Mode.1)Press the SET button to open the menus for the current mode.2)Press the LEFT or RIGHT button to scroll and select the ‘Scene’ menu.3)Press the UP or DOWN button to highlight a specific option.4)Press the SET button to confirm and select the highlighted menu option.A5)selected option icon appears on the selected item.To continue within the menus and select a different menu option:Press the LEFT or RIGHT button to select the next menu item.6)To exit the menu view:Press the MODE button to exit the menu and return to your previous mode.An icon reflecting your selection is displayed on the LCD screen.Image Resolution MenuThe ‘Image Resolution’ menu allows you to choose the desired size of the images taken by yourcamera. Keep in mind that images with a higher resolution will also take up more of yourcamera’s memory.1)Press the SET button to open the menus for the current mode.2)Press the LEFT or RIGHT button to scroll and select the ‘Image Resolution’ menu.3)Press the UP or DOWN button to highlight a specific option.4)Press the SET button to confirm and select the highlighted menu option.Aselected option icon appears on the selected item.23
5)To continue within the menus and select a different menu option:Press the LEFT or RIGHT button to select the next menu item.6)To exit the menu view:Press the MODE button to exit the menu and return to your previous mode.An icon reflecting your selection is displayed on the LCD screen.Image Quality MenuThe ‘Image Quality’ menu allows you to select the desired quality level of the images taken byyour camera. Keep in mind that images with a higher image quality level will also take up morememory on your camera.1)Press the SET button to open the menus for the current mode.2)Press the LEFT or RIGHT button to scroll and select the ‘Image Quality’ menu.3)Press the UP or DOWN button to highlight a specific option.4)Press the SET button to confirm and select the highlighted menu option.A5)selected option icon appears on the selected item.To continue within the menus and select a different menu option:Press the LEFT or RIGHT button to select the next menu item.6)To exit the menu view:Press the MODE button to exit the menu and return to your previous mode.An icon reflecting your selection is displayed on the LCD screen.Self Timer MenuThe ‘Self Timer’ menu allows you to set a delay between the time that the camera’s Shutterbutton is pressed and the actual capture of the picture.This is an optimal feature if you don’t just want to take the picture but would also like to be in thepicture yourself. Just set the desired Self-Timer delay, press the Shutter button on your cameraand position yourself in front of the camera as desired.1)Press the SET button to open the menus for the current mode.24
2)Press the LEFT or RIGHT button to scroll and select the ‘Self Timer’ menu.3)Press the UP or DOWN button to highlight a specific option.4)Press the SET button to confirm and select the highlighted menu option.A5)selected option icon appears on the selected item.To continue within the menus and select a different menu option:Press the LEFT or RIGHT button to select the next menu item.6)To exit the menu view:Press the MODE button to exit the menu and return to your previous mode.An icon reflecting your selection is displayed on the LCD screen.Anti-Shake MenuThe ‘Anti-Shake’ feature reduces image distortion that can be caused by movement of thecamera while capturing the image.1)Press the SET button to open the menus for the current mode.2)Press the LEFT or RIGHT button to scroll and select the ‘Anti-Shake’ menu.3)Press the UP or DOWN button to highlight a specific option.4)Press the SET button to confirm and select the highlighted menu option.A5)selected option icon appears on the selected item.To continue within the menus and select a different menu option:Press the LEFT or RIGHT button to select the next menu item.6)To exit the menu view:Press the MODE button to exit the menu and return to your previous mode.An icon reflecting your selection is displayed on the LCD screen.Multi SnapShots MenuWhen enabled, the ‘Multi SnapShots’ feature allows you to take six rapid snapshots in a row witha single click of the shutter button.This feature can be effective when trying to capture a particular moment in a sporting event or25
other scenes with quick movements.1)Press the SET button to open the menus for the current mode.2)Press the LEFT or RIGHT button to scroll and select the ‘Multi SnapShots’ menu.3)Press the UP or DOWN button to highlight a specific option.4)Press the SET button to confirm and select the highlighted menu option.A5)selected option icon appears on the selected item.To continue within the menus and select a different menu option:Press the LEFT or RIGHT button to select the next menu item.6)To exit the menu view:Press the MODE button to exit the menu and return to your previous mode.An icon reflecting your selection is displayed on the LCD screen.White Balance MenuThe ‘White Balance’ feature allows your camera to adjust the coloring of the captured imagesdepending on the type of light source in the current environment.Properly adjusting the White Balance setting to match your current environment will allow thecamera to properly balance the colors in the images that are taken with your camera.1)Press the SET button to open the menus for the current mode.2)Press the LEFT or RIGHT button to scroll and select the ‘White Balance’ menu.3)Press the UP or DOWN button to highlight a specific option.4)Press the SET button to confirm and select the highlighted menu option.A5)selected option icon appears on the selected item.To continue within the menus and select a different menu option:Press the LEFT or RIGHT button to select the next menu item.6)To exit the menu view:Press the MODE button to exit the menu and return to your previous mode.An icon reflecting your selection is displayed on the LCD screen.26
Color Effect MenuThe ‘Color Effect’ menu allows you to choose a color effect to add to the images taken with yourcamera.1)Press the SET button to open the menus for the current mode.2)Press the LEFT or RIGHT button to scroll and select the ‘Color Effect’ menu.3)Press the UP or DOWN button to highlight a specific option.4)Press the SET button to confirm and select the highlighted menu option.A5)selected option icon appears on the selected item.To continue within the menus and select a different menu option:Press the LEFT or RIGHT button to select the next menu item.6)To exit the menu view:Press the MODE button to exit the menu and return to your previous mode.Image Sharpness MenuUsing the ‘Image Sharpness’ menu you can set the level of sharpness in the images taken withyour camera. The sharpness level dictates if the edges of objects in the image are more or lessdistinct.1)Press the SET button to open the menus for the current mode.2)Press the LEFT or RIGHT button to scroll and select the ‘Image Sharpness’ menu.3)Press the UP or DOWN button to highlight a specific option.4)Press the SET button to confirm and select the highlighted menu option.A5)selected option icon appears on the selected item.To continue within the menus and select a different menu option:Press the LEFT or RIGHT button to select the next menu item.6)To exit the menu view:Press the MODE button to exit the menu and return to your previous mode.An icon reflecting your selection is displayed on the LCD screen.27
Light Exposure MenuThe ‘Light Exposure’ setting helps you control the a
8 Setting the Date and Time The next step in the initial camera setup is to set the date and time on the camera. 1) Press the UP/DOWN button to change and set the specific time/date settings. 2) Press the RIGHT/LEFT button to move/toggle to a different part of the time/date setting options.
