Transcription
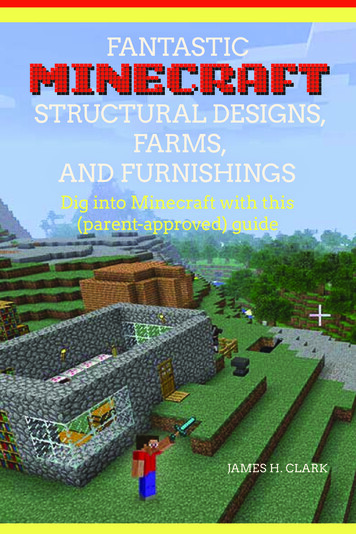
FANTASTICMINECRAFTSTRUCTURAL DESIGNS,FARMS,AND FURNISHINGSDig into Minecraft with this(parent-approved) guideJAMES H. CLARK
Fantastic Minecraft Structural Designs, Farms, and FurnishingsJames H. ClarkPeachpit PressFind us on the web at: www.peachpit.comTo report errors, please send a note to errata@peachpit.comPeachpit Press is a division of Pearson EducationCopyright 2015 Peachpit PressThis material excerpted from The Visual Guide to Minecraft, published by Peachpit Press, 2015Editors: Clifford Colby and Robyn ThomasProduction Editor: Dennis FitzgeraldInterior Design and Compositor: Maureen ForysCopyeditor: Scout FestaCover design: Mimi HeftNotice of RightsAll rights reserved. No part of this book may be reproduced or transmitted in any form by any means,electronic, mechanical, photocopying, recording, or otherwise, without the prior written permission ofthe publisher. For information on getting permission for reprints and excerpts, contact permissions@peachpit.com.Notice of LiabilityThe information in this book is distributed on an “As Is” basis without warranty. While every precautionhas been taken in the preparation of the book, neither the author nor Peachpit shall have any liability toany person or entity with respect to any loss or damage caused or alleged to be caused directly or indirectly by the instructions contained in this book or by the computer software and hardware productsdescribed in it.TrademarksMinecraft is a trademark of Notch Development AB. Many of the designations used by manufacturersand sellers to distinguish their products are claimed as trademarks. Where those designations appear inthis book, and Peachpit was aware of a trademark claim, the designations appear as requested by theowner of the trademark. All other product names and services identified throughout this book are usedin editorial fashion only and for the benefit of such companies with no intention of infringement of thetrademark. No such use, or the use of any trade name, is intended to convey endorsement or other affiliation with this book.ISBN 13: 978-0-134-09679-7ISBN 10:0-134-09679-7
SupportingYour LifestyleAs time passes in your world, you will reach a point when you needmore of, well, everything, but especially food and wood. You need afarm for each of the different types of food, a mine for pulling materials out of the ground, and of course, you’re going to need a place tostore all your items.Storage RoomYour personal inventory and your first few chests will likely be unorganized asyou get settled in the world. But if you build a storage room or facility that iseasy to expand, you’ll be able to keep everything organized and reduce theamount of time you spend grabbing materials from your stores, giving you moretime to build.ChestsWhen you place a chest on the ground, it will be a single chest. Place anotherchest adjacent to it to turn it into a double chest (Figure 3.1). A double chestgives you twice the inventory of a single chest.
Figure 3.1On the left is a single chest. On the right is a double chest.Once you’ve created a double chest, you cannot place another chest adjacentto it. The area immediately above a chest must be free of obstruction for thechest to open. There is, however, an exception to this rule: Place another chestabove or below it and it will still function (Figure 3.2).Figure 3.2 Chests will still functionwith other chests on top of them.While the amount of materials you’re storing will ultimately dictate the size ofyour storage area, you can use this feature to construct a fairly compact storage room.42More Than Just Building—Creating
LabelsThere are a couple of ways to label your chests. Signs, when placed on theground or on a wall, allow you to write up to four lines of text. Each line has amaximum of 15 characters, including spaces and punctuation. You could, forexample, place a sign on a column next to a chest and write what’s in the chest.For more compact signage, place a sign on a column between two chests. Onthe first line, write what’s in the chest to the left. On the second, “write” anarrow pointing to the chest on the left. On the third line, write what’s in thechest on the right. On the fourth line, write an arrow pointing to the chest onthe right (Figure 3.3).Figure 3.3Signs can be used to provide a textual guide to your storage room.You can use item frames to give you a visual guide to your storage room (Figure 3.4). Place an item frame on the wall next to a chest, and place an item(representative of what’s in the chest next to it) in the frame.Figure 3.4 Using item frames isn’t as compact as signs, but it can look nicer.The oak sapling in the item frame could be a signal to you that the chest contains oaksaplings or other organic material.Supporting Your Lifestyle 43
Design ExampleIn Figure 3.5, the chests on the right use item frames as labels. The chests onthe left use signs. The columns are made from spruce wood. Glowstone blocksare used for lighting to keep the room compact and uncluttered. Jungle woodplanks are used as the primary material for the floor.Signs aslabelsJungle woodplanksItem framesas labelsGlowstoneFigure 3.5A completed storage room.FarmingThe goal of any farm is to mass produce materials easily and efficiently. An efficient farm will keep your supplies well stocked with little effort.Plants for FoodWheat is grown from seeds, carrots are grown from other carrots, and potatoesgrow from other potatoes. You can acquire wheat seeds by breaking tall grass.44More Than Just Building—Creating
Carrots and potatoes can be found in world-generated villages. Rarely, theywill drop when you kill a zombie.In order to grow plants, each type of crop needs to be planted on dirt that hasbeen tilled with a hoe (Figure 3.6) and is within 4 blocks of water. The watercan be still or flowing.Figure 3.6From left to right: a dirt block, a tilled dirt block, and planted wheat.When each crop is fully grown (Figure 3.7), aim at the crop and left-click toharvest the crop. Wheat will drop one wheat and up to three seeds. Carrots andpotatoes will drop up to four of each. Be careful: Potatoes have a chance ofdropping a poisonous potato.Figure 3.7From left to right: fully grown wheat, carrots, and potatoes.Supporting Your Lifestyle 45
Plant FarmTypically, the first farm you set up will be a wheat farm, because these seedsare the easiest to come by in the world.This basic farm (Figure 3.8) is a 9-block-by-9-block square of dirt, with abucket of water poured into a hole in the center. It is surrounded by stonebricks with fences on top. You don’t have to enclose it, but doing so makes thedesign of the farm look intentional and will also keep the mobs out.Figure 3.8A basic farm pod.To light the area, you could just place torches on top of the fence posts, butadding a little design will make your farm look better. You’ll notice that the corners of the fence incorporate a version of the lampposts you saw in the previouschapter. Glowstone blocks are placed in the ground in the center of the sides.A farm as small as this is pretty easy to harvest, but as you expand, harvesting quickly becomes tedious. Water, when allowed to flow over farmland, willwash crops away, harvesting them as if you had left-clicked each plant. Thisfeature can be used to automate harvesting wheat, carrots, and potatoes. Andif you build it correctly, the water will push your harvest to one area for easycollection.46More Than Just Building—Creating
There are a few things to keep in mind when building an automated farm.Water will flow 8 blocks, including the source, and toward a drop in terrainheight. So water poured on the ground will flow over a portion of the farm andinto the hole in the center (Figure 3.9).Growing cropsWater sourcefor soilhydrationWater flowingtoward holeWater sourcefrom a bucketFigure 3.9 A failed attempt to harvest a pod with fully grown wheat. Water will flow toward thehole in the center that’s used to hydrate the soil instead of flowing its full distance of 7 blocks. Andbecause the farm is 9 blocks wide by 9 blocks deep, multiple water sources would need to be used tofully harvest the pod.Each time water falls from its initial elevation, it can flow another 8 blocks( Figure 3.10).Supporting Your Lifestyle 47
Figure 3.10 This side view demonstrates the way water flows. The water on the top layerflows 8 blocks. The water is allowed to drop after 7 blocks and flows another 8.Taking these features into consideration, you can build a multi-tier farm thatyou can harvest by releasing water and allowing it to flow over the farm. Thefarm in Figure 3.11 is two tiers tall. The bottom tier is 8 blocks deep. The toptier is 7 blocks deep and built 1 block higher than the bottom tier to allow thewater to drop a level at the end. Water flows from the top to bottom alongone side, hydrating the farmland 4 blocks to the right of the flow. If you placestone slabs above the water, you will be able to walk around the farm withoutdisturbing the crops.Orange woolFamland7 blocksdeepFamland8 blocksdeepStone brickslabsFlowing waterfor hydrationFigure 3.11 A multi-tier farm. Buckets of water are poured behind each orange wool block.When the orange wool is broken, water is released and allowed to flow over the farm, harvesting thecrops. Stone brick slabs placed along the sides will allow you to walk up and down the farm whilepreventing the water from flowing outside of the farm.48More Than Just Building—Creating
When you release water over the farm, it will flow from the top to bottom,pushing all your harvest to the bottom, where you can walk along the path andcollect the items. When you’re ready to stop the water, place a block back infront of the water, as demonstrated in Figure 3.11 with orange wool.Automated FarmThere are a couple of additions you can make to further automate the farm. Youcan completely eliminate the need to place water and break blocks to releaseit by crafting and placing dispensers. A dispenser spits out an item from itsinventory each time it receives a redstone signal. It can also simulate placing abucket of water (Figure 3.12).Figure 3.12Demonstrating the use of dispensers to release water.To place the dispensers, climb to the top of your farm, and with your back tothe bottom, right-click to place the dispenser (crafted from seven cobblestone,one bow, and one redstone) next to the farmland. Move to the back of the dispenser, aim your reticle at the block just behind and below the dispenser, andright -click to place a redstone repeater (crafted from three stone, two redstone torches, and one redstone) (Figure 3.13). Do this for each dispenser. Theredstone repeater, when activated by a redstone signal, will send a signal tothe dispenser, causing the dispenser to dispense water.Supporting Your Lifestyle 49
RedstoneFigure 3.13DispenserRedstonerepeaterDemonstrating the placement of repeaters.Place redstone dust on the block behind each repeater and 1 block to the left orright. Place 1 block of any material on top of the redstone dust that’s extendingout and not touching a repeater (the block you placed will look like it’s floatingin the air). Finally, place a button on the front face of the block (Figure 3.14).Right-click each dispenser and move a bucket of water into its inventory.Right-click the button to activate it. It will send a signal to the block below.The signal will travel along the redstone dust, through the repeaters, and intothe dispensers. The dispensers will dispense water. Activate the button againand the dispensers will suck the water back up.You can utilize hoppers to collect your harvest automatically and deliver theitems to a chest (Figure 3.15). When an item drops onto a hopper, it will besucked into the hopper’s inventory. If the hopper is attached to a chest, it willslowly deliver the items into it.50More Than Just Building—Creating
ure 3.14 Proper placement of redstone repeaters, dust, and a button. Here, the redstoneruns on stone bricks. The button is placed on orange wool.Fully grown wheatHoppersChestFigure 3.15 Hoppers and chests laid out at the bottom of the farm. Each hopper feeds into theone to the right of it, except the last one, which feeds into the chest.Supporting Your Lifestyle 51
Hoppers attach to the block they’re placed against and won’t attach to anything around it until the hopper is broken and replaced. To place a hopperagainst a chest or another hopper, hold the hopper in your hand, press andhold the Shift key, and right-click the side of the hopper or chest.When your crops are fully grown (Figure 3.16), activate the button connectedto your dispensers to allow the water to flow. When the water has pushed yourharvest down to the bottom, activate the button again and the water will stopflowing, allowing you to replant. Check the chest at the bottom for your harvest.Button toactivatedispensersDispensers holdingwater bucketsFigure 3.16FullygrownwheatWater for soil hydrationChestHoppersA completed farm. The wheat crop is ready to harvest.TreesTrees grow from saplings—most from a single sapling. You can plant saplingson dirt, podzol, and grass. Trees need a light level of nine in order to grow, butthey do not need to be near water. When the wood from the trunk is removedfrom a tree, the leaf blocks start to decay and will drop saplings. Oak treesdrop both saplings and apples.52More Than Just Building—Creating
Minecraft currently has six types of saplings: oak, dark oak, birch, acacia, jungle, and spruce. Generally, the more open space above the sapling, the tallerthe tree will grow. Oak trees grow from a single sapling. To grow, oak saplings need at least5 blocks of open air directly above them. Taller oak trees have a chance tosprout branches or grow into a large oak tree. Dark oak grows from four dark oak saplings sown in a 2x2 square. Theyneed at least 7 spaces of air above t
No part of this book may be reproduced or transmitted in any form by any means, electronic, mechanical, photocopying, recording, or otherwise, without the prior
