Transcription
Manage Vault V2 IAM UsersFor use by Vault V2 Customers
Contents1.0 Download and Install the AWS CLI Tool1.1 Download the AWS CLI Installer1.2 Install the AWS CLI Tool2.0 Set Up the AWS CLI Tool2.1 Configure the AWS CLI3.0 Set Up an IAM User3.1 Create the User3.2 Listing Existing Users3.3 Create an Access Key for a User4.0 Managing IAM Users4.1 Managing IAM User Credentials4.1.1 Listing Access Keys4.1.2 Disabling Access Keys4.1.3 Enabling Access Keys4.1.4 Deleting Access Keys4.2 Managing IAM User Policies4.2.1 Creating an IAM User Policy4.2.2 Putting an IAM User Policy on a User4.2.3 Listing Attached IAM Policies5.0 Example IAM Policies5.1 Example 1.0 - Write-Only for all buckets5.2 Example 2.0 - Read-Only for all buckets5.3 Example 3.0 - All Actions for a single bucket6.0 Example Bucket Policies6.1 Example 4.0 – Block Internet Access for all buckets7.0 Further ReadingThis document is intended for CCL Customers Only.
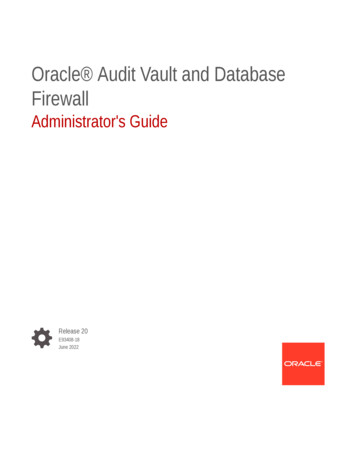
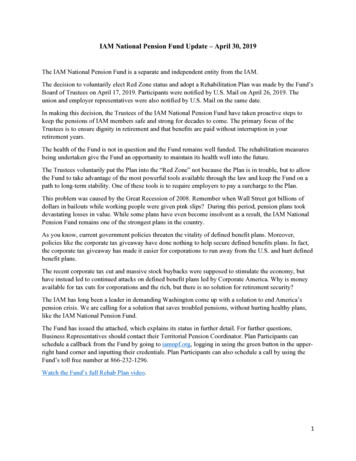
Prerequisites This guide gives examples using the Microsoft Windows 10 Operating System, but the steps can beperformed on any Operating System supported by the Amazon Web Services (AWS) CLI Tool. You must have an existing Vault V2 account and a Vault V2 Storage Account with validcredentials (Access Key Secret Key). The Vault V2 endpoints must be accessible from your device, including the following: https://s3nzl.vault.net.nz, https://iam.vault.net.nzProcess1.0Download and Install the AWS CLI Tool1.1Download the AWS CLI InstallerNavigate to the following URL: AWS Command Line Interface (amazon.com)On the above website, click on the download link for the AWS CLI Installer for Windows.Confirm that the installer has been successfully downloaded, by confirming it exists in your DownloadsFolder (or the folder you selected for the file to be downloaded to).This document is intended for CCL Customers Only.
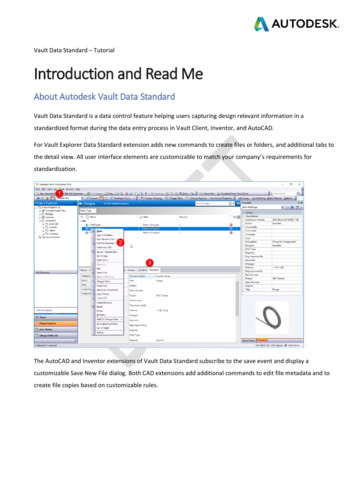
1.2Install the AWS CLIDouble Click on the AWS CLI Installer to start the install wizard.Once open, click the ‘next’ button to proceed.Ensure you read the license agreement and accept all of the terms listed.If you accept all of the terms in the End-User License Agreement for the software, check the ‘I accept theterms in the License Agreement’ checkbox.Note – ensure you agree to the license agreement before checking the ‘I accept the terms in the LicenseAgreement’ box.Once checked, click next.This document is intended for CCL Customers Only.
Once you’ve clicked on Next, you will get to the Setup Screen.Feel free to modify these settings if you like to install software in a custom location, but I wouldrecommend using default settings.Once you’ve configured this, click on next.Once you’re satisfied with the configuration, click ‘Install’.This will install the application on your device.This document is intended for CCL Customers Only.
Note – this application requires you to have Local Administrator privileges. It will require accepting a UserAccount Control (UAC) Prompt.The install will then proceed, accept any User Account Control Prompts that popup.After it’s succeeded, click on Finish.The installation of the AWS CLI Tool has now completed, it will be added to your PATH variable.This document is intended for CCL Customers Only.
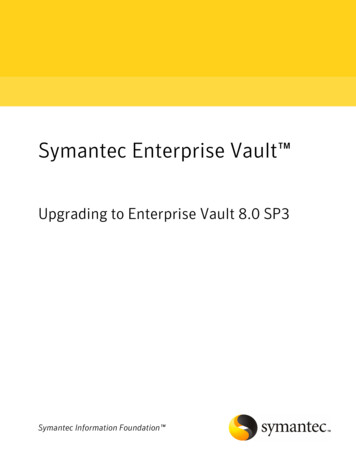
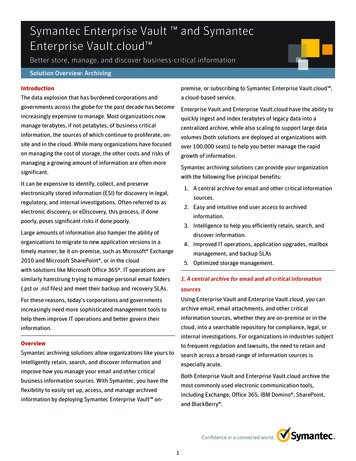
2.0Set Up the AWS CLI Tool2.1Configure the AWS CLINow that you’ve installed the AWS CLI, you need to configure it.Open up a Windows PowerShell window. This is located in the ‘Windows PowerShell’ start menu subfolder.Once Open, type in the ‘aws’ command.You should see some output, indicating that a program is at least running.You now need to configure the AWS CLI to use your Vault V2 S3 CredentialsThis document is intended for CCL Customers Only.
Type in the ‘aws configure’ command.Fill in the form presented with the following: AWS Access Key ID – This should be your Vault V2 Access KeyAWS Secret Access Key – This should be your Vault V2 Secret KeyDefault Region Name – This must be ‘nzl’Default output format – This can be set to whatever you want, you can leave it to None.Re-run the ‘aws configure’ command, and press enter at every field to confirm your settings are correctlyset.3.0Set-Up an IAM User3.1Create the UserThis section describes how to create a normal IAM User with no policies assigned.Creating an IAM User is very simple using the AWS CLI, you just need to run the below command,substituting ‘example-user’ for your username of choice.‘aws --endpoint-url https://iam.vault.net.nz iam create-user --user-name example-user’You will get output indicating some of the basic details about the newly created user.This document is intended for CCL Customers Only.
3.2Listing Existing UsersIt’s important to know what IAM users currently exist, this allows you to identify potential security risks andholes before they become a concern.You can list IAM Users on your Vault V2 Storage Account using the below command:‘aws --endpoint-url https://iam.vault.net.nz iam list-users’As you can see, you get a JSON formatted list of users.3.3Create an Access Key for a UserBefore you can use an IAM User on Vault V2, you must create an access key/secret key pair.You can do this using the below command:‘aws --endpoint-url https://iam.vault.net.nz iam create-access-key --user-name example-user’This document is intended for CCL Customers Only.
Note - Ensure you record the Secret Key here, as you will be unable to display it again. If you do lose it,you can simply re-create a new secret key.4.0Managing IAM Users4.1Managing IAM User CredentialsIf for some reason, you believe an access key has been compromised and you do not want to delete thekey entirely, you can choose to De-activate the key.This means that the key will no longer work, but you can re-activate it easily.4.1.1 Listing Access KeysBefore you can active or deactivate an access key, you need to know which access key you’dlike to update.You can list access keys for an IAM user using the below command:‘aws --endpoint-url https://iam.vault.net.nz iam list-access-keys --user-name example-user’Note - it is impossible to recover the secret key, you must record it somewhere safe in the firstinstance.This document is intended for CCL Customers Only.
4.1.2 Disabling Access KeysIf for some reason, you believe that some credentials for an IAM user have been compromised,you can revoke access from the credentials.You can use the following command:‘aws --endpoint-url https://iam.vault.net.nz iam update-access-key --access-key-id xxxxxxxxxx -status Inactive --user-name example-user’You can then list the access key to verify.As you can see, the access key’s status is now set to Inactive.4.1.3 Enabling Access KeysYou may want to re-enable previous disabled IAM User Credentials. For example, if you disabledsome keys that you believe are unused, but it broke a backup application.You can run the following command to enable an IAM User’s access key:‘aws --endpoint-url https://iam.vault.net.nz iam update-access-key --access-key-id xxxxxxxxxx -status Active --user-name example-user’You can then list the access keys to verify.As you can see, the access key’s status is now set to active.This document is intended for CCL Customers Only.
4.1.4 Deleting Access KeysIf you have disabled an access key for an extended period and would like to delete it, you cando so by using the below command:‘aws --endpoint-url https://iam.vault.net.nz iam delete-access-key --access-key-id xxxxxxxxxx -user-name example-user’You can then list access keys to verify.4.2Managing IAM User Policies4.2.1 Creating an IAM User PolicyDesigning IAM User Policies is outside the scope of this guide, but I have attached some basic IAMexamples below, which you can use to tinker with.Please refer to 5.0 - Example IAM Policies section to view these examples.There are also some great references to assist you with designing an IAM policy to suit yourorganization’s needs:AWS Bucket Policies and User Policies Documentation - Bucket policies and user policies - AmazonSimple Storage ServiceAWS Security Blog: Writing IAM Policies: How to Grant Access to an Amazon S3 Bucket - WritingIAM Policies: How to Grant Access to an Amazon S3 Bucket AWS Security BlogVeeam Knowledge Base KB3151: How to Create Secure IAM Policy for Connection to S3 ObjectStorage - KB3151: How to Create Secure IAM Policy for Connection to S3 Object Storage(veeam.com)4.2.2 Putting an IAM Policy on a UserOnce you have created your IAM Policy, you can attach it to your IAM User.You can use the below command:‘aws --endpoint-url https://iam.vault.net.nz iam put-user-policy --user-name example-user --policyname example-policy --policy-document file://example.json’Note - in the above example, the example.json file was in my working directory.This document is intended for CCL Customers Only.
You can then list out the applied IAM Policies to verify.4.2.3 Listing Attached IAM PoliciesIf you want to list currently applied policies on an IAM User you can use the below command:‘aws --endpoint-url https://iam.vault.net.nz list-user-policies --user-name example-user’5.0Example IAM PoliciesBelow is some JSON for some example IAM Policies you can use or modify to secure your Vault v2account by restricting user permissions.Note:The listed policies below are examples which can be modified and used by Vault V2 customers on theirIAM Users.This document is intended for CCL Customers Only.
Please keep in mind, that these are only examples and should be modified to suit your Vault V2 usersbefore applying them.5.1.1 Example 1.0 - Write-Only for all buckets{"Version": "2012-10-17","Statement": [{"Sid": "VisualEditor0","Effect": "Allow","Action": ["s3:ListAllMyBuckets"],"Resource": "*"},{"Sid": "VisualEditor1","Effect": "Allow","Action": ce": ["arn:aws:s3:::*","arn:aws:s3:::*/*"]}]}This document is intended for CCL Customers Only.
5.1.2 Example 2.0 - Read-Only for all buckets{"Version": "2012-10-17","Statement": [{"Sid": "VisualEditor0","Effect": "Allow","Action": ["s3:ListAllMyBuckets"],"Resource": "*"},{"Sid": "VisualEditor1","Effect": "Allow","Action": ","s3:ListMultipartUploadParts"],"Resource": ["arn:aws:s3:::*","arn:aws:s3:::*/*"This document is intended for CCL Customers Only.
]}]}5.1.3 Example 3.0 - All Actions for a single bucket{"Version": "2012-10-17","Statement": [{"Sid": "VisualEditor0","Effect": "Allow","Action": ["s3:ListAllMyBuckets"],"Resource": "*"},{"Sid": "VisualEditor1","Effect": "Allow","Action": "s3:*","Resource": }]}6.0Example Bucket PoliciesBelow are some JSON examples for bucket policies.Note:The listed policies below are examples which can be modified and used by Vault V2 customers on theirbuckets.Please keep in mind, that these are only examples and should be modified to suit your Vault V2 bucketsbefore applying them.6.1.1 Example 4.0 – Block Internet Access for all buckets{This document is intended for CCL Customers Only.
"Version": "2012-10-17","Statement": [{"Sid": "VisualEditor0","Action": "s3:*","Effect": "Deny","Principal": "*","Resource": "*","Condition": {"IpAddress": {"aws:SourceIp": ["10.xxx.xxx.7/32","10.xxx.xxx.7/32"]}}}]}Note – Please contact CCL for Internet-facing IP addresses, which can be used to block access to yourVault V2 buckets from the internet-facing endpoints.7.0Further ReadingThis guide only covers very basic IAM Administration using the AWS CLI.I would recommend reading the following for more information:AWS CLI Command Reference IAM - iam — AWS CLI 2.2.6 Command Reference (amazonaws.com)This document is intended for CCL Customers Only.
2.0 Set Up the AWS CLI Tool 2.1 Configure the AWS CLI Now that you've installed the AWS CLI, you need to configure it. Open up a Windows PowerShell window. This is located in the 'Windows PowerShell' start menu sub-folder. Once Open, type in the 'aws' command. You should see some output, indicating that a program is at least running.