Transcription
DL4 FE Encrypted External Hard Drive - v1.48/6.4.1 - User GuideUser GuideDL4 FE (FIPS Edition)FIPS 140-2 level 3Common Critera CertifiedEncrypted External Hard Drive 2021 DataLocker Inc. All rights reserved.1
DL4 FE Encrypted External Hard Drive - v1.48/6.4.1 - User GuideContentsAt A Glance4Introduction . . . . . . . . . . . . . . . . . . . . . . . . . . . . . . . . . . . . . . . . . . . . . . . .4General operation of the encryption . . . . . . . . . . . . . . . . . . . . . . . . . . . . . . . . .4Updating Your Device . . . . . . . . . . . . . . . . . . . . . . . . . . . . . . . . . . . . . . . . . .4About the DL4 . . . . . . . . . . . . . . . . . . . . . . . . . . . . . . . . . . . . . . . . . . . . . . .4Getting Started5Tap with precision to input data . . . . . . . . . . . . . . . . . . . . . . . . . . . . . . . . . . . .5Best Practices . . . . . . . . . . . . . . . . . . . . . . . . . . . . . . . . . . . . . . . . . . . . . . .5Product Specifications . . . . . . . . . . . . . . . . . . . . . . . . . . . . . . . . . . . . . . . . . .6Initializing and Connecting Your DL4 . . . . . . . . . . . . . . . . . . . . . . . . . . . . . . . . .7Disconnecting Your DL4 . . . . . . . . . . . . . . . . . . . . . . . . . . . . . . . . . . . . . . . . .9Additional Windows Configuration Changes10Disabling Windows 10 Power Save . . . . . . . . . . . . . . . . . . . . . . . . . . . . . . . . . . .10Disabling Windows 10 Selective Suspend . . . . . . . . . . . . . . . . . . . . . . . . . . . . . . .11Formatting Your DL411Selecting the Correct File System . . . . . . . . . . . . . . . . . . . . . . . . . . . . . . . . . . .11Formatting Your DL4 on Windows . . . . . . . . . . . . . . . . . . . . . . . . . . . . . . . . . . .12Formatting Your DL4 on macOS . . . . . . . . . . . . . . . . . . . . . . . . . . . . . . . . . . . .13Linux Compatibility and Configuration15Features16Administrator Menu . . . . . . . . . . . . . . . . . . . . . . . . . . . . . . . . . . . . . . . . . . .16User Menu . . . . . . . . . . . . . . . . . . . . . . . . . . . . . . . . . . . . . . . . . . . . . . . . .17Accessing the Onboard Administrator or User Menu . . . . . . . . . . . . . . . . . . . . . . . .17Using the Administrator Menu18Change Password . . . . . . . . . . . . . . . . . . . . . . . . . . . . . . . . . . . . . . . . . . . .18Set User . . . . . . . . . . . . . . . . . . . . . . . . . . . . . . . . . . . . . . . . . . . . . . . . . . .19SafeConsole . . . . . . . . . . . . . . . . . . . . . . . . . . . . . . . . . . . . . . . . . . . . . . . .21Zeroize Drive . . . . . . . . . . . . . . . . . . . . . . . . . . . . . . . . . . . . . . . . . . . . . . . .21Self Destruct . . . . . . . . . . . . . . . . . . . . . . . . . . . . . . . . . . . . . . . . . . . . . . . .24Password Complexity . . . . . . . . . . . . . . . . . . . . . . . . . . . . . . . . . . . . . . . . . .25Password Length . . . . . . . . . . . . . . . . . . . . . . . . . . . . . . . . . . . . . . . . . . . . .25 2021 DataLocker Inc. All rights reserved.2
DL4 FE Encrypted External Hard Drive - v1.48/6.4.1 - User GuideAuto-Lock Time . . . . . . . . . . . . . . . . . . . . . . . . . . . . . . . . . . . . . . . . . . . . . .25Touch Sounds . . . . . . . . . . . . . . . . . . . . . . . . . . . . . . . . . . . . . . . . . . . . . . .26Brightness . . . . . . . . . . . . . . . . . . . . . . . . . . . . . . . . . . . . . . . . . . . . . . . . .26Read-Only Mode . . . . . . . . . . . . . . . . . . . . . . . . . . . . . . . . . . . . . . . . . . . . .26Language . . . . . . . . . . . . . . . . . . . . . . . . . . . . . . . . . . . . . . . . . . . . . . . . .26Touch Calibration . . . . . . . . . . . . . . . . . . . . . . . . . . . . . . . . . . . . . . . . . . . . .27Using the User Menu28Change password . . . . . . . . . . . . . . . . . . . . . . . . . . . . . . . . . . . . . . . . . . . .28Auto-Lock Time . . . . . . . . . . . . . . . . . . . . . . . . . . . . . . . . . . . . . . . . . . . . . .28Touch Sounds . . . . . . . . . . . . . . . . . . . . . . . . . . . . . . . . . . . . . . . . . . . . . . .29Brightness . . . . . . . . . . . . . . . . . . . . . . . . . . . . . . . . . . . . . . . . . . . . . . . . .29Language . . . . . . . . . . . . . . . . . . . . . . . . . . . . . . . . . . . . . . . . . . . . . . . . .29SilentKill CodeGenerating a SilentKill Code . . . . . . . . . . . . . . . . . . . . . . . . . . . . . . . . . . . . . .2930Registering Your DL4 to SafeConsole30Using a SafeConsole Managed Device32Unlocking in SafeConsole Mode . . . . . . . . . . . . . . . . . . . . . . . . . . . . . . . . . . . .32Locking Your Managed DL4 . . . . . . . . . . . . . . . . . . . . . . . . . . . . . . . . . . . . . .32Standalone Logins . . . . . . . . . . . . . . . . . . . . . . . . . . . . . . . . . . . . . . . . . . . .33Password Reset . . . . . . . . . . . . . . . . . . . . . . . . . . . . . . . . . . . . . . . . . . . . . .35Unlocking In Read-Only Mode . . . . . . . . . . . . . . . . . . . . . . . . . . . . . . . . . . . . .35Changing the Unlock Message . . . . . . . . . . . . . . . . . . . . . . . . . . . . . . . . . . . .35Editing the Applications List . . . . . . . . . . . . . . . . . . . . . . . . . . . . . . . . . . . . . . .36Scanning your Device for Malware . . . . . . . . . . . . . . . . . . . . . . . . . . . . . . . . . .36Using ZoneBuilder . . . . . . . . . . . . . . . . . . . . . . . . . . . . . . . . . . . . . . . . . . . . .37Reformat Using DataLocker Control Panel . . . . . . . . . . . . . . . . . . . . . . . . . . . . . .38Sanitize . . . . . . . . . . . . . . . . . . . . . . . . . . . . . . . . . . . . . . . . . . . . . . . . . . .38Device Information . . . . . . . . . . . . . . . . . . . . . . . . . . . . . . . . . . . . . . . . . . . .39Getting Help 2021 DataLocker Inc. All rights reserved.403
DL4 FE Encrypted External Hard Drive - v1.48/6.4.1 - User GuideAt A GlanceIntroductionCongratulations on your purchase of the DataLocker DL4 FE (FIPS Edition) hardware encryptedexternal hard drive.Although the DL4 designed with user friendliness at its core, it is recommended that you review thisguide to ensure that you become fully acquainted with your DL4 and make the most of all of itsfeatures.DataLocker is continuously updating its products, the images and text in this manual may varyslightly from the images and text displayed by your DL4. These changes are minor and should notadversely affect the ease of setup.General operation of the encryptionYour DL4 utilizes a hardware encryption engine to encrypt and decrypt data that you store on thedevice. When your device is plugged in and powered on, you will authenticate with the onboardsystem using your password to enable the encryption and use your data. When you lock, poweroff or disconnect your device, the data is stored in an encrypted state.Updating Your DeviceUpdated software and documentation are freely available for download at our website: Latest device updates - http://datalocker.com/device-updates Documentation and support - https://support.datalocker.comImportant: Only the latest device updates should be applied to the device. Downgrading thedevice to an older software or firmware version is not supported and can potentially cause aloss of stored data or impair other device functionality. The latest device updates will always beavailable at the link above.About the DL4The DL4 FE is a FIPS 140-2 Level 3 and Common Criteria cPP certified device1 built around a powerful AES 256-bit cryptographic hardware architecture that then adds layer after layer of securitywith automated policies that intelligently change its security posture based on its location, howit’s being used, and the type of data being stored on it. Available as a SSD or a more economical HDD, the DL4 FE meets the strictest security requirements while offering large-capacitystorage (up to 15.3 TB) and an easy-to-use touchscreen for setup and use. A powerful additionto the DataLocker line of securely managed solutions, the DL4 FE continues our proud tradition ofproviding Simply Secure solutions, plus it’s backed by a limited 3-year warranty. The DL4 is fullycross-platform compatible and OS agnostic. With no software or special drivers required, workswith Windows, Linux, and macOS.1 The DL4 FE has been designed for FIPS 140-2 Level 3 and is being tested by an accredited NIST lab. The product is inprocess for certification and is officially listed by NIST. DL4 FE is also in process to achieve Common Criteria cPP certification.The official listing as a Product under Evaluation by NIAP is expected in March 2021. 2021 DataLocker Inc. All rights reserved.4
DL4 FE Encrypted External Hard Drive - v1.48/6.4.1 - User GuideGetting StartedTap with precision to input dataThe DL4 allows you to navigate its durable screen very accurately using a pointy, non-puncturingobject of any material as a stylus. You can use the tip of your finger, a retracted ballpoint pen, oreven the edge of a plastic card, making input available and stable in any situation. The screenuses a resistive technology that takes input from precise mechanical presses/taps. In the password entry, a touch indicator marks where the device has detected the tap. For the input to besuccessful, most of the indicator needs to appear over the expected target character.Tap instead of softly touching - different than a smartphoneNote that entry on a DL4 is different from your smartphone touch screen that uses the presence ofconductivity such as the moisture of your finger or a capacitive stylus to take input.As an instruction, an animation displays during startup. You can skip the animation by tappinganywhere on the screen.Randomized key placementsThe input keys of the password entry screen are randomized on each use. The randomization willleave the row of letters in order, but the different rows will shift positions. The randomization is toguard against smudge attacks, where an attacker analyses the fingerprint patterns on the device.It also helps against sneak peek attacks if someone would get a glance at the password entry.Best Practices The DL4 is IP64-rated but must be completely dry before connecting to a computer. Only connect the DL4 to certified USB ports. The DL4 has a minimum power requirement of 5Volts and 1A of current drawn from the USB port. Safely eject the DL4 from the operating system before removing it. For more information, seeDisconnecting your DL4. 2021 DataLocker Inc. All rights reserved.5
DL4 FE Encrypted External Hard Drive - v1.48/6.4.1 - User Guide Use a strong password and be sure to remember it. Remote password resets can be enabledif the device is managed by SafeConsole. Use the correct file system based on your operating system and file needs. See Formattingyour DL4 for more information. The DL4 comes preformatted with the exFAT file system.Product SpecificationsSpecificationDetailsCapacity*500GB, 1TB, 2TB, 1TB SSD,2TB SSD, 4TB SSD, 7.6TB SSD, 15.3TB SSDSpeed**USB C:- 150MB/s Read, 100MB/s WriteUSB 3.2:- 150MB/S Read, 100MB/s WriteUSB 2.0:- 40MB/s read, 20MB/s writeDimensions120mm(L) x 75mm(W) x 23mm(D)WeightApproximately 0.85 - 1.1 lbs / 385 - 500 GramWater Resistant***IP64Operating System CompatibilityWindows, macOS, LinuxNote: SafeConsole managed DL4 requires Windows7 . Managed DL4 will require a Standalone loginsfor use on macOS and Linux.Operating Temperature0 C - 45 CStorage Temperature-20 C - 60 CLong Term Storage Temperature(More than 1 week)-20 C - 40 CWarranty3 years LimitedInterfaceUSB-C on the device, compatible with USB 3.2,USB 2.0 (8 TB drives and under)(USB-C to USB-A and USB-C to USB-C cablesincluded)* Advertised capacity is approximate. Some space is required for onboard software.** Speed varies with host hardware, software, and usage. Tests were performed on 1TB HDD model.*** Device should be completely dry before use. 2021 DataLocker Inc. All rights reserved.6
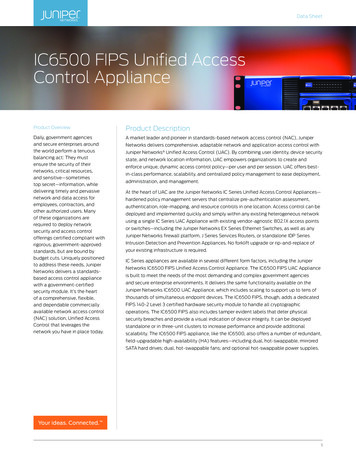
DL4 FE Encrypted External Hard Drive - v1.48/6.4.1 - User GuideInitializing and Connecting Your DL41. Connect the DL4 to your computer with the included USB cable.2. The device will display “PERFORMING SELF TEST” and then will display a DataLocker loadingscreen.3. You will then be prompted to create a password. Tap OK to continue.4. Your DL4 will show an “Enter New Password” prompt. Enter a desired password and then tapthe Ë-button. Tap 123 to swap the keyboard to numbers and special characters. Tap ABCto swap back to letters.Note: Linear and repetitive passwords are not supported and passwords must contain aMINIMUM of 8 characters. It is recommended that you use a combination of letters, numbers andspecial characters for your password.Some examples of invalid passwords are:‘78901234’, ‘43210987’, ’12345678’, ‘1111111’ 2021 DataLocker Inc. All rights reserved.7
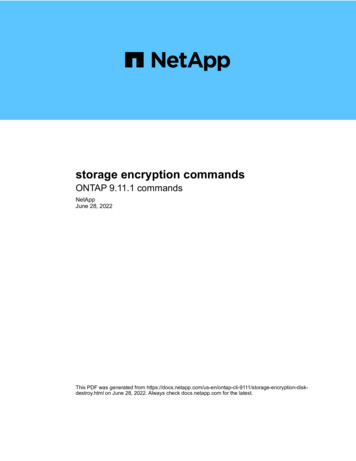
DL4 FE Encrypted External Hard Drive - v1.48/6.4.1 - User Guide5. Confirm your password from Step 4 and tap the Ë-button.If the confirmed password does not match the password entered in Step 4, the device willask you to enter a new password and to confirm the password again. This process will repeatitself until the passwords match each other.6. After the device password is input, the connect screen is shown. Tap Connect to connectthe DL4 instantly. Otherwise, the device will automatically connect to the computer after 10seconds. Selecting Read-Only Mode will connect the device with read-only access - allowingdata to be read from the device, but not modified or deleted. Tapping the 2-icon on thescreen will take you to the administrator menu. See Using the Administrator Menu for moreinformation. Tap the globe to change display language, you confirm the language selectionwhen you tap Connect.7. After the device successfully connects, the DL4 will show the Unlocked and Connectedscreen with a Lock and Disconnect option available. A volume labeled “DataLocker” willbe mounted to the computer and be available for use. You can now work with the deviceas if it was standard storage device in your computer. All data is transparently encrypted bythe hardware when you store it on the DL4.Note: Tapping Lock and Disconnect will disconnect the DL4 drive from the computer. To prevent 2021 DataLocker Inc. All rights reserved.8
DL4 FE Encrypted External Hard Drive - v1.48/6.4.1 - User Guidedata loss or damage to the disk, it is recommended that the DL4 drive be properly ejected fromthe operating system. For more details, see Disconnecting Your DL4.Disconnecting Your DL4To prevent loss or corrupted data, it is recommended that you properly eject the DL4 drivewhen you’re finished using it. The best practice is to use your operating system’s Safely RemoveHardware or Eject function before you power down or detach the DataLocker DL4 from the hostsystem. This will also help prevent damage to the disk.Windows Users1. Right click the Safely Remove Hardware icon located on the lower right hand corner of theWindows taskbar.2. Once the popup menu has appeared, click the correct drive to safely eject the DL4 fromWindows. Your DL4 will automatically lock when ejected.3. Tap Power Off on your DL4 and unplug from the computer. Tap Unlock to start a new session. 2021 DataLocker Inc. All rights reserved.9
DL4 FE Encrypted External Hard Drive - v1.48/6.4.1 - User GuidemacOS Users1.a. Click the Eject button that corresponds with the DataLocker DL4OR1.b. Drag the drive to the trashcan in the macOS dock. Note: The trash can will transition toan eject button while dragging the drive.2. Once the drive has been ejected from macOS, press Lock and Disconnect on the DL4 drive.3. Tap Power Off on your DL4 and unplug from the computer. Tap Unlock to start a new session.Additional Windows Configuration ChangesBy default, Windows 10 attempts to shut off USB devices after a set period of inactivity. If the DL4 isput into this low power state, the drive will automatically lock the drive and require reauthentication.It is recommended that you perform the steps below to ensure the best DL4 user experience onWindows.Disabling Windows 10 Power SaveNOTE: You will need to complete the following steps once for each drive plugged into your computer.1. Log in as a local administrator on your computer.NOTE: If you are not an administrator you will receive a warning indicating you won’t be able tomake changes when you open Device Manager. Please contact your administrator for furtherassistance.2. Unlock your DL4 device. If your device is being managed by SafeConsole, launch the clienton your computer. See Initializing and connecting your DL4 for more information.3. Right click the Start button, and select “Device Manager”.4. Click on the arrow next to “Universal Serial Bus controllers”.5. Right click on “USB Mass Storage Device”.6. Click “Properties”.7. Click the “Power Management” tab.8. Uncheck “Allow the computer to turn off this device to save power”.9. Click OK and close the “Device Manager” window. 2021 DataLocker Inc. All rights reserved.10
DL4 FE Encrypted External Hard Drive - v1.48/6.4.1 - User GuideDisabling Windows 10 Selective Suspend1. In the search box on the taskbar, type control panel.2. Click and Open Control Panel.3. Click on Hardware and Sound.4. Click on Power Options.5. Click the Change plan settings link for the plan you’re currently using.6. Click the Change advanced power settings link.7. Click ( ) next to “USB settings”.8. Click ( ) next to “USB selective suspend setting”.9. Select “Disabled” from the drop-down menu.NOTE: If you are using a device with a battery (ie. Laptop or Tablet), you will need to set this for OnBattery and Plugged in.10. Click OK.Formatting Your DL4Selecting the Correct File SystemYour device is formatted as exFAT from the factory.The DL4 can be reformatted to any file system of your choosing to accommodate a differentoperating system or to remove file size restrictions.Recommended file systems:exFAT- Pros: No file size limitations.- Cons: Not supported by legacy operating systems.NTFS- Pros: No file size limitations.- Cons: Limited cross-platform compatibility - Windows, macOS (read-only), and Linux (read-only).Note: Reformatting your DL4 drive will erase all your files but will not erase your device passwordand settings. As such, formatting should not be used as a method of securely erasing files. Tosecurely erase your files, perform a Zeroize function. For more information, see the Zeroize Drivesection.Important: Before you reformat the device, back up your drive to a separate location, for example,to cloud storage or your computer. 2021 DataLocker Inc. All rights reserved.11
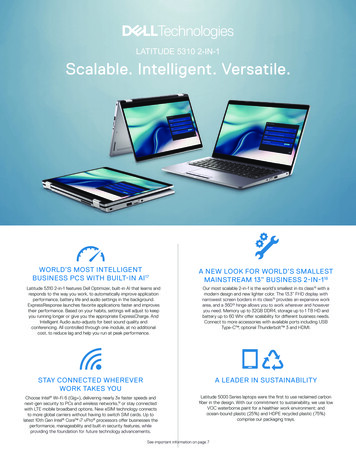
DL4 FE Encrypted External Hard Drive - v1.48/6.4.1 - User GuideFormatting Your DL4 on Windows1. Connect the DL4 to the computer and log in. See Initializing and Connecting your DL4 formore information.2. In the search box on the taskbar, type control panel.3. Click and Open Control Panel.4. Click on System and Security.5. Click on Create and format hard disk partitions.6. Right click on the drive letter that corresponds to your DL4. This example shows (E:).7. Select Format.8. Choose an appropriate ‘Volume Label’ and ‘File system’. Click OK. 2021 DataLocker Inc. All rights reserved.12
DL4 FE Encrypted External Hard Drive - v1.48/6.4.1 - User Guide9. You will be warned that all data will be erased and asked if you would like to continue. ClickOK.When finished, your DL4 will available under This PC.Formatting Your DL4 on macOS1. Go to Applications under your Finder.2. Click Utilities and open Disk Utility. You will receive a warning message that the drive is notreadable. Click Ignore. 2021 DataLocker Inc. All rights reserved.13
DL4 FE Encrypted External Hard Drive - v1.48/6.4.1 - User Guide3. Select the unformatted DL4 disk.4. Click the Erase tab at the top of the screen.5. Rename the disk label to “DataLocker” and choose a file system.6. Click Erase. The drive will begin formatting.7. When it is finished formatting, you may get a popup message asking if you would like tobackup your drive with Time Machine. Choose your preferred option. 2021 DataLocker Inc. All rights reserved.14
DL4 FE Encrypted External Hard Drive - v1.48/6.4.1 - User Guide8. Click Done. Your formatted DL4 should now appear under Devices.Linux Compatibility and ConfigurationThe DL4 is platform independent, capable of being run with 100% compatibility on most systems.For optimal Linux or Unix based system compatibility, we recommend using at least the Linux 2.6.31Kernel (released 9 September 2009), which implemented the xHCI specification for USB 3.0.Although older versions should work, they might run in USB 2.0 mode, which can be significantlyslower.You can check your kernel version by typing the following command in the terminal:# uname -rIn most newer distributions the drive should automatically mount. To format the drive, first, enterterminal, then list detected hard disks using:# fdisk -l grep ’ Disk’Your configuration may vary. For this example, we’ll assume the disk is at /dev/sdb.You will then type:# fdisk /dev/sdbFollow the instructions in fdisk to create a new partition. Finally, use the mkfs command to formatthe disk for Linux. Here, we use ext4.# mkfs.ext4 /dev/sdb1If you want to rename the drive, use the e2label command:# e2label /dev/sdb1 /DataLocker 2021 DataLocker Inc. All rights reserved.15
DL4 FE Encrypted External Hard Drive - v1.48/6.4.1 - User GuideFeaturesAdministrator Menu Tap the 2-icon when you have unlocked the DL4 to access the Administrator Menu. Your configurations are saved when you connect the DL4.Menu OptionDetailsPrevious Menu/Back ButtonTap to go back to the previous menu screenand save the current settings.Next Menu/Forward ButtonTap to go forward to the next menu screen.Change PasswordChange current administrator password.Set UserConfigure a user profile for use on your DL4.Only available to administrator.SafeConsoleUsed to Enable SafeConsole functionality for your DL4.Only available to administrator.Zeroize DriveZeroize the device. Only available to administrator.Self DestructUsed to configure self-destruct counters and methods.Only available to administrator.Password ComplexityEnable various options for increasing password strength.Only available to administrator.PasswordLengthSet the acceptable minimum password length.Only available to administrator. 2021 DataLocker Inc. All rights reserved.16
DL4 FE Encrypted External Hard Drive - v1.48/6.4.1 - User GuideMenu OptionDetailsAuto-lock TimeModify length of time before your device automatically locks.Touch soundsEnable or disable touch sounds.BrightnessChange the level of brightness for your device’s touch screen.Read-Only ModeEnable or disable forced read-only mode.Only available to administrator.LanguageSet preferred Language for the profile.Touch CalibrationCalibrate the touch screen interface.User MenuNOTE: This menu is only accessible after creating a user in the administrator menu. The User profileis not available if SafeConsole is enabled for the device.Menu OptionDetailsPrevious Menu/Back ButtonTap to go back to the previous menu screenand save the current settings.Change PasswordChange current user password.Auto-lock TimeModify length of time before your device automatically locks.Touch soundsEnable or disable touch sounds.BrightnessChange the level of brightness for your device’s touch screen.LanguageSet preferred Language for the profile.Accessing the Onboard Administrator or User MenuFor detailed menu information, see Using the Administrator Menu OR Using the User Menu.NOTE: If your drive was connected to your computer, disconnect your DL4 (See Disconnecting YourDL4), unplug and reinsert the USB cable to your computer.1. Connect the DL4 to your computer with the included USB Cable.OPTIONAL: If the USER profile is enabled, you will need to tap ADMIN OR USER when your DL4loads.2. Enter your password on the “ENTER PASSWORD” screen and tap the Ë-button.3. Tap the 2-icon to enter the Onboard Menu. 2021 DataLocker Inc. All rights reserved.17
DL4 FE Encrypted External Hard Drive - v1.48/6.4.1 - User GuideNOTE: After entering the password the connect screen is briefly shown for 10 seconds. To enter theonboard administrator menu, you will need to tap the 2-icon quickly.Using the Administrator MenuThe administrator menu has various options and features spread over three screens. The administrator menu helps administrators configure various functions that DL4 offers. The available administrator menu features and settings are explained in their own sections below.Once inside the administrator menu, the forward(2) and back(1) button can be used to navigatethrough the administrator menu. The Back button can also be used to save and exit out of theadministrator menu to get back to the connect screen.NOTE: Highlighted (white) text on a selection button denotes the current selection. Upon changingthe values on the various functions, the DL4 automatically saves the changed value when theBack button is pressed. Your configurations are finally confirmed when you connect the DL4 duringthe same usage session.Change PasswordThis option allows the administrator to change the current administrator password. When settingup a device, the administrator creates a password and if they desire to change it later this is wherethey will update the password. Follow these steps to change the DL4 administrator password.1. From the administrator menu, tap Change Password.2. Enter the New Password and tap the Ë-button.3. Re-enter the password to confirm and tap the Ë-button. You must confirm using the samepassword you entered in Step 2.4. Upon successful completion, the device defaults to page 1 of the administrator menu. 2021 DataLocker Inc. All rights reserved.18
DL4 FE Encrypted External Hard Drive - v1.48/6.4.1 - User GuideSet UserThis allows the administrator to either Enable or Disable a user role. When a user password is created your DL4 will show a login selection screen upon the next DL4 connection. If User is selectedupon login, your DL4 will force the user to create a user unlock password. The user will use this password to unlock the device. The DL4 user has a limited feature set compared to the administrator.For detailed information, see Using the User Menu. To create a User profile for your DL4, follow thebelow steps.NOTE: The User profile is not available if SafeConsole is enabled for your DL4.Step-by-step Process to Set User1. From the administrator menu, Tap Set User.2. Tap Enable. (Option is set to Disable as default).3. Tap Back from upper left to select Enable and exit.4. Your DL4 will show a “User has been set” prompt upon successful creation of the user. TapOK. 2021 DataLocker Inc. All rights reserved.19
DL4 FE Encrypted External Hard Drive - v1.48/6.4.1 - User Guide5. Your DL4 will go back to the administrator menu. Proceed to connect the DL4 to confirmyour setting and then lock, and power off. On the next power on the role selection will beavailable.Note: The password for this user profile will be set when the device is next plugged into a workstation and the User option is selected for log in. Detailed steps for the user profile configurationare below. The User login will have its own User menu. For detailed information, see Using the UserMenu.Step by step process for USER configuration1. Plug your device into the computer.2. Tap User when prompted to select login mode.3. Tap OK on the “Please create your password” screen.4. Enter desired password on the “Enter New Password” screen. Tap the Ë-button.5. Confirm the new password and tap the Ë-button. You must confirm using the same passwordyou entered in Step 4.6. Tap Connect to connect the DL4 instantly or wait for 10 seconds for DL4 to automaticallyconnect to your computer.Note: The User Menu can be accessed by tapping the 2-icon instead of tapping Connect. Fordetailed information, see Using the User Menu. 2021 DataLocker Inc. All rights reserved.20
DL4 FE Encrypted External Hard Drive - v1.48/6.4.1 - User GuideAccess User data as an Admin1. Power on.2. Select Admin role, unlock with admin password.3. Connect. User data is accessible on the private partition.Assist a user that forgot their passwordThe scalable method for remote password resets with an audit trail is available when managingDL4 with SafeConsole. If the DL4 is not centrally managed and a User role is activated, the followingprocedure can be used.1.2.3.4.5.6.User forgets password.Power off/on. Select Admin role, unlock with admin password. Tap COG-icon Tap Set User and tap Disable. Connect, power off/on.Select Admin role, unlock again with Admin password.Set User to Enable. Connect, power off/onSelect User role, enter and confirm the new User password. Connect to confirm and accessyour data.SafeConsoleThis option enables SafeConsole management for your DL4. SafeConsole is a central management console used to optionally manage DL4 devices. Managed DL4s require a ConnectionToken upon initialization. The SafeConsole Connection Token is obtained by the System administrator through the Quick Connect Guide, located inside of the SafeConsole user interface.SafeConsole requires a device license for activation. License sold separately.Users without access to a Management Server, please contact sales: sales@datalocker.com /(913)310-9088SafeConsole offers several key features including audit logging, anti-malware services (licensesold separately), remote password reset, and more!Enabling SafeConsole1. From the administrator menu, Tap SafeConsole.2. Tap Enable.3. Tap Back from the upper left menu to save and exit to the administrator menu.4. See Registering your DL4 to SafeConsole to complete registration.Zeroize DriveThis feature allows the administrator to zeroize the drive. Performing this action deletes all thedata, removes the user and administrator passwords, and deletes the SilentKill Code. The DataEncryption Key (DEK) will also be wiped
DL4 FE Encrypted External Hard Drive - v1.48/6.4.1 - User Guide User Guide DL4 FE (FIPS Edition) FIPS 140-2 level 3 Common Critera Certified . DataLocker is continuously updating its products, the images and text in this manual may vary slightly from the images and text displayed by your DL4. These changes are minor and should not