Transcription
asp.net-core#asp.netcore
Table of ContentsAbout1Chapter 1: Getting started with n and Setup2Installing Visual Studio2Creating an ASP.NET Core MVC Application.3Create a new project from the command line5Minimal ASP.NET Core Web API with ASP.NET Core MVC5Controllers6Conclusion7Using Visual Studio code to develop Cross plateform aspnet core applicationSetup environment variable in ASP.NET Core [Windows]Chapter 2: Angular2 and .Net CoreExamples7111616Quick tutorial for an Angular 2 Hello World! App with .Net Core in Visual Studio 201516Expected errors when generating Angular 2 components in .NET Core project (version 0.8.3)41Chapter 3: ASP.NET Core - Log both Request and Response using r Middleware43Chapter 4: Authorization45ExamplesSimple AuthorizationChapter 5: Bundling and MinificationExamples45454747Grunt and Gulp47Bundler and Minifier Extension48
Building Your Bundles48Minifying Your Bundles49Automate Your Bundles49The dotnet bundle Command50Using BundlerMinifier.Core50Configuring Your Bundles50Creating / Updating Bundles51Automated Bundling51Available Commands51Chapter 6: Caching52Introduction52Examples52Using InMemory cache in ASP.NET Core application52Distributed Caching53Chapter 7: essing Configuration using Dependency Injection54Getting Started54Work with Environment Variables55Option model and configuration56In Memory configuration source56Chapter 8: Configuring multiple EnvironmentsExamples5757Having appsettings per Environment57Get/Check Environment name from code57Configuring multiple environments58Render environment specific content in view60Set environment variable from command line60Set environment variable from PowerShell60Using ASPNETCORE ENVIRONMENT from web.config60
Chapter 9: Cross-Origin Requests (CORS)62Remarks62Examples62Enable CORS for all requests62Enable CORS policy for specific controllers62More sophisticated CORS policies63Enable CORS policy for all controllers63Chapter 10: Dependency 66Register and manually resolve66Register dependencies66Lifetime control67Enumerable dependencies67Generic dependencies67Retrieve dependencies on a Controller68Injecting a dependency into a Controller Action68The Options pattern / Injecting options into services69Remarks70Using scoped services during application startup / Database Seeding70Resolve Controllers, ViewComponents and TagHelpers via Dependency Injection71Plain Dependency Injection example (Without Startup.cs)72Inner workings of Collection72IServiceProvider73ResultChapter 11: Error HandlingExamplesRedirect to custom error page73757575
Global Exception Handling in ASP.NET CoreChapter 12: Injecting services into views7577Syntax77Examples77The @inject Directive77Example Usage77Required Configuration77Chapter 13: Localization78Examples78Localization using JSON language resources78Set Request culture via url path86Middleware Registration87Custom Route Constraints87Registering the route87Chapter 14: Logging89Examples89Using NLog Logger89Add Logger to Controller89Using Serilog in ASP.NET core 1.0 application89Chapter 15: Middleware91Remarks91Examples91Using the ExceptionHandler middleware to send custom JSON error to Client91Middleware to set response ContentType92Pass data through the middleware chain92Run, Map, Use93Chapter 16: Models95Examples95Model Validation with Validation Attrributes95Model Validation with Custom Attribute95Chapter 17: project.json97
Introduction97Examples97Simple Library project example97Complete json file:97Simple startup projectChapter 18: Publishing and DeploymentExamplesKestrel. Configuring Listening AddressChapter 19: Rate limiting100101101101103Remarks103Examples103Rate limiting based on client IP103Setup103Defining rate limit rules106Behavior106Update rate limits at runtime107Rate limiting based on client ID108Setup108Defining rate limit rules111Behavior112Update rate limits at runtime113Chapter 20: RoutingExamples114114Basic Routing114Routing constraints114Using it on Controllers114Using it on Actions115Using it in Default Routes115Chapter 21: Sending Email in .Net Core apps using MailKit116Introduction116Examples116Installing nuget package116
Simple implementation for sending emailsChapter 22: Sessions in ASP.NET Core 1.0116118Introduction118Examples118Basic example of handling SessionChapter 23: Tag Helpers118120Parameters120Examples120Form Tag Helper - Basic example120Form Tag Helper - With custom route attributes120Input Tag Helper120Select Tag Helper121Custom Tag Helper123Sample Widget Custom Tag Helper124Label Tag Helper124Anchor tag helper125Chapter 24: View ComponentsExamples126126Create a View Component126Login View Component126Return from Controller Action127Chapter 25: Working with bling webpack-dev-middleware for asp.net-core gAdd Hot Module Replacement (HMR)Prerequisites129129130
ConfigurationGenerating sample single page application with asp.net coreCredits130130132
AboutYou can share this PDF with anyone you feel could benefit from it, downloaded the latest versionfrom: asp-net-coreIt is an unofficial and free asp.net-core ebook created for educational purposes. All the content isextracted from Stack Overflow Documentation, which is written by many hardworking individuals atStack Overflow. It is neither affiliated with Stack Overflow nor official asp.net-core.The content is released under Creative Commons BY-SA, and the list of contributors to eachchapter are provided in the credits section at the end of this book. Images may be copyright oftheir respective owners unless otherwise specified. All trademarks and registered trademarks arethe property of their respective company owners.Use the content presented in this book at your own risk; it is not guaranteed to be correct noraccurate, please send your feedback and corrections to info@zzzprojects.comhttps://riptutorial.com/1
Chapter 1: Getting started with asp.net-coreRemarks.NET Core is a general purpose development platform maintained by Microsoft and the .NETcommunity on GitHub. It is cross-platform, supporting Windows, macOS and Linux, and can beused in device, cloud, and embedded/IoT scenarios.The following characteristics best define .NET Core: Flexible deployment: Can be included in your app or installed side-by-side user- or machinewide. Cross-platform: Runs on Windows, macOS and Linux; can be ported to other OSes. Thesupported Operating Systems (OS), CPUs and application scenarios will grow over time,provided by Microsoft, other companies, and individuals. Command-line tools: All product scenarios can be exercised at the command-line. Compatible: .NET Core is compatible with .NET Framework, Xamarin and Mono, via the .NET Standard Library. Open source: The .NET Core platform is open source, using MIT and Apache 2 licenses.Documentation is licensed under CC-BY. .NET Core is a .NET Foundation project. Supported by Microsoft: .NET Core is supported by Microsoft, per .NET Core SupportVersionsVersionRelease NotesRelease -11-16ExamplesInstallation and SetupInstalling Visual StudioIf you do not have Visual Studio installed, you can download the free Visual Studio CommunityEdition here. If you already have it installed, you can proceed to the next step.https://riptutorial.com/2
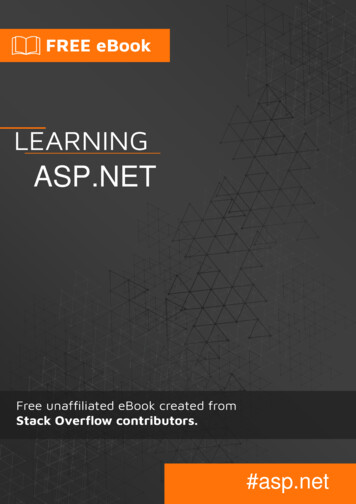
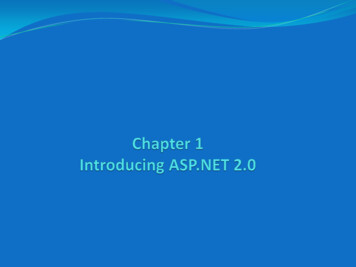
Creating an ASP.NET Core MVC Application.1. Open Visual Studio.2. Select File New Project.3. Select Web under the language of your choice within the Templates section on the left.4. Choose a preferred Project type within the dialog.5. Optional: Choose a .NET Framework you would like to target6. Name your project and indicate if you want to create a Solution for the project.7. Click OK to create the project.You will be presented with another dialog to select the template you want to use for the project :https://riptutorial.com/3
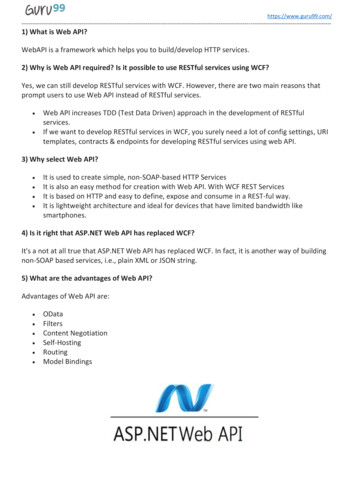
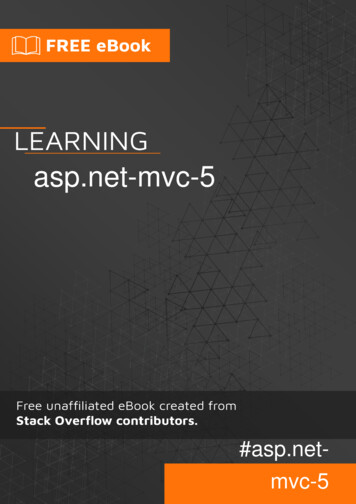
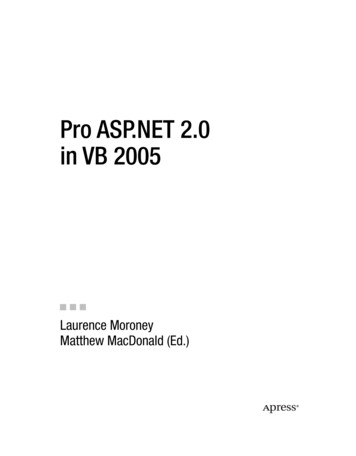
Each of the descriptions are self-explanatory. For this first project, select Web Application, whichwill contain all of the default configurations, authentication, and some existing content.Since this is an introduction application and doesn't require any security or authentication, you canchange the authentication option to No Authentication on the right-side of the dialog and clickOK to create the project.You should then see the new project within the Solution Explorer :Press the F5 key to run the application and begin a debugging session, which will launch theapplication within your default browser :https://riptutorial.com/4
You can now see that your project is up and running locally and is ready as a starting point for youto build your application.Create a new project from the command lineIt's possible to create a new ASP.NET Core project entirely from the command line using thedotnet command.dotnet new webdotnet restoredotnet runscaffolds a new "empty" web project. The web parameter tells the dotnet tool to usethe ASP.NET Core Empty template. Use dotnet new -all to show all the available templates currentlyinstalled. Other key templates include console, classlib, mvc and xunit.dotnet new webOnce the template has been scaffolded out, you can restore the packages required to run theproject (dotnet restore), and compile and start it (dotnet run).Once the project is running, it will be available on the default port: http://localhost:5000Minimal ASP.NET Core Web API with ASP.NET Core MVCWith ASP.NET Core 1.0, the MVC and Web API framework have been merged into oneframework called ASP.NET Core MVC. This is a good thing, since MVC and Web API share a lothttps://riptutorial.com/5
of functionality, yet there always were subtle differences and code duplication.However, merging these two into framework one also made it more difficult to distinguish one fromanother. For example, the Microsoft.AspNet.WebApi represents the Web API 5.x.x framework, notthe new one. But, when you include Microsoft.AspNetCore.Mvc (version 1.0.0), you get the full blownpackage. This will contain all the out-of-the-box features the MVC framework offers. Such asRazor, tag helpers and model binding.When you just want to build a Web API, we don't need all this features. So, how do we build aminimalistic Web API? The answer is: Microsoft.AspNetCore.Mvc.Core. In the new world MVC is splitup into multiple packages and this package contains just the core components of the MVCframework, such as routing and authorization.For this example, we're gonna create a minimal MVC API. Including a JSON formatter and CORS.Create an empty ASP.NET Core 1.0 Web Application and add these packages to yourproject.json:"Microsoft.AspNetCore.Mvc.Core": "1.0.0","Microsoft.AspNetCore.Mvc.Cors": : "1.0.0"Now we can register MVC using AddMvcCore() in the startup class:public void ConfigureServices(IServiceCollection ormatters();}returns an IMvcCoreBuilder instance which allows further building. Configuring themiddleware is the same as usual:AddMvcCorepublic void Configure(IApplicationBuilder app){app.UseCors(policy ersThe 'old' Web API comes with its own controller base class: ApiController. In the new world thereis no such thing, only the default Controller class. Unfortunately, this is a rather large base classand it's tied to model binding, views and JSON.NET.Fortunately, in the new framework controller classes don't have to derive from Controller to bepicked up by the routing mechanism. Just appending the name with Controller is enough. Thishttps://riptutorial.com/6
allows us to build our own controller base class. Let's call it ApiController, just for old times sake:/// summary /// Base class for an API controller./// /summary [Controller]public abstract class ApiController{[ActionContext]public ActionContext ActionContext { get; set; }public HttpContext HttpContext ActionContext?.HttpContext;public HttpRequest Request ActionContext?.HttpContext?.Request;public HttpResponse Response ActionContext?.HttpContext?.Response;public IServiceProvider Resolver ActionContext?.HttpContext?.RequestServices;}The [Controller] attribute indicates that the type or any derived type is considered as a controllerby the default controller discovery mechanism. The [ActionContext] attribute specifies that theproperty should be set with the current ActionContext when MVC creates the controller. TheActionContext provides information about the current request.ASP.NET Core MVC also offers a ControllerBase class which provides a controllerbase class just without views support. It's still much larger than ours though. Use it ifyou find it convenient.ConclusionWe can now build a minimal Web API using the new ASP.NET Core MVC framework. Themodular package structure allows us to just pull in the packages we need and create a lean andsimple application.Using Visual Studio code to develop Cross plateform aspnet core applicationWith AspNetCore you can develop the application on any platform including Mac,Linux,Windowand Docker.Installation and SetUp1. Install visual Studio Code from here2. Add C# extesnion3. Install dot net core sdk. You can install from hereNow you have all the tools available. To develop the application. Now you need some scaffoldingoption. For that you should consider using Yeoman. To install Yeoman1. Install NPM. For this you need Node on your machine. Install from herehttps://riptutorial.com/7
2. Install Yeoman by using NPMnpm install -g yo3. Now install the aspnet generatornpm install -g generator-aspnetNow we have all the setup on your machine. First let's create a new project with DotNetCore basiccommand and then create a new project using Yo.New Project Using Command Line1. Create a new Project Foldermkdir CoreApplication cd CoreApplication2. Scaffold a very basic dotnet project using default command line optiondotnet New1. Restore the packages and run the applicationdotNet restore dotnet runhttps://riptutorial.com/8
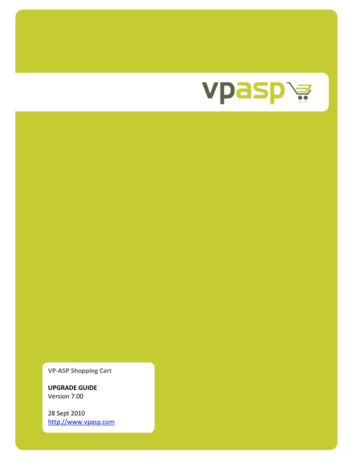
Use Yeoman as Scaffolding OptionCreate Project Folder and Run the Yo Commandyo aspnetYeoman will ask some inputs like Project Type, Project Name etc likehttps://riptutorial.com/9
Now restore the packages by running dotnet restore command and Run the applicationUse VS Code to develop the applicationRun the visual studio code likehttps://riptutorial.com/10
Now open the files and run the application. You can also search the extension for your help.Setup environment variable in ASP.NET Core [Windows] Original Post ASP.NET Core uses the ASPNETCORE ENVIRONMENT environment variable to determine the currentenvironment. By default, if you run your application without setting this value, it will automaticallyhttps://riptutorial.com/11
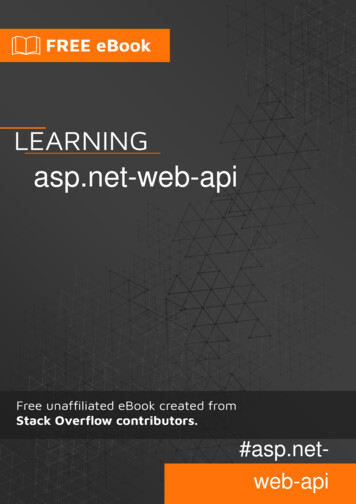
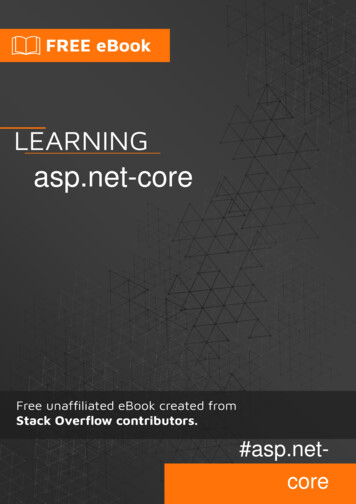
default to the Production environment. dotnet runProject TestApp (.NETCoreApp,Version v1.0) was previously compiled. Skipping compilation.Hosting environment: ProductionContent root path: C:\Projects\TestAppNow listening on: http://localhost:5000Application started. Press Ctrl C to shut down.Setting the environment variable in WindowsAt the command lineYou can easily set an environment variable from a command prompt using the setx.exe commandincluded in Windows. You can use it to easily set a user variable: setx ASPNETCORE ENVIRONMENT "Development"SUCCESS: Specified value was saved.Note that the environment variable is not set in the current open window. You will need to open anew command prompt to see the updated environment. It is also possible to set system variables(rather than just user variables) if you open an administrative command prompt and add the /Mswitch: setx ASPNETCORE ENVIRONMENT "Development" /MSUCCESS: Specified value was saved.Using PowerShell Alternatively, you can use PowerShell to set the variable. In PowerShell, aswell as the normal user and system variables, you can also create a temporary variable using the Env: command: Env:ASPNETCORE ENVIRONMENT "Development"The variable created lasts just for the duration of your PowerShell session - once you close thewindow the environment reverts back to its default value.Alternatively, you could set the user or system environment variables directly. This method doesnot change the environment variables in the current session, so you will need to open a newPowerShell window to see your changes. As before, changing the system (Machine) variables willrequire administrative TCORE ENVIRONMENT", "Development", ETCORE ENVIRONMENT", "Development", "Machine")Using the windows control panel If you're not a fan of the command prompt, you can easilyupdate your variables using your mouse!Click the windows start menu button (or press theWindows key), search for environment variables, and choose Edit environment variables for yourhttps://riptutorial.com/12
account:Selecting this option will open the System Properties dialoghttps://riptutorial.com/13
Click Environment Variables to view the list of current environment variables on your system.https://riptutorial.com/14
Assuming you do not already have a variable called ASPNETCORE ENVIRONMENT, click the New. buttonand add a new account environment variable:ClickOK to save all your changes. You will need to re-open any command windows to ensure the newenvironment variables are loaded.Read Getting started with asp.net-core online: om/15
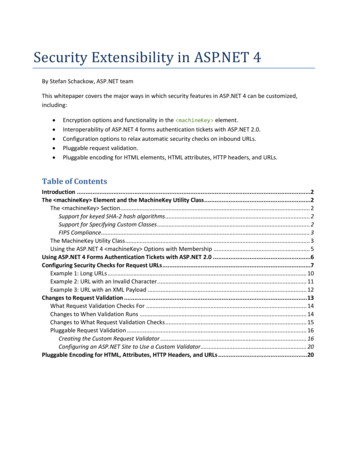
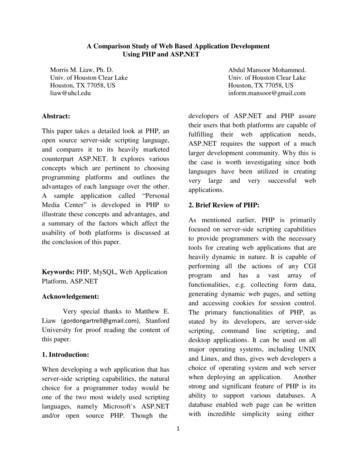
Chapter 2: Angular2 and .Net CoreExamplesQuick tutorial for an Angular 2 Hello World! App with .Net Core in VisualStudio 2015Steps:1. Create Empty .Net Core Web App:https://riptutorial.com/16
2. Go to wwwroot, and create a normal html page called Index.html:https://riptutorial.com/17
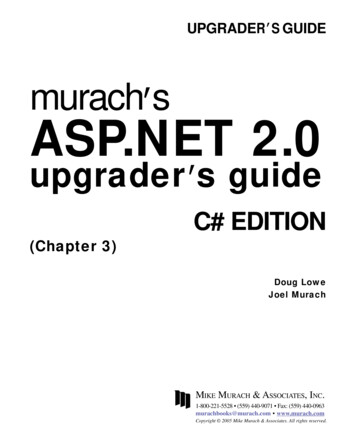
3. Configure Startup.cs to accept static files (this will require to add"Microsoft.AspNetCore.StaticFiles": "1.0.0" library in the “project.json” file):https://riptutorial.com/18
4. Add NPN File: Right click the WebUi project and add NPN Configuration File (package.json):https://riptutorial.com/19
Verify the last versions of the packages:https://riptutorial.com/20
Note: If visual studio does not detect the versions of the packages (Check allpackages, because some of them does show the version, and some others don't), itmight be because the Node version coming in visual studio is not working correctly, soit will probably require to install node js externally and then link that installation withvisual studio.i. Download and install node js: https://nodejs.org/es/download/ii. Link the installation with visual studio: l.com/21
iii. (Optional) after saving the package.json it will install the dependencies in theproject, if not, run "npm install" using a command prompt from the same location as thepackage.json file.https://riptutorial.com/22
Note: Recommended to install "Open Command Line", an extension that can be addedto Visual Studio:5. Add typescript: Create a TsScript folder inside the WebUi project, just for organization (TheTypeScripts won't go to the browser, they will be transpiled into a normal JS file, andthis JS file will be the one going to the wwwroot foder using gulp, this will be explainedlater):https://riptutorial.com/23
Inside that folder add "TypeScript JSON Configuration File" (tsconfig.json):https://riptutorial.com/24
And add the next code:https://riptutorial.com/25
In the WebUi Project’s root, add a new file called typings.json:https://riptutorial.com/26
And add the next code:https://riptutorial.com/27
In the Web Project root open a command line and execute "typings install", this willcreate a typings folder (This requires “Open Command Line” explained as an optionalstep in the Note inside Step 4, numeral iii).https://riptutorial.com/28
https://riptutorial.com/29
https://riptutorial.com/30
6. Add gulp to move files: Add "Gulp Configuration File" (gulpfile.js) at the root of the web project:https://riptutorial.com/31
Add Code:https://riptutorial.com/32
7. Add Angular 2 bootstrapping files inside the “tsScripts” folder:https://riptutorial.com/33
app.component.tshttps://riptutorial.com/34
app.module.tsmain.ts8. Inside wwwroot, create the next file structure:9. Inside the scripts folder (but outside app), add the systemjs.config.js:https://riptutorial.com/35
And add the next code:https://riptutorial.com/36
10. Execute Gulp Task to generate the scripts in wwwroot. Right click gulpfile.js Task Runner Explorerhttps://riptutorial.com/37
i. If the tasks are not loaded ("Fail to load. See Output window") Go to output windowand take a look at the errors, most of the time are syntax errors in the gulp file. Right Click "default" task and "Run" (It will take a while, and the confirmation messagesare not very precise, it shows it finished but the process is still running, keep that inmind):https://riptutorial.com/38
11. Modify Index.html like:https://riptutorial.com/39
12. Now run and enjoy.Notes: In case there are compilation errors with typescript, for example "TypeScript VirtualProject", it is an indicator that the TypeScript version for Visual Studio is not updatedaccording to the version we selected in the “package.json”, if this happens pleaseinstall: spx?id 48593References:https://riptutorial.com/40
Deborah Kurata's "Angular 2: Getting Started" course in gular-2-getting-started-update Angular 2 Official Documentation:https://angular.io/ Articles by Mithun udio/Expected errors when generating Angular 2 components in .NET Core project(version 0.8.3)When generating new Angular 2 components in a .NET Core project, you may run into thefollowing errors (as of version 0.8.3):Error locating module for declarationSilentError: No module files foundORNo app module found. Please add your new Class to your component.Identical ClientApp/app/app.module.ts[SOLUTION]1. Rename app.module.client.ts to app.client.module.ts2. Open app.client.module.ts: prepend the declaration with 3 dots “.” and wrap the declarationin brackets.For example: [.sharedConfig.declarations, MyComponent ]3. Open boot-client.ts: update your import to use the new app.client.module reference.For example: import{ AppModule } from './app/app.client.module';4. Now try to generate the new component: ngg component my-component[EXPLANATION]Angular CLI looks for a file named app.module.ts in your project, and tries to find a references forthe declarations property to import the component. This should be an array (as thesharedConfig.declarations is), but the changes do not get applied[SOURCES]https://riptutorial.com/41
https://github.com/angular/angular-cli/issues/2962 /t/lecture/6848548 (section 3.33 lecturecontributor Bryan Garzon)Read Angular2 and .Net Core online: gular2-and-net-corehttps://riptutorial.com/42
Chapter 3: ASP.NET Core - Log both Requestand Response using MiddlewareIntroductionFor some time I've searched for the best way to log requests and response in an ASP.Net Core. Iwas developing services and one of the requirements was to record request with its response inone record the the database. So many topics out there but none worked for me. it's either forrequest only, response only or simply didn't work. When I was able to finally do it, and it hadevolved during my project to better error handling and logging exceptions so I thought of sharing.Remarkssome of the topics that was helpful to me: quest-and-response-using-middleware ing-asp-net-5-requests-using-middleware/ How to log the HTTP Response Body in ASP.NET Core 1.0ExamplesLogger ttp.Internal;public class LoggerMiddleware{private readonly RequestDelegate next;public LoggerMiddleware(RequestDelegate next){next next;}public async Task Invoke(HttpContext context){using (MemoryStream requestBodyStream new MemoryStream()){using (MemoryStream responseBodyStream new MemoryStream()){Stream originalRequestBody );https://riptutorial.com/43
Stream originalResponseBody context.Response.Body;try{await );requestBodyStream.Seek(0, SeekOrigin.Begin);string requestBodyText uestBodyStream.Seek(0, SeekOrigin.Begin);context.Request.Body requestBodyStream;string responseBody "";context.Response.Body responseBodyStream;Stopwatch watch Stopwatch.StartNew();await (0, SeekOrigin.Begin);responseBody new t.Request.Path, ing.Join(",", context.Request.Headers.Select(he he.Key ":[" he.Value "]").ToList()),requestBodyText, responseBody, dyStream.Seek(0, SeekOrigin.Begin);await y);}catch (Exception ex){ExceptionLogger.LogToDatabse(ex);byte[] data System.Text.Encoding.UTF8.GetBytes("Unhandled Erroroccured, the error has been logged and the persons concerned are notified!! Please, try againin a while.");originalResponseBody.Write(data, 0, data.Length);}finally{context.Request.Body originalRequestBody;context.Response.Body originalResponseBody;}}}}}Read ASP.NET Core - Log both Request and Response using Middleware sing-middlewarehttps://riptutorial.com/44
Chapter 4: AuthorizationExamplesSimple AuthorizationAuthorization in asp.net core is simply AuthorizeAttribute[Authorize]public class SomeController : Controller{public IActionResult Get(){}public IActionResult Post(){}}This will only allow a logged in user to access these actions.or use the following to only limit a single actionpublic class SomeController : Controller{public IActionResult Get(){}[Authorize]public IActionResult Post(){}}If you want to allow all users to access one of the actions you can use AllowAnonymousAttribute[Authorize]public class SomeController: Controller{public IActionResult Get(){}[AllowAnonymous]public IActionResult Post(){}}Now Post can be accessed by any user. AllowAnonymous always comes as a priority to authorize, sohttps://riptutorial.com/45
if a controller is set to AllowAnonymous then all it's actions are public, regardless of if they have anAuthorizeAttribute or not.There is an option to set all controllers to require authorized requests services.AddMvc(config {var policy new ser().Build();config.Filters.Add(new AuthorizeFilter(policy));})This is done by adding a default authorization policy to each controller - any Authorize/AllowAnonymous Attributes over a controller/action will override these settings.Read Authorization online: thorizationhttps://riptutorial.com/46
Chapter 5: Bundling and MinificationExamplesGrunt and GulpIn ASP.NET Core apps, you bundle and minify the client-side resources during design-time usingthird party tools, such as Gulp and Grunt. By using design-time bundling and minification, theminified files are created prior to the application’s deployment. Bundling and minifying beforedeployment provides the advantage of reduced server load. However, it’s important to recognizethat design-time bundling and minification increases build complexity and only works with staticfiles.This is done in ASP.NET Core by configuring Gulp via a gulpfile.js file within your project :// Defining dependenciesvar gulp require("gulp"),rimraf require("rimraf"),concat require("gulp-concat"),cssmin require("gulp-cssmin"),uglify require("gulp-uglify");// Define web rootvar webroot "./wwwroot/"// Defining pathsvar paths {js: webroot "js/**/*.js",minJs: webroot "js/**/*.min.js",css: webroot "css/**/*.css",minCss: webroot "css/**/*.min.css",concatJsDest: webroot "js/site.min.js",concatCssDest: webroot "css/site.min.css"};// Bundling (via concat()) and minifying (via uglify()) Javascriptgulp.task("min:js", function () {return gulp.src([paths.js, "!" paths.minJs], { base: "." .pipe(gulp.dest("."));});// Bundling (via concat()) and minifying (via cssmin()) Javascriptgulp.task("min:css", function () {return gulp.src([paths.css, "!" ipe(cssmin()).pipe(gulp.dest("."));});This approach will properly bundle and minify your existing Javascript and CSS files respectivelyaccordingly to the directories and globbing patterns that ar
from: asp-net-core It is an unofficial and free asp.net-core ebook created for educational purposes. All the content is extracted from Stack Overflow Documentation, which is written by many hardworking individuals at Stack Overflow. It is neither affiliated with Stack Overflow nor official asp.net-core.