Transcription
VP-ASP Shopping CartUPGRADE GUIDEVersion 7.0028 Sept 2010http://www.vpasp.com1 Page
2 Page
Table of Contents1.Introduction . 42.Download upgrade from our website . 53.Install VP-ASP 7.00 files . 64.Copy your existing shop config.asp into “Upgrade” folder . 75.Upgrading from version 3.50 and earlier . 86.Run the Upgrade Wizard . 97.Update your language files for VP-ASP 7.00 . 208.Convert your state and country tax settings. 229.Redesign your new site for VP-ASP 7.00 . 2310. Update templates. 2410.1Upgrading Header and Footer Template from 5.50 . 2410.1.1Header template . 2410.1.2Footer template . 2810.2Upgrading Header and Footer Template from 6.50 . 2810.2.1Header template . 2910.2.2Footer template . 3311. Update shop colors.asp . 3511.1.Upgrading from 4.xx . 3511.2.Upgrading from 5.00 . 3511.3.Upgrading from 5.50 . 3511.4.Upgrading from 6.00 and 6.50 . 3512. Upgrade your gateway . 3713.Upgrade your categories . 3814.Set up your countries and states . 3915.Securing your site . 4015.1Removing “Installation” folder and “Upgrade” folder . 4015.2Removing copy of default database . 4015.3Removing all files starting with the letter “c” in the “admin” folder. . 4015.4Removing all files starting with “diag” . 4015.5Credit Card Storage Settings . 4015.6Securing your Database. 413 Page
1.IntroductionCongratulations on your decision to upgrade to VP-ASP 7.00 - with advanced security and manygreat new features, we are confident you will find the latest version of VP-ASP easier to use andmore powerful than ever before!This document is for customers who are upgrading from an earlier version of VP-ASP to VP-ASP7.00.If you are a new customer using VP-ASP Shopping Cart for the first time, then please refer to ourQuickstart guide for detailed installation instructions.Full version: http://www.vpasp.com/virtprog/quickstart.pdfThe upgrade to VP-ASP 7.00 involves a number of steps, some of which are done automaticallyand others need to be done manually by following the steps below.NOTE: Once you have completed upgrading your database to VPASP 7.0 you will not beable to use your old admin with a store running 650 or earlier VPASP versions.So if you have multiple sites running from the one database then you will need to ensure all sitesare managed using a VPASP 7.0 admin.4 Page
2.Download upgrade from our websiteBefore you can begin the upgrade process, you need to retrieve the upgrade files from the VPASP website.First, visit our upgrade centre by going to http://www.vpasp.com/sales/upgrade.asp.Then enter your Order ID and email address and click the Continue button.Your upgrade options will then be evaluated and you will be presented with a selection of options.If you are upgrading to the same package as you originally purchased, and your order is less than12 months old, you will be able to upgrade for free.Otherwise, if you are outside of your 12 month upgrade period, or you wish to upgrade to a higherpackage, then the cost of your upgrade will be calculated and you will be able to purchase theupgrade through our regular checkout process.Once your order has been received and processed by the VP-ASP administration team and youwill receive an email with your new files.5 Page
3.Install VP-ASP 7.00 filesVP-ASP 7.00 is a complete replacement for previous releases of VP-ASP.First, unzip VP-ASP 7.00 files using a ZIP utility such as WinZip or WinRAR.We recommend that you make a copy or backup of your existing file and database beforecompleting the upgrade.To begin your upgrade process, you need to copy the VP-ASP 7.00 files into your existing VPASP site.If your old version of VP-ASP do not have any customisations, you can just overwrite the previousversion files. If in case that your old version of VP-ASP contains customisation in some of VPASP files, you need to manually insert the customisation codes into the VP-ASP 7.00 files.To check the VP-ASP 7.00 files against your customised VP-ASP previous version, you can usea program called WinMerge available as a free download from:http://winmerge.org/The VP-ASP upgrade process does not alter your data in any way, however it is best to alwaysback up your database before completing any major changes to your site in case something goeswrong and you need to reverse your changes.6 Page
4.Copy your existing shop config.asp into “Upgrade” folderThe first step is to tell VP-ASP 7.00 where it can find your current database and configurations.To do this, you need to copy your previous version of VP-ASP file called “shop config.asp” intothe “Upgrade” folder.Note: “Upgrade” folder is provided with the VP-ASP 7.00 files and folders.7 Page
5.Upgrading from version 3.50 and earlierUpgrade from version 3.50 and earlier also have the same process as mentioned in Chapter 4above.8 Page
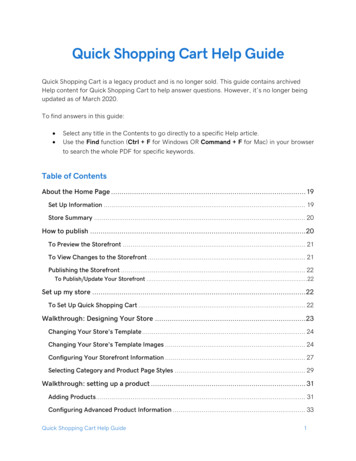
6.Run the Upgrade WizardVP-ASP 7.00 comes with an upgrade wizard which you need to run through your browser. Thiswizard will add new fields and system records to your database, but will not change any of yourexisting data.Please follow these steps below :1. Open your browser and enter the URL of your new VP-ASP folder for examplehttp://www.yoursite.com/vpasp/default.htm where www.yoursite.com is your websiteaddress and vpasp is the folder that you have installed your new copy of VP-ASP 7.00.2. There are two options to choose from: Installing or Upgrading. Please click theUpgrading button.3. You are now ready to start upgrading to VP-ASP 700. You will see a summary page ofthe steps you will be going through to upgrade your existing VPASP to the latest release.Once you have read the page click the button at the bottom.9 Page
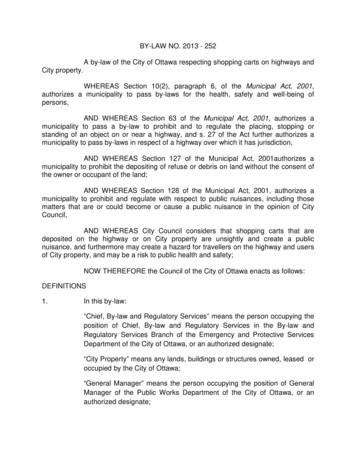
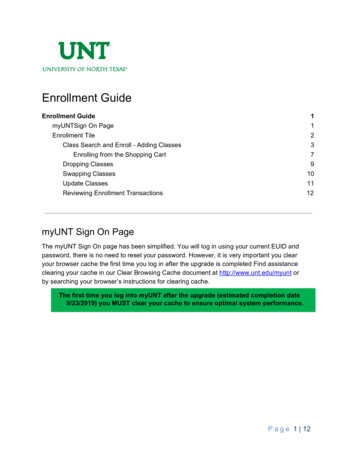
4. The first step is to check your folder permissions and make sure that the folder that arerequired have READ/WRITE permissions applied.Click the Check your folder permissions button.10 P a g e
Some of the folders in VP-ASP 7.00 need to have read/write permissions applied to workproperly. This step will automatically check the required folders to have read/writepermission. Once you are ready, please click button “Check your folder permissions”.Folders that have read/write permission will be displayed with status “Pass”. Folders thatdo not have read/write permission will be displayed with status “Fail”.If one of your folders appears to have “Fail” status, please enable read/write permissionto the folder. You may contact your hosting person to do this if your VP-ASP files are inremote server, if you are running from a local machine, you can enable read/writepermission on the folder yourself.To setup folder permission in Win XP, please refer to the help guide below :http://helpnotes.vpasp.com/shopexd.asp?id 715To setup folder permission in Win Vista/ Win 7, please refer to the help guide below :http://helpnotes.vpasp.com/shopexd.asp?id 914#permissionsPlease click the button “Check your folder permissions” again once you have set theread/write permission to your folders.If all the required folders have “Pass” status, you can click button “Continue”.5. The next step is to connect to your database.This step basically will retrieve your existing database for your new VP-ASP 7.00 site.You need to ensure you have placed your original shop config.asp file from your currentsite into the Upgrade folder.Please click the “Retrieve Database Information”.VP-ASP will then automatically populate the database fields with the connection settingsfrom your existing site.If you are using Access, Database name and Folder will be automatically filled in.If you are using ODBC, the DSN Name will be automatically filled in.11 P a g e
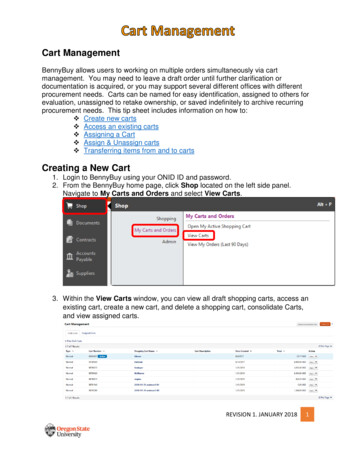
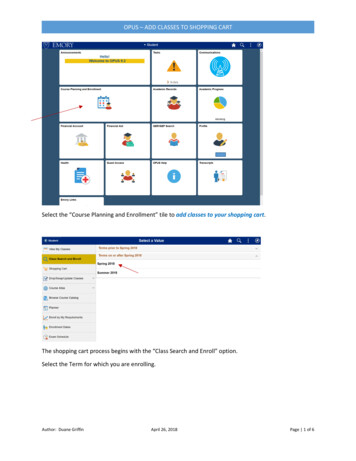
If you are using SQL SERVER or MySQL, the following db details will be automaticallyfilled in :Database NameDatabase User IDDatabase PasswordDatabase AddressClick “Check Database” once you are ready to check your database is connected or not.If the db is connected successfully, the button “Continue To Setup Database Structure”will be visible and you can click to proceed to next step.Note :If you are using VP-ASP SP1 7.00 (UTF-8) files that support double bytes characters withMYSQL db then you must use MYSQL 5.1 ODBC driver or above as the databaseconnector.VP-ASP SP1 7.00 UTF-8 will not work with MYSQL 3.51 ODBC driver. So please makesure your server has the required driver if you are using MYSQL database for DoubleBytes countries.6. Setup Database Structure.This step will add any new fields to your existing db to be ready for VP-ASP 7.00.Click “Upgrade” to start the process.Note: Before you do this, you will need to make sure that you already have backup ofyour existing db.This process will taking a while and you can see the processing icon.If it is finished, a summary of database upgrade will be displayed :12 P a g e
Once it is done, the button “Continue To Upgrade Admin Info” will be visible and youcan click it to proceed to next step.7. Upgrade Admin InfoIn this step, you need to enter your existing Admin User Name and also you need toenter a New Second Password.VP-ASP need to retrieve your existing Admin user Name to give full privileges to accessadministration.While the New Second Password must contains alpha-numeric (a-z, A-Z, 0-9) characters.This will ensure the security of your VP-ASP 7.00 administration.If the details you are entered is valid, the button “Continue To Rename Admin Page”will be visible. Click the button to proceed to next step.8. Rename Admin Page13 P a g e
This step will rename your existing admin page to the file name you specified.Please enter a new name of admin page and make sure the page name is not a commonname.For example, we do not recommend you to create a name e.g. admin or login.You can create the page name with combination of alpha-numeric characters e.g.jacksyte87635.Click “Rename Admin Page” once you have entered the name.Click “Continue To Create Encryption Key” to proceed to next step.9. Create Encryption KeyThis step will create encryption key for your VP-ASP 7.00 site.Encryption key is a unique set of character used to scramble customer credit cardinformation.Make sure you enter a 10 character encryption key, e.g. jfh73GFKah3oClick “Update Encryption Key” to update and check your entered data is valid or not.If valid, the button “Continue To Cart Details” will be visible. Click it to proceed to nextstep.14 P a g e
10. Cart DetailsIn this step, you need to enter all of your cart details for your VP-ASP 7.00 site.Here is the list of fields you need to provide:Email address : After an order has been completed, who should be notified. This is theemail address of that person. This is also the FROM address for the order confirmationsent to the customer.Shop Name : The name of your shop. Used on e-mails to the customer as the name ofthe sender.Email Subject: This is simply the subject when the customer gets an e-mail confirmation.15 P a g e
Mail Server: This is the name of the mail service on your ISP. Your ISP will need to letyou know what this is. It normally will start with mail. Or smtp. There is no standardname. You must ask your Windows administrator or Web hosting company. If not setcorrectly , emails will not be sent. Not used with CDONTS or Unix.Mail User ID : If your ISP is using user ID for mail service, enter value here or leaveempty if not.Mail Password : If your ISP is using password for mail service, enter value here or leaveempty if not.Mail Type: The type of e-mail interface program to use. VP-ASP supports ASPMAIL,CDONTS, ASPEMAIL, OCXMAIL and JMAIL. VP-ASP does not write to your mail systemdirectly. It needs an interface and these are the most common ones.Home Page : The URL to return to your main page. It can be a full URL such as http:. orjust a file name such as default.htm.Default Title: The default title for your shopping cart site e.g. Johny Instrumental Shop.In this step, you can also perfom a test for Mail Component. Click the link “Test MailComponent” to see any available mail components for your hosting. Mail componentswith “Available” status can be selected as a value for Mail Type.Click “Update Cart Details” if all done and click button “Continue To Register YourProduct” to proceed to next step.11. Register Your Product16 P a g e
This step will register your purchase of VP-ASP 7.00 and your information details.Please provide the following details in the form:Order Number : Your VP-ASP Order Number. This should be automatically filled in withyour existing order number.Shop ID : An unique name for your shop - eg. "shop700 myshopname". This should beautomatically filled in with your existing Shop ID.Domain : This represents the URL of your site where the shopping cart files are located(eg. http://www.yourvpaspwebsiteurl.com/vpasp). This should be automatically filled inwith your existing domain url.SSL : This is your secure URL to which credit card information is encrypted. This shouldbe automatically filled in with your existing secure URL.Company Name : Your company / shop nameAddress : Your company / shop address17 P a g e
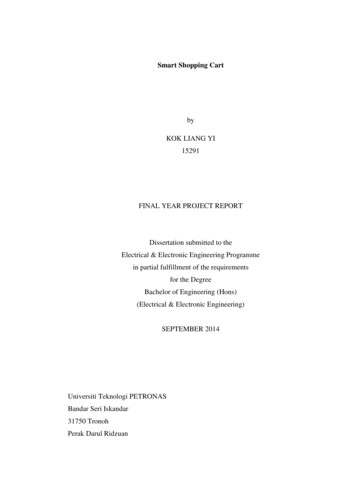
City : Your cityState : Your stateZip Code : Your zip codeCountry : Your countryPhone : Your phone numberFax : Your Fax numberEmail : Your email addressClick “Update Information” after you have entered all the details.Click “Continue To End” to finish the upgrade process.Note: After you have run the wizard, your database will have been updated to the required VPASP 7.00 format.If you want to go to your new front store VP-ASP 7.00, please go to “Click here to see your cart”.If you want to go to your new administration for VP-ASP 7.00, please go to “Click here to seeyour admin page”.Note:Userid is your existing admin user id.Password is your existing admin password.Password 2 is your existing admin password 2. (if you have entered a new second password 2 inthe upgrade wizard, then please enter your new admin password 2).Once you have completed upgrading your database to VPASP 7.0 you will not be able touse your old admin with a store running 650 or earlier VPASP versions.So if you have multiple sites running from the one database then you will need to ensure all sitesare managed using a VPASP 7.0 admin.Basically, below is the example of our new format admin page :18 P a g e
pCompared to your existing admin page format in previous VP-ASP version :http://www.yourvpaspsite.com/youroldadmin.asp19 P a g e
7.Update your language files for VP-ASP 7.00Note: If you only have English in your store, then you can skip this step.There are several new language variables added in VP-ASP 7.00 so, if you have any additionallanguages installed, you will need to update your database.If you are upgrading from a version earlier than VP-ASP 5.00, you will find that languages arehandled completely differently in the latest version. Rather than being stored in theshop language xxxx.asp files, they are stored in the database, in the languages table.1. Download the new language files for VP-ASP 7.00 from the VP-ASP website –http://www.vpasp.com/sales/languages700.asp2. Unzip the downloaded file into the “admin” folder you have VP-ASP 7.00 installed in.3. Login to your VP-ASP administration and go to Advanced Settings International4. Click Language tab.5. Click “Add Language”.6. Type in the filename of the language you are updating – for example, if you are updatingSpanish enter the filename shop language spanish.asp.Set Merge With Database to Yes.If you have made a lot of customizations to the languages and only want to add newentries from the language file to your database, set Update Existing to No.7. Click the Continue button. This will add the new language terms to your languages table.20 P a g e
8. Click the Reset Language link. Select the language you just added and click theContinue button.9. If you have more than one language in your site, complete the steps above for eachlanguage.21 P a g e
8.Convert your state and country tax settingsNote : This step only need to run for version BELOW VP-ASP 6.50 (e.g. 6.00, 5.50, andlower version).If you are using version 6.50 please skip this step.The way state and country tax rates are defined has been changed since VP-ASP 6.50 and thenew 7.00. Rather than having them stored in the shop configuration, they are now stored in theshopstates and shopcountries tables.1. Open your browser2. Enter the URL of your new VP-ASP 7.00 folder followed by converttaxes.asp. Forexample http://www.vpasp.com/vpasp/admin/converttaxes.asp, where www.vpasp.comis your website address and vpasp is the folder that you have installed your new copy ofVP-ASP. Admin is the folder where the file converttaxes.asp is located.Any state or country tax rates you have set up will be automatically converted.22 P a g e
9.Redesign your new site for VP-ASP 7.00In the previous version, you will need to modify the shoppage header.htm andshoppage trailer.htm to change the design, colors, etc based on your own.In VP-ASP 7.00, your site‟s header and footer template now fully controlled by CSS.Your previous version of shoppage header.htm and shoppage trailer.htm is not used in the VPASP 7.00 as it is a fully different layout. VP-ASP 7.00 will use its own shoppage header.htm andshoppage trailer.htm located in the “templates/default-2cols” folder. The header and footerlayout are controlled by the layout.css file.Now, you can just modify the design through the “layout.css” file located in the“templates/default-2cols/css” folder.If you need to setup the layout in your VP-ASP 7.00, such as display search box, mini cart,categories etc. you can easily configure it through our new feature called Layout Manager.Please refer to VP-ASP User Manual chapter 3.22 Layout Manager for more information.VP-ASP downloadable PDF User Manual can be found at:http://www.vpasp.com/helpnotes/VPASP 700 User Manual.zip23 P a g e
10. Update templatesIn our new VP-ASP 7.00, all the template files is stored in folder “templates/default-2cols” (if using2 columns layout) or “templates/default-3cols” (if using 3 columns layout).This is different in our previous version that store the template files in the root directory.After you have located the template files, you will need to update the template files used in yourexisting version to the VP-ASP 7.00 site which is in the folder “templates/default-2cols” (if using 2columns layout) or “templates/default-3cols” (if using 3 columns layout).You may want that you still keep your existing design or layout for the templates to be used in thenew version.Below is the complete guides on how to update each templates to be used in version 7.00:10.1Upgrading Header and Footer Template from 5.50This chapter will explain how to apply your existing header and footer template from VP-ASP 5.50to the new VP-ASP 7.00 site.Note : If you choose to keep your existing header and footer template, the new LayoutManager cannot be used. Layout Manager features can only be used if you utilise theheader and footer template provided in the VP-ASP 7.0 package as they are basicallydifferent compared to the old version header and footer template.Before you apply the changes for the templates, make sure you copy the existing templates fromyour site to a temporary directory. Please follow these steps below:1. Go to the root directory of your 5.50 site.2. Copy these files below :- shoppage header.htm- shoppage trailer.htm3. Create a new temporary directory to store the existing templates in your local computere.g. my550templates.10.1.1 Header templateThese steps below explain to you how to apply your existing header template to the new VP-ASP7.00 site :1. Open the file shoppage header.htm from the temporary directory using notepad.2. Locate the tag title until /title code e.g. : title [your site title could be entered here previously] /title 3. Please replace with : title %shopdynamictitle "title"% /title 4. Locate these code below (if exist) : %NavigateShowAllCategories% 24 P a g e
5. Please replace with : %NavigateShowCategories% Note: For more option snippets in displaying the categories, please refer to VP-ASPDesign Guide chapter 2.2.2. Display Categories with Styled Format Somewhere inYour Site.VP-ASP 7.00 Design Guide can be found at:http://www.vpasp.com/virtprog/VPASP 700 Design Guide.zip6. Locate these code below (if exist): %navigateshowlanguages% 7. Please replace with : %Navigateshowlanguages "yourprefixdivname" % 8. Locate the CSS link somewhere in your site e.g. (if exist): link rel "stylesheet" type "text/css" href "shop.css" Please see where is the CSS file stored in your existing site by looking in the above codeand copy the CSS file into your new VP-ASP 7.00 site.As you can see in the step 8, the shop.css is located in the root directory of your existingsite.Then please copy the file shop.css into folder “templates/default-2cols/css” (if using 2columns layout) or “templates/default-3cols/css” folder (if using 3 columns layout) inyour VP-ASP 7.00 site.If you have any other CSS files that you have created in your own, please also copy theCSS files into folder “templates/default-2cols/css” (if using 2 columns layout) or“templates/default-3cols/css” folder (if using 3 columns layout) in your VP-ASP 7.00site.9. Please change the location of your CSS files to read from the new directory as you havecopied above in step 8. For example, please locate these code below : link rel "stylesheet" type "text/css" href "shop.css" Please change to (make sure the code below in one line) : link rel "stylesheet" type "text/css" media "all"href "templates/ % getconfig("xtemplate")% /css/shop.css" / If you have any other CSS files, please also change the location to point to the newdirectory, for example : link rel "stylesheet" type "text/css" media "all"href "templates/ % getconfig("xtemplate")% /css/YOURFILENAME.css" / 10. Locate the meta description code e.g. (if exist) : meta NAME "description" content "your site description could be entered herepreviously." 11. Please replace with : meta name "description" content " %shopdynamictitle "description"% " / 25 P a g e
Note : if you do not have existing Meta description tag in your existing site, you will needto insert the above code into your header file.12. Locate the meta keyword code e.g. (if exist) : meta name "keywords" content "your site keywords could be entered here previously"/ 13. Please replace with : meta name "keywords" content " %shopdynamictitle "keywords"% " / Note : if you do not have existing Meta keywords tag in your existing site, you will need toinsert the above code into your header file.14. Insert these code below after the head tag : !-- This code must remain in all header files -- %generatebaseurl% !-- end -- meta http-equiv "Content-Type" content "text/html;charset % GetLang("langcharset")% " / meta http-equiv "X-UA-Compatible" content "IE EmulateIE7" / 15. Insert these code below above (before) the /head tag : script language "javascript" type "text/javascript" function clearfield(pform){if (pform.keyword.value " % GetLang("langsearchboxdefault")% ")pform.keyword.value "";} /script script language "javascript" type "text/javascript" function toggleMe(a){var e document.getElementById(a);//if(!e)return true;if(e.style.display "none"){e.style.display "block"} else {e.style.display "none"}//return true;} /script script language "javascript" type "text/javascript" function checkjavascriptstatus(){var checkingurl "shopcheckjavascript.asp";var pars '';var url checkingurl '?' pars;new Ajax.Request(url, {method: 'post',onSuccess: function(transport) {}});} /script !-- noscript not support /noscript -- script language "javascript" type "text/javascript" src "js/vs350.js" /script 26 P a g e
script language "javascript" type "text/javascript"src "js/dropdown.js" /script script language "javascript" type "text/javascript" src "js/shopajax.js" /script script language "javascript" type "text/javascript"src "js/contentslider.js" /script script language "javascript" type "text/javascript" src "js/equalizer.js" /script script language "javascript" type "text/javascript" src "js/tabcontent700.js" /script script language "javascript" type "text/javascript"src "js/shopajaxsearch.js" /script script language "javascript" type "text/javascript"src "shopcheckjavascript.asp" /script link rel "stylesheet" type "text/css" media "all"href "stylesheets/contentslider.css" / link rel "stylesheet" type "text/css" href "stylesheets/tabcontent700.css" / link rel "stylesheet" type "text/css" media "all"href "templates/ % getconfig("xtemplate")% /css/menu.css" / link rel "stylesheet" type "text/css" media "all"href "templates/ % getconfig("xtemplate")% /css/shop700.css" / 16. Insert these code below after the code title %shopdynamictitle "title"% /title : link rel "stylesheet" type "text/css" media "all"href "templates/ % getconfig("xtemplate")% /css/layout.css" / Note : This layout.css may mix up your existing design with default 7.00 design.However, you will still need to include this CSS file as most parts of the site layout usethis CSS file. You may need to customise this file to suit your existing site.Please refer to VP-ASP Design Guide chapter 2.4.1. Change CSS for theBackground of the Site if you wish to change the background display.http://www.vpasp.com/virtprog/VPASP 700 Design Guide.zip17. Copy your existing logo image file into the VP-ASP 7.00 site.For example, if your header file contains the company logo code as below : img border "0" src "shoplogo.gif" Then please upload the image shoplogo.gif into root directory of your VP-ASP 7.00 siteso that the logo can display properly.You would also need to copy any of the existing images in the header file into your newVP-ASP 7.00 site so that all the images in the header file can display correctly.18. Replace the homepage default link to default.asp. If you found somewhere in yourheader file contains homepage link, e.g. index.html, default.htm or default.html or etc.you need to replace it to use default.asp as this is the default page of VP-ASP 7.00.19. If you would like to add any of snippet/tag functionality into your header e.g. addingcurrencies selector, featured products, top sellers section etc. you can refer to VP-ASPDesign Guide chapter 2.2 Code Snippets / Tags to Customize Your Site.VP-ASP 7.00 Design Guide can be found at:http://www.vpasp.com/virtprog/VPASP 700 Design Guide.zip27 P a g e
20. After all the changes above, you can now copy the file shoppage header.htm from thetemporary directory to the folder “templates/default-2cols” (if using 2 columns layout) or“templates/default-3cols” (if using 3 columns layout) in your VP-ASP 7.00 site.10.1.2 Footer templateThese steps below explain to you how to apply your existing footer template to the new VP-ASP7.00 site :1. Open file shoppage trailer.htm (old version) using notepad.2. Locate these code below : %Navigateshowminicart ""% 3. Please replace with : %NavigateShowMiniCartCssStyled% 4. Replace the homepage default link to default.asp. If you found somewhere in your footerfile contains homepage link, e.g. ind
version files. If in case that your old version of VP-ASP contains customisation in some of VP-ASP files, you need to manually insert the customisation codes into the VP-ASP 7.00 files. To check the VP-ASP 7.00 files against your customised VP-ASP previous version, you can use a program called WinMerge available as a free download from: