Transcription
www.it-ebooks.info
www.it-ebooks.info
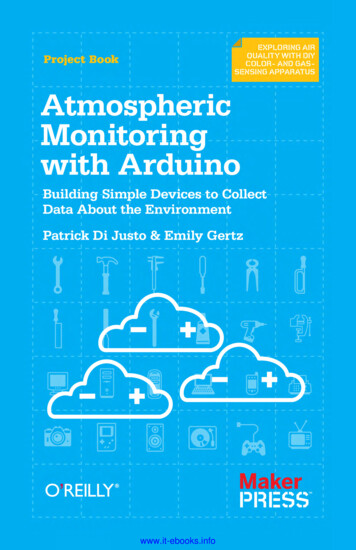
AtmosphericMonitoringwithArduinoPatrick Di Justo and Emily Gertzwww.it-ebooks.info
Atmospheric Monitoring with Arduinoby Patrick Di Justo and Emily GertzCopyright 2013 Patrick Di Justo, Emily Gertz. All rights reserved.Printed in the United States of America.Published by O’Reilly Media, Inc., 1005 Gravenstein Highway North, Sebastopol, CA 95472.O’Reilly books may be purchased for educational, business, or sales promotional use. Onlineeditions are also available for most titles (http://my.safaribooksonline.com). For more information, contact our corporate/institutional sales department: 800-998-9938 or corporate@oreilly.com.Editors: Shawn Wallace and Brian JepsonProduction Editor: Kara EbrahimProofreader: Kara EbrahimCover Designer: Mark PagliettiInterior Designer: David FutatoIllustrator: Rebecca DemarestNovember 2012:First EditionRevision History for the First Edition:2012-11-19First releaseSee http://oreilly.com/catalog/errata.csp?isbn 9781449338145 for release details.Nutshell Handbook, the Nutshell Handbook logo, and the O’Reilly logo are registered trademarks of O’Reilly Media, Inc. Atmospheric Monitoring with Arduino and related trade dressare trademarks of O’Reilly Media, Inc.Many of the designations used by manufacturers and sellers to distinguish their productsare claimed as trademarks. Where those designations appear in this book, and O’Reilly Media, Inc., was aware of a trademark claim, the designations have been printed in caps or initialcaps.While every precaution has been taken in the preparation of this book, the publisher andauthors assume no responsibility for errors or omissions, or for damages resulting from theuse of the information contained herein.ISBN: 978-1-449-33814-5[LSI]www.it-ebooks.info
We dedicate this book to our sisters and brothers:Andy, Lucy, Mathius, and Melissawww.it-ebooks.info
www.it-ebooks.info
ContentsPreface. . . . . . . . . . . . . . . . . . . . . . . . . . . . . . . . . . . . . . . . . . . . . . . . . . . . . . . . . . . vii1/The World’s Shortest Electronics Primer. . . . . . . . . . . . . . . . . . . . . . . . . . . . . 1What Is Arduino?. . . . . . . . . . . . . . . . . . . . . . . . . . . . . . . . . . . . . . . . . . . . . . . . . . . 1Electronic Circuits and Components. . . . . . . . . . . . . . . . . . . . . . . . . . . . . . . . . . . 3Programming Arduino. . . . . . . . . . . . . . . . . . . . . . . . . . . . . . . . . . . . . . . . . . . . . . . 5First Sketch: Make an LED Blink. . . . . . . . . . . . . . . . . . . . . . . . . . . . . . . . . . . . . . . 6Parts. . . . . . . . . . . . . . . . . . . . . . . . . . . . . . . . . . . . . . . . . . . . . . . . . . . . . . . . . . . 6Install the IDE. . . . . . . . . . . . . . . . . . . . . . . . . . . . . . . . . . . . . . . . . . . . . . . . . . . . 6Breadboard the Circuit. . . . . . . . . . . . . . . . . . . . . . . . . . . . . . . . . . . . . . . . . . . . 6Write the Code. . . . . . . . . . . . . . . . . . . . . . . . . . . . . . . . . . . . . . . . . . . . . . . . . . . 8Things to Try. . . . . . . . . . . . . . . . . . . . . . . . . . . . . . . . . . . . . . . . . . . . . . . . . . . . 92/Gadget: Tropospheric Gas Detector. . . . . . . . . . . . . . . . . . . . . . . . . . . . . . . . . 11How Gas Sensors Work. . . . . . . . . . . . . . . . . . . . . . . . . . . . . . . . . . . . . . . . . . . . . 13Which Gases Can We Monitor?. . . . . . . . . . . . . . . . . . . . . . . . . . . . . . . . . . . . . . . 14How This Gadget Works. . . . . . . . . . . . . . . . . . . . . . . . . . . . . . . . . . . . . . . . . . . . 14Transistorized!. . . . . . . . . . . . . . . . . . . . . . . . . . . . . . . . . . . . . . . . . . . . . . . . . . . . 15Build the Gadget. . . . . . . . . . . . . . . . . . . . . . . . . . . . . . . . . . . . . . . . . . . . . . . . . . 16Load the Sketch. . . . . . . . . . . . . . . . . . . . . . . . . . . . . . . . . . . . . . . . . . . . . . . . . . . 21Displaying and Storing Your Data. . . . . . . . . . . . . . . . . . . . . . . . . . . . . . . . . . . . . 25Liquid Crystal Displays. . . . . . . . . . . . . . . . . . . . . . . . . . . . . . . . . . . . . . . . . . . 25Reading Data Off EEPROM. . . . . . . . . . . . . . . . . . . . . . . . . . . . . . . . . . . . . . . . 26Reading Data from an SD Card. . . . . . . . . . . . . . . . . . . . . . . . . . . . . . . . . . . . . 28Things to Try. . . . . . . . . . . . . . . . . . . . . . . . . . . . . . . . . . . . . . . . . . . . . . . . . . . . . 28Other Sensors. . . . . . . . . . . . . . . . . . . . . . . . . . . . . . . . . . . . . . . . . . . . . . . . . . 28Solar Powered. . . . . . . . . . . . . . . . . . . . . . . . . . . . . . . . . . . . . . . . . . . . . . . . . . 28GSM. . . . . . . . . . . . . . . . . . . . . . . . . . . . . . . . . . . . . . . . . . . . . . . . . . . . . . . . . . 29Do Not Deploy Your Gadget in Public Without Official Permission. . . . . . . . . . . . 29Get Official Permission. . . . . . . . . . . . . . . . . . . . . . . . . . . . . . . . . . . . . . . . . . . 30Get Your Community Involved. . . . . . . . . . . . . . . . . . . . . . . . . . . . . . . . . . . . . . 303/A Brief Introduction to LEDs. . . . . . . . . . . . . . . . . . . . . . . . . . . . . . . . . . . . . .33vwww.it-ebooks.info
What Is a Diode?. . . . . . . . . . . . . . . . . . . . . . . . . . . . . . . . . . . . . . . . . . . . . . . . . . 33What Is a Light Emitting Diode?. . . . . . . . . . . . . . . . . . . . . . . . . . . . . . . . . . . . . . 34How Are We Using LEDs in the LED Photometer?. . . . . . . . . . . . . . . . . . . . . . . . 354/Gadget: LED Sensitivity Tester. . . . . . . . . . . . . . . . . . . . . . . . . . . . . . . . . . . .37Mission: Inputtable. . . . . . . . . . . . . . . . . . . . . . . . . . . . . . . . . . . . . . . . . . . . . . . . 37Build the Gadget. . . . . . . . . . . . . . . . . . . . . . . . . . . . . . . . . . . . . . . . . . . . . . . . 385/Gadget: LED Photometer. . . . . . . . . . . . . . . . . . . . . . . . . . . . . . . . . . . . . . . . . . 51Build the Gadget. . . . . . . . . . . . . . . . . . . . . . . . . . . . . . . . . . . . . . . . . . . . . . . . . . 52Load the Sketch. . . . . . . . . . . . . . . . . . . . . . . . . . . . . . . . . . . . . . . . . . . . . . . . . . . 54Calibrate the Gadget: Air Mass, Atmospheric Optical Thickness, andExtraterrestrial Constant. . . . . . . . . . . . . . . . . . . . . . . . . . . . . . . . . . . . . . . 59Calculating Atmospheric Optical Thickness. . . . . . . . . . . . . . . . . . . . . . . . . . . . . 62Things to Try. . . . . . . . . . . . . . . . . . . . . . . . . . . . . . . . . . . . . . . . . . . . . . . . . . . . . 64Detecting “Ozone Holes”: Measuring the Ozone Layer. . . . . . . . . . . . . . . . . . 64Add an Accelerometer. . . . . . . . . . . . . . . . . . . . . . . . . . . . . . . . . . . . . . . . . . . . 656/Using the LED Photometer. . . . . . . . . . . . . . . . . . . . . . . . . . . . . . . . . . . . . . . . 67Atmospheric Aerosols. . . . . . . . . . . . . . . . . . . . . . . . . . . . . . . . . . . . . . . . . . . . . . 69Photosynthetically Active Radiation (PAR). . . . . . . . . . . . . . . . . . . . . . . . . . . . . . 70Water Vapor (WV). . . . . . . . . . . . . . . . . . . . . . . . . . . . . . . . . . . . . . . . . . . . . . . . . 70Extracting Data from the LED Photometer. . . . . . . . . . . . . . . . . . . . . . . . . . . . . . 71Graphing Data in a Spreadsheet. . . . . . . . . . . . . . . . . . . . . . . . . . . . . . . . . . . . 71Sending Data to COSM. . . . . . . . . . . . . . . . . . . . . . . . . . . . . . . . . . . . . . . . . . . 727/Doing Science: How to Learn More from Your Atmospheric Data. . . . . . . . 73The Scientific Method. . . . . . . . . . . . . . . . . . . . . . . . . . . . . . . . . . . . . . . . . . . . . . 73Steps in the Scientific Method. . . . . . . . . . . . . . . . . . . . . . . . . . . . . . . . . . . . . . . 74Observe Something in the World. . . . . . . . . . . . . . . . . . . . . . . . . . . . . . . . . . . . 74Ask an Answerable Question. . . . . . . . . . . . . . . . . . . . . . . . . . . . . . . . . . . . . . . 75Formulate a Hypothesis. . . . . . . . . . . . . . . . . . . . . . . . . . . . . . . . . . . . . . . . . . 75Compare the Predicted to Actual Results, Considering the Results. . . . . . . . 75Ask Another Question. . . . . . . . . . . . . . . . . . . . . . . . . . . . . . . . . . . . . . . . . . . . 76viContentswww.it-ebooks.info
PrefaceThere’s a story (it’s either an old vaudeville jokeor a Zen koan) in which a fisherman asks a fish,“What’s the water like down there?” and thefish replies “What is water?” If the story is justa joke, the point is to make us laugh; but if it’sa koan, the point is that the most obvious andubiquitous parts of our immediate environment are, paradoxically, often the easiest tooverlook.We as a species are probably a little bit smarter than fish: at least we knowthat we spend our lives “swimming” at the bottom of an ocean of air. About4/5th of that ocean is the relatively harmless gas nitrogen. Around another1/5 of it is the highly reactive and slightly toxic gas oxygen. The Earth’s atmosphere also contains trace amounts of other harmless or slightly toxicgases like argon, carbon dioxide, and methane. And depending on where youlive, it may contain even smaller, but much more toxic, amounts of pollutantslike soot, carbon monoxide, and ozone.Yet how many of us, like the fish in the koan, overlook the atmosphere? Whoin your life can tell you the general composition of the air around them? Howmany people know what’s inside every breath they take? Do you? Readingthis book and building these gadgets will take you on the first steps of a journey toward understanding our ocean of air.Conventions Used in This BookThe following typographical conventions are used in this book:ItalicIndicates new terms, URLs, email addresses, filenames, and file extensions.viiwww.it-ebooks.info
Constant widthUsed for program listings, as well as within paragraphs to refer to program elements such as variable or function names, databases, datatypes, environment variables, statements, and keywords.Constant width boldShows commands or other text that should be typed literally by the user.Constant width italicShows text that should be replaced with user-supplied values or by values determined by context.This icon signifies a tip, suggestion, or general note.This icon indicates a warning or caution.Using Code ExamplesThis book is here to help you get your job done. In general, if this book includescode examples, you may use the code in this book in your programs anddocumentation. You do not need to contact us for permission unless you’rereproducing a significant portion of the code. For example, writing a programthat uses several chunks of code from this book does not require permission.Selling or distributing a CD-ROM of examples from O’Reilly books does require permission. Answering a question by citing this book and quoting example code does not require permission. Incorporating a significant amountof example code from this book into your product’s documentation doesrequire permission.We appreciate, but do not require, attribution. An attribution usually includesthe title, author, publisher, and ISBN. For example: “Atmospheric Monitoringwith Arduino by Patrick Di Justo and Emily Gertz (O’Reilly). Copyright 2013Patrick Di Justo and Emily Gertz, 978-1-4493-3814-5.”If you feel your use of code examples falls outside fair use or the permissiongiven above, feel free to contact us at permissions@oreilly.com.Safari Books OnlineSafari Books Online is an on-demand digital library thatdelivers expert content in both book and video form fromthe world’s leading authors in technology and business.viiiPrefacewww.it-ebooks.info
Technology professionals, software developers, web designers, and businessand creative professionals use Safari Books Online as their primary resourcefor research, problem solving, learning, and certification training.Safari Books Online offers a range of product mixes and pricing programs fororganizations, government agencies, and individuals. Subscribers have access to thousands of books, training videos, and prepublication manuscriptsin one fully searchable database from publishers like O’Reilly Media, PrenticeHall Professional, Addison-Wesley Professional, Microsoft Press, Sams, Que,Peachpit Press, Focal Press, Cisco Press, John Wiley & Sons, Syngress, Morgan Kaufmann, IBM Redbooks, Packt, Adobe Press, FT Press, Apress, Manning, New Riders, McGraw-Hill, Jones & Bartlett, Course Technology, anddozens more. For more information about Safari Books Online, please visitus online.How to Contact UsYou can write to us at:Maker Media, Inc.1005 Gravenstein Highway NorthSebastopol, CA 95472800-998-9938 (in the United States or Canada)707-829-0515 (international or local)707-829-0104 (fax)Maker Media is a division of O’Reilly Media devoted entirely to the growingcommunity of resourceful people who believe that if you can imagine it, youcan make it. Consisting of Make magazine, Craft magazine, Maker Faire, aswell as the Hacks, Make:Projects, and DIY Science book series, Maker Mediaencourages the Do-It-Yourself mentality by providing creative inspiration andinstruction.For more information about Maker Media, visit us online:MAKE: www.makezine.comCRAFT: www.craftzine.comMaker Faire: www.makerfaire.comHacks: www.hackszine.comWe have a web page for this book, where we list examples, errata, examples,and plans for future editions. You can find this page at http://oreil.ly/atmospheric-arduino.To comment or ask technical questions about this book, send email to bookquestions@oreilly.com.For more information about our books, courses, conferences, and news, seeour website at http://www.oreilly.com.Prefacewww.it-ebooks.infoix
Find us on Facebook: http://facebook.com/oreillyFollow us on Twitter: http://twitter.com/oreillymediaWatch us on YouTube: ebooks.info
1/The World’s ShortestElectronics PrimerIf you’re a DIY electronics or Arduino novice,the information in this chapter will help you getthe most out of building and programming thegadgets in this book.If you’re already building your own electronics, consider this chapter a refresher to dip into as needed.What Is Arduino?Arduino is best described as a single-board computer that is deliberatelydesigned to be used by people who are not experts in electronics, engineering, or programming. It is inexpensive, cross-platform (the Arduino softwareruns on Windows, Mac OS X, and Linux), and easy to program. Both Arduinohardware and software are open source and extensible.Arduino is also powerful: despite its compact size, it has about as muchcomputing muscle as one of the original navigation computers from theApollo program, at about 1/35,000 the price.Programmers, designers, do-it-yourselfers, and artists around the world takeadvantage of Arduino’s power and simplicity to create all sorts of innovativedevices, including interactive sensors, artwork, and toys.We built each of the products in this book using the Arduino Uno (Figure 1-1and Figure 1-2), which, at the time of writing, is the latest model. By the timeyou’re reading this, there may be something newer.You don’t have to know Arduino Uno’s technical specifications to build andprogram the gadgets in this book, but if you’re interested, you can find themat the official Arduino website.1www.it-ebooks.info
Figure 1-1. Front of the Arduino Uno (Rev. 3).Figure 1-2. Back of the Arduino Uno.2Atmospheric Monitoring with Arduinowww.it-ebooks.info
Electronic Circuits and ComponentsAn electronic circuit is, as the term implies, electricity moving in a path verymuch like a circle. Each circuit has a beginning, a middle, and an end (whichis usually very close to where it began). Somewhere in the middle, the circuitoften runs through various electronic components that modify the electricalcurrent in some way.Each device in this book is a circuit that combines Arduino with differentelectronic components. Some of these manage the power and path of theelectricity, others sense certain conditions in the environment, and still others display output about those conditions.Let’s take a look at some of the components we will be using in our circuits:Light emitting diodes (LEDs)An LED is a lamp made of various rare-earth metals, which give off alarge amount of light when a tiny current is run through them. The composition of the substances within the LED determine the particularwavelength of light emitted: you can buy green, blue, yellow, red, evenultraviolet and infrared LEDs.Technically, the LEDs used in our gadgets are “miniature LEDs,” tinylamps with two wire leads: one long (called the anode) and the other abit shorter (called the cathode). These come in various useful forms (including single lamps from 2 mm to 8 mm in diameter, display bars, andalphanumeric readouts) and can serve as indicators, illuminators, oreven data transmitters.You’ll learn how to use these different types of LEDs while building thedifferent environmental sensors in this book.ResistorsResistors are the workhorses of the electronics world. What do resistorsdo? They simply resist letting electricity flow through by being made ofmaterials that naturally conduct electricity poorly. In this way, resistorsserve as small dumb regulators to cut down the intensity of electric current.Resistance is valuable because some electronic components are verydelicate: they burn out easily if they’re powered with too much current.Putting a resistor in the circuit ensures that only the proper amount ofelectricity reaches the component. It’s hard to imagine any circuit working without a resistor, and with LEDs, resistors are almost mandatory.While building the projects in this book, you’ll learn various creative waysto regulate current with resistors.The World’s Shortest Electronics Primerwww.it-ebooks.info3
SolderingSoldering involves heating up conductive metal, called solder, and thenusing it to fuse other pieces of metal together. In small-scale electronics,we use an electrical tool called a soldering iron, which has a small tip, toheat up thin wires of solder and drip the solder onto the components wewish to join into the circuit.Soldering creates a very stable circuit, and that stability can be a drawback. Fusing together components can make it difficult to reuse or reconfigure circuits. You also must be very careful to not short-circuitcomponents while soldering. Knowing how to solder can be a very usefulskill in DIY electronics. If you’re interested in learning how, this onlineresource is a good place to start.The alternative to soldering is to use a solderless breadboard.Solderless breadboardsSolderless breadboards are small plastic boards studded with pins thatcan hold wires (more about these next). These wires can then be connected to other electronic components, including Arduino.Solderless breadboards make it much easier to design circuits, becausethey allow you to quickly try out various assemblies and componentswithout having to solder the pieces together. While solderless breadboards typically are intended for use only in the design phase, manyhobbyists keep a breadboard in the final version of a device becausethey’re so fast and easy to use.If you don’t feel like soldering circuit boards, solderless breadboards arethe way to go. Each gadget in this book uses a solderless breadboard.WireWire is the most basic electronic component, creating the path alongwhich electrons move through a circuit. The projects in this book use1 mm “jumper wires,” which have solid metal tips perfectly sized to fitinto Arduino and breadboard pins, and come sheathed in various colorsof insulation.Get as much jumper wire as you can afford, in several colors.When building circuits with Arduino, you can’t have too manyjumper wires.4Atmospheric Monitoring with Arduinowww.it-ebooks.info
We order most of our electronics components from these online retailers: Adafruit Industries Eemartee Electronic Goldmine SparkFunMaker Shed, from MAKE and O’Reilly Media, sells books, kits, and tools, aswell as many of the components needed to build the projects in this bookincluding Arduino, breadboards, sensors, and basic electronic components.Maker Shed also supplies convenient bundles for many of the projects in thisbook (you can find more information about these bundles in the individualproject chapters).Don’t count out your friendly local RadioShack, though. While writing thisbook, more than once we ran out to RadioShack for a last-minute component.For years RadioShack cut back on its electronic components inventory, apparently seeing a better future for the business by featuring cell phones andother consumer electronics. But the company has recently begun to embrace the maker movement; at the time of writing, most of their storesaround the country are even carrying Arduinos. We’re hopeful RadioShackis on the return path to being the hacker heaven it was years ago.Programming ArduinoA computer program is a coded series of instructions that tells the computerwhat to do. The programs that run on Arduino are called sketches.The sketches used in this book mostly tell Arduino to read data from one ofthe pins, such as the one connected to a sensor, and to write information toa different pin, such as the pin connected to an LED or display unit.Sometimes the sketches also instruct Arduino to process that informationin a certain way: to combine data streams, or compare the input with somereference, or even place the data into a readable format.An Arduino program has two parts: setup() and loop().setup()The setup() part tells Arduino what it needs to know in order to do whatwe want it to do. For example, setup() tells Arduino which pins it needsto configure as input, which pins to configure as output, and which pinswon’t be doing much of anything. If we’re going to use a special type ofoutput to show our results, such as an LCD display, setup() is where weThe World’s Shortest Electronics Primerwww.it-ebooks.info5
tell Arduino how that output works. If we need to communicate with theoutside world through a serial port or an ethernet connection, setup()is where we put all the instructions necessary to make that connectionwork.loop()loop() tells Arduino what to do with the input or output. Arduino runsthe instructions in loop(), then goes back to the top of loop() and runsthem again. And again. And again. loop() continues to loop as long asthe Arduino has power.First Sketch: Make an LED BlinkBy long tradition (going back to 2006), the first Arduino sketch you will writeis to make an LED blink.Arduino pins can be used for input and output, as long as you tell the computer which is which. So in this sketch, we tell the Arduino to set pin 13 to bethe LED OUTPUT pin, and then we alternately send electricity to pin 13 (setting the pin HIGH) and cut off the electricity to pin 13 (setting the pin LOW).With each alternation, the LED turns on and off.We’ll write all the sketches in this book using the Arduino integrated development environment (IDE), which, simply put, is special software for writingand uploading code to Arduino.Parts1. Arduino Uno2. Breadboard3. LEDInstall the IDEDownload the Arduino IDE, and follow the provided instructions to install iton your computer.Once you’ve installed the software, open the IDE. You should see a screenthat looks something like Figure 1-3.Breadboard the CircuitThe circuit portion of this project is very simple: take an LED and place thelong lead into pin 13 on Arduino, as you can see in the Figure 1-4 breadboardview.6Atmospheric Monitoring with Arduinowww.it-ebooks.info
Figure 1-3. The Arduino IDE on a Mac.Figure 1-4. LED long lead inserted into pin 13 on the Arduino (image madewith Fritzing).The World’s Shortest Electronics Primerwww.it-ebooks.info7
Write the CodeYou can find this code in the Arduino IDE under File Examples or on theEMWA GitHub Repository chapter-1 blink./*BlinkTurns on an LED for one second,then off for one second, repeatedly.This example code is based on example codethat is in the public domain.*/void setup() {// initialize the digital pin as an output.// Pin 13 has an LED connected on most Arduino boards:pinMode(13, OUTPUT);}void loop() {digitalWrite(13, HIGH);delay(1000);digitalWrite(13, LOW);delay(1000);}////////set the LED onwait for a secondset the LED offwait for a secondNormally, you’d need to put a resistor in between the powersource and the LED, so as not to burn out the LED. ArduinoUnos (and later models) have a resistor built into pin 13, sothat’s taken care of.In this sketch, the code in loop() simply tells Arduino to set pin 13 HIGH—taking it up to 5 volts—for 1,000 milliseconds (one second), followed by setting it LOW—taking it down to 0 volts—for another 1,000 milliseconds.Do you notice the /* */ sections and the // lines in the example above?Those are ways to put comments into your code to explain to others (and toyourself) what the code does: /* and */ tell the computer that everything between those marks shouldbe ignored while running the program.8Atmospheric Monitoring with Arduinowww.it-ebooks.info
// tells the computer that everything afterward on that line is a comment.Why Comment Code?Commenting code simply means adding explanations in plain English to yoursketch that describe how the code works. Adding comments to code is a verygood idea. Here’s why:Suppose, after hours trying to get your Arduino to do something, the solutionsuddenly comes to you. Eureka! You hook up your Arduino, bang out yourcode, load it up, and voilà: it works.Fast forward: months later, working on another project, you want your Arduino to do something similar to your earlier project. “No sweat, I’ll just reusemy earlier code,” you think. But you open up the sketch and none of it makessense!You wrote that earlier code in a highly creative state of mind, when your brainchemicals were flowing like a river and your ideas were flashing like summerlightning. In all the excitement, you didn’t comment your code. So now,months later, when you’re in a completely different state of mind, you can’tremember what the code does, and you have to start all over. Is that any wayto live?If you had commented your code from the beginning, you’d know exactlywhat each variable was used for, what each function did, and what each pincontrolled. Your life would be so much more enjoyable.In short, always take a few minutes to comment your code.Things to TryModify this sketch to make the LED do something different:1. Blink twice as quickly.2. Blink twice as slowly.3. Light up for half a second with a 2-second pause between blinks.Congratulations, you’re an Arduino programmer! Now let’s have some realfun.The World’s Shortest Electronics Primerwww.it-ebooks.info9
www.it-ebooks.info
2/Gadget:Tropospheric GasDetectorWe can easily go several hours without drinkingwater. We can comfortably go the better partof a day without eating food. But try and gomore than a few minutes without breathing.(No, don’t really try.) Understanding the composition of the lower atmosphere—the troposphere—is among the most important environmental measurements we can take.Everything floating around the troposphere—nitrogen, oxygen, carbon dioxide, water vapor, and all sorts of pollution—winds up in our lungs, on ourplants, in our food, and in our water (see Figure 2-1). It dusts our windows,our automobiles, and our buildings. For this reason, the authors (as well asorganizations like the American Lung Association) believe that it’s vitally important to know what’s inside every breath we take.In the old days, when people wanted to know what was in the atmosphere,they used chemically-treated filter paper, and hung it in a breeze. The chemicals reacted with whatever was in the air and would respond by changingcolor. Or they bubbled the atmosphere through water and measured the different compounds that resulted as gas dissolved in water. This kind of workcould only be performed in a dedicated chemistry lab.11www.it-ebooks.info
Figure 2-1. This illustration shows how different chemicals and other substances move into and through the troposphere. Credit: U.S. ClimateChange Science Program, 2003.Fortunately for us, we can now purchase a small, complete atmospheric laboratory for less than 10, in the form of an electronic gas sensor (Figure 2-2).These sensors detect different substances in the atmosphere by measuringthe changing resistance of a film made of tin dioxide.12Atmospheric Monitoring with Arduinowww.it-ebooks.info
Figure 2-2. There are lots of inexpensive sensors on the market that can beused for DIY monitoring.How Gas Sensors WorkOxygen in the atmosphere removes electrons from the tin dioxide film, whichdecreases its conductivity (and increases its resistance). When other typesof gases, particularly those that are chemically reducing, touch the tin dioxidefilm, electrons are injected into the material. This increases the conductivity(and lowers the resistance) of the tin dioxide layer. You can use your Arduinoto measure that change in resistance.It’s important to keep in mind that tin dioxide sensors tend to be broadlyselective. While certain sensors may be marketed as being “alcohol” sensorsor “carbon monoxide” sensors, they actually respond to more than just alcohol or carbon monoxide, respectively; they respond to a wide family ofGadget: Tropospheric Gas Detectorwww.it-ebooks.info13
similar gases. Manufacturers can make the tin dioxide-based gas sensorsmore selective by adding various catalysts into the sensor head, or by usingexternal filters. The datasheet provided with each sensor explains morecompletely how to adjust the sensitivity of each s
2 Atmospheric Monitoring with Arduino www.it-ebooks.info. Electronic Circuits and Components An electronic circuit is, as the term implies, electricity moving in a path very much like a circle. Each circuit has a beginning, a middle, and an end (which is usually very close to where it began). Somewhere in the middle, the circuit often runs through various electronic components that modify the .