Transcription
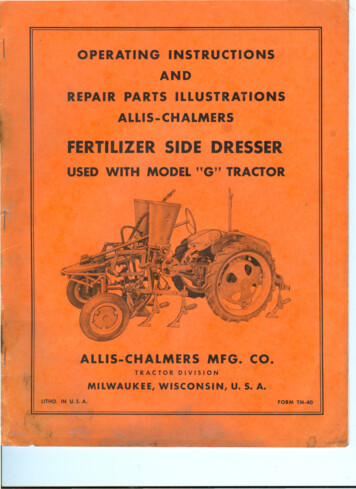
OPERATINGINSTRUCTIONSANDREPAIR PARTS ILLUSTRATIONSALLIS-CHALMERSFERTILIZER SIDE DRESSERUSED WITH MODEL "G" TRACTORALLIS-CHALMERSTRACTORMFG. CO.DIVISIONMILWAUKEE, WISCONSIN,LITHO. IN U. S. A.U. S. A.FORM TM-40
FOREWORDThis book is written for the purpose of providing setting upinstructionsand essential information regarding operation,adjustments and lubrication for the FertilizerSide DressingAttachment for use with the Model "G" One Row Cultivators.A close adherence to these instructionswill result in manyhours of satisfactory service and a longer operating life forthese units.In addition to the written material in this book, actual photographs are used to clearly show the various parts mentionedin the setting up and adjustment instructions.Many Allis-Chalmersowners employ the Dealer I s ServiceDepartment for all service requirementsother than routinecare and adjustments.This practice is encouraged as alldealers are kept well informed regarding advanced methodsof servicing Allis-Chalmersproducts and are equipped torender complete service.
ENERALFOR SIDE DRESSING3INFORMATION3L UBRICA TION8OPERA TION AND AD] USTMENTSEmptyingFertilizerHoppersFertilizerFeed AdjustmentFertilizerHopperHopper Drive ChainHopper Slip ClutchesMain Drive ChainThrowout Arm77PREPARATION3777OF TRACTORRIGHT AND LEFT.3SETTING UP DIRECTIONS& ExtensionAttachingBracketsAttachingFramesto TractorFertilizerHopper.Hopper Framesand DriveLeft Hand HopperRight Hand HopperWheel SprocketSTORAGEWHEEL77Arms45546548TREAD3z
GENERAL INFORMATIONThe fertilizerequipment for Side Dressing isavailable as complete units for use with theModel "G" One Row Cultivators, or conversionsare obtainable for converting the fertilizer attachment used with the One Row Front MountedPlanters.Either one or two hoppers may beused depending on the amormt of fertilizer outputrequired. The fertilizer hoppers are of the gatetype which permits placement of fertilizerinamounts up to approximately1000 pounds peracre in 40 inch rows using one hopper. If twohoppers are used the output will be doubled.The fe rtilizerattachmentis driven from asprocket attached to the rear w el of the tractor.As with all the Model "G" implements, the unitis easily and quickly attached or detached.EQUIPMENT FOR SIDE DRESSINGare required.1. Complete fertilizer side dressing attachmentwith one hopper for the G-l cultivators withspring trips or pin break shanks.4. Adapter to convert One Row Planter fertilizerattachment to Side Dressing with G-l cultivator.2. Complete fertilizer side dressing attachmentwith one hopper for the G-2 cultivators withspring teeth.5. Adapter to convert One Row Planter fertilizerattachment to Side Dressing with G-2 Cultivator.3. Fertilizerhopper and bracket for left handmormting. This is used only when two hoppersBUNDLE NUMBERSlist to make certain all bundles are on handbefore starting to as semble units.Compare the bundle numbers on metal tagsattached to each brmdle (or stenciled number oncartons) with numbers on the enclosed bundleRIGHT AND LEFTrectionThe right and left side is determined by standingat rear of unit or tractor and facing in the diPREPARATIONof forwardtravel.OF TRACTORTractor must be equipped with a Master HandLift and Master Tool Carrier.The cultivatormus t also be availabletrac to r .for attachingto the .WHEEL TREADThe minimum wheel tread that can be used withthe Side Dressing Attachment is 44 inches. Ifwheel tread is less than this, the rear tire willinterfere with the drive chain.3
SETTING UP DIRECTIONSFIG.WHEEL SPROCKE TATTACHING BRACKETS AND EXTENSION ARMRemove leH rear tractor wheel and slide sprocket(1) Fig. lover rear axle housing. Bolt sprocketto br ackets (2) and (3), then attach br ackets toinner side of wheel flange.Place attaching brackets (4) Fig. 2 on tractorframe with clips (5) turned toward rear oftractor.Leave bolts loose. Attach extensionarm (6) to outside of left rocker arm as illustrated.1512L111314FIG. 3HOPPER FRAMES AND DRIVE(12). Slots in be,ayi-hg bracket (11) should beturned up. Detach coupling (13) and assembleshaft (14) through bearing bracket (11). Replacecoupling (13). Remove hopper support (15) frominside fertilizer hopper and attach to front offrame (12). Remove cotter pin from coupling(13) Fig. 4, slide coupling onto drive shaft (16)and replace cotter pin. Connect frames togetherBolt throwout arm (7) Fig. 3 to left hand side ofspring anchor (8). Be sure bushing is used onthe attaching bolt. Hook spring (9) betweencotter pins on throwout arm (7) and spring anchor(8). Loo sen bolts (10) in chain tightener andframe and attach bearing bracket (11) to frame4
1613FIG. 4with bolts (17) and (18) being sure frame (12) isattached to the rear side of main drive frameand longest bolt (18) is used in the right handposition. Leave bolt (18) loose as it is used forattaching frame to tractor.ATTACHING FRAMES TO TRACTORPlace hopper frames under tractor frame andattach to brackets (4) Fig. 5 by means of bolts(18) and (19). Tighten bolts securely.Slidehopper frame and brackets (4) forward so driveshaft and bearings do not bind in curve of tractorframe. Be sure drive shaft turns freely, thenplace drive chain (20) over sprocket on rear axleand clutch sprocket (21). Tighten bolts holdingbrackets (4) to tractor frame after sprockets arein line and drive chain is under sufficient tension.Hook chain (22) between extension arm (6) andthrowout arm (7). Adjust chain (22) so throwoutarm (7) is disengaged from clutch when groundrig is in working position.FERTILIZER HOPPERFIG. 6To determine right and left hand hoppers, referto Fig. 6. Note loc ation of pinions (23). Thepinion on right hand hopper is located adiacentto the hopper outlet. On left hand hopper thepinion is located at the slip clutch end of hoppershaft. Extension (24) must be used on left handhopper to obtain correct sprocket alignment.RIGHT HAND HOPPERAttach hopper (25) Fig. 7 to bracket (15). Spacerend of attaching nuts should be turned towardbottom of bracket (15). Free up and oil slipclutch on hopper shaft and attach selectedsprockets to hopper and drive shaft. Be surehopper shaft turns freely, then place chain (26)over sprocketsand around chain tightener.NOTE: Chain must have slight amount of slack.Attach fertilizerspouts (27) to manifold (28),then, attach manifold to hopper outlet. NOTE: Ifboth L.H. and R.H. hoppers are to be used, hookspout directly to hopper outl t.5
Attach boots (29) in the rear position on the frontspring teeth. NOTE: The boots used with cultivators having spring trip or pin break shanksare right and lefts and should be attached to theouter side of the shovel sleeve.See Fig. 9.LEFT HAND HOPPERAttach left hand hopper bracket (30) Fig. 8 tofront of hopper fr.ame. Attach chain tightener(31) to left hand front of frame as illustrated.Mount left hand hopper on bracket (30) Fig. 9being sure spacer end of attaching nuts areturned toward bottom of bracket (30). Attachsprocket extension (24) and selected sprocketto hopper shaft, also attach drive sprocket (32)to main drive shaft.NOTE: Discard sprocket #311508. It is used withother fertilizer units where a #32 chain is necessary.Free up and oil slip clutch on hopper. Makecertain hopper shaft turns freely, then placechain over sprockets and around chain tightener(31 L NOTE: Chain must have slight amount ofslack.Attach fertilizerspout to hopper outlet, then·fasten other end in boot attached to shanks orspring teeth. .6
OPERATION AND ADJUSTMENTSa 16 tooth driven or hopper sprocket furnishedwith the fertilizer hoppers. To obtain miximumoutput of fertilizer, use largest sprocket on driveshaft. NOTE: Driving sprockets should be usedas drivers only. The pitch diameter is differentfrom driven sprockets and if used on hopperswould cause chain to climb.:MAINDRIVE CHAINMove hopper frame and attaching brackets (4)Fig. 10 forward or back on tractor frame toobtain correct chain tension, or add or removelink from chain (20). NOTE: Be sure driveshaft and bearings do not bind in curve of tractorframe if hopper frame assembly is moved towardthe rear.The rate of flow of fertilizeris controlled bythe gate at inner side of fertilizer hopper. Adjustgate for a given amount of fertilizerper acreafter making trial runs in field. Approximately1000 lbs. of free running fertilizer can be drilledper acre on 40 inch rows with gate wide open.NOTE: If the L.H. fertilizer hopper is also usedthis amount would be double.:HOPPER DRIVE CHAINAdjust chain tightener up or down to obtaincorrect chain tension or add or remove linksfrom chain. For best operation, chain shouldhave a slight amount of slack.With a light fine fertilizer the maximum amountdrilled per acre would be less and best resultswill be obtained with approximately 3/4 openingof the gate.,THROWOUT ARMAdjust chain (22) Fig. 10 between extension (6)and throwout arm (7) so hopper drive will disengage when unit is raised. Chain should be slackwhen unit is in transportposition.Be surethrowout arm (7) does not bind on attaching bolt.EMPTYING FERTILIZERHOPPERS:HOPPER SLIP CLUTCHESTwo methods may be used to empty fertilizerhoppers.Put a few drops of oil on fertilizer hopper slipclutches as needed to avoid rusting or sticking.Never run units if clutches slip too frequently.Empty hoppers and determine cause of slippage.1. Detach spouts (27) Fig. 10 from hopper outlet(28) also chains from hoppers. Remove ataching nuts from hopper brackets and lifthopper off base.FERTILIZER2. Remove the three wing nuts (33) from hopperbase (34). Remove hopper lid and lift straightup on agitator handle on inside of hopper.CAUTION: Do not tip hopper . lile lifting offof base otherwise fertilizerwill spill. Besure pivot washers are left in hopper baseHOPPERRefer to instructions on under side of hopper lid.Fertilizer should not be left in hopper over night.Clean feed plate, hopper base bearings and otherparts after each days use to avoid caking anddamage to hopper and hopper drive. Be sureto oil or grease all moving parts when re-assembling hopper.FERTILIZER(34) .After hopper has been lifted off of base, set intub or open sack and lift up on sides of hopperc an to spill fertilizer out through bottom of hopper.FEED ADJ USTMENTThere are 19 and 32 tooth driving sprockets, also.7
DETACHINGLower cultivator to ground and lock Master LiftLever in ratchet.Remove spouts (27) Fig. 11from boots on cultivator shanks or teeth. Remove pins (35), pull braces (36) out from betweenstraps, then replace pins. Knock wedge pins (37)out of lift arms (38) and remove cultivator fromunder tractor. Unhook chain (22) from extensionarm (6). Loosen bolts holding tightener (31)and bearing bracket (39) to hopper frame. Remove L.H. hopper if on unit. Raise bearingbracket (39) and remove drive chain (20) fromclutch sprocket (21), drape over rear tractor tireand roll tractor over chain. Remove R .H. hopper (25) and detach hopper frame assembly fromattachingbrackets(4). NOTE: Attachingbrackets (4), extension arm (6), straps to whichbraces (36) attach and sprocket on rear axlemay be left on tractor if desired.ATTACHINGand tighten bolts. Hook chain (22) to extensionarm (6). Mount R .H. hopper (25) to hopperbracket and install hopper chain. Place cultivatorunder tractor and attach to lift arms (38) securing with wedge pins (37). Attach braces (36) tostraps and replace pins (35). Fasten fertilizerspouts (27) to boots on cultivator teeth or shanks.Attach hopper frame assembly to brackets (4)Fig. 11. Place main drive chain (20) oversprocket on rear axle and clutch sprocket (21).If two fertilizer hoppers are to be used, mountL.H. hopper to hopper bracket (30). Place hopper drive chain on hopper and drive shaftsprockets and around tightener (31), then placebearing bracket (39) and tightener (31) in positionLUBRICATIONPressuregun grease fittings are located onhopper drive shaft, main drive shaft bearingsand clutch. Lubricate at least twice daily. Useoil on other moving parts and pivot pointsrequired.asSTORAGESuccessful performance of any implement willlargely depend on the kind of care it receives.Before storing units, remove all fertilizer fromhopper s and clean hopper s thoroughly. Oil applied to moving parts in the hoppers, will aid inr us t prevention during storage.The replacement of worn or broken parts willgreatly increase the life and performance of thisequipment, resulting in long and satisfactoryserVIce.8
REPAIR PARTS SECTIONREPAIR PARTSOrder all repair parts for your Model "G" SideDresser Attachment from your local AllisChalmers Dealer.To guide you in ordering repairs we have provided the folfowing illustrationswhich identifythe various parts of the unit.HOW TO ORDER REPAIR PARTSWhen ordering repairfollowing information:3. Give descriptionon the unit.parts always supply the1. State repairs are for a Model "G" Side Dresser Attachment.Z. State whether repairsLeft Hand side.of the part and its location4. Always print your name and post off-ice address where parts are to be shipped. Specifywhether material is to be shipped by freight,express or parcel post.are for Right Hand orIMPORTANTUnless claims for shortages or errors are madeimmediately upon receipt of goods, they willnot be considered.transportationcompany, from whom a receiptis received showing that shipment was in goodcondition when delivered to them; therefore,claims (if any) should be filed with the transportation company and not with Allis-C halmersManufacturing Company.When broken goods are received, a full description of the damage should be made by the carrieragent on the freight bill. If this description isinsisted upon full damage can always be collectedfrom the transportation company.The right is reserved to change the constructionor material of any parts where it seems desirable to do so, without incurring the obligationof installing such changes on units already delivered.No responsibility is assUITledfor delay or damageto merchandise while in transit. Our responsibility ceases upon delivery of shipment to theOrder Repair Parts by Description.9
ACTUATINGARMDRIVING SPROCKET (191. or 321.)MAINDRIVE SPROCKETWIDE BRACKET-::::--.-- -. " /1-' f"e-,-.,.,,"DRIVEN SPROCKET(161.) "T.: -. . , . ." . CLUTCH BELL "CLUTCH SPACERBEARINGDRIVE SHAFTNARROWBRACKETCLUTCH DOG SPRINGHOPPER FRAMEHOPPER&DRIVENBRACKETBEARINGSPROCKET(19T" or 32T.)HOPPER FRAME&ARM SPRINGDRIVE L. H.COUPLINGDRIVINGTHROWOUTDRIVE R. H.Order Repair Parts by Description.10SPROCKET(l6T.)
BOOT (R.H. AND l.H.)BOOTFER TILIZERBOOTSLOCK MANIFOLDFERTILIZERSPOUT&MANIFOLDOrder Repair Parts by Description.11
IIIISPROCKET (161)CLUTCHPINIONCOLLARSTARWHEEl II:IIIFEED PLATE DRAG LINKIIPIN fJ'f 'PLAIN THRUST WASHER @I""'8t 6,tI'CLUTCHSPRINGWASHERCLUTCHHUBHOPPER SHAFTQ :" : liLOWER WASHER ,'I'HOPPERBOTTOM FOR R.H. SIDE1\11--', 'r' :.:I(fv-CLlITCHSPROCKET (16 1) .'l :r:--------------J '8,CJ "fiPLAIN\WASHERCLUTCHCOLLARHOPPERHUB. SPR CKET SPACERl' PINIONHOPPER SHAFTBOTTOM FOR L.H. SIDEFER TILlZER HOPPEROrder Repair Parts by Description.12
2. Complete fertilizer side dressing attachment with one hopper for the G-2 cultivators with spring teeth. 3. Fertilizer hopper and bracket for left hand mormting. This is used only when two hoppers are required. 4. Adapter to convert One Row Planter fertilizer attachment to Side Dressing with G-l culti vator. 5. Adapter to convert One Row .