Transcription
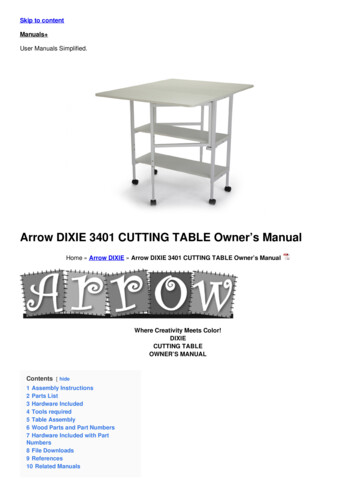
Skip to contentManuals User Manuals Simplified.Arrow DIXIE 3401 CUTTING TABLE Owner’s ManualHome » Arrow DIXIE » Arrow DIXIE 3401 CUTTING TABLE Owner’s ManualWhere Creativity Meets Color!DIXIECUTTING TABLEOWNER’S MANUALContents [ hide1 Assembly Instructions2 Parts List3 Hardware Included4 Tools required5 Table Assembly6 Wood Parts and Part Numbers7 Hardware Included with PartNumbers8 File Downloads9 References10 Related Manuals
Assembly InstructionsModel Numbers:3401 WhiteIMPORTANT: Please read these instructions before assembling!Parts List
ITEMDESCRIPTIONQTY.PACK.ATop panel12 of 2A1Top leaf22 of 2FFixed shelf22 of 2F1Frame leg support21 of 2SSide leg supports21 of 2LAdjustable leg with casters61 of 2RRail31 of 2Hardware IncludedITEMDESCRIPTIONQTY.b16 12 Bolt12b28 25 Bolt10b34 8 Bolt2b46 35 Bolt18BBracket2pPlastic Support Tube2h1Hinge6r14mm Allen key1r25mm Allen key1r314mm Spanner1s13.5 14 Screw42tCaster6Tools required
Table AssemblyStep 2. Slide-in adjustable legs (L) into side legs support (S) to the desired height and lock using bolts (b1) with (r1)Allen key spanner as shown on the illustration below.Step 3. Connect the two frame leg supports (F1) with three rails (R) using bolts (b2) using Allen key spanner (r2) asshown on the illustration below.
Step 4. Connect the two side leg supports (S) with leg frame assembly (F1) using bolts (b2) with Allen key spanner(r2) as shown on theillustration below. Place the Fixed shelf (F) on the place and attach using bolts (b4) using Allen key spanner (r1)firmlyas shown on the illustration below.Step 5. Lay panels (A1), (A) on a clean soft surface.Attach hinges (h1) with screws (s1) following the predrilled holes as shown on the illustration below.
Step 6. Two people should flip and align entire leg assembly with holes on panels and attach using bolts (b4) usingAllen key spanner (r1) firmly as shown on the illustration below.Step 7. Attach plastic support tube (p) with connector (b) using bolt (b3) firmly as shown on the illustration below.
Step 8. Attach plastic support tube (p) and connector (b) assembly with screws (s1) firmly on both sides (A1)following the predrilled holes as shown on the illustration below.Two people should flip the entire assembly and make sure all legs contact the ground and side leg supports areproperly snapped to its connectors on both side before use.
Wood Parts and Part Numbers
DescriptionPart#Cabinet Model#3401 (White)ATop Panel3401 PARTAlLeaf Panel3401A1FFixed Shelf3,401 FFlFrame Leg Support3401F1SSide Leg Support3401SLAdjustable Leg with Caster3401LRRail3401RRef.Hardware Included with Part Numbers
ItemDescriptionPart No.B16 12 Bolt3401B1B28 25 Bolt3401B2B34 8 Bolt3401B3B46 35 Bolt3401B4BBracket3401BpPlastic Support Tube3401PH1Hinge3401H1R14mm Allen Key3401R1R2R35mm Allen Key3401 R214mm Spanner3401R3S13.5 14 Screw340151TCaster3401TAccessories to Complete Your Sewing ExperienceCustom InsertEnhance your sewing experience with a custom made insert for your Arrow or Kangaroo cabinet. Inserts aredesigned to reduce the gapbetween the machine and cabinet opening. This provides an ergonomic work surface for the free arm of the sewingmachine, allowing for straighter stitches, less fatigue and an overall better experience using your machine andcabinet.
Arrow Sewing ChairsOur adjustable height sewing chair is a perfect accessory for any craft and sewing room. The chair’s height isadjustable with easy-to-use controls and the cushions provide perfect lumbar support and comfort for those longsewing hours. Chair features five casters on a starbase for greater movement at your sewing cabinet or craftingsurface. Lift the seat cushion to reveal a hidden storage compartment foryour small notions or patterns.P.O. Box 307 Delavan, WI 531151-800-533-7347 Ext. 1cs@arrowcabinets.comwww.arrowcabinets.com
File DownloadsArrow DIXIE Owner's Manual Download [optimized]CUTTING TABLE, 3401DownloadReferencesArrow Cabinets - Where Creativity Meets Color - Arrow Sewing CabinetsRelated Manuals1. KLUTCH 4 1 2in. x 6in. Metal Band Saw With Vertical Cutting Table Owner’s Manual KLUTCH 4 1 2in. x 6in.Metal Band Saw With.2. dams Arrow head leg square extension table Instructions EB10 24.02.2011 Please read before asembling the productCarefully open.3. 2021 Nissan Rogue Owners Manual 2021 Nissan Rogue Owners Manual – Optimized PDF 2021 Nissan.4. Hughes DirectV Receiver Owners Manual Hughes DirectV Receiver Owners Manual – Download [optimized] HughesDirectV.5. Panasonic H-H025 Owners Manual INTERCHANGEABLE LENS FOR DIGITAL CAMERA Please read these instructionscarefully.6. 2021 Nissan Altima Sedan Owners Manual 2021 Nissan Altima Sedan Owners Manual – Optimized PDF 2021.
Arrow DIXIE Owner's Manual CUTTING TABLE, 3401 Download [optimized] Download References Arrow Cabinets - Where Creativity Meets Color - Arrow Sewing Cabinets Related Manuals 1. KLUTCH 4 1 2in. x 6in. Metal Band Saw With Vertical Cutting Table Owner's Manual KLUTCH 4 1 2in. x 6in. Metal Band Saw With.