Transcription
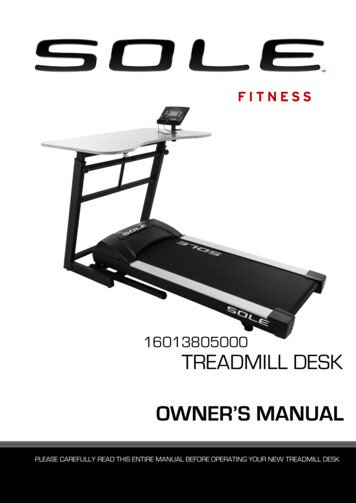
16013805000TREADMILL DESKOWNER’S MANUALPLEASE CAREFULLY READ THIS ENTIRE MANUAL BEFORE OPERATING YOUR NEW TREADMILL DESK
TABLE OF CONTENTSProduct Registration2Important Safety Instructions4Important Electrical Instructions5Grounding Instructions5Important Operation Instructions6Treadmill Desk Assembly Instructions9Folding Instructions15Transport Instructions16Console Operation17Setting Stride Length for Step Count20General Maintenance21Service Checklist – Diagnosis guide24Exploded View Diagram26Parts List27Warranty301customerservice@dyaco.caDyaco Canada Inc. 2018
CONGRATULATIONS ON YOUR NEW TREADMILL DESK AND WELCOME TO THE SOLE FAMILY!Thank you for your purchase of this quality SOLE treadmill from Dyaco Canada Inc. Your new treadmillhas been manufactured by one of the leading fitness manufacturers in the world and is backed byone of the most comprehensive warranties available. Dyaco Canada Inc. will do all we can to makeyour ownership experience as pleasant as possible for many years to come.If you have any questions about your new SOLE product or questions about the warranty contactDyaco Canada Inc. at 1-888-707-1880.Please take a moment at this time to record below the name of the dealer, their telephone number,and the date of purchase for easy contact in the future. Keep your receipt for proof of purchase. Weappreciate your confidence in SOLE and we will always remember that you are the reason that we arein business. Please complete and mail your registration card today and enjoy your new treadmill.Yours in Health,Dyaco Canada Inc.Name of DealerTelephone Number of DealerPurchase DatePRODUCT REGISTRATIONRECORD YOUR SERIAL NUMBERPlease record the Serial Number of this fitness product in the space provided below.Note: Serial Number can be found on the frame or the warning label.Serial NumberRegister your purchaseThe self-addressed product registration card must be completed in full and returned to Dyaco CanadaInc. You can also go to www.solefitness.ca to register online.2customerservice@dyaco.caDyaco Canada Inc. 2018
BEFORE YOU BEGINThank you for choosing the SOLE Treadmill Desk. We take great pride in producing this qualityproduct and hope it will provide many hours of quality exercise to make you feel better, look better,and enjoy life to its fullest. It's a proven fact that a regular exercise program can improve yourphysical and mental health. Too often, our busy lifestyles limit our time and opportunity to exercise.The SOLE Treadmill Desk provides a convenient and simple method to begin your assault on gettingyour body in shape and achieving a happier and healthier lifestyle. Before reading further, pleasereview the drawing below and familiarize yourself with the parts that are labeled.Read this manual carefully before using the SOLE Treadmill Desk. Although Dyaco Canada Inc.constructs its products with the finest materials and uses the highest standards of manufacturing andquality control, there can sometimes be missing parts or incorrectly sized parts. If you have anyquestions or problems with the parts included with your SOLE Treadmill Desk, please do not returnthe product. Contact us FIRST! If a part is missing or defective call us toll free at 1-888-707-1880. OurCustomer Service Staff are available to assist you from 8:30 A.M. to 5:00 P.M. (Eastern Time) Mondaythrough Friday. Be sure to have the name and model number of the product available when youcontact us.3customerservice@dyaco.caDyaco Canada Inc. 2018
IMPORTANT SAFETY INSTRUCTIONSWARNING - Read all instructions before using this equipment.DANGER - To reduce the risk of electric shock disconnect your SOLE treadmill from the electricaloutlet prior to cleaning and/or service work.WARNING - To reduce the risk of burns, fire, electric shock, or injury to persons, install the treadmillon a flat level surface with access to a 120-volt, 15-amp grounded outlet with only the treadmillplugged into the circuit.DO NOT USE AN EXTENSION CORD UNLESS IT IS A 14AWG OR BETTER, WITH ONLY ONEOUTLET ON THE END: DO NOT ATTEMPT TO DISABLE THE GROUNDED PLUG BY USINGIMPROPER ADAPTERS, OR IN ANY WAY MODIFY THE CORD SET.A serious shock or fire hazard may result along with computer malfunctions. See Grounding Instructions ifapplicable. Do not operate treadmill on deeply padded, plush or shag carpet. Damage to both carpetand treadmill may result.Do not block the rear of the treadmill. Provide a minimum of 3 1/2 feet clearance betweenthe rear of the treadmill and any fixed object.Keep children under the age of 13 away from the treadmill. There are obvious pinch pointsand other caution areas that can cause harm.Keep hands away from all moving parts.Never operate the treadmill if it has a damaged cord or plug. If the treadmill is not workingproperly, contact your Authorized SOLE dealer.Keep the cord away from heated surfaces.Do not operate where aerosol spray products are being used or where oxygen is beingadministered. Sparks from the motor may ignite a highly gaseous environment.Never drop or insert any object into any openings.Do not use outdoors.To disconnect, turn all controls to the off position, remove tether cord, and then remove theplug from the outlet.Do not attempt to use your treadmill for any purpose other than for the purpose it isintended.Wear proper shoes. Quality athletic shoes are recommended to avoid leg fatigue.Please verify and make sure safety key functions properly before using the treadmill. Alwayswear the safety key clip while in use.For energy savings, always unplug the power cord when treadmill is not in use.This equipment is not intended for use by persons with reduced physical, sensory or mentalcapabilities, or lack of experience and knowledge, unless they have been given supervisionor instruction concerning use of the equipment by a person responsible for their safety.User weight should not exceed 265 lbs. (120 kg).Remove tether cord after use to prevent unauthorized treadmill operation.SAVE THESE INSTRUCTIONS - THINK SAFETY!4customerservice@dyaco.caDyaco Canada Inc. 2018
NEVER remove any cover without first disconnecting AC power. If voltage varies by ten percent (10%) ormore, the performance of your treadmill may be affected. Such conditions are not covered under yourwarranty. If you suspect the voltage is low, contact your local power company or a licensed electrician forproper testing.NEVER expose this treadmill to rain or moisture. This product is NOT designed for use outdoors, near apool or spa, or in any other high humidity environment. The temperature specification is 40 degrees C,and humidity is 95%, non-condensing (no water drops forming on surfaces).Circuit breakers: Avoid AFCI/GFCI circuit breakers if possible. These breakers may trip occasionally duringuse because of the high inrush currents from the treadmill drive motor. This condition is an issue with alltreadmills and other products with large motors or electric heating elements like ovens.New laws in your area may require these breakers. If you do have these breakers and outlets in yourhome and are experience nuisance tripping, you should check to see if there are any other devicesplugged into the same circuit like fluorescent lights with electronic ballasts, coffee maker, space heater,etc. Optimally the treadmill should be the only device plugged into the circuit.Our treadmills do have surge suppressors built-in to help avoid nuisance tripping. And we have testedseveral AFCI/GFCI breakers and outlets with our products that do not trip when only the treadmill isconnected. Brands we have tested are: Eaton (Cutler Hammer Series), Leviton (Smart lock pro) andSchneider electric (Canadian home series).Customer Service 1-888-707-1880Email: customerservice@dyaco.ca5
IMPORTANT OPERATION INSTRUCTIONS NEVER operate this treadmill without reading and completely understanding the results of anyoperational change you request from the computer.Understand that changes in speed do not occur immediately. Set your desired speed on thecomputer console and release the adjustment key. The computer will obey the commandgradually.NEVER use your treadmill during an electrical storm. Surges may occur in your power supplythat could damage treadmill components. Unplug the treadmill during an electrical storm as aprecaution.Use caution while participating in other activities while walking on your treadmill. Distractionsmay cause you to lose balance or stray from walking in the center of the belt; which may resultin serious injury.NEVER mount or dismount the treadmill while the belt is moving. Treadmills start at a very lowspeed and it is unnecessary to straddle the belt during start up. Simply standing on the beltduring slow acceleration is proper after you have learned to operate the unit.Do not use excessive pressure on console control keys. They are precision set to functionproperly with little finger pressure. If you feel the buttons are not functioning properly withnormal pressure contact your Authorized SOLE Fitness dealer.SAFETY TETHER CORDA safety tether cord is provided with this unit. It is a simple pin design that should be used at alltimes. It is for your safety should you fall or move too far back on the tread-belt. Pulling thissafety tether cord will stop tread-belt movement.To Use:1. Place the pin into position on the red portion of the console control head between the Startand Stop keys. Your treadmill will not start and operate without this. Removing the pinalso secures the treadmill from unauthorized use.2. Fasten the plastic clip onto your clothing securely to assure good holding power.Note: The pin has strong enough power to minimize accidental, unexpected stopping. The clipshould be attached securely to make certain it does not come off. Be familiar with its functionand limitations. The treadmill will stop, depending on speed, with a one to two step coastanytime the pin is pulled off the console. Use the red Stop / Pause switch in normal operation.6customerservice@dyaco.caDyaco Canada Inc. 2018
PREVENTATIVE MAINTENANCE CHARTVacuum UnderMotorCover&CheckWiring (EveryOther Month)Clean&InspectDeck forLubrication(Every OtherMonth)Lubricate Deck(Every 90 hoursof use or soonerif dry)Inspect BeltTracking(Monthly)Adjust if necessaryDate7customerservice@dyaco.caDyaco Canada Inc. 2018
WARNING DECAL REPLACEMENTThe decal shown below has been placed on the treadmill. If the decal is missing or illegible, pleasecall our Customer Service Department toll-free at 1-888-707-1880 to order a replacement decal.8customerservice@dyaco.caDyaco Canada Inc. 2018
TREADMILL DESK ASSEMBLY INSTRUCTIONS!!ATTENTION: IMPORTANT UNPACKING INSTRUCTIONS.PLEASE READ BEFORE UNPACKING YOUR TREADMILL DESK!!Serious injury could occur if this treadmill is not unpacked properly. There is a Velcro strapinstalled around the treadmill base that prevents the treadmill from unfolding accidentallyduring shipping. If this strap is not removed properly the treadmill could spring openunexpectedly and cause injury if someone is standing near the treadmill when the strap isremoved.To ensure your personal safety during removal of the shipping strap please make sure thetreadmill is positioned flat on the ground, in the orientation it would be in if you wereusing the treadmill. Do not turn the treadmill up on its side while removing the shippingstrap. This could cause the treadmill’s folding mechanism to spring open. If the end of theVelcro strap (that you need to grab to remove it) happens to be under the treadmill deck,reach under the deck to grab it, but do not tilt the treadmill up to gain access to the strapend.Cut the banding straps with a short box cutter (razor knife); separate the carton from theone underneath it by prying up on the staples (if applicable). Pull the carton over thetreadmill parts and locate the hardware pack. The hardware pack is separated into fivesections; one section containing tools and four sections labeled steps 1-4 which contain thehardware needed for assembly of each step. The assembly steps below are numbered onethrough four and correspond to the hardware in the numbered sections of the hardwarepack. Remove only the hardware for the step you are currently assembling to avoidconfusion and mix ups.Then remove the treadmill from the carton and lay it on a level surface.DESK ASSEMBLY TOOLS#142. M5 Allen Wrench#141. M6 Allen Wrench#139. Phillips Head Screw Driver#140. 13/14mm Wrench9customerservice@dyaco.caDyaco Canada Inc. 2018
1Connect the Fixed Upright Assembly (113) with the Frame Base Tube (L.R) (116) and useL Allen Wrench (141) to tighten 16pcs of 3/8" UNC16 1/2" Button Head Socket Bolts(135).HARDWARE#135. 3/8" 1/2" ButtonHead Socket Bolt(16 pcs)10customerservice@dyaco.caDyaco Canada Inc. 2018
2Lay the Desk Board (120) on the Sliding Upright Assembly (114). Use two Nuts (121) tosecure with Desk Board Stand (115). Secure the Desk Board Stand (115) onto the SlidingUpright Assembly (114) by using the open end of the wrench (140) and the Allenwrench (141) to tighten 2pcs of 3/8" UNC16 1-3/4" Button Head Socket Bolts (136)and 2pcs of 3/8" UNC16 7T Nyloc Nuts (137).HARDWARE#136. 3/8" 1-3/4"Button Head SocketBolt (2 pcs)#137. 3/8" 7TNyloc Nut(2 pcs)11customerservice@dyaco.caDyaco Canada Inc. 2018
3Use the Allen wrench (142) and the Wrench (140) to tighten 4pcs of 5/16" UNC18 2"Button Head Socket Bolts (70), together with 4pcs of 5/16" UNC18 7T(mm) Nyloc Nuts(79) to secure the two Limit Brackets (R.L) (118.119) through both Frame Base Tubes(116).HARDWARE#70. 5/16" 2"Button Head Socket Bolt(4 pcs)#79. 5/16" 7TNyloc Nut (4 pcs)12customerservice@dyaco.caDyaco Canada Inc. 2018
41. Slide the Computer Cable Upper (46) into the console Bracket assembly (106) toconnect to the Console assembly (66). Use the Phillips Head Screwdriver (139) totighten 4pcs of M5 P0.8 12L Phillips Head Screw (112) to secure the Consoleassembly (66) with the Console Bracket Assembly (106).2. Locate the Console Bracket Assembly (106) on the right side of the Desk Board (120),to secure Console Bracket Assembly with the Tension Knob (107).HARDWARE#112. M5 12mmPhillips Head Screw(4 pcs)13customerservice@dyaco.caDyaco Canada Inc. 2018
To adjust the distance between the desk and the treadmill, the user can adjust the position of thetreadmill by moving the unit on the limit brackets to the desired position.The console assembly can be secured on the desk after positioning the treadmill.14customerservice@dyaco.caDyaco Canada Inc. 2018
TREADMILL DESK FOLDING INSTRUCTIONSDo not attempt to move the unit unless it is in the folded and locked position. Be sure the powercord and console cable are secured to avoid possible damage. Use both handrails to maneuver theunit to the desired position. TO ADJUST THE DESK HEIGHTLoosen the knobs (1&2) and press down on the handle of the hydraulic cylinder (5), the desk can beadjusted up or down to the desired height gently and then retighten the knobs (1&2). TO FOLD/USE THE DESKNote: Please check if the console has been secured on the desk or removed.Loosen the knobs (3&4) and fold the desk back until the rubber foot pads are near the frameuprights.To use the desk pull down the desk table and secure the knobs (3&4) to lock the desk while in use.15customerservice@dyaco.caDyaco Canada Inc. 2018
FOLDING INSTRUCTIONS TO FOLD THE TREADMILL1. Disconnect the power cord and computer cable from the desk board stand.2. Move the unit backward or fold the desk board then fold up the treadmill deck.3. Lift the treadmill running deck until it is secured by the locking telescoping tube assemblyin center back of base. TO UNFOLD THE TREADMILLApply slight forward pressure* on the treadmill running deck with one hand. Pull down onthe unlocking lever and slowly lower the running deck to the floor. The deck will lowerunassisted when it reaches about waist high. *At the rear roller area to relieve pressure on the Locking system.During installation, lay the treadmill deck under the desk with the transport wheels in thegrooves of the limit brackets in order to secure the desk board stand.TRANSPORT INSTRUCTIONSThe treadmill is equipped with four transport wheels that are engaged when thetreadmill is folded. After folding simply roll the treadmill away.16customerservice@dyaco.caDyaco Canada Inc. 2018
OPERATION OF YOUR TREADMILLGetting familiar with the treadmill console controlsGETTING STARTED:Power the treadmill on by plugging it into an appropriate wall outlet,then turn on the power switch located at the front of the treadmillbelow the motor hood. Ensure that the Safety Key is installed, as thetreadmill will not operate without it.When the power is turned on, the console will show the currentsoftware version, the total running mileage, hours. The treadmillwill then enter idle mode, which is the starting point for operation.CONSOLE OPERATIONQUICK-START OPERATION1.2.3.4.Attach the Safety key to enable the display (if not already on).Press the START key to begin belt movement. Adjust to the desired speed using the SPEED / keys.You may also use the QUICK SPEED keys SLOW-MEDIUM-FAST to adjust the speed.To slow tread-belt press the SPEED key to the desired speed.To stop the tread-belt press the STOP key or pull away Safety key.17customerservice@dyaco.caDyaco Canada Inc. 2018
PAUSE/STOP/RESET FEATURE1.2.When the treadmill is running the pause feature may be utilized by pressing the STOP key once. This willslowly decelerate the tread-belt to a stop. The Time, Distance and Calorie readings will hold while theunit is in the pause mode. After five minutes the display will reset and return to the start up screen.To resume your exercise, when in Pause mode, press the START key. The speed will return to theirprevious settings. Pause is executed when the STOP key is pressed once. If the STOP key is pressed a second time theprogram will end. If the STOP key is pressed a third time, the console will reset.CALORIE DISPLAYDisplays the cumulative calories burned at any given time during your workout.Note: This is only a rough guide used for comparison of different exercise sessions, which cannot be used formedical purposes.TO TURN TREADMILL OFF1.2.Remove tether cord.Turn off the main switch on the front of the treadmill, below the motor cover.TO TURN OFF AUDIBLE BEEP1.If you want to turn off the audible beep sound that occurs when you press keys, etc., press the MUTEbutton on the top left of the console.WINDOW DISPLAYSCAN:SPEED:TIME:STEP:DISTANCE:CALORIES:Each parameter will take turns to display the exercising data for 5 seconds.Displays the current running speed from 0.8 KPH 6.0 KPH.(0.5MPH 4.0MPH)Accumulates total workout time from 00:00 to 99:59.Accumulates total steps on training from 0 to 9999.Accumulates total workout distance from 0.00 to 99.99 Kilometers (99.99Miles).Accumulates the user’s calories consumption during exercise. Max. Value is 999.9calories.Note: This is only a rough guide used for comparison of different exercise sessions,which cannot be used for medical purposes.FUNCTION BUTTONENTER:Press “ENTER” button to set the parameter of count down. When the belt stop runningwhich press and hold this button for 3 seconds to reset all data which the parametervalue of accumulating is. Use the “ENTER” button to confirm stride length setting.START:Press “START” button to begin training.STOP:Press “STOP” button to control stop training.SPEED :Press “FAST” button to increase your speed, each increment is 0.1KPH (0.1MPH).SPEED :Press “SLOW” button to decrease your speed, each decrement is 0.1KPH (0.1MPH).STRIDE LENGTH: To set one step stride length, adjust the range from 30 99 centimeter. (See page 20)18customerservice@dyaco.caDyaco Canada Inc. 2018
(SL.)DISPLAY:SAFETY KEY:To show workout information time, distance.etc.Attach the safety key in its position to power on the computer. When safety key ispulled away from its position, the computer will shut down automatically.DIRECT SPEED KEYS:3 preset buttons for direct speed: 1kph/1mph, 2kph/2mph, 3kph/3mph.User can press the 3 buttons, mentioned above, at any time, to start treadmill and treadmill willautomatically adjust to press speed.OPERATION (MANUAL):STEP 1: Attach the Safety key to console then press any button to wake display up (if not already on),the screen will light up.STEP 2:Press the START button to begin belt movement, before training; the console will be a 3seconds final count down and a beep sound for short time. Using the SPEED / keys toadjust the desired speed (on console) at any time during training.STEP 3:Press ENTER button to see the value of parameter, which includes speed, time, distance,calories or scan. If chooses the scan mode that will take turns to display all value of parameterevery 5 seconds.STEP 4:While training, you can press STOP button to stop your workout or pull safety key away from itsposition to shut down the computer. If you want to resume your workout, you can press STARTbutton again and all previous data will resume counting.STEP 5:After training, press DISPLAY button to display the accumulating data for speed, time, distanceand calories that will be recorded during training. If you want to continue your workout, pressSTART button to begin the treadmill again.19customerservice@dyaco.caDyaco Canada Inc. 2018
SETTING STRIDE LENGTH (S.L.):Use the chart below for a quick guide to determine your stride length by using your height. While thisis not as accurate as some other methods, it can give you a close estimate of your stride length. For amore accurate stride length, measure your walking step from toe to toe in CM. Enter that value to setStride Length. Adjust desired stride length according to your preference.HEIGHT (CM)155 CM (5’)160 CM (5’, 3”)165 CM (5’,5”)170 CM (5’,7”)175 CM (5’, 9”)180 CM (5’, 11’)185 CM (6’)190 CM (6’, 2”)195 CM (6’, 5’)STRIDE LENGTH aco Canada Inc. 2018
GENERAL MAINTENANCEWARNING: Always unplug your treadmill prior to cleaning in order to avoid electrical hazard orshock.BELT & DECKYour treadmill uses a very high-efficient low-friction deck. Performance is maximized when the deck iskept as clean as possible. Use a soft, damp cloth, or paper towel to wipe the edge of the belt and thearea between the belt edge and the frame. Also reach as far as practical directly under the belt edge.This should be done once a month to extend belt and deck life. A mild soap and water solution alongwith a nylon scrub brush will clean the top of the textured belt. Allow to dry before using.BELT DUSTThis occurs during normal break-in or until the belt stabilizes. Sometimes the black dust from the beltwill appear on the floor behind the treadmill, this is normal.GENERAL CLEANINGDirt, dust, and pet hair can block air inlets and accumulate on the running belt. Please vacuumunderneath your treadmill on a monthly basis to prevent excess build-up of dirt that can get sucked upand get into the inner workings under the motor cover. Once a year, you should remove the blackmotor hood and vacuum out dirt that may accumulate. UNPLUG POWER CORD BEFORE THIS TASK.Cleaning metal surfaces may be accomplished by using a soft cotton or terry cloth rag with a lightapplication of car wax. Do not use aerosol sprays or pump bottles as they may deposit wax upon thewalking or computer surface. Under no circumstances are you to use ammonia, oils, silicones, or anyother compounds on the rubberized walking surface. The use of such materials may cause seriousinjury to the body and/or deteriorate the performance of the walking surface. Only clean therubberized walking surface with a damp cloth (water only). From time-to-time the computer surfacemay collect dust or finger prints. The use of harsh chemicals will destroy the protective coating andcause a static build up that will damage the components. This surface may be cleaned with speciallyprepared chemicals found in most computer supply stores especially made for anti-static surfaces. It isstrongly recommended that you purchase such a cleaning compound.BELT ADJUSTMENTSTread-belt Tension Adjustment - Belt tension is not critical for most users. It is very important forjoggers and runners in order to provide a smooth, steady running surface. Adjustment must bemade from the right and left side of the rear roller in order to adjust tension with the 6 mm Allenwrench provided in the parts package. The adjustment bolt is located at the end of the right andleft side rails as noted in diagram below.Tracking / TensionAdjustmentTracking / TensionAdjustmentNote: Adjustment is through small hole in end cap.Tighten the rear roller only enough to prevent slippage at the front roller. Turn the tread-belt tensionadjusting bolt in increments of 1/4 turn and inspect for proper tension.21customerservice@dyaco.caDyaco Canada Inc. 2018
When an adjustment is made to the belt tension, you must also make a tracking adjustment tocompensate for the change in belt tension. This is accomplished by turning both the tension andtracking Allen bolts an equal amount. This adjustment should be made by turning both bolts clockwiseby no more than a 1/4 turn at a time.DO NOT OVERTIGHTEN–Over tightening will cause belt damage and premature bearing failure. If youtighten the belt a lot and it still slips, the problem could actually be the drive belt-located under themotor cover - that connects the motor to the front roller. If that belt is loose it feels similar to thewalking belt being loose. Tightening the motor belt should be done by a trained service person.TREAD-BELT TRACKING ADJUSTMENTThe performance of your treadmill is dependent on the frame running on a reasonably level surface.If the frame is not level, the front and back roller cannot run parallel, and constant belt adjustmentmay be necessary.The treadmill is designed so that the tread-belt remains reasonably centered while in use. It is normalfor some belts to drift near one side while in use, depending on a user’s gait and if they favor one leg.But if during use the belt continues to move toward one side, adjustments are necessary.SETTING TREAD-BELT TRACKINGA 6mm Allen wrench is provided for this adjustment. Make tracking adjustments on the left side bolt.Set belt speed at 3 mph. Be aware that a small adjustment can make a dramatic difference which maynot be apparent right away. If the belt is too close to the left side, then turn the bolt only a 1/4 turn tothe right (clockwise) and wait a few minutes for the belt to adjust itself. Continue to make 1/4 turnsuntil the belt stabilizes in the center of the running deck.If the belt is too close to the right side, turn the boltcounter-clockwise. The belt may require periodictracking adjustment depending on use andwalking/running characteristics. Some users may affect tracking differently. Expect to makeadjustments as required to center the tread-belt.Adjustments will become less of a maintenanceconcern as the belt is used. Proper belt tracking is anowner responsibility common with all treadmills.ATTENTION:DAMAGE TO THE RUNNING BELT RESULTING FROM IMPROPER TRACKING / TENSIONADJUSTMENTS IS NOT COVERED UNDER THE WARRANTY.TREADMILL BELTThe walking belt on your new SOLE treadmill is made of the highest quality materials designed to lasteven under punishing conditions. When a treadmill belt is brand new, and has been in the package fora few months before use, a common occurrence can happen; the area of the belt that wraps aroundthe rollers will take on the shape of the roller. Upon starting the treadmill this shape in the belt causesa thumping sound each time the belt moves past the rollers. Once the treadmill has been used for afew workouts, the belt wears in and the thumping sound goes away. This noise is normal on newhigher end belts so there is no need to contact service; the new belt just requires a wear in period.Thank you for choosing SOLE and enjoy your new treadmill.22customerservice@dyaco.caDyaco Canada Inc. 2018
BELT/DECK LUBRICATIONFirst, you want to clean between the belt and deck to remove any debris that may be trapped. Use aclean, non-fraying rag, t-shirt, or light towel. Halfway between the end of the treadmill and motorcover, shove the garment under the belt until you can grasp it on both sides of the belt. Drag thegarment the length of the entire belt 1-2 times. Remove the garment.Only lubricate your treadmill with 100% silicone treadmill lubricant. Your treadmill comes with onetube of “Lube” and extra tubes can be ordered directly from Dyaco Canada Inc. or your authorized SoleFitness dealer. You may also use a Lube‐n‐Walk kit that can be purchased through bothaforementioned sellers.Keeping the deck lubricated at the recommended intervals ensures the longest life possible for yourtreadmill. If the lubricant dries out, the friction between the belt and deck rises and places unduestress on the drive motor, drive belt and electronic motor control board, which could result incatastrophic failure of these expensive components. Failure to lubricate the deck at regular intervalsmay void the warranty.The belt & deck come pre-lubricated and subsequent lubrication should be performed every 90 hoursof use or if you notice that the deck is dry. It is recommended that you reach between the belt anddeck to verify there is lubrication present, every other month. If you check and there isn’t anylubrication present, follow the procedure below even though the “Lube” indicator isn’t lit on theconsole. Otherwise, lubricate when the console’s lubrication reminder lights after 90 hours of use. Usethe following procedure to apply the silicone lubricant:1. Turn the power switch off and unplug the power cord from the wall outlet.2. Measure 18” from the edge of the motor cover; kneel down and reach under the beltapproximately 4-6” from one edge. Squirt a line of lubr
Unplug the treadmill during an electrical storm as a precaution. Use caution while participating in other activities while walking on your treadmill. Distractions may cause you to lose balance or stray from walking in the center of the belt; which may result in serious injury. NEVER mount or dismount the treadmill while the belt is moving .

