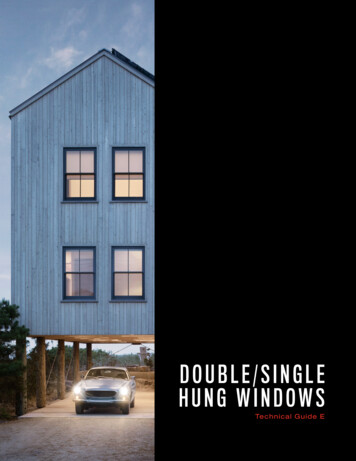
Transcription
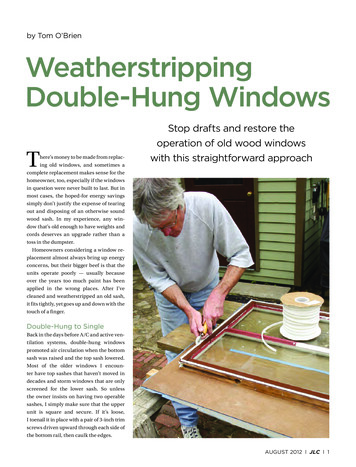
by Tom O’BrienWeatherstrippingDouble-Hung WindowsThere’s money to be made from replacing old windows, and sometimes acomplete replacement makes sense for thehomeowner, too, especially if the windowsin question were never built to last. But inmost cases, the hoped-for energy savingssimply don’t justify the expense of tearingout and disposing of an otherwise soundwood sash. In my experience, any window that’s old enough to have weights andcords deserves an upgrade rather than atoss in the dumpster.Homeowners considering a window replacement almost always bring up energyconcerns, but their bigger beef is that theunits operate poorly — usually becauseover the years too much paint has beenapplied in the wrong places. After I’vecleaned and weatherstripped an old sash,it fits tightly, yet goes up and down with thetouch of a finger.Stop drafts and restore theoperation of old wood windowswith this straightforward approachDouble-Hung to SingleBack in the days before A/C and active ventilation systems, double-hung windowspromoted air circulation when the bottomsash was raised and the top sash lowered.Most of the older windows I encounter have top sashes that haven’t moved indecades and storm windows that are onlyscreened for the lower sash. So unlessthe owner insists on having two operablesashes, I simply make sure that the upperunit is square and secure. If it’s loose,I toenail it in place with a pair of 3-inch trimscrews driven upward through each side ofthe bottom rail, then caulk the edges.AUGUST 2012 l JLC l 1
Weatherstripping Double-Hung WindowsRemoving the SashABCTaking out a lower sash simply requiresprying off one stop and disconnecting thecords, but I remove both stops becausethey will need to be ripped down slightlyto accommodate the thickness of theweather seals. After I disconnect eachsash cord, I attach a spring clamp to prevent the weight from falling to the bottom of the weight box (see Figure 1). If I’mworking on more than one window, I markan indelible code on each of the pieces toensure that everything goes back in theright place.Since old windows of this type typically have some lead paint on them, I setup a lead-safe work space around each ofthe window frames, and take appropriatesafety measures while preparing the sashand stops for weatherstripping.Sashes that are in rough shape — withextensive wood rot, flaking paint, separated joints, cracked panes, or crumblingglazing — need to be completely strippedand repaired. But if the sash is generallysound, I simply remove the paint from thesurfaces that are to be fitted with weatherseals or that are subject to abrasion. Forthis task I use an infrared paint removerDFigure 1. A lead-safe work zone is needed when working with old double-hungs(A). A spring clamp prevents the sash cord from dropping into the pocket; onthe window shown (B), the trim was in bad shape and was removed for replacement, allowing the author to insulate the cavity with XPS and spray foam. Toimprove the window’s operation, old paint is removed from all running surfaces;here the author uses an infrared paint-stripping tool (C). Paint is also removedfrom the inside of the window frame and the edge of the stop (D); raw wood surfaces will be waxed.AUGUST 2012 l JLC l 2
ABCFigure 2. After years of weatherstripping old windows anddoors, the author has settled on three seal profiles for mostjobs: a polypropylene brush seal for the sides; a 1 4-inchtube seal (white or bronze) for the meeting rail, and a white3 16 -inch tube for the bottom (A). Slots for the seals are cutwith a 3-millimeter slot cutter (B); the seals are installed witha screen tool or by hand (C).(around 500 from Eco-Strip, 703/4766222, eco-strip.com), which breaks thebond between the paint and substratewithout releasing lead fumes. The tool isan investment, but worth it if you plan todo a lot of this work; nothing is faster.After the paint is gone, I give the barewood surfaces a light sanding with 100-gritpaper in a random orbit sander attachedto a HEPA vac.MaterialsOver the years, I’ve experimented witha variety of materials and techniques forweather-sealing double-hung windows.What’s worked best for me is a combination of silicone-rubber tube seals on thetop and bottom surfaces and polypropylene pile brush seals on the side rails(Figure 2, page 2). I use the brush sealsbecause the side-mounted weather sealshave to be able to withstand abrasionwhen the sash is raised and lowered. Theother weather seals are only subject tocompression. I’ve been weatherstrippingwindows and doors for decades, so I’vebuilt up a substantial inventory of shapes,sizes, and colors of seals that I can rummage through to fine-tune a fit, or solvea problem. It often doesn’t matter whatcolor you use, but it’s nice to be able toput a bronze tube seal on the meeting railFigure 3. The bottomedge of the sash mustbe trimmed by about1 8 inch to account for thethickness of the weatherseal (above). After thecut, the end grain getsa treatment of epoxyconsolidant to preventrot infestation (left).AUGUST 2012 l JLC l 3
Weatherstripping Double-Hung Windowsof a dark-colored window, so that it’s notnoticeable when the window’s opened.For most windows, I use a 1 4-inch tubeseal (white or bronze) for the meeting rail,a white 3 16 -inch tube for the bottom, andgray 1 8-inch brush seals for the side rails.All these products, as well as the router bitthat carves the mounting slots, are sold byResource Conservation Technology (800/477-7724, conservationtechnology.com).APreparationBFigure 4. Using a plungerouter, the author centersthe slot for the bottomtube seal 5 8 inch fromthe face of the sash (A);the slot for the meetingrail seal is centered3 8 inch below the topedge (B). The side brushseals are placed as closeto the edge as practical— 1 4 inch (C). Any closerand the thin strip of woodleft behind may break off.CWeather seals are most effective — andleast likely to bind — when they’re gentlycompressed, not squeezed tight. So beforeI rout the grooves that will house the various materials, I trim the bottom edge ofthe sash by about 1 8 inch to allow for thetube seal that goes on the bottom (Figure3, page 3.Before the sash is reinstalled I’ll makespace for the seals that mount on the threeremaining surfaces of the sash by rippingthe stops and planing the face of the stool.Typically these cuts also remove about1 8 inch, but if I notice before the sash isremoved that it fits loosely in the frame,or if the tops of the meeting rails weren’tflush, I’ll modify the cuts accordingly.Rot treatment. After trimming the bottom rail, I repair any damaged spots withepoxy wood filler and slather the vulnerable end grain with epoxy consolidant toprevent rot.Installing the SealsThe weather seals have barbed tails thatsnap into a 3-millimeter groove that canbe cut with a self-piloted router bit. Theplacement of each groove (relative to theedge of the window) is different for eachtype of weather seal. If I’m upgrading onlya couple of windows, I’ll chuck the routerbit into a plunge router and adjust thestops to match the offsets. If it’s a biggerjob, I’ll outfit three routers with separatebits and label them as to location, so all Ihave to do is reach for the one I need.Layout. The placement of the top andAUGUST 2012 l JLC l 4
Weatherstripping Double-Hung Windowsbottom slots isn’t critical, but for the sideslots it matters; too far from the edge andthe weatherstripping won’t line up withthe stop; too close to the edge and theslotting bit leaves a narrow strip of woodthat’s vulnerable to breakage. So I centerthe slots on the sides exactly 1 4 inch fromthe outside edge.For aesthetic reasons, I center the tubeon the meeting rail 3 8 inch below thetop edge; this puts the top of the seal justbelow the top rail of the window, where itwon’t leave an unsightly gap. I center thetube under the bottom rail 5 8 inch behindthe face of the sash.Slotting. The router bit’s top-mountedpilot makes it easy to control, even on facecuts (Figure 4, page 4). To ensure that allof the weather seals snap in without anyfuss, I make two smooth, steady passes foreach slot, then vacuum out the cavity. Afterthe cutting is done but before installation,most of the window — except the glidingsurfaces — gets primed and painted.I measure each seal by laying it in position on the sash, marking the end with aSharpie, and cutting it with scissors. It’simportant to avoid stretching the tubeseals or they’ll shrink and leave a gap. Aplastic-wheeled roller makes it easy tofirmly seat the weatherstripping in thegroove, but you can also use a screen toolor just finger pressure.Putting It All Back TogetherFigure 5. Before the weatherstripped sash can be reinstalled, thestool must be scribed and trimmed to allow for the thickness of thebrush seals on the face of the side rails. A 1/16 -inch-wide gap, scribedwith a carpenter’s pencil, allows for expansion (top). A bullnose planewith a removable toepiece cuts away the excess stock with a minimum of dust (above).Once the sash is ready to be reinstalled,I always take the time to double-checkthe condition of the sash cords. If they’refrayed, or stiff from years of sloppy painting, they should be replaced. To ensurethat all the moving parts glide smoothly,I lubricate the inner workings of each pulley with a squirt of Tri-Flow, and rub ablock of paraffin wax (the kind that’s usedfor canning) along all of the running surfaces, including the stops.After attaching the cords, I temporarilyplace the sash in the opening and let it reston top of the stool. While applying gentlepressure against the stops, I scribe thestool to determine how much stock mustbe removed to allow the window to close(Figure 5). In most cases, it’s a hassle toremove the stool, so I trim it in place usinga Veritas bullnose plane with a removable toepiece that lets me work right up toa corner (veritastools.com). A multi-tooland a detail sander work well too.The final step is to replace the stops. Istart by tacking each one in place on thetop with a hand-driven 4-penny finishnail. Next, I close the window and pushthe bottom of the stop tight enough to gently compress the brush seal. Then I tackthe bottom and drive two or three morenails in between. I don’t set the nails untilI’m satisfied with the fit and the operation of the sash. A properly installed sashlock ensures a tight seal at the top; the onlyplace the stop must tightly engage the sashis at the bottom.Tom O’Brien is a JLC contributing editor and a restoration carpenter in NewMilford, Conn. Photos by Jake O’Brien.AUGUST 2012 l JLC l 5
Weatherstripping Double-Hung Windows of a dark-colored window, so that it's not noticeable when the window's opened. For most windows, I use a 1 4-inch tube seal (white or bronze) for the meeting rail, a white 3 16-inch tube for the bottom, and gray 1 8-inch brush seals for the side rails. All these products, as well as the router bit