Transcription
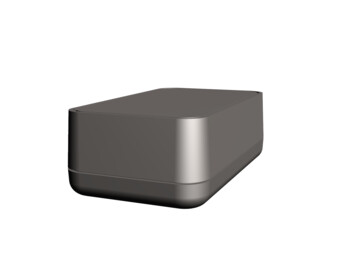
Project Santa Cruz Development Kit OverviewDevkit ContentsThe Project Santa Cruz Development Kit contains the following major components: Carrier board with Wi-Fi antennas Azure Eye SoM Azure Ear SoM (includes microphone array) RBG camera (connects to Eye SoM) Required cables: MIPI, USB-C, USB Micro Type-B to USB-A, power cable. Welcome card with hex key Section of 80/20 1010 Series mounting railFor more detailed specs, please see the datasheets for the devkit, Eye SoM, and Ear SoM.Getting StartedThere are three main stages to getting started with your Project Santa Cruz Development Kit:1. Onboarding2. Devkit unboxing and set up3. Out of Box Experience (OOBE)In the onboarding stage, you will assign an Azure subscription within your account to Project SantaCruz. The onboarding tool will walk you through the process of creating an IoT Hub within yourAzure subscription to use with Project Santa Cruz. You will have the option of enabling services,such as the Device Provisioning Service (DPS), Azure Device Update (ADU), and Automatic ImportUpdates, within your IoT Hub.After onboarding has been completed, follow the devkit unboxing and set up guide for guidanceon connecting the various components of the kit and powering on your device.Once your devkit is powered on, work through the OOBE (out-of-box experience) to connect yourdevkit to a Wi-Fi network, set up an SSH login (optional), connect your devkit to your Azureaccount, and assign it to your Project Santa Cruz IoT Hub (created during onboarding).After the onboarding, devkit set up, and OOBE have been completed, you are ready to beginprototyping.
Vision and Speech ExperiencesThere are a number of no-code vision and audio solutions available for prototyping with yourdevkit. For more information on these experiences, please reference the prototypingdocumentation.Updating your DevkitYour devkit OS and firmware may be updated over-the-air (OTA) or via USB. For more informationon updating your device, please see the update experience documentation.Project Santa Cruz onboardingWelcome to Project Santa Cruz! Prior to getting started with the Santa Cruz devkit, pleasecomplete the onboarding as described herein. During onboarding, you will: create an IoT Hub within your Azure account and connect it to Project Santa Cruz enable Device Provisioning Service (DPS), Azure Device Update (ADU), and AutomaticImport Update (AIU) within your IoT HubPlease note that it may take up to two business days to process your request to access theonboarding portal.Why is onboarding important?An IoT Hub is required for working with the Project Santa Cruz devkit. In addition, the onboardingportal is currently the only location where you may create an IoT Hub with ADU enabled. ADUallows you to perform over-the-air (OTA) updates from within the Azure portal--a feature wehighly recommend.Onboarding also allows for easy enablement of DPS and AIU, both recommended features. DPSenables zero-touch provisioning of devices, and AIU will automatically upload new device updatesto your ADU account.Prerequisites
Azure account with Azure Active Directory enabled and "owner" or "contributor"permissionsRequest access1. Open a browser and enter https://projectsantacruz.microsoft.com/ in the address bar toopen the onboarding portal.2. Enter your account login details and click Next.[!IMPORTANT] To ensure you onboard the correct Azure subscription, you must log into thesite with an Azure Active Directory-enabled account that is a member of the Azuresubscription you wish to onboard. In most cases, users will want to onboard a subscriptionfrom their company's Azure account, in which case they should log in with their corporatecredentials. If you want to onboard an Azure subscription that is different than yourcorporate subscription, you will need to log in with a user account that is a member of thatsubscription. If you do not have a user account for that subscription, or if your companydoes not use Azure Active Directory, you can follow the MSA account onboarding accessinstructions to create an account. Once you have successfully created your new user, returnto this article for guidance on completing the rest of the onboarding process.
3. Click Request access. It may take up to 2 business days to process your request to accessthe onboarding portal.Create an IoT Hub and enable Azure services1. Once your access request has been processed, return to the onboarding portal. Click GetStarted on the welcome screen.2. Select the Azure subscription you would like to use with Project Santa Cruz from the dropdown menu. If you do not have an Azure subscription, or if you would like to create a newsubscription to use with Project Santa Cruz, click the blue Learn more icon. This linkredirects to the Azure website where you may create a new Azure account. Please note thatthe free account is sufficient to get started with Project Santa Cruz. Your account credit cardwill be charged for usage following the exhaustion or expiration of account credits. Afteryou have selected the appropriate Azure subscription from the drop-down on theonboarding screen, click Next.
3. Create an IoT Hub.i.Enter your IoT Hub name. It is recommended that you create a new IoT Hub forworking solely with Project Santa Cruz.ii.Select your hub’s pricing tier from the drop-down menu. The S1 tier is recommendedfor use with Project Santa Cruz because other pricing tiers do not support IoT Edge,which is required. Note that Azure account credits may be used towards IoT Hubfees.iii.Select a resource group from the drop-down menu or create a new one.iv.Select your location from the drop-down menu. Note that you may use any availableregion regardless of your country of residence.v.After selecting your IoT Hub properties, click Submit. It will take a few minutes tocreate and activate your new IoT Hub. After submitting, any changes to your IoT Hubproperties can be made in your Azure account.
vi.In some cases, you may receive the following error message after clicking Submit:The error message indicates that your Azure subscription is not registered to usethe Microsoft.Devices namespace. To fix this, register your Azure subscriptionthrough the Azure portal by following the steps described here. There is no chargeassociated with the Microsoft.Devices namespace. Wait approximately 30 minutesafter registering before trying to create your IoT Hub through the onboarding toolagain.
4. After creating your IoT Hub, you will see a new option at the bottom of the screen forenabling the Device Provisioning Service (DPS). Check the box and click Next to create yourDPS instance and link it to your IoT Hub. This may take a few minutes to complete. Whenfinished, you will see a new section for Device Management Services that lists your DPSstatus (ON) and your DPS name.5. Next, you will see an option at the bottom of the screen for enabling Azure Device Update(ADU). We recommend enabling ADU so you may update your devkit over-the-air (OTA).Check the box and click Next to create your ADU account. This may take a few minutes tocomplete. When finished, you will see your ADU status (ON), ADU account name, and ADUinstance name listed under Device Management Services on your screen.6. Finally, you will see an option at the bottom of the screen for enabling Automatic ImportUpdate (AIU). Like the name implies, AIU automatically imports new device updates intoyour ADU account, removing the need to manually download update files from the ProjectSanta Cruz Update Management website. Please note that AIU is not required to performOTA updates. To enable AIU, first complete the steps detailed in this AIU setup guide. Whenyou are done, check the box, enter your AAD Application ID, and click Next.7. After enabling AIU, you will see your AIU status (ON) and your AIU application ID listedunder Device Management Services on your screen.
Congratulations! You have successfully completed the onboarding tool and are ready to getstarted with Project Santa Cruz. Any changes to the settings you selected in the onboarding toolcan now be made in your in your Azure account (this link allows you to access the Azure DeviceUpdate extension, which is a Private Preview service).Next stepsOnce you have received a Project Santa Cruz Development Kit, please see the unboxing guide forinformation on powering on your device and accessing the OOBE (out of box experience).Project Santa Cruz Development Kit unboxingand setupReference this guide for information on connecting the devkit components and powering on thedevice.Prerequisites Project Santa Cruz Devkit. P7 screwdriver (optional, used for securing the power cable connector to the carrier board).Devkit unboxing and setup procedure1. Unbox the devkit components.
oThe devkit contains a carrier board, Azure Eye SoM, Azure Ear SoM, RGB camera,accessories box with antennas and required cables, a section of 80/20 1010 Seriesmounting rail, and a welcome card with a hex key.oThe welcome card includes a sticker that has two passwords needed to access thedev kit's wifi access point. The first password is "santacruz" and is what should beused with the dev kit out of the box. The second password is "scz-xxxx"(where xxxx are the last four digits of the dev kit's MAC address), and will beactivated after you upgrade the dev kit to the latest OS version. DO NOT LOSE THISPASSWORD.oThe major components come mounted to the 80/20 rail out of the box, but they canbe removed or adjusted with the included hex key as desired.2. Connect the devkit components:[!NOTE] The power adapter port is located on the right side of the carrier board. Theremaining ports (2x USB-A, 1x USB-C, 1x HDMI, and 1x Ethernet) and the reset button arelocated on the left side of the carrier board.i.Hand screw both Wi-Fi antennas into the carrier board.ii.Connect the Azure Eye SoM to the carrier board's USB-C port with the USB-C cable.iii.Connect the Azure Ear SoM to the carrier board with the USB Micro Type-B to USBType-A cable. Connect the Micro Type-B end of the cable to the SoM and the Type-Aend to the carrier board.iv.Connect the power cable to the power adapter.v.Remove any remaining plastic packaging from the devices.vi.Connect the power adapter/cable to the carrier board and a wall outlet. To fullysecure the power cable connector to the carrier board, use a P7 screwdriver (notincluded in the devkit) to tighten the connector screws.
vii.After plugging the power cable into a wall outlet, the device will automatically poweron. The reset button on the left side of the carrier board will be illuminated, and theEar SoM LEDs will turn green, indicating device authentication is in progress(specifically, the LED marked L01 will turn on and remain green, and LED L02 willflash green). Please allow some time for the device to boot up.[!NOTE] The reset button is for powering off or resetting the device while connectedto a power outlet. In the event of a power outage, the device will automatically resetand power back on.Next stepsNow that your devkit is powered on, please see the OOBE (out-of-box-experience) walkthrough forguidance on connecting to and working through the OOBE. The OOBE allows you to connect yourdevkit to a Wi-Fi network, set up an SSH login, and provision it to your Azure account. Once youhave completed the OOBE, you will be ready to dive into our prototyping experiences.OOBE (out-of-box experience) WalkthroughAfter completing the onboarding for Project Santa Cruz Private Preview and setting up your devkit,you may proceed with the OOBE (out-of-box experience). The OOBE walks you through theprocess of connecting your devkit to a Wi-Fi network, setting up an SSH login for your devkit,connecting your devkit to your Azure account, and assigning your devkit to your Project SantaCruz IoT Hub.Prerequisites Project Santa Cruz devkit Ethernet cable (optional) Onboarding completed Project Santa Cruz Devkit setup completed Device with Wi-Fi connectivity and browserConnecting to OOBE for Initial Setup
What is SoftAP?SoftAP, or software-enabled access point, allows your devkit to act as a wireless accesspoint/hotspot through its integrated Wi-Fi module. The devkit's SoftAP IP address is 10.1.1.1. Wewill be using the devkit's SoftAP for the initial setup.Connect to OOBEWarning: If completing OOBE via a mobile device, be aware that data rates from yourmobile carrier may apply.1. To get started, power on your devkit.2. If the host computer you will be using has an active WWAN/Cellular connection, disconnectfrom it before proceeding. This can sometimes cause interference to the SoftAP.3. From your host computer, establish a Wi-Fi connection to the devkit's SoftAP. This varies byplatform (Windows/Linux/Mac).i.SoftAP/Hotspot SSID: scz-xxxx (where xxxx the last four digits of the devkit's Wi-FiMAC address)ii.Password: santacruz (if you have already manually set your SoftAP password duringthe OOBE, enter that password here)[!NOTE] If you experience issues while trying to connect with the devkit's SoftAP pleasereview the known issues page. Windows may complain about the SoftAP using a less securestandard (WPA2 TKIP cipher). This will be addressed in a future build to only allowconnections via the CCMP pairwise cipher.4. Open a browser and go to http://10.1.1.1:4242 to access the OOBE. If you have alreadyflashed your device to a newer build, use http://10.1.1.1.OOBE procedure1. Click Next on the OOBE Welcome screen.
2. On the Network connection page, click Connect to a new WiFi network to connect yourdevkit to a Wi-Fi network.3. Select your Wi-Fi network from the available connections.
[!NOTE] The Wi-Fi network you connect to must currently have internet connectivity so wecan communicate with Azure. EAP[PEAP/MSCHAP], captive portals, and Enterprise EAP-TLSconnectivity is currently not supported.4. Write down the IP address you are shown once a connection is established. You will want touse this IP address after OOBE completes for viewing the Preview Video Output instead of10.1.1.1:3000. You can also use this IP address for SSH sessions and connecting to OOBE.Once you’ve noted your IP address, navigate to the Network connection page.
5. On the Network connection page, click Access advanced network settings.6. On the Advanced network settings page, click Define access point passphrase.
7. On the Define access point passphrase page, enter a passphrase/password for yourdevice's SoftAP hotspot and click Save. After changing your password, you will bedisconnected from the SoftAP and will need to reconnect your device to proceed with theOOBE. Instead of reconnecting to the SoftAP with your new password, we recommendconnecting to either your Wi-Fi network that was set up in a previous step or over Ethernet.Once you are back on your home/office network, use the IP address you noted from aboveto restart OOBE (if connected over Ethernet, use the IP gathered from your router) and skipthe Wi-Fi connection screen. To restart OOBE, open a browser and go tohttp:// your devices ip :4242 or http:// your devices ip , depending on your build.8. Read through the License Agreement, select I have read and agree to the LicenseAgreement, and click Next.
9. If you would like to set up SSH for remote access to your devkit, enter your SSH usernameand password. To disable the root SSH login (username root, password p@ssw0rd),check the box next to SSH Root Login Disabled (Recommended). To prevent brute forcesecurity attacks, we recommend keeping SSH root login disabled. If you are an advanceduser and choose to enable root login, please enable appropriate security measures for yourdeployment environment. Finally, click Save.
10. On the next screen, click Connect with a new device to begin the process of linking yourdevkit to Azure. To check your Azure subscription status goto https://ms.portal.azure.com/#home, then tap Subscriptions.11. Click Copy to copy your device code (this may take a few seconds to generate). Once youhave copied your device code, click Login to Azure, which opens a new browser tab.
i.On the new browser tab, paste the device code you copied in the previous step intothe window and click Next.ii.Sign into your Azure account (the same account used during the onboardingprocess) and click Next. Navigate back to the OOBE window, which will show“Successfully Linked” once account sign-in is successful.
12. Select the IoT Hub you created during the onboarding process to assign it to your devkit. Ifyou are not sure which IoT Hub was created during onboarding, please checkthe onboarding website.13. Enter a device name for your devkit, check the TPM enrollment box, and click Next.
14. Congratulations! Your devkit has been successfully linked to your Azure account and ProjectSanta Cruz IoT Hub. You may now access your device within the Azure Portal. Before doingso, disconnect your computer from the devkit's SoftAP.[!NOTE] The Preview Video Output hyperlink on the final screen will no longer work oncedisconnected. Instead, use the IP address you wrote down in step 4 to preview the videooutput for the best streaming performance: http:// your noted IP address :3000. If youneed to SSH into your devkit, use your noted IP address .
Notes1. To protect your security, after 30 minutes of inactivity, we stop the OOBE process (and weremove the port 80 allow rule). If this occurs, please restart the OOBE.2. If at anytime during OOBE you see blue dots and then OOBE restarts, this is due to losinginternet connectivity. Please verify you have a consistent internet connection.3. During the WiFi connection, three blue dots will be shown. These will go away once the WiFiconnection has been established.4. Captive portal is not supported on IPV65. If you have added an IoT Hub outside of OOBE, please refresh the browser and wait a fewminutes for it propogate on the IoT Hub screen.Update your device's root SSH passwordThe root SSH password for your device (p@ssw0rd) will expire after 90 days. We recommendupdating this password now to avoid any interruption to root SSH access.1. SSH into your device with the root login:oUser: rootoPassword: p@ssw0rd
2. You will be prompted to enter a new password, which must contain letters and numbersand be least 12 characters in length. Type your new password into the PuTTY terminal andhit Enter.3. Write down your password in a safe place.4. You are now free to close the PuTTY terminal.Provide FeedbackAfter completing the OOBE, please provide feedback on your experience via this questionnaire.Your feedback will help us continue to fine-tune and improve the OOBE experience.For more information on Project Santa Cruz Quests and to provide feedback on other experiences,please visit the test scenarios page.Next StepsYou may now begin solution development with your Project Santa Cruz Development Kit. To getstarted, check out the no-code vision experience and no-code speech experience to create, train,and deploy simple AI models to your device.
open the onboarding portal. 2. Enter your account login details and click Next. [!IMPORTANT] To ensure you onboard the correct Azure subscription, you must log into the site with an Azure Active Directory-enabled account that is a member of the Azure subscription you wish to onboard. In most cases, users will want to onboard a subscription