Transcription
Instant Broadband SeriesCable/DSL RoutersUse this guide to install the following products:BEFSR41 ver. 2 EtherFast Cable/DSL Router with 4-Port SwitchBEFSRU31EtherFast Cable/DSL Router with USB Port and 3-Port SwitchBEFSR11 ver. 2 EtherFast 1-Port Cable/DSL RouterUser Guide
COPYRIGHT & TRADEMARKSCopyright 2002 Linksys, All Rights Reserved. Linksys and EtherFast are registeredtrademarks of Linksys. Instant Broadband is a trademark of Linksys. Microsoft,Windows, and the Windows logo are registered trademarks of Microsoft Corporation. Allother trademarks and brand names are the property of their respective proprietors.LIMITED WARRANTYLinksys guarantees that every Instant Broadband EtherFast Cable/DSL Router will befree from physical defects in material and workmanship for one year from the date of purchase, when used within the limits set forth in the Specifications section of this UserGuide. If the product proves defective during this warranty period, call Linksys TechnicalSupport in order to obtain a Return Authorization number. BE SURE TO HAVE YOURPROOF OF PURCHASE ON HAND WHEN CALLING. When returning a product, markthe Return Authorization number clearly on the outside of the package and include acopy of your original proof of purchase. RETURN REQUESTS CANNOT BE PROCESSEDWITHOUT PROOF OF PURCHASE. All customers located outside of the United Statesof America and Canada shall be held responsible for shipping and handling charges.IN NO EVENT SHALL LINKSYS’S LIABILITY EXCEED THE PRICE PAID FOR THE PRODUCT FROM DIRECT, INDIRECT, SPECIAL, INCIDENTAL, OR CONSEQUENTIAL DAMAGES RESULTING FROM THE USE OF THE PRODUCT, ITS ACCOMPANYING SOFTWARE, OR ITS DOCUMENTATION. LINKSYS OFFERS NO REFUNDS FOR ITS PRODUCTS. Linksys makes no warranty or representation, expressed, implied, or statutory,with respect to its products or the contents or use of this documentation and all accompanying software, and specifically disclaims its quality, performance, merchantability, orfitness for any particular purpose. Linksys reserves the right to revise or update its products, software, or documentation without obligation to notify any individual or entity.Please direct all inquiries to:Linksys P.O. Box 18558, Irvine, CA 92623.FCC STATEMENTThe Instant Broadband EtherFast Cable/DSL Router has been tested and complies withthe specifications for a Class B digital device, pursuant to Part 15 of the FCC Rules.These limits are designed to provide reasonable protection against harmful interferencein a residential installation. This equipment generates, uses, and can radiate radio frequency energy and, if not installed and used according to the instructions, may causeharmful interference to radio communications. However, there is no guarantee that interference will not occur in a particular installation. If this equipment does cause harmfulinterference to radio or television reception, which is found by turning the equipment offand on, the user is encouraged to try to correct the interference by one or more of thefollowing measures: Reorient or relocate the receiving antennaIncrease the separation between the equipment or devicesConnect the equipment to an outlet other than the receiver’sConsult a dealer or an experienced radio/TV technician for assistanceUG-BEFSR11/41/U31-AOL-091402NC-KL
Instant Broadband SeriesEtherFast Cable/DSL RoutersTable of ContentsChapter 1: IntroductionThe Linksys EtherFast Cable/DSL RouterFeaturesPackage Contents for the 4-Port Router (BEFSR41)Minimum RequirementsPackage Contents for the 1-Port Router (BEFSR11)Minimum RequirementsPackage Contents for the 3-Port Router with USB (BEFSRU31)Minimum RequirementsAn Introduction to LANs and WANsIP AddressesNetwork Setup Overview111223344457Chapter 2: Getting to Know the 4-PortEtherFast Cable/DSL RouterThe 4-Port Router’s Rear PanelThe 4-Port Router’s Front Panel LEDs889Chapter 3: Getting to Know the 1-PortEtherFast Cable/DSL RouterThe 1-Port Router’s Rear PanelThe 1-Port Router’s Front Panel LEDs111112Chapter 4: Getting to Know the 3-PortEtherFast Cable/DSL RouterThe 3-Port Router’s Rear PanelUSB CompatibilityThe 3-Port Router’s Front Panel LEDs14141516Chapter 5: Connect the RouterOverviewConnecting Your Hardware Together and Booting UpUplinking: Connecting More Devices to the Router18181921Chapter 6: Installing the BEFSRU31’s USBPort DriversInstalling the Windows 98 DriverInstalling the Windows 2000 DriverInstalling the Windows Millennium DriverInstalling the Windows XP Driver2222273133Chapter 7: Configure the PCsOverviewConfiguring Windows 95, 98, and Millennium PCsConfiguring Windows 2000 PCsConfiguring Windows XP PCs3535363840Chapter 8: Configure the Router42Chapter 9: The Cable/DSL Router’sWeb-based UtilityOverviewQuick and Easy Router lpAdvancedIP FilteringPort Range ForwardingDynamic RoutingStatic RoutingDMZ HostMAC Address Clone4747474854555658596162636570717374Appendix A: TroubleshootingCommon Problems and SolutionsFrequently Asked Questions757588Appendix B: Glossary92Appendix C: How to Ping Your ISP’s E-mail &Web Addresses105Appendix D: Installing the TCP/IP Protocol108
Instant Broadband SeriesEtherFast Cable/DSL RoutersChapter 1: IntroductionAppendix E: Twisted-Pair CablingCrimping Your Own Network Cables110111Appendix F: Finding the MAC Address and IPAddress for Your Ethernet Adapter112Appendix G: Setting Up AOL Broadband Cable & DSLAOL Broadband via CableAOL Broadband via DSL116116118Appendix H: 4-Port Router Specifications4-Port Environmental Specifications119119Appendix I: 1-Port Router Specifications1-Port Environmental Specifications120120Appendix J: 3-Port Router Specifications3-Port Environmental Specifications121121Appendix K: Warranty Information122Appendix L: Contact Information123The LinksysLinksys EtherFastEtherFast Cable/DSLCable/DSLRouterRouterTheCongratulations on the purchase of the EtherFast Cable/DSL Router fromLinksys! The Router is the perfect solution for connecting a network of PCs toa high-speed broadband Internet connection and to an Ethernet network backbone. Configurable as a DHCP server for your network, the Router is the onlyvisible network device on the Internet. The Router also serves as your InternetNAT firewall, protecting your network’s PCs from being accessed by externalusers. All incoming data packets are monitored and filtered. The Router canalso be configured to block internal users’ access to the Internet with IP filtering, as well as to play Internet games, videoconference, and much more. Plus,the Router supports Universal Plug and Play (UPnP), which allows WindowsXP to automatically configure the Router for various Internet applications,such as videoconferencing and gaming—making the Router a snap to use.Now all of your PCs can enjoy lightning-fast broadband Internet connectionsand share internal network data. Link them all together and network faster thanyou ever thought possible.Features Connects Your Cable or DSL Modem to Multiple Computers for Internet,File, and Printer Sharing Set Up Your Computers and Router Easily Using Linksys Setup Wizard Supports UPnP for Easy Network Configuration Supports Enhanced Security Using NAT Firewall and ZoneAlarm Pro* andPC-cillin Software* Access Your Network Remotely over the Internet through Virtual PrivateNetworking (VPN)—Supports IPSec and PPTP Pass-Through Easily Configurable through a Web Browser—Locally and over the Internet Administer and Upgrade the Router Remotely over the Internet Advanced Security Management Functions for Port Filtering, MAC AddressFiltering, and DMZ Hosting 3- or 4-Port, 10/100 Mbps, Built-in Switch Speeds Up Your Gaming andMultimedia Experience (BEFSRU31 & BEFSR41 ver. 2 only) Configurable as a DHCP Server on Your Network* each sold separately1
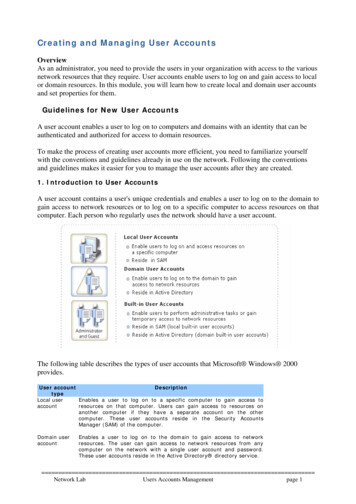
Instant Broadband SeriesPackage Contents for the 4-Port Router (BEFSR41)EtherFast Cable/DSL RoutersPackage ContentsContents forfor thethe 1-Port1-Port RouterRouter (BEFSR11)(BEFSR11)PackageFigure 1-1 2One EtherFast Cable/DSL Router with 4-Port SwitchOne Setup Wizard CD-ROM with User Guide IncludedOne Power AdapterOne Fast Start GuideOne Registration Card (not shown)Figure 1-2 One EtherFast 1-Port Cable/DSL RouterOne Setup Wizard CD-ROM with User Guide IncludedOne Power AdapterOne Fast Start GuideOne Registration Card (not shown)Minimum RequirementsMinimum Requirements One Windows PC equipped with: TCP/IP Protocol, Internet Explorer 4.0 or Netscape Navigator 4.7 for web-basedconfiguration, a CD-ROM Drive, and an Ethernet Adapter with a UTP CAT 5 Network Cable One Windows PC equipped with: TCP/IP Protocol, Internet Explorer 4.0 or Netscape Navigator 4.7 for web-basedconfiguration, a CD-ROM Drive, and an Ethernet Adapter with a UTP CAT 5 Network Cable Cable or DSL Modem with Ethernet Connection and Internet Access Cable or DSL Modem with Ethernet Connection and Internet Access3
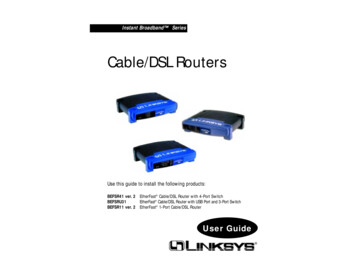
Instant Broadband SeriesPackage Contents for the 3-Port Router (BEFSRU31)EtherFast Cable/DSL RoutersThe Router’s firewall (NAT) protects your network of PCs so users on the public, Internet side cannot “see” your PCs. This is how your LAN, or network,remains private. The Router protects your network by inspecting the first packet coming in through the WAN port before delivery to the final destination onthe LAN port. The Router inspects Internet port services like the web server,ftp server, or other Internet applications, and, if allowed, it will forward thepacket to the appropriate PC on the LAN side.Remember that the Router’s ports connect to two sides: your 10/100 LANport(s) and the Internet WAN port. The LAN port(s) transmit data at 10 Mbpsor 100 Mbps, whereas the broadband port, or WAN port, transmits data at10 Mbps.IP AddressesFigure 1-3 One EtherFast Cable/DSL Router with USB Port & 3-Port SwitchOne Setup Wizard CD-ROM with User Guide IncludedOne USB CableOne 3.5" Floppy Disk for USB SetupOne Power AdapterOne Fast Start GuideOne Registration Card (not shown)Minimum Requirements Internet Explorer 4.0 or Higher (5.5 Recommended), or Netscape Navigator4.7 or Higher TCP/IP Protocol, Ethernet Adapter, and Ethernet Cable (UTP CAT 5 with RJ45 connectors) per PC One External Cable or DSL Modem with Ethernet Port and Ethernet Cable(UTP CAT 5 with RJ-45 connectors)An Introduction to LANs and WANsSimply put, a router is a network device that connects two networks together.In this instance, the Router connects your Local Area Network (LAN), or thegroup of PCs in your home or office, to the Wide Area Network (WAN), thatis, the Internet. The Router processes and regulates the data that travelsbetween these two networks.Think of the Router as a network device with two sides: the first side is madeup of your private Local Area Network (LAN) of PCs. The other, public sideis the Internet, or the Wide Area Network (WAN), outside of your home oroffice.4What’s an IP Address?IP stands for Internet Protocol. Every device on an IP-based network, including PCs, print servers, and routers, requires an IP address to identify its “location,” or address, on the network. This applies to both the WAN and LAN connections.There are two ways of assigning an IP address to your network devices.Static IP AddressesA static IP address is a fixed IP address that you assign manually to a PC orother device on the network. Since a static IP address remains valid until youdisable it, static IP addressing ensures that the device assigned it will alwayshave that same IP address until you change it. Static IP addresses are commonly used with network devices such as server PCs or print servers.Note: Since the Router is a device that connects two networks, it needstwo IP addresses—one for the LAN side, and one for the WAN side.In this User Guide, you’ll see references to the “WAN IP address” andthe “LAN IP address.”Since the Router has firewall security (NAT), the only IP address thatcan be seen from the Internet for your network is the Router’s WAN IPaddress.However, even this WAN IP address for the Router can be blocked, sothat the Router and network seem invisible to the Internet—see theBlocking WAN Requests description under IP Filtering in “Chapter 9:The Cable/DSL Router’s Web-based Utility.”5
Instant Broadband SeriesIf you use the Router to share your cable or DSL Internet connection, contactyour ISP to find out if they have assigned a static IP address to your account.If so, you will need that static IP address when configuring the Router. You canget the information from your ISP.Dynamic IP AddressesA dynamic IP address is automatically assigned to a device on the network,such as PCs and print servers. These IP addresses are called “dynamic”because they are only temporarily assigned to the PC or device. After a certaintime period, they expire and may change. If a PC logs onto the network (or theInternet) and its dynamic IP address has expired, the DHCP server will assignit a new dynamic IP address.For DSL users, many ISPs may require you to log on with a user name andpassword to gain access to the Internet. This is a dedicated, high-speed connection type called Point to Point Protocol over Ethernet (PPPoE). PPPoE issimilar to a dial-up connection, but PPPoE does not dial a phone number whenestablishing a connection. PPPoE also will provide the Router with a dynamicIP address to establish a connection to the Internet.DHCP (Dynamic Host Configuration Protocol) ServersPCs and other network devices using dynamic IP addressing are assigned a newIP address by a DHCP server. The PC or network device obtaining an IPaddress is called the DHCP client. DHCP frees you from having to assign IPaddresses manually every time a new user is added to your network.EtherFast Cable/DSL RoutersNetwork Setup OverviewThis user guide covers the basic steps for setting up a network with a router.After going through the appropriate “Getting to Know the Router” chapter(Chapter 2, 3, or 4, depending on which Router you have), most users will onlyneed to use the following chapters: Chapter 5: Connect the RouterThis chapter instructs you on how to connect the cable or DSL modem to theRouter and connect the PC(s) to the Router. Chapter 7: Configure the PCsThis chapter instructs you on how to configure your PC(s) for a DHCP connection, if the network settings are not already set to DHCP. Chapter 8: Configure the RouterThis chapter explains how to configure the Router using your web browserand the Router’s web-based utility. You will configure the Router using thesettings provided by your ISP.When you’re finished with the basic steps, then you are ready to connect to theInternet. After the PC(s) can access the Internet through the Router, you canalter the Router’s settings further; for example, you can adjust security featuresand other settings to enableNote: To learn about additional securityonline gaming.features, ZoneAlarm Pro and PC-cillin(each sold separately), see “Chapter 9: TheCable/DSL Router’s Web-based Utility.”A DHCP server can either be a designated PC on the network or another network device, such as the Router. By default, the Router’s WAN setting is DHCPclient.By default, a DHCP server (LAN side) is enabled on the Router. If you alreadyhave a DHCP server running on your network, you must disable one of the twoDHCP servers. If you run more than one DHCP server on your network, youwill experience network errors, such as conflicting IP addresses. To disableDHCP on the Router, see the DHCP section in “Chapter 9: The Cable/DSLRouter’s Web-based Utility.”Note: Even if you assign a static IP address to a PC, other PCs canstill use DHCP’s dynamic IP addressing, as long as the static IPaddress is not within the DHCP range of the LAN IP Address.If the dynamic IP addressing fails to provide a dynamic IP address,refer to “Appendix A: Troubleshooting.”6Notebook with Ethernet AdapterWANLANCable or DSLModemCable/DSL RouterPC with Ethernet AdapterFigure 1-47
Instant Broadband SeriesChapter 2: Getting to Know the 4Port EtherFast Cable/DSL RouterEtherFast Cable/DSL RoutersThe 4-Port Router’s Front Panel LEDsThe 4-Port Router’s Rear PanelThe Router’s ports, where network cables are connected, are located on the rearpanel of the Router, as shown in Figure 2-1.Figure 2-2PowerGreen. The Power LED lights up when the Router is poweredon.Link/ActGreen. The Link/Act LED serves two purposes. If the LEDis continuously lit, the Router is successfully connected to adevice through the corresponding port (1, 2, 3 or 4). If theLED is flickering, the Router is actively sending or receivingdata over that port. Port 1 is lit when using the Uplink port.Full/ColGreen. The Full/Col LED also serves two purposes. If thisLED is lit up continuously, the connection made through thecorresponding port is running in Full Duplex mode. If theLED flickers, the connection is experiencing collisions.Infrequent collisions are normal.Figure 2-1WANPorts 1-4UplinkThe WAN (Wide Area Network) port is where youconnect your cable or DSL modem through anEthernet cable. Your modem connection will notwork from any other port.These four LAN (Local Area Network) ports connect to network devices, such as PCs, print servers,and remote hard drives. If Port 1 is being used, theUplink port will not work because these two sharedports have internally shared wiring.The Uplink port is used to expand your network byconnecting to another switch or hub. To uplink to aswitch or a hub, simply run a cable from the Uplinkport to the other device. See the “Uplinking:Connecting More Devices to the Router” section formore on uplinking.If this LED flickers too often, there may be a problem withyour connection. See “Appendix A: Troubleshooting” if youencounter this problem.100Orange. The 100 LED lights up when a successful 100Mbpsconnection is made through the corresponding port.If this LED does not light up, then your connection speed is10 Mbps.If the Uplink port is being used, Port 1 will notwork.Power8The Power port is where you will connect thepower adapter.9
Instant Broadband SeriesThe WAN IndicatorsLinkActDiagGreen. The Link LED lights up when a successful connection is made between the Router and your cable or DSLmodem or network.Green. The Act LED flickers when the Router is sending orreceiving data over the WAN port (to the Internet).Red. The Diag LED lights up when the Router goes throughits self-diagnosis mode during every boot-up. It will turn offupon successful completion of the diagnosis.EtherFast Cable/DSL RoutersChapter 3: Getting to Know the 1Port EtherFast Cable/DSL RouterThe 1-Port Router’s Rear PanelThe rear panel of the Router is where all of the Router’s cabling connectionsare made, and where you can reset or configure the Router’s LAN port, asshown in Figure 3-1.If this LED stays on for an abnormally long period of time,see “Appendix A: Troubleshooting.”The Reset Button*The Reset button can be used in one of two ways.Figure 3-1The WAN (Wide Area Network) port is where youconnect your cable or DSL modem through anEthernet cable. Your modem connection will notwork from any other port.1. If the Router is having problems connecting to the Internet, press the Resetbutton for just a moment with a paper clip or a pencil tip. This clears up anyjammed connections, and is similar to pressing the Reset button on your PCto reboot it.WAN2. If you are experiencing extreme problems with the Router and have tried allother troubleshooting measures, press the Reset Button and hold it downuntil the red Diag LED on the front panel turns on and off completely.LANThe LAN (Local Area Network) port is where youconnect the Router to a PC, hub, or switch. If youhave more than one PC, connect an Ethernet hub orswitch to the Router, and then connect your PCs tothat hub or switch.PowerThe Power port is where you will connect thepower adapter.This will restore factory defaults and clear all of the Router’s settings, including settings such as IP addresses or a new password.* The Reset Button is located on the front panel of the 4-Port Router, and the rear panels of the 3Port Router and the 1-Port Router.Buttons & SwitchesProceed to “Chapter 5: Connect the Router.”10The Reset ButtonDetails on the Reset button are found in the“Chapter 2: Getting to Know the 4-Port EtherFastCable/DSL Router.”11
Instant Broadband SeriesThe Crossover SwitchWhen “uplinking,” or connecting two pieces of network hardware together,such as a hub and a switch, a general rule of thumb is to plug one end of anetwork cable into a straight-through port, and the other end into a crossoverport (uplink port). Standard ports are straight-through ports, and uplink portsare crossover ports.The1 PortEtherFast Cable/DSL RoutersFull/ColIf this LED flickers too often, there may be a problem withyour connection. See “Appendix A: Troubleshooting” if youencounter this problem.10/100The WAN IndicatorsLinkGreen. The Link LED lights up when a successful connection is made between the Router and your broadband deviceor network.ActGreen. The Act LED flickers when the Router is sending orreceiving data over the WAN port.DiagRed. The Diag LED lights up when the Router goes throughits self-diagnostic mode. It will turn off upon successfulcompletion of the diagnosis.The 1-Port Router’s Front Panel LEDsPowerLink/Act12Figure 3-3Green. The Power LED lights up green when the Router ispowered on.Green. The Link/Act LED serves two purposes. If the LEDis continuously lit, the Router is successfully connected to adevice through the LAN port. If the LED is flickering, theRouter is actively sending or receiving data through the LANport.Orange. The 10/100 LED lights up when a successful100 Mbps connection is made through the correspondingport.If a connection is running at 10 Mbps, the 10/100 LED willnot light up.Figure 3-2Important: The chart in Figure 3-2 is for reference purposesonly. Every network is different. If you do not make a connection to a hub or switch by using the settings above, change theposition of the Crossover Switch.Green. The Full/Col LED also serves two purposes. If thisLED remains lit, a LAN port connection is being successfully maintained. If the LED flickers, the connection is experiencing collisions. Infrequent collisions are normal.If this LED stays on for an abnormally long period of time,see “Appendix A: Troubleshooting.”Proceed to “Chapter 5: Connect the Router.”13
Instant Broadband SeriesChapter 4: Getting to Know the 3Port EtherFast Cable/DSL RouterThe 3-Port Router’s Rear PanelEtherFast Cable/DSL RoutersUSB CompatibilityNote: USB ports do not work on PCs running Windows 95 or NT.To use the USB port on the 3-Port Router, you must have Windows 98, 2000,Millennium, or XP installed on your PC. USB cannot run in a Windows 95 orNT environment.Also, your PC must have a USB port installed and enabled. Some PCs mayhave a disabled USB port. If your port doesn’t seem to be working, there maybe jumpers on the motherboard or a menu option in the BIOS to enable a PC’sUSB port.Ports 1-3UplinkThe Uplink port connects to another hub or switchfor port expansion when you run out of open portsfor your network devices. Since the Uplink port andthe standard port right next to it share internal wiring,you can only use one of the two ports at a time.WANThe WAN (Wide Area Network) port is where youconnect your cable or DSL modem through anEthernet cable. Your modem connection will notwork from any other port.PowerThe Power port is where you will connect thepower adapter.USBThe USB port (Type B - slave) can connect to aUSB-ready PC or a USB hub. This allows you toenjoy an immediate, plug-and-play connection without even installing an Ethernet adapter for your PC.To work with USB ports, your PC must be runningWindows 98, 2000, Millennium, or XP.The Reset Button14Figure 4-1These three LAN ports connect to your PCs, hubs,switches, print servers, or any other devices with anEthernet port.Details on the Reset button are found in the“Chapter 2: Getting to Know the 4-Port EtherFastCable/DSL Router.”Other motherboards have USB interfaces, but no ports. You can purchase andinstall a USB-ready card at your local computer store. See your PC’s userguide for instructions.This USB icon, shown in Figure 4-2, denotes the presence of a USB port orconnector.Figure 4-2The 3-Port Router comes with a USB cable that has two different types of connectors. Type A, the master connector, is shaped like a rectangle and plugs intoyour PC’s USB port. Type B, the slave connector, resembles a square and connects to the USB port on the rear panel of the Router.USB Type BUSB Type AFigure 4-315
Instant Broadband SeriesThe 3-Port Router’s Front Panel LEDsPowerLink/ActFull/ColFigure 4-4Green. The Power LED lights up green when the Router ispowered on.Green. The Link/Act LED serves two purposes. If the LEDis continuously lit, the Router is successfully connected to adevice through the corresponding RJ-45 port (1, 2, or 3). Ifthe LED flickers, then that port is sending or receiving datato and from the network. When the Uplink port is in use, thenPort 3 will be lit.EtherFast Cable/DSL RoutersThe WAN IndicatorsLinkGreen. The Link LED lights up when a successful connection is made between the Router and your broadband deviceor network.ActGreen. The Act LED flickers when the Router is sending orreceiving data over the broadband WAN port.DiagRed. The Diag LED lights up when the Router goes throughits self-diagnostic mode. It will turn off upon successfulcompletion of the diagnosis.If this LED stays on for an abnormally long period of time,see “Appendix A: Troubleshooting.”Proceed to “Chapter 5: Connect the Router.”Green. The Full/Col LED also serves two purposes. If thisLED is continuously lit, the connection made through thecorresponding port is running in Full Duplex mode. If theLED is flickering, the connection is experiencing collisions.Infrequent collisions are normal.If this LED flickers too often, there may be a problem withyour connection. See “Appendix A: Troubleshooting” if youhave problems.16100Orange. The 100 LED lights up when a successful 100 Mbpsconnection is made through the corresponding port. If thisLED does not light up, then your connection speed is10 Mbps.USBThe USB LED lights up when the USB port is successfullyconnected to a USB-ready PC or USB hub.17
Instant Broadband SeriesEtherFast Cable/DSL RoutersChapter 5: Connect the RouterConnecting Your Hardware Together and Booting UpOverview1. Before you begin, make sure that all of your hardware is powered off, including the Router, PCs, hubs, switches, and cable or DSL modem.Unlike a hub or a switch, the Cable/DSL Router’s setup consists of more thansimply plugging hardware together. You will have to configure your networkedPCs to accept the IP addresses that the Router assigns them (if applicable), andyou will also have to configure the Router with setting(s) provided by yourInternet Service Provider (ISP).The installation technician from your ISP should have left the setup information with you after installing your broadband connection. If not, you can callyour ISP to request the data.Once you have the setup information you need for your specific type of Internetconnection, you can begin installation and setup of the Router.Notebook with Ethernet AdapterWANLANCable or DSLModem2. If you have the 4-Port Router, go to step 2.A. If you have the 1-Port Router,go to step 2.B. If you have the 3-Port Router, go to step 2.C.2. A. If you have the 4-Port Cable/DSL Router, connect one end of anEthernet cable to one of the LAN ports (labeled 1, 2, 3, or 4) on the back ofthe Router, and the other end to a standard port on a network device, e.g., aPC, print server, hub, or switch. See “Appendix E: Twisted-Pair Cabling” fordetails on network cabling.Note: A standard port is any port other than the WAN port andthe Uplink port on the Router. It is a straight-through port.Repeat the above step to connect more PCs or network devices to the Router.2. B. If you have the 1-Port Router, connect one end of an Ethernet cable tothe LAN port on the back of the Router, and the other end to a port on a network device, e.g., a PC, hub, or switch. If you are using the LAN Port to connect to a PC, set the Crossover switch to straight-through mode ( ). If youare connecting the Router to a hub or switch, refer to the chart shown inFigure 5-2 when setting the Crossover switch.Cable/DSL RouterPC with Ethernet AdapterFigure 5-1Figure 5-22. C. If you have the 3-Port Cable/DSL Router, connect one end of anEthernet cable from the Router’s LAN ports (labeled 1, 2, or 3) to anEthernet adapter port on a PC, hub, switch, or other network device.The 3-Port Router features one USB plug-and-play port that connectsinstantly to any USB-ready PC or USB hub. This allows you to connect toand access the Router without even installing any Ethernet adapter cards.1819
Instant Broadband Series3. Connect the Ethernet cable from your cable or DSL modem to the WAN porton the Router’s rear panel. This is the only port that will work for yourmodem connection.4. Connect the power adapter to the Power port on the rear panel of the Router,and then plug the power adapter into a power outlet.Note: You should always plug the Router’s poweradapter into a surge protecting power strip.EtherFast Cable/DSL RoutersUplinking: Connecting More Devices to the RouterIf the Router’s LAN ports are all full and you still have PCs and/or devices toconnect, connect a hub or a switch to the Router using an Ethernet cable.To do so, use the Router’s Uplink port to connect to a standard port on a hubor switch. This leaves you with new, open ports on the hub or switch, to whichyou can add more PCs and/or network devices. The Power LED on the front panel will light up green as soon as the poweradapter is connected properly.If you have a PC/device connected to the port right next to the Uplink port (onthe 3- and 4-Port Routers), disco
One EtherFast Cable/DSL Router with USB Port & 3-Port Switch One Setup Wizard CD-ROM with User Guide Included One USB Cable One 3.5" Floppy Disk for USB Setup One Power Adapter One Fast Start Guide One Registration Card (not shown) Internet Explorer 4.0 or Higher (5.5 Recommended), or Netscape Navigator 4.7 or Higher