Transcription
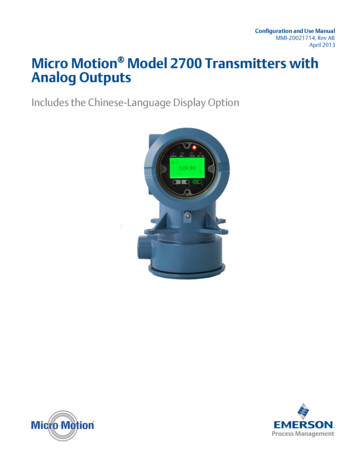
Configuration and Use ManualMMI-20021714, Rev ABApril 2013Micro Motion Model 2700 Transmitters withAnalog OutputsIncludes the Chinese-Language Display Option
Safety messagesSafety messages are provided throughout this manual to protect personnel and equipment. Read each safety message carefullybefore proceeding to the next step.Micro Motion customer serviceEmail Worldwide: flow.support@emerson.com Asia-Pacific: APflow.support@emerson.comNorth and South AmericaEurope and Middle EastAsia PacificUnited States800-522-6277U.K.0870 240 1978Australia800 158 727Canada 1 303-527-5200The Netherlands 31 (0) 318 495 555New Zealand099 128 804Mexico 41 (0) 41 7686 111France0800 917 901India800 440 1468Argentina 54 11 4837 7000Germany0800 182 5347Pakistan888 550 2682Brazil 55 15 3238 3677Italy8008 77334China 86 21 2892 9000Venezuela 58 26 1731 3446Central & Eastern 41 (0) 41 7686 111Japan 81 3 5769 6803Russia/CIS 7 495 981 9811South Korea 82 2 3438 4600Egypt0800 000 0015Singapore 65 6 777 8211Oman800 70101Thailand001 800 441 6426Qatar431 0044Malaysia800 814 008Kuwait663 299 01South Africa800 991 390Saudia Arabia800 844 9564UAE800 0444 0684
ContentsContentsPart I Getting StartedChapter 1Before you begin . 31.11.21.31.4Chapter 2About this manual . 3Transmitter model code . 3Communications tools and protocols . 3Additional documentation and resources . 4Quick start .72.12.22.32.42.52.6Power up the transmitter .7Check flowmeter status .7Make a startup connection to the transmitter .9Characterize the flowmeter (if required) .102.4.1Sample sensor tags . 112.4.2Flow calibration parameters (FCF, FT) . 122.4.3Density calibration parameters (D1, D2, K1, K2, FD, DT, TC) .13Verify mass flow measurement .13Verify the zero . 142.6.1Verify the zero using ProLink II . 142.6.2Verify the zero using ProLink III . 152.6.3Terminology used with zero verification and zero calibration .16Part II Configuration and commissioningChapter 3Introduction to configuration and commissioning . 213.13.23.33.43.5Chapter 4Configuration flowchart . 21Default values and ranges .23Enable access to the off-line menu of the display . 23Disable write-protection on the transmitter configuration . 23Restore the factory configuration . 24Configure process measurement . 254.14.24.3Configure mass flow measurement . 254.1.1Configure Mass Flow Measurement Unit . 254.1.2Configure Flow Damping .284.1.3Configure Mass Flow Cutoff .29Configure volume flow measurement for liquid applications . 314.2.1Configure Volume Flow Type for liquid applications .314.2.2Configure Volume Flow Measurement Unit for liquid applications . 324.2.3Configure Volume Flow Cutoff .35Configure gas standard volume (GSV) flow measurement . 364.3.1Configure Volume Flow Type for gas applications . 374.3.2Configure Standard Gas Density .374.3.3Configure Gas Standard Volume Flow Measurement Unit . 384.3.4Configure Gas Standard Volume Flow Cutoff . 41Configuration and Use Manuali
Contents4.44.54.64.74.84.9Chapter 5Configure device options and preferences . 795.15.25.35.45.55.6iiConfigure Flow Direction .434.4.1Options for Flow Direction .43Configure density measurement . 484.5.1Configure Density Measurement Unit .494.5.2Configure slug flow parameters . 504.5.3Configure Density Damping . 524.5.4Configure Density Cutoff . 53Configure temperature measurement .544.6.1Configure Temperature Measurement Unit . 544.6.2Configure Temperature Damping . 55Configure the petroleum measurement application . 564.7.1Configure petroleum measurement using ProLink II . 564.7.2Configure petroleum measurement using ProLink III . 574.7.3Configure petroleum measurement using the Field Communicator .594.7.4API reference tables . 60Configure the concentration measurement application . 614.8.1Configure concentration measurement using ProLink II . 624.8.2Configure concentration measurement using ProLink III . 644.8.3Configure concentration measurement using the Field Communicator . 674.8.4Standard matrices for the concentration measurement application .694.8.5Derived variables and calculated process variables .70Configure pressure compensation .724.9.1Configure pressure compensation using ProLink II . 724.9.2Configure pressure compensation using ProLink III . 744.9.3Configure pressure compensation using the Field Communicator . 764.9.4Options for Pressure Measurement Unit .77Configure the transmitter display . 795.1.1Configure the language used for the display . 795.1.2Configure the process variables shown on the display . 805.1.3Configure the precision of variables shown on the display .825.1.4Configure the refresh rate of data shown on the display .825.1.5Enable or disable automatic scrolling through the display variables . 835.1.6Enable or disable the display backlight . 845.1.7Enable or disable Status LED Blinking .84Enable or disable operator actions from the display . 855.2.1Enable or disable Totalizer Start/Stop from the display .855.2.2Enable or disable Totalizer Reset from the display . 865.2.3Enable or disable the Acknowledge All Alarms display command . 87Configure security for the display menus . 87Configure response time parameters . 895.4.1Configure Update Rate . 895.4.2Configure Calculation Speed (Response Time) . 91Configure alarm handling . 925.5.1Configure Fault Timeout .925.5.2Configure Status Alarm Severity . 93Configure informational parameters . 975.6.1Configure Descriptor . 975.6.2Configure Message .985.6.3Configure Date .985.6.4Configure Sensor Serial Number . 99Micro Motion Model 2700 Transmitters with Analog Outputs
Contents5.6.55.6.65.6.7Chapter 6Integrate the meter with the control system .1036.16.26.36.46.56.6Chapter 7Configure the transmitter channels . 103Configure the mA output . 1046.2.1Configure mA Output Process Variable . 1046.2.2Configure Lower Range Value (LRV) and Upper Range Value (URV) .1066.2.3Configure AO Cutoff .1086.2.4Configure Added Damping . 1106.2.5Configure mA Output Fault Action and mA Output Fault Level .111Configure the frequency output . 1126.3.1Configure Frequency Output Process Variable . 1136.3.2Configure Frequency Output Polarity . 1146.3.3Configure Frequency Output Scaling Method . 1156.3.4Configure Frequency Output Maximum Pulse Width . 1176.3.5Configure Frequency Output Fault Action and Frequency Output Fault Level . 118Configure the discrete output . 1196.4.1Configure Discrete Output Source .1206.4.2Configure Discrete Output Polarity . 1226.4.3Configure Discrete Output Fault Action . 124Configure events . 1256.5.1Configure a basic event .1256.5.2Configure an enhanced event . 126Configure digital communications . 1286.6.1Configure HART/Bell 202 communications . 1296.6.2Configure HART/RS-485 communications . 1346.6.3Configure Modbus/RS-485 communications . 1356.6.4Configure Digital Communications Fault Action .137Completing the configuration .1397.17.27.3Chapter 8Configure Sensor Material . 99Configure Sensor Liner Material . 100Configure Sensor Flange Type . 100Test or tune the system using sensor simulation .1397.1.1Sensor simulation . 140Back up transmitter configuration . 141Enable write-protection on the transmitter configuration . 142Set up the Weights & Measures application . 1438.18.28.3Weights & Measures application .143Set up the Weights & Measures application using ProLink II . 144Set up the Weights & Measures application using ProLink III . 147Part III Operations, maintenance, and troubleshootingChapter 9Transmitter operation . 1539.19.29.39.4Record the process variables . 153View process variables .1549.2.1View process variables using the display (standard option) . 1549.2.2View process variables using the Chinese-language display . 1559.2.3View process variables using ProLink III . 156View transmitter status using the status LED . 156View and acknowledge status alarms . 157Configuration and Use Manualiii
Contents9.59.69.79.8Chapter 10Operate the transmitter with the Weights & Measures application . 16910.110.210.310.4Chapter 11Operate the transmitter when the Weights & Measures application is installed . 16910.1.1 Approved methods to read or obtain process data .17010.1.2 Large totalizer values on the display (OIML applications only) . 17010.1.3 Effect of the Weights & Measures application on process measurement andoutputs .17110.1.4 Effect of the Weights & Measures application on operation and maintenancefunctions . 172Switch between secured and unsecured mode . 17410.2.1 Switch between secured and unsecured mode using ProLink II . 17510.2.2 Switch between secured and unsecured mode using ProLink III . 17510.2.3 Switch between secured and unsecured mode using the switching utility .176Clear Status Alarm A027: Security Breach . 176Replacing the core processor in a Weights & Measures installation .177Measurement support . 17911.111.211.311.411.511.611.7iv9.4.1View and acknowledge alarms using the display (standard option) . 1579.4.2View and acknowledge alarms using the Chinese-language display . 1609.4.3View and acknowledge alarms using ProLink II .1629.4.4View and acknowledge alerts using ProLink III .1629.4.5View alarms using the Field Communicator . 1639.4.6Alarm data in transmitter memory .163Read totalizer and inventory values . 164Start and stop totalizers and inventories .1659.6.1Start and stop totalizers and inventories using the display (standard option) . 165Reset totalizers .1669.7.1Reset totalizers using the display (standard option) . 167Reset inventories .168Options for measurement support . 179Use Smart Meter Verification .17911.2.1 Smart Meter Verification requirements .18011.2.2 Smart Meter Verification test preparation .18011.2.3 Run Smart Meter Verification .18111.2.4 View test data . 18711.2.5 Schedule automatic execution of the Smart Meter Verification test . 193Zero the flowmeter . 19811.3.1 Zero the flowmeter using the display (standard option) .19911.3.2 Zero the flowmeter using the Chinese-language display . 20011.3.3 Zero the flowmeter using ProLink II .20111.3.4 Zero the flowmeter using ProLink III .20211.3.5 Zero the flowmeter using the Field Communicator . 203Validate the meter .20511.4.1 Alternate method for calculating the meter factor for volume flow .206Perform a (standard) D1 and D2 density calibration .20711.5.1 Perform a D1 and D2 density calibration using ProLink II . 20711.5.2 Perform a D1 and D2 density calibration using ProLink III . 20911.5.3 Perform a D1 and D2 density calibration using the Field Communicator . 210Perform a D3 and D4 density calibration (T-Series sensors only) . 21211.6.1 Perform a D3 or D3 and D4 density calibration using ProLink II .21211.6.2 Perform a D3 or D3 and D4 density calibration using ProLink III .21311.6.3 Perform a D3 or D3 and D4 density calibration using the Field Communicator . 214Perform temperature calibration . 216Micro Motion Model 2700 Transmitters with Analog Outputs
Contents11.7.111.7.2Chapter 12Perform temperature calibration using ProLink II . 216Perform temperature calibration using ProLink III . 217Troubleshooting . 2.2212.2312.2412.2512.2612.2712.2812.2912.30Status LED states . 220Status alarms .220Flow measurement problems . 232Density measurement problems . 234Temperature measurement problems .235Milliamp output problems . 236Frequency output problems . 237Use sensor simulation for troubleshooting . 238Check power supply wiring .238Check sensor-to-transmitter wiring . 239Check grounding . 239Perform loop tests . 24012.12.1 Perform loop tests using the display (standard option) . 24012.12.2 Perform loop tests using the Chinese-language display .24112.12.3 Perform loop tests using ProLink II . 24312.12.4 Perform loop tests using ProLink III . 24412.12.5 Perform loop tests using the Field Communicator . 246Trim mA outputs . 24712.13.1 Trim mA outputs using ProLink II . 24712.13.2 Trim mA outputs using ProLink III .24812.13.3 Trim mA outputs using the Field Communicator .249Check the HART communication loop . 249Check HART Address and Loop Current Mode . 250Check HART burst mode .250Check Lower Range Value and Upper Range Value . 251Check mA Output Fault Action . 251Check for radio frequency interference (RFI) .251Check Frequency Output Maximum Pulse Width .251Check Frequency Output Scaling Method . 252Check Frequency Output Fault Action .252Check Flow Direction . 252Check the cutoffs . 252Check for slug flow (two-phase flow) . 253Check the drive gain . 25312.26.1 Collect drive gain data . 255Check the pickoff voltage . 25512.27.1 Collect pickoff voltage data . 256Check for electrical shorts .25612.28.1 Check the sensor coils .256Check the core processor LED .25812.29.1 Core processor LED states .
Configuration and Use Manual MMI-20021714, Rev AB April 2013 Micro Motion Model 2700 Transmitters with Analog Outputs Includes the Chinese-Language Display Option
