Transcription
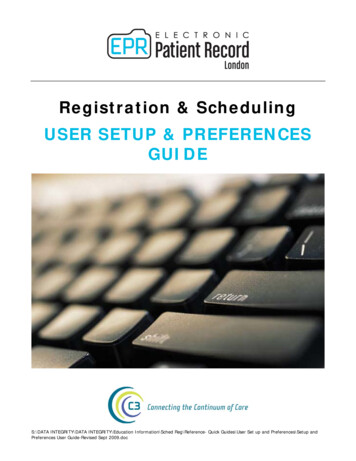
Registration & SchedulingUSER SETUP & PREFERENCESGUIDES:\DATA INTEGRITY\DATA INTEGRITY\Education Information\Sched Reg\Reference- Quick Guides\User Set up and Preferences\Setup andPreferences User Guide-Revised Sept 2009.doc
Users Setup & Preferences GuidePage 2Table of ContentsArranging buttons on the AppBar. 3How to Set up User Preferences in Cerner Patient Scheduling . 3Options . 3User Defaults Tab. 4Appointment Tab. 4Navigation Tab. 5Confirm Tab . 5Viewing Cancelled and/or Rescheduled Appointments . 7Demographic Bar. 8To Change or Add Information to the Demographic Bar . 8Book Settings - View . 10Proportional vs Non Proportional options:. 10Proportional, Multiple-day . 10Book Settings - Properties. 11General Tab. 11Fonts Tab . 12Adding the Anonymous Flag to the Check In Screens * . 13Adding the Health Card Validation Tab to the Inquiry Screens * . 15S:\DATA INTEGRITY\DATA INTEGRITY\Education Information\Sched Reg\Reference- Quick Guides\User Set up and Preferences\Setup andPreferences User Guide-Revised Sept 2009.doc
Users Setup & Preferences GuidePage 3Arranging buttons on the AppBarTo change the order of the buttons on your Appbar, left-click on the Cernerbutton and select customize.To move a button, left-click on the button thatyou would like to move and use the arrows tomove it up or down the list.Spaces can also be added to separate groupsof applications as shown to the left. To dothis, left-click on the ‘Insert Space’ buttonshown in the diagram on the previous page.How to Set up User Preferences in Cerner Patient SchedulingUsers will have to set preferences prior to using the Scheduling Appointment Book for the first time. Ifthese preferences are not set, the user will not be able to complete their work properly.OptionsFollow the steps below to set your preferences. The steps with an asterisk (*)beside them are mandatory.* Open the Scheduling Appointment Book. Left-click View, then Options to openthe Setup window.S:\DATA INTEGRITY\DATA INTEGRITY\Education Information\Sched Reg\Reference- Quick Guides\User Set up and Preferences\Setup andPreferences User Guide-Revised Sept 2009.doc
Users Setup & Preferences GuidePage 4User Defaults TabTo set your default location (clinic/area for scheduling), left-click the down arrow to select theappropriate location from the list.If you have more than one location code, then leave this blank to avoid any chance of using theincorrect code.If a clinic has a default synonym for theirappointment types, then you can click on thecheck box, then select the synonym from thesystem table.Appointment Detail fields –move PersonName to the top of the list by highlightingand using the arrows to move upAppointment TabUsers can place a checkmark in the box besideDisplay future requests / appointments in order toview a list of appointments that the patient alreadyhas booked and avoid any conflicts within your clinic.*Users are encouraged to check the box to Displayextended conflict details. This will prompt the userwhen the patient already has another appointmentthat is in conflict with the appointment they are tryingto schedule.The Flex Form defaults need to be set accordingto the individual user’s security position, if thesefields are blank, please contact the eHIMEducation team.S:\DATA INTEGRITY\DATA INTEGRITY\Education Information\Sched Reg\Reference- Quick Guides\User Set up and Preferences\Setup andPreferences User Guide-Revised Sept 2009.doc
Users Setup & Preferences GuidePage 5Navigation TabFor any staff who will use one particular book most often, you can set the default book that you wouldlike the system to open every time you enter the Scheduling Appointment Book.* Left-click the Navigation tab in order to set your default Bookshelf and default Book.* Left-click the drop-down arrow to select the Bookshelf that you would like to automatically open whenyou launch the scheduling application.Confirm Tab* Next left-click the Confirm tab to select the option of displaying the confirmation dialog box whenconfirming all appointments.Users have the option to have thescreen return to the previousdisplay prior to booking theappointment, return to the currentdate and default appointment bookor to maintain focus on the lastconfirmed appointment.For users who schedule as well ascheck in patients, you may want toselect the option to return to thecurrent date after each newappointment has been confirmed.* The Confirmation dialog box is used to add booking notes, to modify patient demographic informationwhile booking the appointment or to print a list of appointment dates / times when booking multipleappointments for one patient. It is recommended that you place the checkmark in this box.S:\DATA INTEGRITY\DATA INTEGRITY\Education Information\Sched Reg\Reference- Quick Guides\User Set up and Preferences\Setup andPreferences User Guide-Revised Sept 2009.doc
Users Setup & Preferences GuidePage 6The Confirm dialog box is alsothe last opportunity to verifythe appointment informationwith the patient prior toconfirming the appointment inthe system. If a date or timeneeds to be changed after theappointment is confirmed,then the appointment willhave to be rescheduled.Check In TabUsers who will always create a new encounterfor every scheduled appointment and willnever check in more than one appointmentinto a single encounter can select the ‘alwayscreate a new encounter when required’ box.Please check with the eHIM Education or IMScheduling team to ensure that this selectionis correct for your area.The Flex Form defaults need to be setaccording to the individual user’s securityposition, if these fields are blank, pleasecontact the eHIM Education teamS:\DATA INTEGRITY\DATA INTEGRITY\Education Information\Sched Reg\Reference- Quick Guides\User Set up and Preferences\Setup andPreferences User Guide-Revised Sept 2009.doc
Users Setup & Preferences GuidePage 7Check out Tab*ALL users in ALL departments must have the following settings on their Check out tabPlace checks as indicated belowThe Flex Form defaults need to be setaccording to the individual user’s securityposition, if these fields are blank, pleasecontact the eHIM Education teamViewing Cancelled and/or Rescheduled AppointmentsTo view cancelled and rescheduled appointments in your Appointment Book, left-click View and add acheckmark beside Cancels and Reschedules by selecting them one at a time. To change back to theoriginal view, left-click them again and this removes the checkmark.Note: Cancels and rescheduled appointments should only be turned on when trouble shootingan appointment.S:\DATA INTEGRITY\DATA INTEGRITY\Education Information\Sched Reg\Reference- Quick Guides\User Set up and Preferences\Setup andPreferences User Guide-Revised Sept 2009.doc
Users Setup & Preferences GuidePage 8Demographic Bar*Unless otherwise instructed, users should have the demographic bar appearing on their schedulingscreens. To do this, left-click View then Demographic Bar to add a checkmark and display the patientdemographics.To Change or Add Information to the Demographic BarRight-click on the Demographic bar and select Properties.In order to make room for other fields to appear on the Demographics bar, add 4 more columns (total 9columns).S:\DATA INTEGRITY\DATA INTEGRITY\Education Information\Sched Reg\Reference- Quick Guides\User Set up and Preferences\Setup andPreferences User Guide-Revised Sept 2009.doc
Users Setup & Preferences GuidePage 9Search for the demographic attribute on the list, and make the changes as indicated on the table(sample shown below):Name of FieldNameMRNDOBAgeGenderHome PhoneFamily PhysicianVIPPerson CommentsAllergiesCustom Field 01Field LabelLocation(Left, Top)Size date Add Add Add Add Add BoldBoldBoldBoldBoldBoldBoldBoldBoldBoldThe following is a demonstration of changing the attributes:1. Search for the attribute from thelist by typing in the first letter.2. Choose Update or Add (asindicated on the above table).The Attribute Properties windowopens.3. Select the appropriate Location andSize form the drop down lists.4. Select Font to change font attributes orcolour.5. Repeat until all attributes have beencompleted.S:\DATA INTEGRITY\DATA INTEGRITY\Education Information\Sched Reg\Reference- Quick Guides\User Set up and Preferences\Setup andPreferences User Guide-Revised Sept 2009.doc
Users Setup & Preferences GuidePage 10Book Settings - ViewProportional vs. Non Proportional options:The system will default to a non-proportional day, which means that the appointment times for eachresource will be listed according to the start of the template for each resource. If one resource starts at0800 and another at 0900 then both of these appointments times will appear next to each other on thescreen. Also if there are multiple appointment slots in the template for the same time, then they will belisted underneath each other.There are two ways that a user can change their view:1) Left-click on the Change View icon at the top of thescreen and select Proportional, Multiple-day.2) Right-click in the bottom portion of thescheduling book and select BookSettings View Proportional,Multiple-day.Proportional, Multiple-dayUsers can now see a week view in the scheduling book for a single resource. The resource can bechanged using the drop down arrow at the top of the schedule to switch from one resource in a book toanother.Users can also determine the number of days to view in the range. The default is 5 days, Monday toFriday but it can be changed to any number between 2 & 7 depending on the clinic needs.S:\DATA INTEGRITY\DATA INTEGRITY\Education Information\Sched Reg\Reference- Quick Guides\User Set up and Preferences\Setup andPreferences User Guide-Revised Sept 2009.doc
Users Setup & Preferences GuidePage 11To change the default view:1) Right-click in the bottom portion of the scheduling book and select Book Settings Properties.2) Left-click on the last tab, View-Proportional, Multiple-day.3) Change the number of days in the top box and left-click on OK.Book Settings - PropertiesRight-click in the appointment area and select Book Settings then Properties. The Appointment bookproperties window will appear.General TabColumn headingsPlace a check mark in front of Display number ofscheduled appointmentsVisible day rangeUsers can change the start of day that appears onthe scheduling screen by setting the “Begin Time” onthis tab.TooltipsUsers can change the duration for the tooltips todisplay on the screen. If the tips disappear soonerthan you would like, then increase the duration.Display fieldsUsers can change or add to the information that isavailable when hovering your curser over anappointment. Place a check mark in the box next tothe desired field to add it to the list. To change theorder of the information, left-click on the name of thefield and then use the up and down arrows to place itin the desired spot on the list.Example:The patient’s age, phone number and start/end time of appointmenthas been added to the display fields to the left.S:\DATA INTEGRITY\DATA INTEGRITY\Education Information\Sched Reg\Reference- Quick Guides\User Set up and Preferences\Setup andPreferences User Guide-Revised Sept 2009.doc
Users Setup & Preferences GuidePage 12Fonts Tab (for visually impaired users only)If a user needs to increase the size of the font thatappears on the scheduling screen, this can bechanged on the Fonts tab.Left-click on the Font button to select the size.Left-click on OK.View –Proportional Single-DayDisplay binderUsers can choose to remove the graphic of thebinder coils from the scheduling screen byremoving the checkmark from the Display binderfield.Time intervalFor any staff that will be booking appointmentslonger than 15 minutes, you may want to increasethe time interval. This will shorten the length of theappointment view on the screen.Note: if you book 10 or 20 minute appointments, donot select 15 or 30 minutes for a time interval.Column widthCustom width defaults to 150. If this width does notallow the user to see all of the appointmentinformation, then you can increase this width.Size to fit all will allow the user to view all resourcesavailable on the screen without scrolling. Thisoption may make the column width smaller thandesired if there are more than 5-6 resourcesavailable to schedule.Start display atStaff can choose the time of day that the scheduling book will begin displaying or check off the option tostart the display for the current time. Either of these options are very helpful if a clinic does not haveappointments in the morning and staff has to scroll down to the bottom of the screen to book allappointments.S:\DATA INTEGRITY\DATA INTEGRITY\Education Information\Sched Reg\Reference- Quick Guides\User Set up and Preferences\Setup andPreferences User Guide-Revised Sept 2009.doc
Users Setup & Preferences GuidePage 13*Adding Fields to the Check In Screens1. Right-click on an appointment in the scheduling book andselect Actions, Check In.The Check In window will open.2. Right-click on the columnheadings and selectPreferences.3. Locate VIP in the AvailableColumns list and select Move tomove it to the Selected Columnslist. Use the arrows to move it tothe top of the list.Now repeat this step to move all ofthe fields shown in the selectedcolumns to appear as shown to theright.4. Click on OKThe Check In window will bedisplayed again.S:\DATA INTEGRITY\DATA INTEGRITY\Education Information\Sched Reg\Reference- Quick Guides\User Set up and Preferences\Setup andPreferences User Guide-Revised Sept 2009.doc
Users Setup & Preferences GuidePage 145. Select Set Enc.The Encounter Selection window will open.6. Right-click on the column headings and select Preferences.7. Locate VIP in the Available Columns list and select Move to move it to the Selected Columnslist. Use the arrows to move it to the top of the list. Ensure that all of the selected columnsappear as shown below before left clicking on OK.S:\DATA INTEGRITY\DATA INTEGRITY\Education Information\Sched Reg\Reference- Quick Guides\User Set up and Preferences\Setup andPreferences User Guide-Revised Sept 2009.doc
Users Setup & Preferences GuidePage 15The Check In window will be displayed again.8. Select Cancel to exit this window without checking in the appointment.*Adding the Health Card Validation Tab to the Inquiry Screens* To add the HCV Tab to the Appointment View Screen:1.2.3.4.Right click on an appointmentSelect ‘Inquiry’ ‘Appointment View’The Appointment View window will appearRight click in the grey area shown below and select‘Preferences’S:\DATA INTEGRITY\DATA INTEGRITY\Education Information\Sched Reg\Reference- Quick Guides\User Set up and Preferences\Setup andPreferences User Guide-Revised Sept 2009.doc
Users Setup & Preferences GuidePage 165. The appointment View preferenceswindow will appear. Left click onHCV on the left side of the screenunder available tabs.6. This will activate the arrow in thecentre of the screen. Click on thearrow to move HCV to the rightcolumn.7. Once HCV is placed under the selected tabs side of the screen, the up and down arrows willbecome active. Use the up arrow to place the HCV tab after the Event Details tab.* Users should also move the ActionHistory, Action Details, Orders andWarnings tabs to appear after theHCV tab since these are the mostcommonly used information tabs inthis inquiry.Staff who are using the request list,protocol appointments or recurringseries appointments will want tohave they tabs appear as shown.It is not necessary to repeat these steps for the Appointment HistoryView screen under ‘Inquiry’. This is linked to the Appointment Viewscreen and will be automatically changed.S:\DATA INTEGRITY\DATA INTEGRITY\Education Information\Sched Reg\Reference- Quick Guides\User Set up and Preferences\Setup andPreferences User Guide-Revised Sept 2009.doc
How to Set up User Preferences in Cerner Patient Scheduling Users will have to set preferences prior to using the Scheduling Appointment Book for the first time. If these preferences are not set, the user will not be able to complete their work properly. Options Follow the steps below to set your preferences. The steps with an asterisk (*)


