Transcription
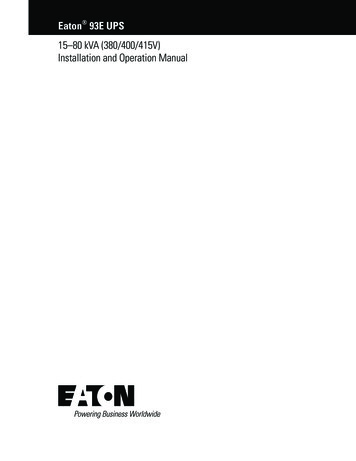
rinnai.us1-800-621-9419INSTALLATION AND OPERATION MANUALM-Series Condensing BoilerWall-Mounted, Gas-Fired Solo BoilerCentral HeatingMODELSM060SM090SM120SCertified to ANSI Z21.13 and CSA 4.9WARNING If the information in these instructions is not followed exactly, a fire or explosionmay result causing property damage, personal injury, or death.Do not store or use gasoline or other flammable vapors and liquids in the vicinity of this or any other appliance.WHAT TO DO IF YOU SMELL GAS Do not try to light any appliance. Do not touch any electrical switch; do not use any phone in your building. Immediately call your gas supplier from a neighbor’s phone. Follow the gas supplier’s instructions. If you cannot reach your gas supplier, call the fire department.Installation and service must be performed by a qualified installer, service agency or the gas supplier.Rinnai M-Series Condensing Solo Boiler Installation and Operation Manual8U513600/06.18 Changes ReservedM160S
Contents1 Welcome . 32 Safety . 4Safety Symbols . 4Safety Precautions . 53 About the Boiler . 6Components . 6Specifications . 7Dimensions. 8Accessories . 9How to Remove the Front Panel . 104 Installation. 11Installation Overview . 11Installation Guidelines . 12Unpack the Boiler. 13Choose an Installation Location . 14Mount the Boiler to the Wall . 165 Venting . 17Venting Guidelines . 17Venting Installation Sequence . 18Termination Considerations . 18Venting Options . 196 System Piping . 38Piping for Central Heating Systems . 38Piping for DHW Systems . 42Connect the Condensate Drain Line . 44Connect the Pressure Relief Valves . 467 Gas Supply. 47Connect the Gas Supply . 47Gas Operating Instructions . 48Gas Pipe Sizing Reference Tables. 49Test the Ignition Safety Shut Off Device . 518 Power Supply . 52Guidelines . 52Electrical Connections . 53Post-Power Supply Connection Checklist . 539 Commissioning . 54Safety Precautions . 54Instructions . 5410 Post-Installation Checklist . 5711 Operation . 59Start-Up Information . 59Control Panel . 60Boiler Display . 61Basic Operation Settings . 6212 Maintenance . 70Boiler Maintenance . 70Flushing the Plumbing System for CentralHeating Systems . 7113 Appendices . 73Approved Cleaners, Inhibitors and Antifreezes 73Boiler Parts . 74System Application Examples . 81Gas Conversion . 87Wiring Diagram . 91Ladder Diagram . 92Pressure Drop and Water Flow Curve . 93Resistance/Temperature Table for Sensors . 94Remove a Boiler from a CommonVent System . 95Massachusetts State Gas Regulations . 96Warranty. 97READ AND SAVE THESE INSTRUCTIONS2Rinnai M-Series Condensing Solo Boiler Installation and Operation Manual
1 WelcomeThank you for purchasing a Rinnai M-Series Condensing Boiler. Before installing and operating this boiler, be sure toread these instructions completely and carefully to familiarize yourself with the boiler’s features and functionality.To The Consumer You must read the entire manual to properlyoperate the boiler and to have regularmaintenance performed.Keep this manual for future reference.As when using any appliance generating heat,there are certain safety precautions you shouldfollow. See the Safety Precautions section inthis manual for detailed safety precautions.Be sure your boiler is installed by a licensedinstaller.If installing in the state of Massachusetts, youmust read the Massachusetts State GasRegulations section in this manual.To The Installer A trained and qualified professional mustinstall the boiler, inspect it, and leak test itbefore use. The warranty will be voided due toany improper installation.The trained and qualified professional shouldhave skills such as: Gas line sizing Connecting gas lines, water lines, valves,and electricity Knowledge of applicable national, state,and local codes Installing venting through a wall or roof Training in installation of condensingboilers. Training on Rinnai M-SeriesCondensing Boilers is accessible atwww.trainingevents.rinnai.us.Read all instructions in this manual beforeinstalling the boiler. The boiler must beinstalled according to the exact instructions inthis manual.Proper installation is the responsibility of theinstaller.When installation is complete, leave thismanual with the boiler or give the manualdirectly to the consumer.If You Need ServiceContact your local dealer/distributor or call RinnaiCustomer Care at 1-800-621-9419 Monday to Fridaybetween 8 AM to 8 PM ET. Please have your full serialnumber or model number available for product- orservice-related issues.QUICK REFERENCEFor an approved list of system cleaners,inhibitors, and antifreezes, reference thefollowing section in the Appendix: ApprovedCleaners, Inhibitors and AntifreezesAcronyms and AbbreviationsFollowing is a list of acronyms and abbreviations used in thismanual:ANSIAmerican National Standards InstituteBTUBritish Thermal UnitCHCentral HeatingDHWDomestic Hot WaterGPMGallons per minuteLPLiquid PropaneNGNatural GasO2OxygenPPPolypropylenePSIPounds per square inchW.C.Inches water columnFor Your RecordsDealer Name:Dealer Phone #:Purchase Date:Serial #:Rinnai M-Series Condensing Solo Boiler Installation and Operation ManualLocated on bottom left side of unit3
2 SafetyTopics in this section Safety SymbolsSafety Precautions WARNING If the information in these instructions is not followed exactly, a fire or explosion may result causing propertydamage, personal injury, or death. Do not store or use gasoline or other flammable vapors and liquids in the vicinity of this or any other appliance. WHAT TO DO IF YOU SMELL GAS: Do not try to light any appliance. Do not touch any electrical switch; do not use any phone in your building. Immediately call your gas supplier from a neighbor’s phone. Follow the gas supplier’s instructions. If you cannot reach your gas supplier, call the fire department. Installation and service must be performed by a qualified installer, service agency or the gas supplier. The warning signs in this manual are here to prevent injury to you and others. Please follow them explicitly.Safety SymbolsThis manual contains the following important safety symbols. Always read and obey all safety messages.Safety alert symbol. Alerts you to potentialhazards that can kill or hurt you and others.DANGER4Indicates an imminently hazardoussituation which, if not avoided, willresult in personal injury or death.WARNINGIndicates a potentially hazardoussituation which, if not avoided,could result in personal injury ordeath.CAUTIONIndicates a potentially hazardoussituation which, if not avoided,could result in minor or moderate injury. It may also be used toalert against unsafe practices.Rinnai M-Series Condensing Solo Boiler Installation and Operation Manual
Safety PrecautionsThe following precautions apply to the installer and consumer. Read and follow all instructions in this section. Before operating, smell all around the appliance Do not use an extension cord or adapter plug with thisarea for gas. Be sure to smell next to the floorappliance.because some gas is heavier than air and will settle Any alteration to the appliance or its controls can beon the floor.dangerous and will void the warranty. Keep the area around the appliance clear and free Proper venting is required for the safe operation of thisfrom combustible materials, gasoline, and otherappliance.flammable vapors and liquids. Flammable liquids such as cleaning solvents, aerosols, Combustible construction refers to adjacent wallspaint thinners, adhesives, gasoline and propane mustand ceiling and should not be confused withbe handled and stored with extreme care. Thesecombustible or flammable products and materials.flammable liquids emit flammable vapors and whenCombustible and/or flammable products andexposed to an ignition source can result in a fire hazardmaterials should never be stored in the vicinity ofor explosion. Flammable liquids should not be used orthis or any gas appliance.stored in the vicinity of this or any other gas appliance. To protect yourself from harm, before performing DO NOT operate the boiler without the front panelmaintenance:installed. The front panel should only be removed for Turn off the electrical power supply byservice/maintenance or replacing internal components.unplugging the power cord or by turning off the BURN HAZARD. Hot exhaust and vent may causeelectricity at the circuit breaker. (The boilerserious burns. Keep away from the boiler. Keep smallcontroller does not control the electricalchildren and animals away from the boiler.power.) Heating supply and return pipes leaving the boiler can Turn off the gas at the gas control, usuallybe hot to touch.located immediately below the boiler. Do not store or use gasoline or other flammable vapors Turn off the incoming water supply. This can beand liquids in the vicinity of this or any other appliance.done by turning off the water supply to the Install the vent system per local and national codes.building for the central heating system. Do not install this boiler above 10,200 ft (3,109 m). Use only your hand to turn the manual gas Do not obstruct combustion air to the boiler.control valve. Never use tools. If the manual Failure to properly vent this appliance can result ingas control valve will not turn by hand, do notdeath, personal injury and/or property damage.try to repair it; call a trained and qualified Rinnai recommends that every home have a carbonprofessional. Force or attempted repair maymonoxide (CO) alarm in the hallway near bedrooms inresult in a fire or explosion.each sleeping area. Check batteries monthly and Do not use this appliance if any part has been underreplace them annually.water. Immediately call a licensed professional to California law requires the following Proposition 65inspect the appliance and to replace any part of thewarning to be provided:control system and any manual gas control valvewhich has been under water.WARNING Do not use substitute materials. Use only partscertified for the appliance.This product can expose you to chemicals including Should overheating occur or the gas supply fail toNickel compounds, Lead and Lead compounds which areshut off, turn off the manual gas control valve toknown to the State of California to cause cancer, birththe appliance.defects or other reproductive harm. For more Only licensed professionals who are trained forinformation, visit www.P65Warnings.ca.gov.servicing Rinnai Condensing Boilers are permittedto adjust parameter settings.Rinnai M-Series Condensing Solo Boiler Installation and Operation Manual5
3 About the BoilerTopics in this section ComponentsSpecificationsDimensionsAccessoriesHow to Remove the Front ��Located behind#6 (Silencer)❻❼❿Located behind#6 (Silencer)⓬⓯123456786iCon Heat ExchangerBurner Hood with Burner CassetteFan with Integrated VenturiGas ValveIgnition UnitSilencerCondensate TrayFlue Gas Exhaust/Air Intake withMeasuring Points9101112Automatic De-aeratorControl PanelPressure SensorModulating Pump13Diverter Valve14Flow Sensor15Condensate Trap⓮⓭Rinnai M-Series Condensing Solo Boiler Installation and Operation Manual
SpecificationsM060SModelDimensions - w, h, dM090SM120S17 in. x 28 in. x 10 in.Weight(439 mm x 699 mm x 264 mm)64 lb (29 kg)70 lb (32 kg)Appliance TypeWall-Mounted, Gas-Fired Solo BoilerInstallation TypeIndoorIgnition SystemDirect Electronic IgnitionHeat Exchanger TypeHeat Exchanger Surface AreaiCon1iCon27.3 sq ft11.8 sq ftTemperature Setting (Min - Max)Water ContentGasConsumption(Btu/h)MinimumWater SupplyPressureCentral HeatingPressure Relief ValveMaximum68 F - 185 F (20 C - 85 C)1 Gallon1 Gallon3.8 Liters3.8 LitersNG: 17,000LP: 31,50060,00090,000NormalElectrical DataMaximum: 45 PSI30 PSIUPER 15-7839 dB42 dB48 dB54 dB155 W177 W164 W191 W1.67 Amps1.97 AmpsStandbyMax Current3.5 W1.62 Amps1.8 AmpsFuseGasSupply Pressure1.4 Gallons1.4 Gallons5.2 Liters5.2 LitersNG: 23,500LP: 73,500120,000160,000Minimum: 14 PSIPump ModelSound LevelM160S5 AmpsNatural Gas3.0 in. - 10.5 in. W.C.Propane8.0 in. - 13.5 in. W.C.Electric ConnectionsAC 120 Volts, 60Hz.Energy Star QualifiedRecognized as the Most Efficient of ENERGY STAR 2018CertificationsANSI Z21.13, CSA 4.91Minimum flow may vary slightly depending on the temperature setting and the inlet water temperature. Minimum activation flow is 0.4 GPM (1.5 L/min).2The maximum gas supply pressure must not exceed the value specified by the manufacturer.Rinnai products are continually being updated and improved; therefore, specifications are subject to change without prior notice.Rinnai M-Series Condensing Solo Boiler Installation and Operation Manual7
DimensionsMeasurements: in. (mm)FrontSideSupply ConnectionsGasCentral HeatingSupply8Central HeatingReturnRinnai M-Series Condensing Solo Boiler Installation and Operation Manual
AccessoriesThe following optional accessories are available for the Rinnai M-Series Condensing Boiler.For questions, or to purchase an accessory, contact your local Rinnai dealer/distributor or call Rinnai Customer Care at1-800-621-9419.CONDENSATE NEUTRALIZERNeutralizes the condensategenerated by the boiler.BOILER TOOLKITSCALECUTTERFilters and reduces the amount ofscale entering the boiler allowingfor greater boiler longevity.SCALECUTTER REFILL CARTRIDGERefill cartridge for the ScaleCutterfilter assembly.CLOSELY SPACED TEE KITSet of specific tools recommendedfor boiler service.Rinnai M-Series Condensing Solo Boiler Installation and Operation Manual9
How to Remove the Front PanelIMPORTANTDo not operate the boiler without the front panel installed. The front panel shouldonly be removed for service/maintenance or replacing internal components.You Will Need: 1Philips head screwdriverUsing a Philips head screwdriver, removethe 2 screws from the top of the boiler.TIPBe careful not to lose the screws. You’ll needthem when reinstalling the front cover.2Lift the tab slightly above the peg.3To remove, carefully lift the panel upand off to release it from the boiler.10Rinnai M-Series Condensing Solo Boiler Installation and Operation Manual
4 InstallationTopics in this section Installation OverviewInstallation GuidelinesUnpack the BoilerChoose an Installation LocationMount the Boiler to the WallTHIS SECTION IS INTENDED FOR THE INSTALLERInstaller qualifications: A trained and qualified professional must install the appliance, inspect it, and leak test theboiler before use. The warranty will be voided due to any improper installation. The trained and qualified professionalshould have skills such as: Gas sizing; Connecting gas lines, water lines, valves, and electricity; Knowledge of applicablenational, state, and local codes; Installing venting through a wall or roof; and training in installation of condensingboilers. Training for Rinnai Condensing Boilers is accessible online at www.trainingevents.rinnai.us.Installation OverviewBelow is an overview of the installation process. Detailed information about each step is provided in the followingpages.1Read and Understand theInstallation Guidelines2Unpack the Boiler andVerify the Contents3Choose an InstallationLocation4Mount the Boilerto the WallRinnai M-Series Condensing Solo Boiler Installation and Operation ManualConsider water quality,environment, andclearances11
Installation Guidelines This boiler is certified for installation in residentialand commercial applications. This boiler is suitable for combination water heating(through an indirect tank) and central heating. The installation must conform with local codes or, inthe absence of local codes, with the National FuelGas Code, ANSI Z223.1/NFPA 54, or the Natural Gasand Propane Installation Code, CSA B149.1. Ifinstalled in a manufactured home, the installationmust conform with the Manufactured HomeConstruction and Safety Standard, Title 24 CFR, Part3280 and/or CAN/SCA Z240 MH Series, MobileHomes. The appliance, when installed, must be electricallygrounded in accordance with local codes or, in theabsence of local codes, with the National ElectricalCode, ANSI/NFPA 70, or the Canadian ElectricalCode, CSA C22.1. The appliance and its main gas valve must bedisconnected from the gas supply piping systemduring any pressure testing of that system at testpressures in excess of 1/2 psi (3.5 kPa) (13.84 inW.C.). For system testing at pressures less than orequal to 1/2 psi (3.5 kPa) (13.84 in W.C.) theappliance must be isolated from the gas supplypiping by closing its individual manual shutoff valve.DO NOTDO NOT install the boiler in an area wherewater leakage of the unit or connections willresult in damage to the area adjacent to theappliance or to lower floors of the structure.When such locations cannot be avoided, it isrequired that a suitable drain pan, adequatelydrained, be installed under the boiler. The panmust not restrict combustion air flow.DO NOT install the boiler in an area withnegative air pressure.DO NOT obstruct the flow of combustion andventilation air.DO NOT use substitute parts that are notauthorized for this appliance.DO NOT install the boiler on carpeting. You must follow the installation instructions andthose in the Venting section for adequatecombustion air and exhaust. If the boiler is installed in a closed water supplysystem, such as one having a backflow preventer inthe cold water supply line, means shall be providedto control thermal expansion. Contact the watersupplier or local plumbing inspector on how tocontrol thermal expansion. Should overheating occur or the gas supply fail toshut off, turn off the manual gas control valve to theappliance. Combustion air must be free of chemicals, such aschlorine or bleach, that produce fumes. Thesefumes can damage components and reduce the lifeof your appliance.12Rinnai M-Series Condensing Solo Boiler Installation and Operation Manual
Unpack the BoilerItems IncludedWhat You’ll NeedCarefully unpack your boiler system and verify thefollowing contents are included.Gather the recommended tools and parts beforestarting installation.If any items are damaged or missing, contact your localdealer/distributor or call Rinnai Customer Care at 1-800621-9419. Do not attempt to use any item that appearsdamaged.Items included with boiler package:Tools Needed Standard tools for central heating, gas fittingand plumbing. Digital manometer capable of reading bothpositive and negative pressure Combustion analyzer (intended for use withcondensing boilers) Digital multimeter capable of readingmicroamps Rinnai Condensing Boiler Integrated Modulating Pump Wall Mounting Bracket Pressure Relief Valve Condensate Collector Kit pH digital meter or test strips Outdoor Reset Sensor Metric Allen wrenches (use metric only) 3 in. (80 mm) Polypropylene to 3" PVCAdapter (Qty 2) Metric Socket wrenches (use metric only) 3 in. PVC to 2 in. PVC or 2 in. (60 mm)Polypropylene adapter (Qty 2)For wall mounting bracket installation: 3 in. X 5 in. Concentric Vent Adapter Vent top with integrated 3 in. (80mm)Polypropylene Adapters NPT Adapters: 1 in. (25 mm) (Qty 2) 3/4 in. (19 mm) for Gas Supply connection Liquid Propane Field Conversion Kit Installation and Operation Manual (this manual) User Manual ISCL (Installation, Service, and Commissioning Log) Level Screws (use appropriate screws for typeof wall construction)Other Items You May Need Hand truck with fastening belt Boiler toolkit (optional accessory for boilerservice. See the Accessories section for moreinformation)WARNINGTo avoid danger of suffocation, keep plastic bagsaway from babies, small children and pets. Do notuse these bags in cribs, beds, carriages, or playpens.The bags are not a toy.Rinnai M-Series Condensing Solo Boiler Installation and Operation Manual13
Choose an InstallationLocation Unsuitable heating system water can cause theformation of scale or sludge, which affects systemefficiency. It can also cause corrosion and reducelife of the heat exchanger. Never use water that has been treated by a reverseosmosis, deionized, or distilled water to soften thewater to fill the heating system. Do not use inhibitors or other additives unlessapproved by Rinnai for that purpose. When using oxygen-permeable pipes for in-floorheating systems, you must separate the systemfrom the boiler using plate heat exchangers. Thoroughly flush the system prior to filling. Whileflushing, isolate the boiler. Do not introduce any system cleaner into the boilerloop. Flush the system thoroughly to remove allsystem cleaner before filling the boiler with water.Water Quality Guidelines Consideration of care for your boiler should includeevaluation of water quality.When freeze protection of the heating system isdesired, only use Rinnai-approved antifreezes. Theallowed maximum concentration is 50%. Reference section Approved Cleaners, Inhibitorsand Antifreezes in the Appendix for an approvedlist of system cleaners, inhibitors, and antifreezes.When choosing an installation location, you mustensure that clearances will be met and that the ventlength will be within required limits. Consider theinstallation environment, water quality, and need forfreeze protection. Requirements for the gas line, waterlines, electrical connection, and condensate disposalcan be found in their respective installation sections inthis manual.This section provides information on the importance ofwater quality to the Rinnai Condensing Boiler. Theinformation is intended to serve as general guidelinesonly and is not a complete list of water qualityguidelines. The water must be potable, free of corrosivechemicals, sand, dirt, or other contaminants. It is up to the installer to ensure the water doesnot contain corrosive chemicals or elements thatcan affect or damage the boiler. Water that contains chemicals exceeding the levelsbelow can damage the boiler.ContaminantMaximum LevelTotal HardnessUp to 200 mg/LAluminum *Up to 0.2 mg/LChlorides *Up to 250 mg/LCopper *Up to 1.0 mg/LDissolved Carbon Dioxide (CO2)Up to 15.0 mg/LIron *Up to 0.3 mg/LManganese *Up to 0.05 mg/LpH *6.5 to 8.5TDS (Total Dissolved Solids) *Up to 500 mg/LZinc *Up to mg/LIMPORTANTReplacement of components due to waterquality damage is not covered by the warranty.* Source: Part 143 National Secondary DrinkingWater Regulations14Rinnai M-Series Condensing Solo Boiler Installation and Operation Manual
EnvironmentAir surrounding the boiler, venting, and vent termination(s) is used for combustion and must be free of any compoundsthat cause corrosion of internal components. These include corrosive compounds that are found in aerosol sprays,detergents, bleaches, cleaning solvents, oil based paints/varnishes, and refrigerants. The air in beauty shops, drycleaning stores, photo processing labs, and storage areas for pool supplies often contains these compounds. The boiler,venting, and vent termination(s) should not be installed in any areas where the air may contain these corrosivecompounds.ClearancesLocationClearanceTop2 in. (51 mm)0 in. from vent componentsBottom (Ground)12 in. (305 mm)Front6 in. (152 mm)Clearance for servicing is 24 in. (610 mm) in front of boilerBack0 in.Sides (Left and Right)2 in. (51 mm)Vent0 in.TOPFRONTBOTTOMCloset Installation ClearancesTop6 in. (152 mm)0 in. from vent componentsBottom (Ground)12 in. (305 mm)Front6 in. (152 mm)Clearance for servicing is 24 in. (610 mm) in front of boilerBack0 in.Sides (Left and Right)2 in. (51 mm)Vent0 in.Installation Location ChecklistUse this checklist to ensure you have selected the correct location for the boiler. The boiler is not exposed to corrosive compounds in the air.The boiler location complies with the required clearances.The planned combustion air and exhaust termination locations meet the required clearances.The water supply does not contain chemicals or exceed total hardness that will damage the heat exchanger.A standard 3 prong 120 VAC, 60 Hz properly grounded wall outlet or other 120 VAC, 60 Hz source is available.The installation must conform with local codes or, in the absence of local codes, with the National Fuel GasCode, ANSI Z223.1/NFPA 54, or the Natural Gas and Propane Installation Code, CSA B149.1.Rinnai M-Series Condensing Solo Boiler Installation and Operation Manual15
Mount the Boiler to the WallYou Will Need 1Supplied by Installer Rinnai Condensing BoilerWall Mounting BracketHold the wall mounting bracket up againstthe wall and use a level to make sure thebracket is even.2Proper operation requires the boiler to belevel.LevelScrews for boiler and mounting bracketinstallation (use appropriate screws for type ofwall construction)Use the appropriate screws for the wallconstruction to secure the mounting bracketto the wall (use any of the screw holes in themounting bracket).LevelWall Mounting Bracket3Insert the boiler top bracket into the wall mounting bracket.Make sure the wall mounting bracket is sturdy and can hold the weight of the boiler before you fully let go.Insert the boiler top bracket into the wall mounting bracket16Assembled viewRinnai M-Series Condensing Solo Boiler Installation and Operation Manual
5 VentingTopics in this section Venting GuidelinesVenting Installation SequenceTermination ConsiderationsVenting OptionsVenting Guidelines M-Series boilers can be installed as direct vent ornon-direct vent applications. When installed as Direct Vent, refer to thefollowing section for a complete list of approvedvent manufacturers and products: Venting Options Direct Vent: Approved Vent Manufacturers andProducts. When installed as Non-Direct Vent (Room Air), thevent must be Category IV and of a type listed by anational recognized testing agency. Exhaust must be directly vented to the outside.Combustion air can be provided from outside(Direct Vent) or from room air (Non-Direct Vent). If using room air (non-direct vent) for combustion,ensure the required volume of indoor air isavailable according to the National Fuel Gas Code,ANSI Z223.1/NFPA 54. Avoid dips or sags in horizontal vent runs byinstalling supports per the vent manufacturer’sinstructions. Support horizontal vent runs every 4 ft (1.2 m) andall vertical vent runs every 6 ft (1.83 m) or as pervent manufacturer’s instructions or local coderequirements. If venting reassembly is needed, follow the stepsfor installing the venting in the followingsections. Make certain that the vent piping andseals are not damaged. Only use sealants,primers, or glues that are approved for the ventmaterial in use. Refer to the instructions of the vent systemmanufacturer for component assemblyinstructions. If the vent system is to be enclosed, it issuggested that the design of the enclosure shallpermit inspection of the vent system. The designof such enclosure shall be deemed acceptable bythe installer or the local inspector. Any issues resulting from improper ventinstallation will not be covered by warranty.WARNINGDO NOT use cellular core PVC/CPVC.DO NOT use Radel, ABS, or galvanized material tovent this appliance.DO NOT cover non-metallic vent pipe and fittingswith thermal insulation.DO NOT combine vent components fromdifferent manufacturers. Venting should be as direct as possible with aminimum number of pipe fittings.DO NOT reduce the vent diameter. Ventdiameter cannot be less than 2 in. For manufactured vent systems, vent connectionsmust be firmly pressed together so that theconnections form an air tight seal. Follow theventing manufacturer’s instructions.DO NOT connect the venting system with anexisting vent or chimney. Refer to the Schedule 40 PVC/CPVC manufacturerfor appropriate fittings, solvents or joiningmethods.DO NOT common vent with the vent pipe of anyother manufacturer’s boiler or appliance.Rinnai M-Series Co
Training in installation of condensing boilers. Training on Rinnai M-Series ondensing oilers is accessible at www.trainingevents.rinnai.us. Read all instructions in this manual before installing the boiler. The boiler must be installed according to the exact instructions in this manual. Proper installation is the responsibility of the