Transcription
ADTT Pulsee Interactivve SoluutionssDBC835Wirelesss HD Doorbbell CaameraaQuick Insttallatioon GuideProperty of ADTT, LLC. Inforrmation accuurate as of puublished datte and is providedwarranty of anya kind.“as is” without w017ADT LLCC dba ADT SecuritySServvices. All rigghts reserveed. ADT, the ADT 20logoo, 800 ADT.AASAP and thhe product/sservice nammes listed in thist documeent aremarrks and/or reegistered maarks. Unautthorized usee is strictly prohibited.DBCC835
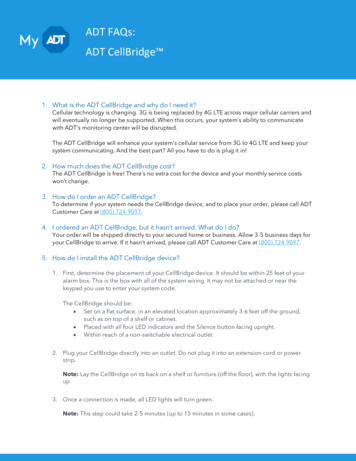
Chhapter 1InntroduuctionThiss Chapter pprovides detailsdof thhe Doorbelll Camera'ss features,commponents aand capabilities.1Paackage CContenttsThee following items are included inn the packaage.1. DoorbellDCCamera x 12. TwoTMountting Brackeets (Small & One ganng-box sizee)3. WoodWScreew/Anchor x 24. GangGBox SScrew x 22DDBC835WirelessWDooorbell Cameera Installation
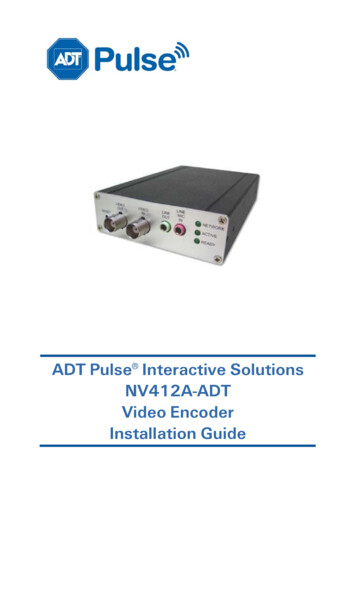
Chapter 1: IntroductionOverviewDBC835 supports both analog and digital chime within AC 8-24 voltage.The operation temperature is –4 F to 122 F. (–20 C to 50 C)(The battery will not be charged when the temperature is 0 C)Figure 1: Front PanelFigure 2: Rear PanelDBC835 Wireless Doorbell Camera Installation3
Chapter 1: IntroductionPhysical DetailsDoorbell/WPSButtonLED Behavior4This button has two functions:1. WPS Pin Code Mode. When pressed and held for0-10 seconds, the doorbell camera will be in theWPS Pin Code mode.Note: When WiFi connection is established, the WPSfunction is disabled.2. Doorbell. Press the button to ring the bell.zOff - No power.zOn (Blue) - Power On / Network connection isavailable.zBlinking (Green). The WPS connection is active.zOn (Red) - If the LED is on for 5 seconds andthen turns off, the WPS function has failed.zBlinking (Red) - Network connection is failed.zSpinning (Green). The firmware is beingupgraded.zIntermittent Blinking (Red) – If the LED isblinking for 2 seconds, means AC power isdisconnected.DBC835 Wireless Doorbell Camera Installation
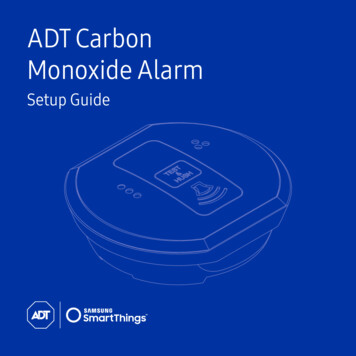
Basic SetupThis section provides information on how to assemble andconfigure the DBC835 Doorbell Camera for enrollment.2Installation1. Power Up and check the LEDTurn on the switch on the rear side of the doorbell camera and wait for20 seconds until the LED turns to flashing red.Note 1: The internal battery usually could last 40 minutes of operation.If you don’t see the camera powering up, please charge the doorbellcamera via Micro USB cable with USB charger for 2 hours beforeinstallation.Note 2: If the LED does not flash red, please hold the reset button for15 seconds to factory default the camera then start the installationprocess over.Figure 3: Power LED2. Enroll the Camera in ADT PulseThis process is described in Chapter 3 ADT Pulse Enrollment.3. Mount the Doorbell CameraMount the camera in its final permanent location. Please refer toChapter 4 Hardware Installation for more details.DBC835 Wireless Doorbell Camera Installation5
ADT Pulse EnrollmentThis section provides instructions for wirelessly enrollingthe DBC835 Doorbell Camera into the ADT Pulse network.This process uses the Wi-Fi Protected Setup (WPS) with PIN methodto wirelessly enroll the HD Camera to the gateway via the ADT PulsePortal or TS Installer App.3Using WPS with PIN to Enroll the Doorbell Camera1. Power up the camera and wait for the LED turning flashing red, asdescribed in the previous chapter.2. Launch an Internet browser and log in to the Pulse portal or TSinstaller app.3. Enter the Manage Devices screen using one of these methods:xFor the Pulse portal, select the System tab and click ManageDevices.xFor the TS installer app, click the following Pulse Devices 0-323/access/signin.jsp4. In the Manage Devices screen, click Cameras.Figure 4: Clicking "Cameras" Button6DBC835 Wireless Doorbell Camera Installation
Chapter 3: ADT Pulse Enrollment5. Click the Add Using WPS button at the bottom of the screen.2Figure 5: Clicking "Add Using WPS" Button6. Locate the camera’s PIN number on the label on the rear of thecamera. Enter the PIN number in the WPS PIN field.Figure 6: Entering the PINDBC835 Wireless Doorbell Camera Installation7
PuChapter 3: ADT Pulse Enrollment7. Press the Ring button, the LED would be turned to blinking green forWPS process.Note: This WPS process must be completed within 2 minutes or elseit will be time out. The remaining time is displayed in the upper leftportion of the screen.8. Click the Continue button to initiate the WPS process.Figure 7: Clicking "Continue" ButtonFigure 8: Add Camera Using WPS Screen8DBC835 Wireless Doorbell Camera Installation
Chapter 3: ADT Pulse Enrollment29. If the doorbell camera is enrolled, the Camera Details screen will bedisplayed. Name the device and select the desired bandwidth & chimertype. Click Save after entering all the data.Figure 9: Saving Camera Details10. The newly-added device will be shown in the Cameras list, then clickGo Back at the top left of the screen.Figure 10: Clicking Go Back ButtonDBC835 Wireless Doorbell Camera Installation9
Chapter 3: ADT Pulse EnrollmentPu11. The Manage Devices screen is displayed. Click Close.Figure 11: Manage Devices Screen12. Click "System" page to check if the device is enrolled already.Figure 12: System Screen13. Move the camera to where the doorbell button is located and checkthe LED to see if the camera still has WiFi connectivity.Note: If the WiFi cannot reach the front doorbell camera, you will seethe power LED kept blinking red. Then a repeater is required or movethe CloudLink/TSS to the center of the house.10DBC835 Wireless Doorbell Camera Installation
Hardwaare InnstallaationThiss section prrovides dettails for wall mountingg of the DBBC835Dooorbell Cammera.4Insstallationat the camera is conffigured andd enrolled in ADTNote: Ensure thaPulse before perrmanently mounting itt.1. Turn off the breaker circuit.FFigure13: Breaker CCircuitA wires. (The(2. Unscrew tthe legacy doorbell and you wil l find two ACrecommennded installlation heigght of the ccamera is abouta120 150cm)Figgure 14: MountingMLoocationDBC835 Wireeless Doorbbell Cameraa Installatioon11
Chapter 4: Hardware Installation3. Choose the mounting bracket to be able to cover the hole of thelegacy doorbell button.Figure 15: Choosing Mounting Bracket4. Use the AC wires from the existing traditional doorbell and connect theAC wires to screw terminals of the bracket.Figure 16: Connecting the AC Wires12DBC835 Wireless Doorbell Camera Installation
Chapter 4:: Hardwaree Installatioon5. Secure thee bracket withw screwss. Please ssee Figuree 17.Note: Inseert the anchhors if necessary.Figure 17: Insstalling thee Screws6. AttachAthe ddoorbell caamera to thhe mountin g bracket. Make suree thedoorbell cammera is firmmly fixed anda workingg properly.Caution: To avoid damaging the rubberr of the pogo pin, pleeasehe camera to the mouunting braccket horizoontally.attach thFFigure 18: AttachingAthet Camerra to the Brracket7. Turn on the breaker circuit.Cif thee chime is workingwnoormally afteer pushing the Ring button.bIf8. CheckAC wires arre not connnected propperly, the rred LED willw blink eveery 5seeconds.Note 1: Pleaase check if the sounnd of chimeer works ass usual. Thhe chimeype could bbe manageed in ADT pulsepenroollment process.tyNote 2: Commpatibility IssueIof diggital chimee models anda if the chimer isnoot working properly, please chaange to Annalog Chimmer.NoteN3: Cheeck WiFi signal and if the poweer LED blinnks red, pleease adda WiFi repeeater or moove the ClooudLink/TSSS to the centercof the house.DBBC835 Wireeless Doorbell Cameraa Installationn13
AppendixChime Compatibility ListChime Compatibility ListUtilitechModel # UT-27103-02UtilitechModel # UT-2735-02UtilitechModel # UT-7574-02IQ AmericaModel # DW-2403AHampton BayModel # HB-7621-02HoneywellModel# RCW102NHoneywellModel# RCW251NNuToneModel# LA100WHNuToneModel# LA126WHHeath ZenithModel# DC3360A 7KLV GHYLFH FRPSOLHV ZLWK 3DUW RI WKH )&& 5XOHV 2SHUDWLRQ LV VXEMHFW WR WKH IROORZLQJ WZR FRQGLWLRQV WKLV GHYLFH PD\ QRW FDXVH KDUPIXO LQWHUIHUHQFH DQG WKLV GHYLFH PXVW DFFHSW DQ\ LQWHUIHUHQFH UHFHLYHG LQFOXGLQJ LQWHUIHUHQFH WKDW PD\ FDXVH XQGHVLUHG RSHUDWLRQ Q\ FKDQJHV RU PRGLILFDWLRQV QRW H[SUHVVO\ DSSURYHG E\ WKH SDUW\ UHVSRQVLEOH IRU FRPSOLDQFH FRXOG YRLG WKH DXWKRULW\ WR RSHUDWH HTXLSPHQW 7KLV GHYLFH DQG LWV DQWHQQD PXVW QRW EH FR ORFDWHG RU RSHUDWLQJ LQ FRQMXQFWLRQ ZLWK DQ\ RWKHU DQWHQQD RU WUDQVPLWWHU (QG XVHUV DQG LQVWDOOHUV PXVW EH SURYLGHG ZLWK DQWHQQD LQVWDOODWLRQ LQVWUXFWLRQV DQG WUDQVPLWWHU RSHUDWLQJ FRQGLWLRQV IRU VDWLVI\LQJ 5) H[SRVXUH FRPSOLDQFH )RU SURGXFW DYDLODEOH LQ WKH 86 &DQDGD PDUNHW RQO\ FKDQQHO a FDQ EH RSHUDWHG 6HOHFWLRQ RI RWKHU FKDQQHOV LV QRW SRVVLEOH 14DBC835 Wireless Doorbell Camera Installation
Appendix A: Chime Compatibility ListRegulatory ApprovalsFCC Statement (US)This equipment has been tested and found to comply with the limits for a ClassB digital device, pursuant to part 15 of the FCC rules. These limits are designedto provide reasonable protection against harmful interference in a residentialinstallation. This equipment generates, uses and can radiate radio frequencyenergy and, if not installed and used in accordance with the instructions, maycause harmful interference to radio communications. However, there is noguarantee that interference will not occur in a particular installation.If this equipment does cause harmful interference to radio or televisionreception, which can be determined by turning the equipment off and on, theuser is encouraged to try to correct the interference by one or more of thefollowing measures:x Reorient or relocate the receiving antenna. x Increase the separation between the equipment and receiver. x Connect the equipment into an outlet on a circuit different from that towhich the receiver is connected. x Consult the dealer or an experienced radio/TV technician for help. To assure continued compliance, any changes or modifications not expresslyapproved by the party responsible for compliance could void the user'sauthority to operate this equipment. (Example - use only shielded interfacecables when connecting to computer or peripheral devices).RF Exposure PartThis equipment complies with FCC RF radiation exposure limits set forth for anuncontrolled environment. This transmitter must not be co-located oroperating in conjunction with any other antenna or transmitter.This equipment should be installed and operated with a minimum distance of20 centimeters between the radiator and your body.DBC835 Wireless Doorbell Camera Installation15
Appendix A: Chime Compatibility ListIC Statement (Canada)This device complies with Industry Canada’s licence-exempt RSSs. Operationis subject to the following two conditions:(1) This device may not cause interference; and(2) This device must accept any interference, including interference that maycause undesired operation of the device.Le présent appareil est conforme aux CNR d’Industrie Canada applicables auxappareils radio exempts de licence. L’exploitation est autorisée aux deuxconditions suivantes :(1) l’appareil ne doit pas produire de brouillage ;(2) l’utilisateur de l’appareil doit accepter tout brouillage radioélectrique subi,même si le brouillage est susceptible d’en compromettre le fonctionnement.This transmitter must not be co-located or operating in conjunction with anyother antenna or transmitter. This equipment should be installed and operatedwith a minimum distance of 20 centimeters between the radiator and your body.Cet émetteur ne doit pas être Co-placé ou ne fonctionnant en même tempsqu'aucune autre antenne ou émetteur. Cet équipement devrait être installé etactionné avec une distance minimum de 20 centimètres entre le radiateur etvotre corps.ExposureThis device meets the exemption from the routine evaluation limits in section2.5 of RSS102 and users can obtain Canadian information on RF exposure andcompliance.Le dispositif rencontre l'exemption des limites courantes d'évaluation dans lasection 2.5 de RSS 102 et la conformité à l'exposition de RSS-102 rf,utilisateurs peut obtenir l'information canadienne sur l'exposition et laconformité de rf.16DBC835 Wireless Doorbell Camera Installation
ADT W perty of ADT is" without w 17ADT LL C o, 800 ADT.A ks and/or r e 835 Pulse ireless Quic, LLC. Info r arranty of a dba ADT S SAP and t h egistered m a Inte DB HD k Inst mation acc u ny kind. ecurity Ser v e product/ s rks. Unau t ractiv C835 Doorb allatio rate as of p u ices. All ri g ervice na m horized us e e Solu ell Ca n Gu .