Transcription
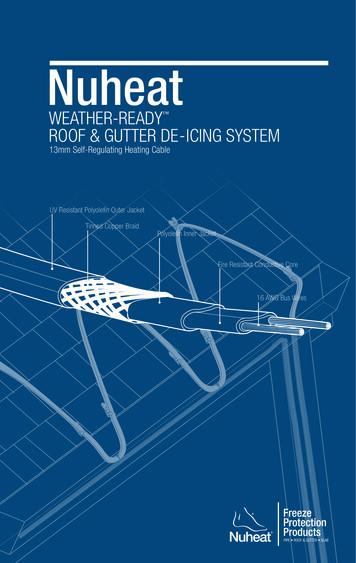
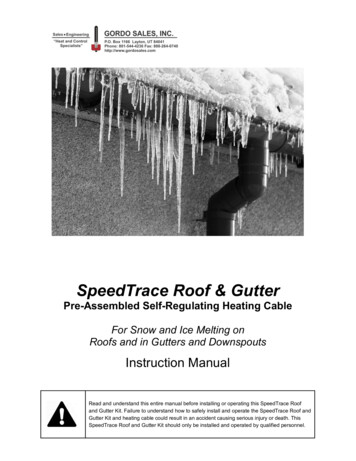
SpeedTrace Roof & GutterPre-Assembled Self-Regulating Heating CableFor Snow and Ice Melting onRoofs and in Gutters and DownspoutsInstruction ManualRead and understand this entire manual before installing or operating this SpeedTrace Roofand Gutter Kit. Failure to understand how to safely install and operate the SpeedTrace Roof andGutter Kit and heating cable could result in an accident causing serious injury or death. ThisSpeedTrace Roof and Gutter Kit should only be installed and operated by qualified personnel.
SpeedTrace Roof & Gutter KitTABLE OF CONTENTSINTRODUCTIONThank you for purchasing a BriskHeat SpeedTrace Roof& Gutter Kit. Your SpeedTrace Roof & Gutter Kit isdesigned to provide a long and efficient service life withfunction, reliability, and safety in mind. For additionalinformation or other BriskHeat products, please contactBriskHeat at 1-800-848-7673 (toll free, U.S. / Canada) or614-294-3376.Introduction .2Safety Alert Symbol .2Important Safety Instructions .3Description .4Kit Contents .4General Requirements.5Electrical Codes . 5Heating Cable Selection .6Installation Introduction .7SAFETY ALERT SYMBOLWhen to Install . 7The symbol above is used to call your attention toinstructions concerning your personal safety. It points outimportant safety precautions. It means “ATTENTION!Become Alert! Your Personal Safety is involved!”Read the message that follows and be alert to thepossibility of personal injury or death.Roof & Gutter Requirements .7Electrical Requirements .7Before Installation . 7Cable Pattern Arrangement & Roof Clip Placement .8Standard Pitched Roof With Gutters . 9Standard Pitched Roof Without Gutters . 10Valleys .11Immediate hazards which WILL result in severe personalinjury or deathStanding Seam Metal & Plastic Roofs . 12Installation Instructions .13Installation of Cable & Roof Clips on Standard Pitched Roofs(With or Without Gutters) .13Hazards or unsafe practices that COULD result in severepersonal injury or deathInstallation of Cable & Roof Clips on Standing Seam Metal orPlastic Roofs .20Installation in Gutters & Downspouts . 22Mark Installation. 24Hazards or unsafe practices that COULD result in minorpersonal injury or property damageCheck Installation . 24Starting the System .24Off-Season/Year-Round Installation & Removal .25General Heating Cable Specifications . 25Detailed Heating Cable Specifications . 25Troubleshooting. 26Warranty .26SAVE THESE INSTRUCTIONS!Additional copies of this manual are available upon request.BriskHeat Corporation. All rights reserved2
SpeedTrace Roof & Gutter KitIMPORTANT SAFETY INSTRUCTIONS A person who has not read and understood all operatinginstructions is not qualified to operate this product. Keep volatile or combustible material away fromheating cable when in use. Use the heating cable only in approved locations. Keep sharp metal objects away from the heatingcable. Failure to observe these warnings may result in electricshock, risk of fire, or personal injury. End User Must Comply to the Following: Only qualified personnel are allowed to connectelectrical wiring. Disconnect all supply power at the source beforemaking any power connections. All electrical wiring must follow local electricalcodes and highly recommend following NEC Article427. Final installation / wiring is to be inspected by theauthority who has jurisdiction in the area where theheating cable is installed. The end-user is responsible for providing a suitabledisconnecting device. The end-user is responsible for providing a suitableelectrical protection device. It is highlyrecommended that a ground fault circuit breaker isused.Never handle the heating cable while it is inoperation; always disconnect the heating cablefrom the power source and allow to cool prior tohandling.Inspect heating cable before use.If spillage of foreign matter onto heater occurs,disconnect from power source and clean afterheating cable has been allowed to cool.Fasten heating cable using approved methodsonly.Do not repair damaged or faulty heating cable.Do not crush or apply severe physical stress onheating cable or cord assembly.Unplug heating cable when not in use.Do not use for other applications.Failure to observe these warnings may result inpersonal injury or damage to the heating cable.Failure to observe these warnings may result inpersonal injury or damage to the heating cable.BriskHeat Corporation. All rights reserved3
SpeedTrace Roof & Gutter KitRead and understand this entire manual before installing or operating this SpeedTrace Roof and Gutter Kit. Failure to understandhow to safely install and operate the SpeedTrace Roof and Gutter Kit and heating cable could result in an accident causing seriousinjury or death. This SpeedTrace Roof and Gutter Kit should only be installed and operated by qualified personnel.DESCRIPTION BriskHeat ’s SpeedTrace Roof & Gutter Kit is designed to melt snow and ice on roofs and in gutters anddownspouts.SpeedTrace Roof & Gutter Kits are available in 50, 75, and 100 foot lengths, and each heating cable comes preassembled with a 30-inch power cord and 120 VAC plug. Kits include roof clips, hanger brackets, and cable ties forinstallation.Automatically adjusts heat output based on surface and ambient temperature.No temperature controller is required.KIT CONTENTSKit Part NumberFFRG15-50FFRG15-75FFRG15-10050 ft75 ft100 ft1-SpeedTrace FFSL1-501-SpeedTrace FFSL1-751-SpeedTrace FFSL1-100305080244UV Resistant Cable Ties5075100Electrical Caution Labels222LengthHeating CableRoof ClipsHanger BracketNeed more hanger brackets? Additional hanger brackets are available. (Two are needed per downspout.) ContactBriskHeat for more information at 1-800-848-7673 (U.S. / Canada) or 1-614-294-3376 (worldwide).Additional items required, but not supplied: RTV Adhesive for Roofs Caulk Gun For Shake or Shingle Roofs: Nails & Hammer OR Screws & a Screwdriver or Drill Pen & Paper ChalkOptional Recommended AccessoriesThe Thermo Cube Thermostatically Controlled Outlet is perfect for worry-free operation all year long. The Thermo Cubeis a device which, when plugged into a standard GFCI 120 VAC (15 amp minimum) electrical outlet, will automaticallyturn power on and off to any device plugged into it. The Thermo Cube will automatically turn on power when airtemperature reaches approximately 35 F (2 C) and will turn off the power when the temperature exceeds approximately45 F (7 C).For more information, please contact BriskHeat at 1-800-848-7673 (U.S. / Canada) or 1-614-294-3376(worldwide).BriskHeat Corporation. All rights reserved4
SpeedTrace Roof & Gutter KitRead and understand this entire manual before installing or operating this SpeedTrace Roof and Gutter Kit.GENERAL REQUIREMENTS FOR ROOF AND GUTTER DE-ICING BriskHeat ’s SpeedTrace Roof & Gutter Kit is designed to melt snow and ice on roofs and in gutters and downspouts.The SpeedTrace Roof & Gutter heating cable will not keep snow or ice from falling off the roof. Snow fences or snowguards should be used to eliminate snow movement.Use the product only as described in this manual.SpeedTrace Roof & Gutter Kits may be used on: Standard pitched roofs with or without a gutter Roofs made from all types of standard roofing materials including: shake, shingle, rubber, tar, wood,plastic, and metal Gutters made from standard materials including metal and plasticNot for use on: Flat roof tops Slate or tile roofs as damage may occur to the roof materialUse of an extension cord is not recommended, but if an extension cord is needed, call your local electrical inspectionagency for a recommendation on the proper outdoor-safe extension cord.Do not install the heating cable underneath any roof covering for roof and gutter de-icing.Install only in accessible locations. Do not install behind walls, ceilings, floors, in insulation, or where the cable couldbe hidden.Do not alter the SpeedTrace pre-assembled heating cable.SpeedTrace heating cable, roof clips, and hanger brackets must be installed properly to ensure proper operation andto prevent the risk of electrical hazard or fire. Follow all design, installation, assembly, and test instructions carefully.Connect only to GFCI 120 VAC (15 amp minimum) outlets that have been installed in accordance with all prevailingnational and local codes and standards and are protected from rain and other water.De-energize all power circuits before installation or servicing.Keep ends of heating devices and kit components dry before and during installation.While using pliers to close clamps on heating cable, heating cable should not be crushed or altered in any way.The cable should not be twisted during installation.Damaged heating cable can cause arcing or fire. Do not energize damaged heating cable. Replace damaged heatingcable prior to applying power.To minimize the risk of fire from sustained electrical arcing if the heating cable is damaged or improperly installed,and to comply with the requirements of national electrical codes, ground-fault equipment protection must be used oneach heating cable branch circuit. Arcing may not be stopped by conventional circuit protection.ELETRICAL CODESFailure to meet these electrical system requirements may result in ice formation or an accident from electrical shock or fire.Articles 422 and 427 of the National Electrical Code (NEC), and Part 1, Section 62 of the Canadian Electrical Code(CEC), govern the installation of SpeedTrace Roof & Gutter Kits and must be followed.Important: For the BriskHeat SpeedTrace Roof & Gutter Kit warranty to be valid, you must comply with all therequirements outlined in these guidelines.All thermal and design information provided here is based upon a standard installation with heating cable on roofs andgutters. For any other application or method of installation, please contact BriskHeat at 1-800-848-7673 (U.S. /Canada), or 1-614-294-3376 (worldwide).BriskHeat Corporation. All rights reserved5
SpeedTrace Roof & Gutter KitHEATING CABLE SELECTION FOR ROOF & GUTTER DE-ICINGUse the table below and the equation to calculate the required heating cable length:Roof edge length (ft) x (feet of heating cable per foot of roof edge in table) Total gutter length (ft) Total downspout length (ft) 1 ftTotal Heating Cable Length Required (If less than the SpeedTrace Roof and Gutter Kit lengths, round up to the nearestcable size.)Example (Standard Roof):Measurements:Roof edge: 15 ftRoof overhang: 1 ftRoof gutter: 15 ftDownspout (at end of circuit): 15 ftEquation:Roof edge: 15 ft x 2 (from table)Roof gutter: 15 ftDownspout: 15 ft 1 ft61 ft, Requires SpeedTrace Roof & Gutter Kit FFRG15-75, 75 ft lengthLength of Cable per Foot of Roof Edge Roof OverhangStandard RoofStanding Seam Roof18” SeamStanding Seam Roof24” SeamNone, *Gutter Required2.0 ft2.5 ft2.0 ft12”2.0 ft2.8 ft2.4 ft24”3.0 ft3.6 ft2.9 ft36”4.0 ft4.3 ft3.6 ftFor standard roofs, add 1 ft of heating cable for each foot of gutter.If the downspout is at the end of a run, add 1 ft of heating cable per foot of downspout.If the downspout is not at the end of a run, you will need to loop the cable down and back up. Double the length ofthe downspout to determine the length of the cable to install.For valleys, run the heating cable two thirds of the way up and down the valley.Heating cable in downspouts should extend below the frost line if tied into a drainage system.If installing the cable in a gutter at the very end of a run, do not allow the end of the heating cable to stick out in theair at the end of the downspout. Instead loop the cable back up the downspout for 1 ft and connect with a cable tie ifpossible.For roof drains leading into a heated area, a loop of heating cable is installed to a typical depth of 3.3 ft.Important: All thermal and design information provided here is based upon a standard installation. For any otherapplication or method of installation, please contact BriskHeat at 1-800-848-7673 (U.S. / Canada) or 1-614-294-3376(worldwide).BriskHeat Corporation. All rights reserved6
SpeedTrace Roof & Gutter KitINSTALLATION INTRODUCTIONRead and understand this entire manual before installing or operating this SpeedTrace Roof and Gutter Kit. Failure to understand howto safely install and operate the SpeedTrace Roof and Gutter Kit and heating cable could result in an accident causing serious injuryor death. This SpeedTrace Roof and Gutter Kit should only be installed and operated by qualified personnel.WHEN TO INSTALLInstall the SpeedTrace Roof & Gutter Kit when the conditions are warm, dry, and safe. The best time to install is inadvance of cold temperatures arriving. Warmer temperatures will also allow standard shingles or shakes to set or resealafter installation.When using an RTV adhesive, follow the application directions provided by the RTV manufacturer. Be sure to allow timefor the RTV to cure and set without being interrupted by inclement weather.ROOF & GUTTER REQUIREMENTSSuitable For: Standard pitched roof with or without a gutterStandard roofing materials including shingle, shake, rubber, tar, wood, metal and plastic roofsGutters made from standard materials including metal and plasticDownspouts made from standard materials including metal and plasticNot Suitable For: Flat roof topsSlate, stone, ceramic, composite (tar and gravel) roofsELECTRICAL REQUIREMENTSFailure to meet these electrical system requirements may result in ice formation or an accident from electrical shock or fire.SpeedTrace Roof and Gutter Kits require a GFCI 120 VAC (15 amp minimum) outlet that is close to the cable startingpoint on the roof and protected from the weather.Use of an extension cord is not recommended, but if an extension cord is needed, call your local electrical inspectionagency for a recommendation on the proper outdoor-safe extension cord.BEFORE INSTALLATION Carefully remove any existing cables, clips, and roof clips from the roof, gutter, and downspouts.Clean the roof, gutter, and downspouts of leaves and other debris.Check the roof, gutter, and downspouts for sharp edges and file them down.Test the heating cable to make sure it’s functioning. Unwind the cable and then plug it in. Wait 5 minutes then touchthe cable. The cable should feel slightly warm to the touch.Unplug the cable before installing.BriskHeat Corporation. All rights reserved7
SpeedTrace Roof & Gutter KitCABLE PATTERN ARRANGEMENT & ROOF CLIP PLACEMENTArrangement for Standard Pitched Roof with Gutter ShownTo save time and ease the installation of the SpeedTrace heating cable, plan the Cable Pattern Arrangement and RoofClip Placement prior to installation. It is recommended to install the cable in areas that are prone to freezing, ice dams,snow build-up, and icicles. Premeasure the length of the roof, gutters, and downspouts.Using this information and the arrangements listed below, sketch the Cable Plan Arrangement and Roof ClipPlacement on paper.After sketching it on paper, it’s recommended that you chalk the roof to match the drawing for easy installation.Plan the pattern for your roof.Choose a Starting PointSelect a starting point for the cable near a power outlet. The outlet should be protected from the inclement weather.BriskHeat Corporation. All rights reserved8
SpeedTrace Roof & Gutter KitSTANDARD PITCHED ROOFS WITH GUTTERS*For use with seamless standard pitched roofs. For standard pitched metal or plastic standing seam roofs, see page 12.Cable Placement: The cable will be installed in a triangular zig-zag pattern with the lower corner points overhanging theedge of the roof into the gutter and almost touching the bottom of the inside of the gutter.Roof ClipClip Placement: Use 1 roof clip at each top corner point of the zig-zag and 2 clips at each bottom corner point.Shake and Shingle RoofsRoof OverhangTracing WidthTracing HeightNone, *Gutter Required24”18”Feet of Cable per Foot of RoofEdge, Not Including Gutter2 ft12”24”18”2 ft24”24”30”3 ft36”24”42”4 ftBriskHeat Corporation. All rights reserved9
SpeedTrace Roof & Gutter KitSTANDARD PITCHED ROOFS WITHOUT GUTTERS*For use with seamless standard pitched roofs. For standard pitched metal or plastic standing seam roofs, see page 12.Cable Placement: The cable will be installed in a triangular zig-zag pattern with the lower corner points overhanging theedge of the roof.Roof ClipClip Placement: Use 1 roof clip at each top corner point of the zig-zag and 2 clips at each bottom corner point.Shake and Shingle RoofsRoof OverhangTracing WidthTracing HeightNone, *Gutter Required24”18”Feet of Cable per Foot of RoofEdge, Not Including Gutter2 ft12”24”18”2 ft24”24”30”3 ft36”24”42”4 ftBriskHeat Corporation. All rights reserved10
SpeedTrace Roof & Gutter KitVALLEYS(Angled areas where two sections of roof meet)Cable Placement: Run the heating cable 2/3rds of the way up and down the valley.Clip Placement: Use 4 roof clips to secure the cable on the valley. Use 2 roof clips at the top corner point on each side ofthe run, and 2 roof clips at the bottom corner point on each side of the run.BriskHeat Corporation. All rights reserved11
SpeedTrace Roof & Gutter KitSTANDING SEAM METAL & PLASTIC ROOFS*For use with pitched metal or plastic standing seam roofs. For use with standard pitched roofs with or without gutters,see pages 9-10.Cable Placement: Run the heating cable along the standing seam to the tracing height specified in the chart below. Thenrun the cable to the edge of the roof. Where the two ends of the cable meet at the base of each seam, they will beconnected with a cable tie as shown.Cable TieClip Placement: Use 2 roof clips at the top corner points and 2 roof clips at the lower bottom corner points along thestanding seam. Where the 2 ends of the cable meet at the base of each seam, they will be connected with a UVresistant cable tie.Standing Seam Metal or Plastic Roofs**Roof OverhangTracing WidthTracing HeightNone, *Gutter Required18”18”Feet of Cable per Root of RoofEdge, Not Including Gutter2.5 ft12”18”24”2.8 ft24”18”36”3.6 ft36”18”48”4.3 ftNone, *Gutter Required24”18”2.0 ft12”24”24”2.4 ft24”24”36”2.9 ft36”24”48”3.6 ft**No additional heating cable is required for gutter when tracing standing seam metal roofs.BriskHeat Corporation. All rights reserved12
SpeedTrace Roof & Gutter KitINSTALLATION INSTRUCTIONSRead and understand this entire manual before installing or operating this SpeedTrace Roof and Gutter Kit. Failure to understandhow to safely install and operate the SpeedTrace Roof and Gutter Kit and heating cable could result in an accident causing seriousinjury or death. This SpeedTrace Roof and Gutter Kit should only be installed and operated by qualified personnel.Choose a Starting PointSelect a starting point for the heating cable near a GFCI 120 VAC (15 amp minimum) power outlet. The outlet should beprotected from inclement weather.Draw Diagram of the Cable Plan Arrangement and Roof Clip PlacementUsing the roof, gutter, and downspout measurements and the arrangements listed previously, sketch the cablearrangement and roof clip placement on paper.Mark the Roof with ChalkAfter sketching it on paper, it’s recommended that you mark the roof with chalk to match the drawing for easy installation.The markings should indicate where the cable and roof clips will need to be installed.INSTALLATION OF CABLE & ROOF CLIPS ON STANDARD PITCHED ROOFS(WITH OR WITHOUT GUTTER)*For use with seamless standard pitched roofs. For standard pitched metal or plastic standing seam roofs, see page 20.Items Needed: Roof ClipsSpeedTrace Heating CableRTV Adhesive for RoofsCaulk GunNails & Hammer OR Screws & a Screwdriver or DrillHanger Brackets if Roof has a GutterInstall the roof clips according to the Cable Pattern Arrangement and Roof Clip Placement diagram and chalk markingson the roof.NOTE: Roof clips are NOT for use on slate, stone, ceramic, or composite (tar and gravel) roofs.BriskHeat Corporation. All rights reserved13
SpeedTrace Roof & Gutter KitShingle/Shake InstallationRoof clips may be attached to a shingle or shake roof using RTV adhesive and nails or screws.1. Determine the heating cable layout and clip placement according to the Cable Pattern Arrangement and Roof ClipPlacement.2. Following the RTV adhesive manufacturing instructions, apply RTV adhesive appropriate for your roof, to the backside of the roof clip where the nail or screw will be used.3. Orient the clip as needed on the roof. Place the roof clip on the roof where the roof is marked. Press down on theclip so that the adhesive flows through the holes. The cable insertion clamp should be vertical on the roof. Attachthe clip to the roof using a nail or a screw.BriskHeat Corporation. All rights reserved14
SpeedTrace Roof & Gutter Kit4. Apply the sealant on top of the nail or screw heads.5. Allow the RTV adhesive to cure and dry before installing the cable. Refer to the RTV adhesive instructions for thecure time of the adhesive used.6. Repeat this process. Wait for all of the adhesive on the roof clips to cure before continuing with the installation ofthe cable.7. After the RTV adhesive has cured, install the heating cable between the clip clamps following the Cable PatternArrangement and Roof Clip Placement diagrams. Use pliers to close the clamps gently around the heatingcable. Do not crush the heating cable.8. Run the cable from the starting point and use a roof clip to connect the cable to the edge of the roof.9. If chalk lines were made, follow the chalk lines in the standard zig-zag pattern and attach the cable to the roof withthe roof clips. The lower corner points of the cable should hang over the edge of the roof. Note: If the roof has agutter, make sure the lower corner points of the zig-zag touch the bottom of the inside of the gutter.10. Continue installing the cable according to the specified zig-zag pattern.The cable should be installed as shown:BriskHeat Corporation. All rights reserved15
SpeedTrace Roof & Gutter KitShake and Shingle RoofsRoof OverhangTracing WidthTracing HeightNone, *Gutter Required24”18”Feet of Cable per Foot of RoofEdge, Not Including Gutter2 ft12”24”18”2 ft24”24”30”3 ft36”24”42”4 ftIf the Standard Roof Has a GutterAt the end of the zig-zag pattern, run the cable back through the gutter towards the direction where you started. Thecable should be lying along the bottom of the gutter. When running the cable back through the gutter, use a UV-resistantcable tie to connect each bottom lower corner point to the cable running in the gutter. This will help ensure a drainagechannel off of the roof and into the gutter and downspout.Cable TieBriskHeat Corporation. All rights reserved16
SpeedTrace Roof & Gutter KitDownspout Hanger Bracket InstallationItems Needed: 2 Hanger Brackets Per DownspoutSpeedTrace Heating Cable2 Cable Ties Per Hanger BracketWhen running the cable down the downspouts, use hanger brackets to easily suspend the cable into the downspout,ending the run below the freezing level.Cable TiesHanger BracketTwo Hanger Brackets are used in each downspout to protect and provide stability to the heating cable. If you need moreHanger Brackets for additional downspouts, contact BriskHeat for more information at 1-800-848-7673 (U.S. / Canada)or 1-614-294-3376 (worldwide).1. Bend the hanger bracket to 90 degrees. Position the bracket next to the heating cable and insert cable tiesthrough the bracket holes.BriskHeat Corporation. All rights reserved17
SpeedTrace Roof & Gutter Kit2. Tighten the cable ties to secure the cable. Trim off the excess ends of the ties. Do NOT cut the heating cable.3. Make a “U’ in the cable so the cable goes down the downspout and comes back up to complete the run along theremainder of the gutter.4. Insert the “U” cable into the downspout.5. On the loose end of the cable, connect it to the second hanger bracket as shown in steps 1 and 2.6. Position the hanger brackets in the center and on the edge of the downspout to prevent damage and to supportthe heating cable.7. Continue running the cable according to the Cable Pattern Arrangement.Note: If installing the cable in a gutter at the very end of a run, do not allow the end of the heating cable to stick out in theair at the end of the downspout. Instead loop the cable back up the downspout for 1 ft and connect with a cable tie ifpossible.Cable TieBriskHeat Corporation. All rights reserved18
SpeedTrace Roof & Gutter KitIf the Standard Pitched Roof Does Not Have a Gutter: The lower corner points of the cable should hang overthe edge of the roof. At the end of the run, install the cable so that the end of the cable is hanging off the edge of the roofby 2-3”.2-3”BriskHeat Corporation. All rights reserved19
SpeedTrace Roof & Gutter KitINSTALLATION OF CABLE & ROOF CLIPS ON STANDING SEAM METAL OR PLASTIC ROOFS*For use with standard pitched metal or plastic standing seam roofs. For seamless standard pitched roofs, see page 13.Items Needed: Roof ClipsSpeedTrace Heating CableRTV Adhesive for RoofsCaulk GunInstall the roof clips according to the diagram and chalk markings on the roof.NOTE: Roof clips are NOT for use on slate, stone, ceramic, or composite (tar and gravel) roofs.Standing Seam Metal or Plastic Roof InstallationRoof clips may be attached to a metal or plastic roof using an RTV adhesive.1. Determine the heating cable layout and clip placement according to the Cable Plan Arrangement and Roof ClipPlacement.2. Select the appropriate adhesive. We recommend selecting an adhesive specifically made for outdoor use onroofs.3. Following the RTV adhesive manufacturing instructions, apply RTV adhesive appropriate for your roof, to the backside of the roof clip.BriskHeat Corporation. All rights reserved20
SpeedTrace Roof & Gutter Kit4. Orient the clip as needed on the roof. Place the roof clip on the roof where the roof is marked. Press down on theclip so that the adhesive flows through the holes. The cable insertion clamp should be vertical on the roof.5. After the RTV adhesive has cured, install the heating cable between the clip clamps following the Cable PatternArrangement and Roof Clip Placement. Use pliers to close the clamps gently around the heating cable. Do notcrush the heating cable.6. Run the cable from the starting point and use a roof clip to connect the cable to the edge of the roof.7. If chalk lines were made, follow the chalk lines in the standing seam cable pattern and attach the cable to the roofwith the roof clips. Run the heating cable along the standing seam to the tracing height specified in the chartbelow.Standing Seam Metal or Plastic Roofs**Roof OverhangTracing WidthTracing HeightNone, *Gutter Required18”18”Feet of Cable per Foot of RoofEdge, Not Including Gutter2.5 ft12”18”24”2.8 ft24”18”36”3.6 ft36”18”48”4.3 ftNone, *Gutter Required24”18”2.0 ft12”24”24”2.4 ft24”24”36”2.9 ft36”24”48”3.6 ft**No additional heating cable is required for gutter when tracing standing seam metal roofs.Note: The lower corner points of the cable should hang over the edge of the roof.BriskHeat Corporation. All rights reserved21
SpeedTrace Roof & Gutter Kit8. Use 2 roof clips at the top corner points and 2 roof clips at the lower bottom corner points along the standingseam. Where the 2 ends of the cable meet at the base of each seam, they will be connected with a UV-resistantcable tie.The cable should be installed as shown:9. Continue installing the cable according to the standing seam cable pattern.10. Run the cable through the gutter. The cable should be lying along the bottom of the gutter.INSTALLATION IN GUTTERS & DOWNSPOUTSItems Needed: 2 Hanger Brackets Per DownspoutSpeedTrace Heating Cable2 Cable Ties Per Hanger BracketDownspout Hanger Bracket InstallationWhen running the cable down the downspouts, use hanger brackets to easily suspend the cable into the downspout,ending the run below the freezing level.Cable TiesHanger BracketTwo Hanger Brackets are used in each downspout to protect and provide stability to the heating cable. If you need moreHanger Brackets for additional downspouts, contact BriskHeat for more information at 1-800-848-7673 (U.S. / Canada)or 1-614-294-3376 (worldwide).BriskHeat Corporation. All rights reserved22
SpeedTrace Roof & Gutter Kit1. Bend the hanger bracket to 90 degrees. Position the bracket next to the heating cable and insert cable tiesthrough the bracket holes.2. Tighten the cable ties to secure the cable. Trim off the excess ends of the ties. Do NOT cut the he
Roof gutter: 15 ft. Downspout (at end of circuit): 15 ft. Equation: Roof edge: 15 ft x 2 (from table) Roof gutter: 15 ft. Downspout: 15 ft 1 ft _ 61 ft, Requires SpeedTrace Roof & Gutter Kit FFRG15-75, 75 ft length. Length of Cable per Foot of Roof Edge For standard roofs, add 1 ft of heating cable for each foot of gutter.