Transcription
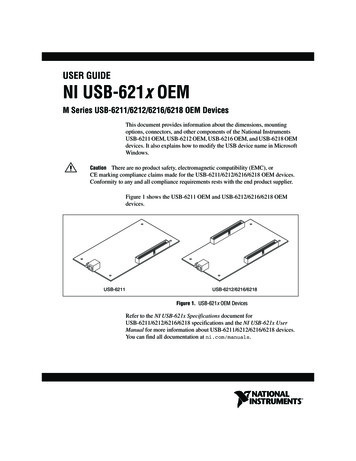
Setup GuidePosi 3 USBComputerized Performance Testerfor Air-Supplied Breathing ApparatusHoneywell Analytics, Inc.405 Barclay BlvdLincolnshire, IL 60069(800) 711-6776FAX (800) 995-4992www.honeywellanalytics.com23 April 2015 P/N 13-348Version 5
The Posi 3 USB Computerized SCBA Test Bench has beendesigned to evaluate the performance of Self Contained BreathingApparatus and other types of respiratory protective equipment.In order to ensure that performance evaluations are conductedand recorded properly, it is essential that the instructions in thismanual be read, fully understood, and followed.Copyright 2015byHoneywell Analytics, Inc.All rights reserved.No page or part of this operation manual may be reproduced in any form withoutwritten permission of the copyright owner shown above.All rights reserved to correct typographical errors.1
TABLE OF CONTENTSSignal Words . 3Warnings and Cautions . 31.Overview . 41.11.21.31.4Installation Overview .4Note on Brand-Specific Software . 4Calibration Requirement .4Software License .52.Out of the box . 53.PC Requirements . 53.1Software .5Hardware .54.Software . 54.1Software Installation.5Database Setup .74.2 Advanced Server Installation . 11Postgre Client Access Settings. 145.Hardware Setup . 165.15.25.35.46.Installing the test head . 16Connect the Posi 3 USB to the PC. 17Turn on the power . 17Install the microphone (optional) . 17Launch the Software . 186.1Pre-Test Requirements . 186.2Initial Login. 186.3Set up a User Account . 196.3.1 User Permission Levels . 196.3.2 Create a New User . 196.3.3 Edit User Data . 206.4Add Apparatus Models . 206.5Add New Serial Number. 226.6Import Serial Numbers . 237.Connect the breathing apparatus to the Posi 3 USB. . 247.1Identify the major parts. 25Brand and Model-Specific Parts . 257.2Attach the Facepiece . 257.3Attach the high or low pressure manifold . 257.4Attach the first stage manifold . 26Appendix A: Operating Ranges . 272
Signal WordsThe following signal words, as defined by ANSI Z535.4-1998, areused in the Posi 3 USB Setup Guide.indicates an imminently hazardous situationwhich, if not avoided, will result in death or serious injury.indicates a potentially hazardous situationwhich, if not avoided, could result in death or serious injury.indicates a potentially hazardous situation, whichif not avoided, may result in moderate or minor injury.CAUTION used without the safety alert symbol indicates apotentially hazardous situation which, if not avoided, may resultin property damage.Warnings and CautionsDo not open the Posi 3 USB’s case while it is powered up.Contact with the Posi 3 USB’s powered internal circuitry may lead to deathor serious injury.SCBA Cylinders are under considerable pressure. Alwaysfollow the manufacturer’s recommendations for proper handling whenworking with compressed air cylinders. Failure to follow the manufacturer’srecommendations may lead to death or serious injury.Replace the AC mains line cord ONLY with a cord havingelectrical ratings equivalent to those of the line cord supplied with the unit.3
1.21. OverviewThe Posi 3 USB is a computerized test benchdesigned to evaluate the performance of acompletely assembled self-containedbreathing apparatus (SCBA) and other typesof air-supplied respiratory protectiveequipment.The Posi 3 USB is the standard tester forevery major brand of SCBA. Most SCBAmanufacturers offer brand-specific softwarethat personalizes the Posi 3 USB for thatparticular brand of SCBA.Users who plan to service their own SCBAmust purchase brand-specific software, whichis available directly from the SCBAmanufacturer. Brand-specific softwareincludes all relevant data on themanufacturer’s current models and alsoincludes the manufacturer’s first stagepressure requirements. Standard Posi 3 USBSoftware does not provide pass/fail tolerancesfor first stage performance.This Setup Guide is designed to provide theuser with step-by-step instructions for theinitial setup of the Posi 3 USB.Instructions for running tests are contained inthe Posi 3 USB Help File.1.1Note on Brand-SpecificSoftwareInstallation OverviewPrior to performing tests, the following itemsmust be accomplished:Brand-specific software is planned for mostmanufacturers. Currently the following OEMversions of software are available: Honeywell Safety Products U.S. MSA Dräger ISI Interspiro ScottHoneywell Analytics expects to release otherOEM versions in the near future.In most cases, the SCBA manufacturer willprovide a model-specific adapter for themedium pressure connection.Use of the first stage manifold inconjunction with brand-specific softwareallows the user to test specific breathingapparatus to the tolerances specified bythe SCBA manufacturer and allows theuser to easily isolate problem components.1. Remove the Posi 3 USB and theaccessories from the shipping cartonsand verify that all parts are present. Seesection 2 for the complete parts list.Do not discard the shipping cartons andpacking materials – they are necessaryfor returning the Posi 3 USB to HoneywellAnalytics for its annual calibration.2. Verify that your PC meets the OS andhardware requirements as described insections 3.1 and 3.2 below.3. Install the software (see section 4 below).4. Attach the head, plug in the Posi 3 USBand connect the PC to the Posi 3 USB.Then turn the Posi 3 USB on (seesection 5 below).5. Launch the software (see section 6below). If this is the initial use of thesoftware, “Setup” is both the user nameand the password for the initial openingof the software.1.36. Create a user that has the rights tocreate and modify apparatus data in thesoftware. (see section 6.2)Calibration RequirementThe Posi 3 USB must be calibrated annuallyto maintain the accuracy of the internaltransducers. Calibration must be performedeither by Honeywell Analytics, or by aHoneywell-authorized repair facility.7. Enter information about the breathingapparatus models into the software. Thissection can be disregarded by users withmanufacturer-specific software. Seesection 6.3.Posi 3 USB units located in North Americamust be returned to the HoneywellAnalytics factory annually for calibration.Contact Honeywell Analytics for a ReturnAuthorization Number (RA#) prior toreturning the Posi 3 USB.8. Assign the serial number of the breathingapparatus to the model/apparatus infothat was created.9. Attach the breathing apparatus to thePosi 3 USB (see section 7 below).(800) 711-6776 or Fax: (800) 995-499210. Perform Tests. See the Posi 3 USB HelpFile for further information about testing.4
1.4Software License3. PC RequirementsEach copy of Posi 3 USB Software islicensed to the user who purchased it. Thename of the registered user will appearduring the software installation procedure.3.1SoftwareThe Posi 3 USB Software has the followingOS requirements: The license information may be viewed atany time through the Help - About screen.Windows XP to Windows 7, 32 or 64bit. For versions above Windows 7,see the label on the software CD orcontact the factory.In order to install the software, the softwareinstaller must log on as system administrator.The software license information is stored inthe record of each breathing test that isperformed, and will be displayed on thebreathing test results when printed.HardwareMake sure that yourcomputer system meets the minimumrequirements prior to attempting to installor use Posi 3 USB Software. Inadequatesystem resources may prevent thesoftware from operating properly on yoursystem. The minimum specifications forthe computer used to run Posi 3 USBSoftware vary according to the operatingsystem used. 2. Out of the box The Posi 3 USB is delivered with thefollowing items: Posi 3 USBHead Assembly (w/attached Tygon tube)Low Pressure Manifold*High Pressure Manifold*First Stage Manifold*Head Gasket4 Standoffs4 Tightening KnobsCD-ROM with BA Test SoftwareSetup GuideQuick Start GuideUSB CablePower Cable3 High Pressure Manifold ReplacementO-Rings*3 Low Pressure Manifold ReplacementO-Rings*High Pressure Manifold ReplacementHex-Head Screw*Spare Fuses (2)Microphone (optional)Pentium 4 processor 2.0 GHz orhigher512 MB RAM50 MB hard drive spaceUSB 2.0 PortCD ROM drive (for installation ofsoftware)4. Software4.1Software InstallationAll Posi3 USB software end users must havepermission to modify the following areas ofthe PC:1. The registry sectionHKEY LOCAL MACHINE\SOFTWARE\Sperian\Posi3USB and all itssubsections.2. The folder location C:\ProgramFiles\Sperian\Posi3USB and all itssubfolders.It may be necessary to contact your ITdepartment so they can provide you with thenecessary access.Disabling any anti-virus software on the PCwill significantly increase the speed of theinstallation.* not included with the internal manifoldEuropean Model.5
Note: Copies of the most recent Posi 3USB reference materials are included inthe software installation. Onceinstallation is complete, the latest Posi 3USB Manual will be located on the PC’shard drive under C:\ Program Files \Sperian \ Posi3USB \ Standard.1. To install your Posi 3 USB software placethe CD-ROM into your computer’s CDtray and close the tray. If the softwareinstallation fails to launch, use WindowsExplorer to locate the CD-ROM drive andrun the “BATestSetup.exe” program.The following three screens will beshown in succession.3. The software will recommend closingout all existing Windows Programs tostreamline the installation. Click“Next”. 4. At the Software’s End User LicenseAgreement screen click Yes to acceptthe terms. Click No to end theinstallation. 5. The Posi 3 USB Software is loaded intothe destination folder a C:\ Program Files\ Sperian \ Posi3USB \ Standard \ BATest. Click “Next” to continue.2. Click “Done”.6
The Select Components screen allows theuser to install the PostgreSQL databaseserver without installing the Posi 3 USBSoftware. The checkbox to install the Posi 3USB BA Test Software is selected by default.Most users will leave the checkbox selected.To install the PostgreSQL database serveronly, uncheck the box.6. Click “Next” to continue.8. Click Finish.Database SetupThe database setup screen has already beenlaunched. If the database setup screen isminimized, click the icon on the task bar tomake it visible.Help is available during the databasesetup procedure. Press the F1 key at anytime to view the Help File for this section.Note: Administrator-level system accessis required to implement some of thechanges necessary to install thePostgreSQL database server. Do notbegin the installation withoutadministrator-level system access.7. Click “Next” to begin the installation.A note to save your original shippingcontainer will be shown. At the time thismanual was written, the minimum cost toreplace the cardboard box for the Posi 3 USBis 50 plus shipping.9. Click “Next”.The software will prompt to either install adatabase server or log on to an existingserver. (If the server has already been7
installed on this PC, the option to install theserver will be "grayed out" and unavailable.)11. Click “Next”The Server Installation Type selection screenwill be shown.10.To connect to a server that is alreadyinstalled on a different PC, select "Connect toexisting server". Otherwise select “Install anew PostGre Server” at left.The Posi 3 USB Database Install Wizardgives you two options for the database serverinstallation:Occasionally a network firewall will preventthe database service from starting properly.The wizard will automatically test the firewallwhen the Choose Server Installation screenis launched. If an error message is shownthat indicates there is a problem with thefirewall, contact your network administratorfor help in resolving the problem. Click the"Firewall Test" button on the Choose ServerInstallation screen to test the firewall aftermaking changes.The Basic Installation installs the server onyour PC with default settings and can beused in most cases. Most of the options canbe changed after the installation is completeby changing the client access settings, asdescribed in section 4.2.The Advanced Installation allows the userto choose a number of configuration settingsduring the installation process and is requiredto allow remote client access to the databaseover a network.When the firewall test is done, WindowsVista will automatically launch a security alertscreen to allow you to unblock the firewall forthe installation.Note: The PostgreSQL AdvancedInstallation Instructions begin in section4.2 and should be read thoroughly beforestarting the advanced installation. Only ITProfessionals should perform theAdvanced Network Installation.In Vista, click "Unblock" in order to install thedatabase server.Note: If your network is set up so thatnew users are automatically grantedadministrative rights, do not proceed.You must access the Windows ControlPanel followed by User Accounts andcreate a new user manually withoutadministrative rights for AdvancedNetwork Installation.12.Select the type of installation. Mostusers will select the Basic Installation. TheAdvanced Network Installation should onlybe performed by IT Professionals.Basic PostgreSQL Database ServerInstallation8
13. Click Install.Once the server installation is complete andthe connection is established, the softwarewill prompt for server selection and install themodels database. If using the databaseserver that was just installed, it will beselected automatically.For the basic server installation, the onlychoice required is the Service Account name.The Service Account is a user account that isset up by the server installation on the PC tobe used by the PostgreSQL server. ThePostgreSQL installation requires that theService Account must not have administratorrights over the computer.A default value of "bio1" is automaticallyentered for the Service Account name. Thisname can be changed, but the user accountmust be new and must not already exist onthe PC.15. Click “Next” to continue.Once the models database is installed, thesoftware will prompt to install the test resultsdatabase.14. Enter the name of the Service Accountand press OK.16. Click “Next” to continue.A number of screens will be shown as theInstallation proceeds. During the BasicInstallation, the database server will beinstalled on the PC with the default values.The software will then prompt for theselection of the PostGreSQL Server for thedatabase that will be used to store testresults.Please note that the server installation is aseparate application. If you switch to otherapplications while it is installing, it maybecome hidden behind the databaseinstallation wizard or another application.Do not continue with the databaseinstallation wizard until the databaseserver installation is complete.17. Click “localhost” unless a different serverwill be used. Then click “Next”.9
Once the connection is established, thesoftware will prompt you to choose optionsfor the test results database.18. Click “Next” to continue.21. Follow the instructions, and then closethe help window.19. Select “Install a NEW test resultsdatabase” and click “Next”.22. Click the Finish Button to complete theinstallation.The software will then prompt for the name ofthe test results database.The software automatically displays a printdialog box with the option to print theInstallation Log. The Installation Logcontains detailed information related to thePostGreSQL database server, the testresults database and the models database.A printed copy of the Installation Log may behelpful if any problems occurring during therest of the installation.20. Name the test results database and clickOK.USB Driver InstallationThe section of the Posi 3 USB Help File willbe shown detailing the installation of the USBdrivers.Note: The USB Driver must be installed priorto running the software. The USB Driver isrequired to establish communication betweenthe PC and the Posi 3 USB.23. Click OK to print.The Installation Log is also saved to the localhard drive at the address given on thescreen.10
Installation Types (section 4.1 step 11) andclick Install.24. Click OK to continue.25. The PC must be restarted to completethe software installation. Press OK tocontinue and restart the PC. ClickCancel to return to Windows.Some network domains are set up so thatsystem policies are only enforced on startup.Restarting the PC finalizes all settings thathave been changed during the installation.Select the language that will be used duringthe installation and click "Start" to begin.This concludes the basic software setup.4.2Advanced Server InstallationThe advanced database server installationallows the user to customize the installationprocess and is required if errors occur duringthe basic server installation procedure or ifremote client access to the database isrequired over a network.Most of the options can be changed after theinstallation is complete by changing the clientaccess settings. See section 4.3 forinstructions.Note: If your network is set up so thatnew users are automatically grantedadministrative rights, do not proceed.You must access the Windows ControlPanel followed by User Accounts andcreate a new user manually withoutadministrative rights for AdvancedNetwork Installation.Close out all Window programs except thePosi 3 USB installation and Help Files, theDatabase Installation Wizard, and thePostgreSQL installation wizard.To perform the Advance Network Installation,choose the Advanced option from the ServerThe PostgreSQL Installation Notes containinformation on the legal status of thePostgreSQL software, and a link to the FAQ(Frequently Asked Questions) section of thePostgreSQL installer website. For those notClick "Next".11
familiar with this type of installation, readingthis material is recommended.The Service Account is a Windows UserAccount that is set up on the PC to be usedby the PostgreSQL server.Click "Next" to proceed to InstallationOptions.The service configuration screen allows theuser to enter an account name and passwordthat will be used for the Service Account.The Service name and Account domain areautomatically filled in, and should be leftunchanged unless a user account for thePostgreSQL Server has already been set up.In this case enter the User Account nameand password to access the account.To have the installation set up the account,leave the default account name of “postgres”,or enter another account name of yourchoice. If a new account is being created,the password may be left blank and theinstallation will automatically generate one.The Installation Options window allows theuser to choose the locations for the variouscomponents of the database server. Thescreen defaults to choosing the location forall components of PostgreSQL, which isindicated by highlighting "PostgreSQL" in thetree view pane. The current locationselected is shown below the tree view. Tochange the location, click the "Browse"button and navigate to the new location.Note: Some networks are set up so thatnewly created users receiveadministrative rights by default. If yournetwork is set up this way, you must setup a new user account that will be usedas the service account manually and limitthe system rights so that the PostgreSQLaccount does not have administratorrights.Click "Next" to proceed.PostgreSQL recommends installing allcomponents of the database server to thesame location.The following two screens may be showndepending on the configuration of yournetwork and your password choice.Honeywell Analytics recommendsinstalling the database server to anetwork location that is scheduled forregular system backups to prevent theaccidental loss of data. For moreinformation on network storage, consultyour IT department.Click "Yes" to create the new account.Click Next to continue to the ServiceConfiguration screen.Click "Yes" to have the system create arandomly generated password.Initialize database cluster12
In order to allow database access fromexternal addresses (clients on differentcomputers), click the checkbox next toAddresses.When the selections on the database clusterscreen are complete click "Next" to continue.At the Locale drop down box, select theappropriate locale.The following message will appear. See thesection on Client Access Settings for moreinformation.The Procedural Language settings will thenbe shown.At the Encoding drop down box, change thedefault SQL ASCII to UTF-8.The database cluster Superuser is usedinternally by the database server, and is notthe service account. (The default names thatthe PostgreSQL installation chooses for theservice account and the superuser are thesame, which can be confusing.)Select "PL/pgsql" and click "Next".Choose a password. It is very important toremember the password entered on thisscreen, as it will be used later in thisinstallation.PLEASE WRITE THE PASSWORD DOWNHERE FOR FUTURE REFERENCE.PASSWORD:13
Select Admin81 only and click “Next”.Once the installation is complete, click"Finish" to return to the Database InstallationWizard.Click "Next" to proceed with the installation.Postgre Client Access SettingsThe database server's client access settingscontrol access to the database when it islocated on a network with multiple users.PostgreSQL's client access settings must beconfigured prior to use. This is doneautomatically in the basic server installation,but must be done manually when theadvanced server installation is used.The client access setting can be changed atany time by following this procedure.The PostgreSQL database is configuredthrough the pgAdmin III application located atPrograms / PostgreSQL 8.1 / pgAdmin III.If Antispyware is installed on the PC, thefollowing notice may be shown. Pleasedisregard this notice.Once the application launches, the followingscreen will be shown.In the left pane under the Server List, doubleclick on "PostgreSQL Database Server 8.1".14
Enter the password that was entered for thecluster Superuser in the advancedinstallation. For those who performed thebasic installation, the password is"biosystems".Click OK. The server information screen willthen be shown.In the "Backend Configuration Editor",double-click on "listen addresses" to accessthe configuration settings for listenaddresses.From the Tools Menu select ServerConfiguration / postgresql.conf to access thePostgreSQL backend configuration settings.Click on the "Enabled" box. The default entryfor the Value input box is "localhost". To limitthe database access to the host PC, thesetting should be "localhost".To grant client access to clients that are NOTon this PC, the value should be changed toan asterisk ("*"). The asterisk setting allowsthe PC that is creating the database tocontinue to access the database along withthe listen addresses that will be specified inthe Client Access Configuration screen.The "Backend Configuration Editor” screenwill be shown.Click OK and return to the main pgAdmin IIIscreen.The “Backend Access Configuration” mustalso be changed for other clients to haveaccess.15
for the client (external) to access thedatabases (internal).To set up client access, first click on thecheckbox next to "Enabled".For more information about the choices inany of the drop-down boxes, click the Helpbutton.The "Type" setting should be "host", althoughother settings are available.Under "Database", select the database thatshould be accessible by the client, or leave itset to "All". To limit the client's access toonly the PostgreSQL database(s), select"postgres".From the “pgAdmin III” screen, access theTools menu and select Server Configuration /pg hba.conf to access the Backend AccessConfiguration Editor.Under "User", enter a specific user accountname or user group as the network wouldrecognize it.Enter the IP Address filter for the user or usergroup. See the Posi 3 USB Installation helpfile for more information and examples orconsult your IT department.Three options will be shown the first time thisscreen is launched after installation. Thecheckbox at the left of each option indicateswhether or not it is enabled. The first twooptions may or may not be enabled,depending on network configuration. Do notchange them. The unchecked, final optionwill be configured for the Posi 3 USBsoftware's client access.Honeywell Analytics recommends that"Method" be set to "md5".Once Client Access is properly configured,click the Close “X” button to close theBackend Access Configuration Editor.Software installation is now complete.5. Hardware Setup5.1Installing the test headThe test head must be mounted to the top ofthe Posi 3 USB chassis. A gasket installedbetween the top of the bellows assembly andthe bottom of the test head guards againstleakage. A Tygon tube connects the staticpressure port located in the left eye of thetest head with a hose barb fitting on thebellows chamber base plate. The head issecured by four mounting standoffs and fourtightening knobs.Double-click the bottom option to configurethe client access settings.To install the test head on the Posi 3 USBchassis:1. Make sure the base of the testhead, gasket, and bellowschamber inlet area (where thetest head will be mounted) areclean and free of dust and/orother contaminants.The client access configuration windowallows the user to control access to the Posi3 USB databases through the PostgreSQLdatabase server. The settings allow the userto specify the parameters that need to be met2. Screw the four standoffs intoplace at the top of the Posi 3 USBchassis by hand until they are16
tight. No tools are necessary. Do notover tighten! The hexagonal standoffsmay have an arrow etched into one ofthe sides. The arrow on the standoffshould be pointing upwards when thestandoff is properly positioned.5.2Connect the Posi 3 USB to thePCThe Posi 3 USB is connected to the PC viaUSB cable. Once the software is installedand the Posi 3 USB is assembled, use theUSB cable to attach the Posi 3 USB to thePC.3. Center the head gasket into position onthe bellows chamber inlet between thestandoffs.5.3Turn on the powerTo turn the Posi 3 USB on, simply plug thepower cord of the Posi 3 USB into agrounded outlet and flip the rocker switchlocated on the rear panel of the Posi 3 USBchassis.Note: Honeywell Analytics recommendsthat the Posi 3 USB be plugged into asurge protector. Failure to use a surgeprotector may lead to sporadic loss ofcommunication between the Posi 3 USBand the PC.Do not attach thepressure-reducing manifold, or mount anSCBA facepiece on the test head prior toturning the Posi 3 USB on. Doing so priorto completion of the electronic self testand startup sequence may result indamage to the Posi 3 USB and/orincorrect test data.The USB Drivers must be installed prior tolaunching the Posi 3 USB software. TheUSB driver installation is covered in section4.1 above (see st
Setup Guide . Posi 3 USB . Computerized Performance Tester . for Air-Supplied Breathing Apparatus . Honeywell Analytics, Inc. 405 Barclay Blvd . Lincolnshire, IL 60069