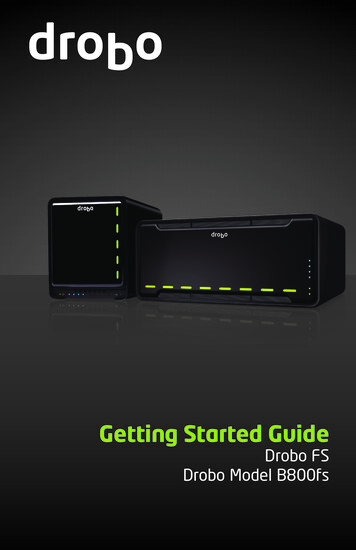
Transcription
Page 1 of 33
Drobo, Inc. supports lawful use of technology and does not endorse or encourage the use of its products for purposes otherthan those permitted by copyright law.Copyright 2016 Data Robotics, Inc. Data Robotics, Drobo, DroboShare, DroboPro, DroboElite and BeyondRAID aretrademarks of Drobo, Inc., which may be registered in some jurisdictions. All other trademarks used are the property oftheir respective owners.Information supplied by Drobo, Inc. is believed to be accurate and reliable at the time of printing, but Drobo, Inc. assumes noresponsibility for any errors that may appear in this document. Drobo, Inc. reserves the right, without notice, to makechanges in product design or specifications. Information is subject to change without notice.Drobo, Inc., 2540 Mission College Blvd., Santa Clara, CA 95054, U.S.A.For more info, visit: http://www.drobo.comPage 2 of 33
Table of Contents1.Before You Begin.51.1 Product Features at a Glance .51.2 Check Box Contents .61.3 Check System Requirements .61.3.1Operating Systems Supported for Drobo Model B810i for iSCSI connectivity .61.3.2Operating Systems Supported for the Drobo Dashboard Management Application .61.3.3 Cable Interfaces Supported .71.4Checking the Hardware You Need.81.4.1 Selecting Hard Drives .81.4.2 Determining How Much Hard Drive Space You Need .81.4.3 Using a Router or Switch .91.4.4 Using an Uninterruptible Power Supply (UPS) or Power Surge Protector . 102.Setting Up in Just a Few Steps!. 102.1 Rack Mount the Drobo B810i . 102.2 Installing Drobo Dashboard. 112.3 Inserting the Hard Drives . 132.4 Configuration Options for Drobo B810i . 142.5 Connecting the Cables with iSCSI and Turning On Your Drobo Device . 152.5.1 Connecting the Management Port . 152.5.2 Connecting to a Power Source . 162.6 Turn On Drobo B810i for upgrading to latest firmware release . 162.7 Set the Administrator Username and Password . 182.8 Configuration options for Drobo B810i . 192.9Configuring iSCSI Settings . 202.10 Formatting the Drives into Volumes . 222.10.1 Selecting a File System and Volume Size. 222.10.2 Creating Volumes . 232.10.3 Creating Volumes with Other Operating System Platforms . 282.11 Adding the Drobo B810i to Your Virtual Environment . 293.Where to Go from Here . 293.1 Using Best Practices . 303.2 Keeping Your Software Up to Date . 30Page 3 of 33
3.3 Safely Shutting Down Your Drobo B810i . 313.3.1 Safely Shutting Down Your Drobo Device Using Drobo Dashboard . 313.3.2 Safely Shutting Down Your Drobo Device Manually . 323.4 Using the Online User Guide . 323.5 Using Context-Sensitive Help . 333.6 Using the Knowledge Base . 333.7 Getting Support . 33Page 4 of 33
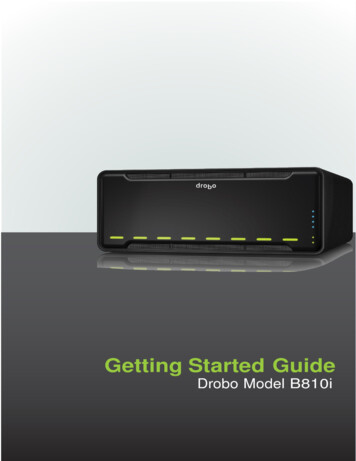
1.Before You BeginCongratulations on your new Drobo! This Getting Started Guide will help you get your Drobo set up injust a few steps. Before you begin, it’s a good idea to check your system and hardware requirements. Inthis chapter, you will: View product features at a glanceCheck box contentsCheck system requirementsEnsure that you have the hardware you need for the Drobo device1.1 Product Features at a GlanceCapacity GaugeActivity IndicatorDriveBayDrive BayIndicatorDriveLatchPowerFigure 1: Front of the Drobo B810i with the Front Bezel removedPoweriSCSI dataportsiSCSI MGMTportPower ToggleButtonFigure 2: Back of the Drobo B810i with the Rear Bezel removedPage 5 of 33
1.2 Check Box ContentsCheck your product’s box to ensure it contains all the components listed below.-Drobo 8-Bay SAN Storage for Business, model B810i-3x 6 ft. CAT6 Ethernet CableOne 6’ Power Cord (regions specific power cord)-Protective BagSafety/Warranty BookletDrobo logo decal3 LED status labels - one each for France, Germany and Japan-1.3 Check System RequirementsCheck to ensure your operating system and cable interface are supported.1.3.1Operating Systems Supported for Drobo Model B810i for iSCSI connectivityFollowing is the list of operating systems that Drobo B810i supports for the iSCSI connectivity (serverswhich use the storage space on the Drobo B810i) Windows Server 2012Windows Server 2008 R2 SP1Windows 10Windows 8/8.1Windows 7Mac OS X Server 10.10 and higher (64 bit)VMware vSphere 6.0 (ESXi)Note:For best performance, ensure you are running the latest service packs for the appropriate Windowsoperating systems. For the most current list of supported operating systems, you can check thespecifications for your product online www.drobo.com/products/index.php., click Drobo B810i andthen click the Tech Specs tab.1.3.2Operating Systems Supported for the Drobo Dashboard ManagementApplicationDrobo Dashboard is the software companion to the Drobo B810i. It can be installed on client computerswhich connect to the Drobo B810i via a network in order to set up, manage and use the Drobo B810i.Following is the list of operating systems that support Drobo Dashboard on the client computer(s). Windows Server 2012Page 6 of 33
Windows Server 2008 R2 SP1Windows 10Windows 8/8.1Windows 7Mac OS X Server 10.10 and higher (64 bit)Note:The iSCSI initiator for MAC systems is not included with the Drobo system. Please refer to iSCSI KB 01 for ATTO on MAC. For the most current list ofsupported operating systems, navigate to www.drobo.com/products/index.php., click Drobo B810i andthen click the Tech Specs tab.1.3.3 Cable Interfaces SupportedDrobo B810i has three Gigabit Ethernet ports available: one dedicated management port and two iSCSIdata ports.iSCSI (Ethernet) Data PortISCSI (Internet Small Computer System Interface) is an internet Protocol (IP) based networking standardfor connecting storage devices to computers. By using a high performance Ethernet connection, iSCSIcan be used over long distances on your existing network infrastructure. It’s also ideal for high volumedata storage traffic and is designed to be a direct block-level protocol that reads and writes directly tothe storage device.With two iSCSI data ports on the Drobo B810i, you can maximize performance by creating greaterbandwidth and failover protection. You can configure each port to a different network so that bothnetworks have access to the Drobo B810i. You can also connect one port directly to the host computerand the other to a network via a router.Drobo B810i’s management (“MGMT”) port is used to configure network settings and perform otheradministrative tasks. The MGMT port can be connected to your Local Area Network (LAN) or directly to acomputer.You will configure the ports during the setup process. See “Setting Up in Just a Few Steps!” for moreinformation.Page 7 of 33
Notes:- While the MGMT port is dedicated to management traffic (out-of-band), Drobo B810i can also bemanaged by a connected server through an iSCSI data port (in-band)- Drobo B810i’s iSCSI connection supports gigabit Ethernet connections (1000 Mbit/s) for optimalperformance. Although your Drobo B810i will auto-negotiate the highest connection speed availableto your computer, router or switch, iSCSI is designed for higher speeds and does not perform as wellat slower speeds. Hence, it is recommended to use a gigabit switch for iSCSI traffic.- A regular network adapter card is required, as Drobo, Inc., does not support iSCSI-specific cards, orHBA (host bus adapter) cards.1.4Checking the Hardware You NeedTo use your Drobo B810i, you’ll need at least two hard drives. If you plan to use Dual Disk Redundancy,which protects your data against two hard drive failures, you will need at least three hard drives.Note:For the Drobo B810i, we recommend that you use at least four hard drives and two SSDs. This providesmore data drives, better striping performance (especially with DDR enabled), and also helps distributeloads more effectively.This section helps you: Select the hard drives to use with B810iChoose the amount of drive space (capacity) to have available on those drives to ensureYour data is protected.Know the basic requirements for Ethernet cablesKnow the requirements for a router or switchWork with your power supplyKnow the requirements for power protection1.4.1 Selecting Hard DrivesYou can use hard drives from any manufacturer and with any capacity (the space available on the harddrive) with your Drobo device.Warning:Any pre-existing data on the drives will be erased when inserted into the Drobo B810i. If you wish tokeep the data, copy it to another drive or medium before using with this Drobo device.1.4.2 Determining How Much Hard Drive Space You NeedIn order to protect your data from hard drive failure, your Drobo device requires more space than whatyou will use for your data, sometimes as much as double or more the amount of space.Page 8 of 33
The best way to determine how much usable, protected storage space you will have available for yourdata, based on the number and capacity of your drives, is to use our Capacity Calculator alculator/A shortcut to estimating the capacity available for your data is to omit the largest drive and then add thecapacity of the remaining drives. If you plan to use Dual Disk Redundancy, omit the largest two drives.For example:Single Disk (Default) RedundancyDual Disk RedundancyNotes:- Actual capacity is often less than what is shown in the examples above due to the different systemsused for rating capacity. This has nothing to do with Drobo devices.- Know that all Drobo devices enable you to easily increase storage capacity at any time by simplyinserting additional drives or replacing smaller drives with larger ones.1.4.3 Using a Router or SwitchSince Drobo B810i has 3 Gigabit Ethernet ports, you might need two or up to three Ethernet cables,depending on how you plan to configure and use Drobo B810i.Tip:For best performance, we recommend using Category 6 (CAT6) copper Ethernet cables with RJ45connectors. If you are connecting a Drobo B810i to a router or switch, your router or switch needs tosupport gigabit Ethernet connections (1000 Mbit/s) for optimal performance. Although your DroboB810i will auto-negotiate the highest connection speed available to your router or switch, iSCSI does notperform well at slower speeds.Page 9 of 33
1.4.4 Using an Uninterruptible Power Supply (UPS) or Power Surge ProtectorWe highly recommend you plug your Drobo device into an uninterruptible power supply (UPS), whichprotects against sudden losses in power as well as power surges. We also recommend a power surgeprotector, although this only protects against power surges.2.Setting Up in Just a Few Steps!Once you ensured you meet all system and hardware requirements, it’s time to set up your Drobo B810ifor use. This can be done in just a few steps.1.2.3.4.5.6.7.8.Rack Mount the B810iInstall Drobo Dashboard.Insert the hard drives.Consider the configuration options for Drobo B810i.Connect cables for the management port, and power on your Drobo device.Turn on Drobo B810i for upgrading to latest firmware releaseReboot the System and Set the administrator username and password.Configure iSCSI settings.Note:This is required if you will be connecting your Drobo B810i to a router or switch via its iSCSIconnection(s), or if you plan to use your Drobo B810i in a multi- host, virtual environment.9. Format the drives into volumes, or Logical Unit Numbers (LUNs).Note:- If you plan to use your Drobo B810i in a multi-host (clustered), virtual environment, you then alsoneed to provision storage to the virtual machine (VM) using your virtualization managementsoftware. For more information, see this topic in the Drobo B810i Online User Guide2.1 Rack Mount the Drobo B810iYou have the option of rack mounting the B810i. You will require an 8 slot rack mount (P/N DR–B8002R11)Page 10 of 33
2.2 Installing Drobo DashboardDrobo Dashboard is the management software companion to the Drobo device, enabling you to easilyset up and manage Drobo B810i. Drobo Dashboard can also manage more than one Drobo device at atime.You first install Drobo Dashboard on a client computer on the LAN to which you connected Drobo B810ivia its management port. You will use this connection to configure network settings for the iSCSI dataports on Drobo B810i.You can install the latest version of the Drobo Dashboard from You need to have administrator rights on the computer on which you install Drobo Dashboard.1. Using your browser on an active Internet connection, navigate to http://www.drobo.com/start/start-drobo-b810i/.2. Locate the link for the latest Drobo Dashboard software and click on it.3. If you’re given a choice to install (or run) Drobo Dashboard or save the installation file to yourcomputer, choose to save the file to your computer. Locate the file and double-click on it to begininstallation. (You can delete the installation file afterwards.)4. If warning messages appear, asking if you’re sure you want to open and/or install the file or program,click the OK or Run button, as appropriate, to continue with the installation.5. A dialog box may appear, asking you to select your language from the drop-down list. After doing so,click the OK button.6. The Drobo Dashboard Installation Wizard appears, preparing to install.Page 11 of 33
7. Click the Next button (Windows) or the Continue button (Macintosh), as appropriate.Note:If the Microsoft iSCSI Initiator window appears, click the Yes button. Follow the instructions to installthe Microsoft iSCSI Initiator, clicking the Next button as needed. When finished, you are returned tothe InstallShield Wizard to continue installation.8. Follow the directions of the Installation Wizard, clicking the Next or Continue button after each page,as appropriate.9. When you reach the ready to install page, click the Install button.Depending on your operating system, one of the following may result:-In some Windows operating system, a Windows Access Control dialog box appears, asking if youwant to allow changes to your computer. Click the Allow or Yes button, as appropriate.In the Macintosh, you will be prompted for your administrator password. Enter it and click theappropriate button.Page 12 of 33
10. Drobo Dashboard installs on your computer.11. If you are on a Macintosh, you will be prompted to restart your computer in order to completeinstallation. Do this.12. After installation is complete, leave the Launch Drobo Dashboard check box selected and click theFinish button.13. The Drobo Dashboard application appears. When it launches for the first time, the Confirm dialog boxappears, asking if you would like Drobo to automatically check for software updates of your DroboDashboard and firmware for your Drobo device.14. We strongly recommend that you click the Yes button.Afterwards, the All Devices page displays in Drobo Dashboard. Leave Drobo Dashboard open as youcontinue with the set up procedures.2.3 Inserting the Hard DrivesAfter installing Drobo Dashboard, you are ready to insert hard drives into your Drobo B810i. For moreinformation on hard drive requirements, see “Checking the Hardware You Need”.Warning:Any pre-existing data on the hard drives will be erased, as the drives will be formatted. If you wish tokeep the data, copy it to another drive or medium before using with your Drobo device.Note:Once you insert the drives into your Drobo device, they function as a unit or “pack.” To access the dataon them, you will need the entire pack.1. Remove the face plate from the front of your Drobo B810i by pulling it off.2. With one hand, hold the hard drive so that its connectors are positioned at the device and toward theleft.ConnectorsPage 13 of 33
Warning:For optimal performance, keep the Drobo B810i in its normal horizontal position. If placed on its side,hard drives may disconnect.3. With your other hand, use your thumb to depress and hold open one of the drive locks to a selecteddata bay. Refer to the image below.Capacity GaugeActivity IndicatorDriveBayDrive BayIndicatorDriveLatchPower4. Slide the hard drive into the data bay, release the drive lock and push the drive into place until youfeel it connect. The drive lock will snap behind the drive, securing it into place.5. Insert additional drives in the same manner, following steps 2 through 4.6. When finished, replace the faceplate right side up, so that when your Drobo device is turned on, youwill be able to see the indicator lights.You are now ready to connect cables and power on your Drobo device. Before connecting cables,however, it is a good idea to consider the configuration options for Drobo B810i.2.4 Configuration Options for Drobo B810iBefore connecting cables, it is important to know how you plan to set up the Drobo B810i in yourenvironment. With two iSCSI data ports on the Drobo B810i, you have the flexibility to configure theports to optimally meet your specific needs. For more information and recommended examples of howto configure Drobo B810i in your networked environment, teWe recommend that you connect Drobo B810i (via any of its iSCSI ports) to a private, isolated StorageArea Network (SAN). This will increase the security of the data on the server. A single storage devicecan serve 2 different application servers via the two iSCSI data ports, each of which can be on 2different private networks.Specifically, you can connect the Drobo B810i via its iSCSI data ports in any one of these three ways:Page 14 of 33
1. Connecting directly to a host computer / server2. Connecting to a dedicated switch, which is then connected to a host computer / server. (This is atypical method of configuring a SAN).3. Connecting to your existing LAN, which is then connected to your computer / server, sharing acommon network for iSCSI regular data traffic.4. For all options, we recommend that you manually set a static IP address for each iSCSI data portyou use, so that the configuration does not change (like it would in DHCP) and you do notexperience a loss of connectivity. To do this, you configure the network settings using DroboDashboard, the software companion to the Drobo device.2.5 Connecting the Cables with iSCSI and Turning On Your Drobo DeviceAfter installing Drobo Dashboard and inserting the hard drives into your DroboB810i, you are ready to connect the cables. You will first connect your DroboB810i to a host computer using the Ethernet cable on management port (MGMT) for the initial,administrative setup only — regardless of how you plan to use your Drobo B810i. After the initialsetup, and also implement its use in a multi-host, virtual environment if desired.As you follow the steps, refer to the image below, which shows the back of a Drobo B810i.PoweriSCSI dataportsiSCSI MGMTportPower ToggleButton2.5.1 Connecting the Management Port1. Plug one end of the Ethernet cable into the MGMT port (MGMT) back of your Drobo B810i.Page 15 of 33
2. Plug the other end to a host computer, a switch or into a router on your LAN.2.5.2 Connecting to a Power Source1. Connect the power cord to the power connection at the back of your Drobo device.2. Connect the other end of the power cord to a power source.Note:We recommend plugging into an uninterruptible power supply (UPS) or surge protector. For moreinformation, see “Using an Uninterruptible Power Supply (UPS) or Power Surge Protector”.You are now ready to turn on your Drobo device.2.6 Turn On Drobo B810i for upgrading to latest firmware release1. When you first receive the Drobo B810i, you must use the Drobo Dashboard app to update it to thelatest firmware release.ImportantPage 16 of 33
If you are a first-time Drobo user, simply install the latest version of Drobo Dashboard. If you are anexisting Drobo user and have a Drobo Dashboard version earlier than 2.8.0 installed, then youmust use these instructions to uninstall Drobo Dashboard (Windows, Mac) prior to installing thelatest version.2. Ensure that the Mac or the PC you are using for this setup has a valid internet / networkconnection.3. If using Mac, ensure that the Firewall (System Preferences - Security & Privacy - Firewall) is setto “allow incoming” for DD service (Drobo Dashboard).4. Verify that the Drobo is powered off.5. Turn on the Drobo.Warning:Powering on the Drobo will begin the disk format process. Please be aware that all data on thedisks will be erased.6. Your Drobo should begin updating to the latest firmware and automatically formatting the disk.Please allow Drobo up to 20 minutes for the total initialization process. Here's what you will seehappen:When your Drobo appears in Drobo Dashboard, you may select it and go into the Status page whichwill show that the Drobo is initializing. While initialization is taking place, all of the drive slot LEDswill be yellow, and the capacity LEDs will blink blue. When initialization is complete, Drobo willrestart to finish the firmware upgrade process.Note:If Drobo Dashboard does not detect your Drobo and initialization does not begin, please disableany firewall and antivirus programs and ensure that your Drobo is connected directly to theEthernet port on your computer and not via an Ethernet switch. In this scenario, be sure that yourcomputer is set to get its IP address on that Ethernet port via DHCP. If Drobo Dashboard will stillnot detect your Drobo and the lights remain solid red, please call our support line for assistance oropen a ticket on your support account. For more info, please see: How do I contact technicalsupport?7. If red drive lights are seen again (e.g. "Unknown Disk Set"), please go to Drobo Dashboard's "Tools"and choose ERASE (reset), allowing reboot of the Drobo. Alternatively, you can use the pinholemethod as described in Step 2 of this article. **WARNING! THIS PROCEDURE WILL ERASEALL DATA FROM ALL DRIVES AND RETURN YOUR DROBO TO DEFAULT SETTTINGS. **The next step is to set the administrator username and password for your Drobo B810i.Page 17 of 33
2.7 Set the Administrator Username and PasswordFollow these steps while still connected to the Drobo B810i via the Ethernet cable.1. In the Drobo Dashboard, make sure the Drobo B810i is selected from the All Drobos page.2. Click the Tools option on the Navigation Menu.3. Click the link that reads: Click here to password protect this Drobo device. The Admin Settings pageopens.4. Ensure that the Enable administrative password protection check box is selected.5. In the Username text box, enter a username for the administrator.6. In the Password text box, enter the password for the administrator.7. In the Confirm Password text box, e-enter the password you just typed.8. Click the OK button.Page 18 of 33
You are returned to the main page in the Drobo Dashboard, showing that you are now connected toDrobo B810i with the username you entered.You are now ready to configure network settings for the iSCSI data ports, as applicable.2.8 Configuration options for Drobo B810iBefore using Drobo B810i, you will need to configure the settings for its iSCSI data ports.Network settings include IP addresses for the two iSCSI data ports available on your Drobo B810i, aswell as the related subnet mask and default gateway information. Network settings also include theability to modify the Maximum Transfer Unit (MTU) for each iSCSI data port (This is the maximumnumber of bytes that can be transferred at a time, in one frame).You can modify the MTU settings in order to support the use of jumbo frames. Jumbo frames are thosethat maintain data transfer rates of more than 1,500 bytes per frame, and can carry up to 9,000 bytesper frame. Use of jumbo frames minimizes transaction loads, and can dramatically improve networkperformance by raising effective bandwidth.You can also choose to modify the settings for the management port.If you use jumbo frames, ensure that the frame size (in bytes) that you enter for the MTU is supportedby your computer and router or switch. There needs to be end-to-end matching of MTU settings, fromthe Drobo B810i to your switch or router to your host computer.With two iSCSI data ports on the Drobo B810i, you can configure each port to a different network sothat both networks have access to the Drobo B810i. You can also connect one port directly to the hostcomputer and the other to a network via a router. What iSCSI settings you configure depend on howyou plan to set up your Drobo B810i. With iSCSI, you have the option to set up your Drobo B810i in oneof three general configurations.1. Directly connect your Drobo B810i via the management (MGMT) port to your computer’s Ethernetport. In this configuration, you do not need to set a static IP address for data ports.Page 19 of 33
2. Connect your Drobo B810i via the management (MGMT) port to a switch in which another Ethernetport on the switch is connected to your computer. In this configuration, you will need to manuallyset static IP addresses for the data ports.Note:You can connect multiple Drobo B810is to the same switch provided the Drobo B810is and the hostcomputer are on the same subnet and each Drobo B810i has a unique static IP address assigned toit.3. Connect your Drobo B810i via the management (MGMT) port to a switch (or router) in whichanother Ethernet port on the switch (or router) is connected to your network. In this configurationyou will need to manually set static IP address for your data ports.Notes:- Drobo B810i supports gigabit Ethernet connections (1000 Mbits) for optimal performance ofiSCSI. Although your Drobo B810i will auto-negotiate the highest connection speed available toyour computer, router or switch, iSCSI does not perform well at slower speeds.- You can purchase an add-on gigabit Ethernet adapter card for your computer, if needed. Note,however, that regular adapter network card is required, as Drobo, Inc. does not support iSCSIspecific cards, or HBA (host bus adaptor) cards.- If you experience trouble with the following setup steps (such as everything appearing fine, butDrobo Dashboard is
Page 8 of 33 Notes: - While the MGMT port is dedicated to management traffic (out-of-band), Drobo B810i can also be managed by a connected server through an iSCSI data port (in-band) - Drobo B810i's iSCSI connection supports gigabit Ethernet connections (1000 Mbit/s) for optimal performance. Although your Drobo B810i will auto-negotiate the highest connection speed available