Transcription
Drobo B810n Getting Started Guide
Table of Contents1: Before You Begin . 41.1 Product features at a glance . 41.2 Checking box contents . 51.3 Checking system requirements . 51.4 Checking hardware requirements . 61.4.1 Selecting drives . 61.4.2 Recommended number and type of drives . 71.4.3 Determining drive space requirements . 81.4.4 Using power protection. 92: Setting Up Drobo B810n . 92.1 Inserting drives . 102.1.1 How to insert the drives .102.2 Connecting Ethernet and power cables . 112.2.1 How to connect Ethernet and power cables .112.3 Powering on the Drobo 810n . 122.4 Downloading and installing Drobo Dashboard . 122.4.1 How to download Drobo Dashboard application .132.4.2 How to install Drobo Dashboard on Windows .132.4.3 How to install Drobo Dashboard on Mac .162.5 Initializing and updating your Drobo B810n to the latest firmware . 212.6 Registering your Drobo B810n . 232.7 Shares and Users . 252.8 Using Drobo B810n with Time Machine or backup software . 262.8.1 Overview .262.8.2 Creating a backup volume .262.9 Safely shutting down your Drobo B810n . 282.9.1 When to shut down your Drobo B810n .292.9.2 Shutting down your Drobo B810n using Drobo Dashboard .293: What To Do Next . 30Drobo B810n Getting Started Guide2
3.1 Using best practices for protecting data . 313.2 Keeping your software up to date . 313.2.1 Checking for software updates .313.3 Using online user guide . 323.4 Using context-sensitive help . 323.5 Using knowledge base . 323.6 Registering your Drobo B810n . 323.7 Getting technical support . 333.8 Guide to meaning of indicator lights (LEDs) . 333.8.1 Indicator light messages .34Drobo B810n Getting Started Guide3
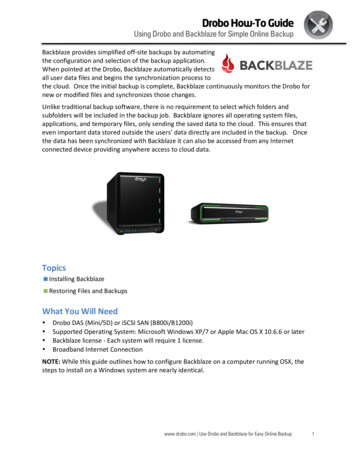
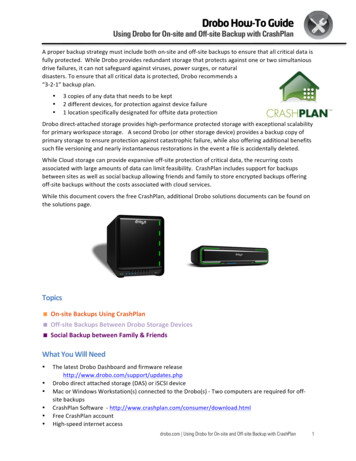
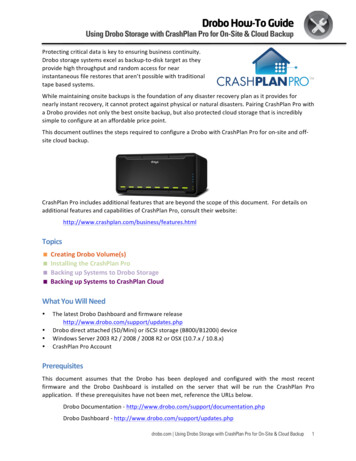
1: Before You BeginBefore you begin to set up your Drobo B810n, it is recommended to check the operating system andhardware requirements.This section covers the following topics: Product features at a glance Checking box contents Checking system requirements Checking hardware requirements1.1 Product features at a glanceFor a quick review of Drobo B810n hardware features, please review these images.Figure 1: Front of the Drobo B810n with bezel (faceplate) removedFigure 2: Front of the Drobo B810n with bezel (faceplate) removedDrobo B810n Getting Started Guide4
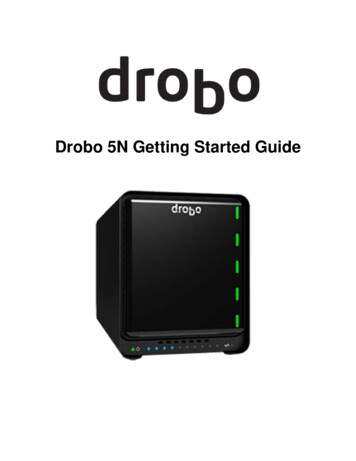
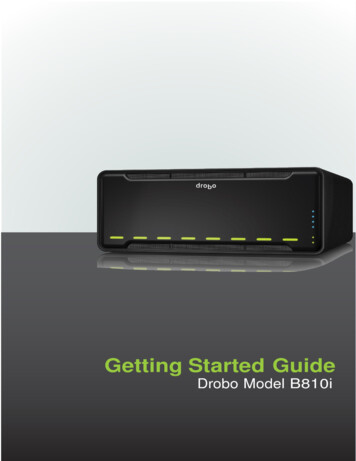
Figure 3: Rear panel of Drobo B810n1.2 Checking box contentsEnsure that your product's box contains all the components listed below. Drobo B810n 2 x 6 ft (1.8 m) Ethernet cables 6 ft (1.8 m) Power Cord Quick Start Card International LED Labels for Front Panel (German, French, and Japanese)Optional AccessoriesDrobo 8-Bay Rack Mount Kit1.3 Checking system requirementsThis article provides the system requirements for using Drobo B810n.Drobo System Requirements and SpecificationsOperating systemsOperating systems supported for the Drobo B810n include: Apple Macintosh Mac OS X 10.8 or higher Microsoft Windows 10 32- and 64-bit Microsoft Windows 8/8.1 32 and 64 bit Microsoft Windows 7 32 and 64 bit Microsoft Windows Server 2012 32 and 64 bit Microsoft Windows Server 2008 R2 32 and 64 bitNote 1: For best performance and interoperability, ensure that you arerunning the latest service packs for the appropriate Windows operatingsystems.Note 2: For the most current list of supported operating systems, check thespecifications for your products online at Drobo B810n Specifications.Drobo B810n Getting Started Guide5
Drobo softwareDrobo Dashboard 2.7.0 or later. To download the latest DroboDashboard, see the Drobo B810n page on our website.Connection (GigabitTo connect to your router, network switch, or computer, Drobo B810nEthernet)uses Gigabit Ethernet.DrivesDrobo B810n requires at least two drives. It has eight 3.5-inch SATA drivebays. SSDs can be used in addition to the minimum 2 HDDs to acceleratethe unit.For more information on selecting drives for Drobo B810n, see SelectingDrives.Power protectionThough not required, we recommend using the following power(optional)protection with your Drobo B810n:Electrical / operatingenvironment An uninterruptible power supply (UPS), which protects againstsudden losses in power A power surge protector to protect against power surgesPower Supply: AC Input - 100-240VAC, 1.8/0.75 A, 50/60HzOperating Temperature: 10 C-35 C (50 -95 F)Non-operating (storage): 10 -60 C (14 -140 F)Operating Humidity: 5% - 80%Dimensions: 12.17” wide x 5.46” tall x 14.1” long (309mm wide x 138.9mmtall x 357.4mm long)Weight: 16 lbs 3 oz1.4 Checking hardware requirementsTo use your Drobo B810n device, you will need at least two drives. If you plan to use Dual DiskRedundancy, which protects your data against two concurrent drive failures, you will need at leastthree drives.This section covers the following topics: Selecting drives Determining drive space requirements Using power protection1.4.1 Selecting drivesThe Drobo B810n supports both standard 3.5” SATA III hard disk drives (HDDs) as well as SATAsolid-state drives (SSDs) for added performance.Drobo B810n Getting Started Guide6
Warning:When you insert drives into the Drobo B810n device, the pre-existing data on the drives will be erased.You can choose HDDs from any manufacturer and with any capacity. For choosing SSDs, please visitour web page to view the compatible drive options.1.4.2 Recommended number and type of drivesHere are the recommended number and type of drives you can use with your Drobo B810n device.Note that you need at least two drives in the drive bays to ensure your data is protected in the eventof drive failure.ConfigurationBenefitAll HDDs (2 to 8 slots)Highest capacity6 HDDs 2 SSDsBest mix of capacity & performance5 HDDs 3 SSDs DDR enabledBest mix of capacity, performance & redundancyFor a performance comparison of these options, see the following illustration.1.4.2.1 Additional SSD benefitsAdding SSDs to your Drobo B810n provides multiple benefits. Along with accelerating the IOPS(Input/Output Operations Per Second) of the unit, SSDs also enable other advanced capabilities, suchas Hot Data Cache (requires 1 SSD) and Data-Aware Tiering (requires 2 SSDs in Single DiskRedundancy mode, 3 SSDs in Dual Disk Redundancy mode). SSDs must be added in addition to theminimum 2 HDDs.Drobo B810n Getting Started Guide7
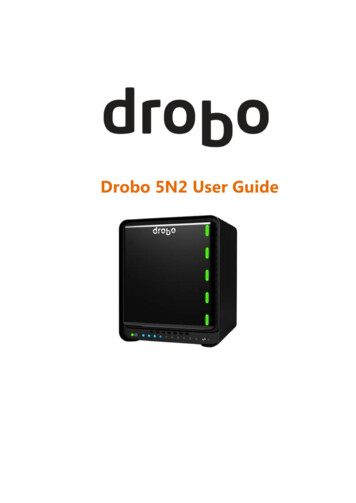
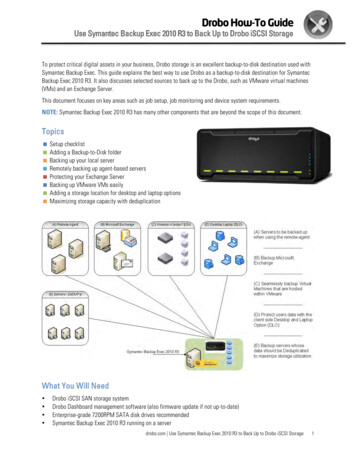
1.4.2.2 Drobo drive compatibilityThis table describes Drobo B810n compatibility with specific types of HDDs and SSDs.DriveTypeCompatibleIncompatibleHDDSATA I, II, and IIIIDEAny sizeSCSIAny manufacturerPATAAny performance classification. Choose based onyour usage demands.SASTo see which solid state drives are compatible withDrobo B810n, please see a list of qualified drives atWhat SSDs can I use with the Drobo B810n, Drobo5D, Drobo Gen 3, Drobo 5N and Drobo Mini?If an incompatible SSD isinserted into the Drobo, thedrive light will blink red,indicating the need to replacethat drive.SSD1.4.3 Determining drive space requirementsYour Drobo B810n automatically divides the total disk capacity of all its drives between data storage,data protection, and expansion. We offer a tool for previewing that space allocation.1.4.3.1 Capacity calculatorThe best way to determine how much usable and protected storage space is available for your data,based on the number and capacity of your drives, visit our Drobo Drive Capacity Calculator page.Figure 4: Drobo Drive Capacity CalculatorDrobo B810n Getting Started Guide8
A shortcut to estimate the capacity available for your data is to omit the largest drive and then, addthe capacity of the remaining drives. If you plan to use Dual Disk Redundancy, then omit the largesttwo drives.Single disk (default) redundancy# DrivesDrive CapacityUsable Protected Capacity *36TB 6TB 6TB 12TB44TB 6TB 6TB 6TB 14TB54TB 6TB 6TB 6TB 6TB 22TBDual disk redundancy# DrivesDrive CapacityUsable Protected Capacity *36TB 6TB 6TB 6TB44TB 4TB 6TB 6TB 8TB54TB 6TB 6TB 6TB 6TB 16TBNotes:- Actual capacity is often less than what is shown in the examples above due to the different systemsused for rating capacity. This has nothing to do with the Drobo B810n.- Your Drobo B810n enables you to easily increase storage capacity at any time by simply insertingadditional drives or replacing smaller drives with larger ones.1.4.4 Using power protectionWe recommend using the following power protection with your Drobo B810n: An uninterruptible power supply (UPS), which protects against sudden losses in power. A power surge protector to protect against power surges.2: Setting Up Drobo B810nOnce you have unpacked your Drobo B810n device from its box and ensured that you meet all theoperating system and hardware requirements, it is time to set up your device for use.The Drobo B810n shipped out will not have the latest firmware. So, it is recommended to upgradethe firmware to the latest version before using the device.Drobo B810n Getting Started Guide9
You can perform the set up in just a few easy steps.1.Inserting the drives2.Connecting the data port of the Drobo to an Ethernet switch3.Powering on your Drobo B810n4.Downloading and installing Drobo Dashboard5.Registering your Drobo B810n6.Initializing your Drobo 810n and updating it with the latest firmware7.Shares and UsersOther topics mentioned in this section are:8.Using Drobo B810n with Time Machine or backup software9.Safely shutting down your Drobo B810n2.1 Inserting drivesInsert the drives into your Drobo B810n. For more information on drive requirements, see Selectingdrives.Warning:Any pre-existing data on the drives will be erased, as the drives will be formatted. If you wish to keepthe data, copy it to another drive or medium before using with your Drobo B810n.Note:Once you insert the drives into your Drobo B810n, they function as a unit or “pack.” To access the dataon them, you will need the entire pack.2.1.1 How to insert the drivesTo insert the drives to your Drobo B810n device:1.Remove the magnetic front bezel (faceplate) from the front of your Drobo B810n by pulling itoff.2.Hold the HDD with its connectors positioned at the device and toward the left (usually thelabels will be on the top). Refer to the images below.Drobo B810n Getting Started Guide10
3.With your other hand, use your thumb to depress and hold open one of the drive locks to aselected drive bay. Refer to the image below.4.Slide the drive into the drive bay, release the drive lock and push the drive into place until youfeel it connect. The drive lock snaps behind the drive, securing it into place.Note:If you are inserting an SSD (Solid State Drive), ensure that it is compatible by visiting our web page oncompatible drive options.5.Insert additional drives in the same manner following Step 2 to Step 4.6.When finished, replace the faceplate right side up so that when your Drobo B810n is turnedon you will be able to see the indicator lights. For more information on Indicator lights, seeGuide to meaning of indicator lights (LEDs).2.2 Connecting Ethernet and power cablesAfter inserting the drives into your Drobo B810n, you are ready to connect the power and Ethernetcables to your Drobo B810n.2.2.1 How to connect Ethernet and power cablesAs you follow the steps below, refer to the following image.Drobo B810n Getting Started Guide11
1.Plug one end of the Ethernet cable into the back of your Drobo B810n.2.Plug the other end of the Ethernet cable into your router, switch, or computer.3.Connect the power supply to the power connection at the back of your Drobo B810n.4.Connect the other end of the power supply to a power source.Note:We recommend plugging into an uninterruptible power supply (UPS) or surge protector. For moreinformation, see Using power protection.2.3 Powering on the Drobo 810nThe next step is to power on the Drobo device. For this, you have to attach the power cord and then,turn on the Drobo using the power switch located on the back. The Drobo will take several minutesto complete the power on cycle. When the power on cycle is complete the Drobo will flash blue andyellow lights.Note:If you need to assess that the process is moving smoothly, see Guide to meaning of indicator lights(LEDs).2.4 Downloading and installing Drobo DashboardThe Drobo Dashboard application will help you to set up and manage your Drobo B810n. Afterinstalling the Dashboard, you can configure the settings to automatically install version updates,which is highly recommended. You can install the Drobo software and firmware updates from StartDrobo B810n page.This section covers the following topics: Downloading Drobo Dashboard Installing Drobo Dashboard on Windows Installing Drobo Dashboard on MacNote:You need a full admin user account and Internet access on the computer on which you install theDrobo DashboardDrobo B810n Getting Started Guide12
2.4.1 How to download Drobo Dashboard applicationGo to the Start Drobo B810n page and click the appropriate Drobo Dashboard installation file basedon the operating system (Windows/Mac) you are using. This downloads the Drobo DashboardInstaller.Now, let us see how to install the Drobo Dashboard.2.4.2 How to install Drobo Dashboard on WindowsTo install the Drobo Dashboard on a Windows machine:Note:If you are a first-time Drobo user, then simply install the latest version of the Drobo Dashboard.If you are an existing Drobo user and have a Drobo Dashboard version earlier than 2.7.0 installed, thenyou must uninstall the Drobo Dashboard prior to installing the latest version. For more information, seeWhat is the proper way to uninstall and re-install Drobo Dashboard on my Windows computer?1.After downloading the Drobo Dashboard installation file for Windows, double-click the DroboDashboard Installer to launch it.2.A pop up will appear asking you to choose the language for installation. Select the language ofyour choice and click OK.Drobo B810n Getting Started Guide13
3.The Drobo Dashboard Installer (or Installation Wizard) will appear.4.Click the Next button to proceed.5.Follow the instructions of the Installation Wizard by clicking the Next button after each page.6.Once you reach the installation page, click the Install button.7.In some Windows operating systems, the Windows Access Control dialog box appears, askingif you want to allow changes to your computer. Click the Allow or Yes button. This installs theDrobo Dashboard.Drobo B810n Getting Started Guide14
8.After the installation is complete, be sure the Launch Drobo Dashboard checkbox is selectedand then, click the Finish button.9.The Drobo Dashboard application launches and you will be prompted to register your DroboB810n. You can either register the Drobo B810n or skip the step and register it later. Select anoption based on you preference. The serial number is printed on the compliance label at thebottom of the device.Note:We highly recommend to register your product in order to obtain support.Drobo B810n Getting Started Guide15
10. Click the Next button to view the All Drobos page. After a few seconds, Drobo "discovers" allDrobo devices currently connected and displays them on this page.Note:After the Drobo Dashboard launches, you may be asked if Drobo can collect anonymous informationon your usage. Click Yes or No, as desired.11. If you have no Drobo device connected to the computer or powered on, a "No DrobosDetected" message displays until you do.12. Your Drobo B810n will not work until you update the firmware. For information on updatingthe firmware to the latest version, see Updating your Drobo B810n to the latest firmware.2.4.3 How to install Drobo Dashboard on MacTo install the Drobo Dashboard on Mac:Note:If you are a first-time Drobo user, then simply install the latest version of the Drobo Dashboard. If youare an existing Drobo user and have a Drobo Dashboard version earlier than 2.7.0 installed, then youmust uninstall the Drobo Dashboard prior to installing the latest version. For more information, seeWhat is the proper way to uninstall and re-install Drobo Dashboard on my Mac?1.After downloading the Drobo Dashboard installation file for Mac, double-click the DroboDashboard Installer to launch it.Drobo B810n Getting Started Guide16
2.A pop up will appear asking whether to open the Installer. Click Open.3.The Install Drobo Dashboard page will appear. Click Continue to proceed to the next screen.4.The Firewall Warning page appears. Click Continue.5.Next, the Installation Wizard page appears. Click Continue to proceed.Drobo B810n Getting Started Guide17
6.The Software License Agreement page appears. From here, you can choose the language inwhich you want to proceed the installation process.7.After choosing the desired language, Click Continue.Drobo B810n Getting Started Guide18
8.A dialog box will appear asking you to Agree or Disagree the terms of the license agreement.Click Agree to proceed.9.You will reach the Installation Type section. Click Install to proceed.10. You will be prompted to enter the administrator password. Enter the password and clickInstall Software.11. Then, you will be prompted to restart your computer in order to complete the installation.Click Continue Installation to proceed.Drobo B810n Getting Started Guide19
12. When the installation completes, you will see the following screen to restart the computer tofinish the installation. Click Restart.13. The Drobo Dashboard installer will prompt you to restart your computer. When the windowpops up asking if you are sure you want to restart your computer, be sure to select the checkbox next to Reopen windows when logging back in, so that you can continue you from thesame point in the online setup.14. Once the computer restarts, launch the Drobo Dashboard application.15. The application will prompt you to register your Drobo B810n. You can either register it orskip the step and register it later. Select an option based on you preference.Drobo B810n Getting Started Guide20
Note:We highly recommend to register your product in order to obtain support.16. Click the Next button to view the All Drobos page. After a few seconds, Drobo "discovers" allDrobo devices currently connected and displays them on this page.Note:After the Drobo Dashboard launches, you may be asked if Drobo can collect anonymous informationon your usage. Click Yes or No, as desired.17. If you have no Drobo device connected to the computer or powered on, a "No DrobosDetected" message displays until you do.18. Your Drobo B810n will not work until you upgrade the firmware. For information on updatingthe firmware to the latest version, see Updating your Drobo B810n to the latest firmware.2.5 Initializing and updating your Drobo B810n tothe latest firmwareWhen you first receive a new Drobo B810n device, you must use the Drobo Dashboard app toupdate it to the latest firmware release.Important Note:The Drobo B810n device will not be usable until you upgrade the firmware.If you are a first-time Drobo user, then install the latest version of Drobo Dashboard. If you are anexisting Drobo user and have a Drobo Dashboard version earlier than 2.7.0 installed, then you mustfollow the instructions to uninstall Drobo Dashboard prior to installing the latest version.For information on uninstalling or re-installing Drobo Dashboard on your Windows computer, seeWhat is the proper way to uninstall and re-install Drobo Dashboard on my Windows computer?For information on uninstalling or re-installing robo Dashboard on your Mac computer, see What is theproper way to uninstall and re-install Drobo Dashboard on my Mac?If you are a first time user, please follow these steps to update the firmware of your Drobo B810n tothe latest one:1.Connect the data port of the Drobo to an Ethernet switch.2.Ensure that the Mac or PC you are using for this setup has a valid Internet/network connection.3.If using a Mac, ensure that the Firewall (System Preferences Security and Privacy) is set to"allow incoming" for DD service (Drobo Dashboard).4.Verify that the Drobo is powered off.5.Insert the drives.6.Turn on the Drobo B810n.Drobo B810n Getting Started Guide21
Warning:Powering on the Drobo will begin the disk format process. Please be aware that all data on the diskswill be erased.7.Your Drobo B810n will appear with a yellow Drobo device icon on your main dashboard screen.8.Click the Drobo device icon to begin initialization of your Drobo B810n. During this processyour Drobo will download the latest firmware from the internet.9.Go to the Status page in the Dashboard which will show that the Drobo is initializing. Whileinitialization is taking place, all of the drive slot LEDs will be yellow, and the capacity LEDs willblink blue. When initialization is complete, Drobo will restart to finish the firmware upgradeprocess.10. Your Drobo should begin updating to the latest firmware and automatically formatting thedisk. Please allow Drobo up to 20 minutes for the total initialization process.Note:If the Drobo Dashboard does not detect your Drobo 810n and initialization does not begin, pleasedisable any firewall and antivirus programs and ensure that your Drobo is connected directly to theEthernet port on your computer and not via an Ethernet switch. In this scenario, be sure that yourcomputer is set to get its IP address on that Ethernet port via DHCP.If the Drobo Dashboard is still not detecting your Drobo 810n and the lights are remaining solid red,please call our support line for assistance or open a ticket on your support account. For moreinformation, please see: How do I contact technical support?11. If the red drive lights are seen again (e.g. "Unknown Disk Set"), go to the Drobo Dashboard'sTools section and choose ERASE (reset), allowing the Drobo 810n to reboot.Drobo B810n Getting Started Guide22
Note:If you need to assess that the process is moving smoothly, see Guide to meaning of indicator lights(LEDs).12. Alternatively, you can use the pinhole method to erase data from the disk. For moreinformation, see How can I clear all my data off my Drobo storage device and start anew? Thisis for new setups only where the drives have no data.Warning:This procedure will erase all data from all drives and return your Drobo 810n to default settings.2.6 Registering your Drobo B810nIf you did not register your Drobo B810n during setup, then you can register it from the DroboDashboard.Note:Make sure you are connected to the Internet before performing this action.To register your Drobo B810n from the Drobo Dashboard:1.From the All Drobos page, select Drobo B810n. Then, click the Help and Support option onthe Navigation menu.2.The Help and Support page for Drobo B810n opens.Drobo B810n Getting Started Guide23
3.In the Drobo Registration area, click the Register my Drobo devices link. This opens theRegistration page.4.Do one of the following: If you do not have a Drobo account, click the Create a new Drobo account link. TheLogin page opens in your web browser. Then, click the Create an Account button to openthe Signup page. Enter the required information and create your account, and then returnto this step to log in to your account.Drobo B810n Getting Started Guide24
If you already have a Drobo account, then select the Register new Drobo with my Droboaccount option and enter your Drobo username and password. You can click the Forgotusername or password link if needed. Continue with step 4.5.Click the Next button. The connected Drobo devices and their serial numbers will appear.6.Select Drobo B810n and enter its purchase date. Then, select the region from where youpurchased it, as shown in the image below.Tip:You can click the Skip this step for now check box at any time.7.Click the Register Drobo button. The next page shows with a check mark that your producthas been registered.Note:You can choose to purchase a DroboCare license by clicking on that link.8.Repeat steps 5 and 6 to register additional Drobo devices.9.When finished, click the Done button. You will return to the Help and Support page.2.7 Shares and UsersTo view the Share settings:1.Select the Drobo 810n by clicking on the green Drobo device icon.Drobo B810n Getting Started Guide25
2.Then, click the Shares option on the Navigation menu. This opens the Share Settings window.3.You will see the Public share that is created automatically under the Select a share section andready to use.4.You can setup additional shares and users from the Share settings window.Now, you can start using your Drobo B810n.2.8 Using Drobo B810n with Time Machine orbackup software2.8.1 OverviewDrobo B810n introduces the ability to create a dedicated backup volume for use with OS X TimeMachine, Windows Backup and Restore, or other backup software. The backup volume iscompatible with encrypted backup options. This article will show you how to set it up.2.8.2 Creating a backup volumeThese steps will create a fixed-size backup volume that will appear as a new disk, separate from yourmain Drobo volume. Having this dedicated, fixed-size backup volume will prevent backup softwarefrom filling your main Drobo volume with daily backups.Drobo B810n Getting Started Guide26
Follow these steps:1.Open the Drobo Dashboard, and wait for your Drobo B810n to appear under in the All Drobospage. Then, double-click the image of your Drobo B810n.2.Then, click Volumes.3.Click the Enable Backup button.4.Enter a name for your backup volume and the desired size (GB).Drobo B810n Getting Started Guide27
5.Click the OK button.6.When you see the "Confirm Restart" dialog, take a moment to stop any activity on the DroboB810n, because it must restart. When you are ready, click Yes to continue.7.Wait until you receive the message that "Volume management changes have been madesuccessfully," then click the OK button.8.Now you will see the backup volume you created listed under Volumes. You may now close theDrobo Dashboard.9.To finish the process, open the settings for your third-party backup software, such as TimeMachine, and select the backup volume that you created as the destination volume.2.9 Safely shut
5D, Drobo Gen 3, Drobo 5N and Drobo Mini? If an incompatible SSD is inserted into the Drobo, the drive light will blink red, indicating the need to replace that drive. 1.4.3 Determining drive space requirements Your Drobo B810n automatically divides the total disk capacity of all its drives between data storage, data protection, and expansion.