Transcription
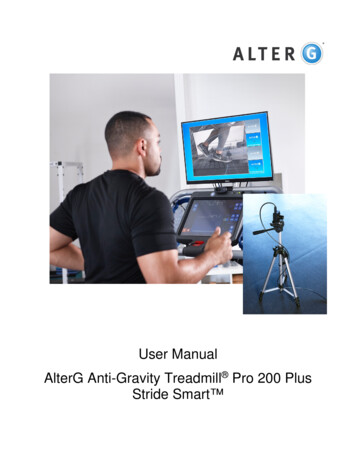
User ManualAlterG Anti-Gravity Treadmill Pro 200 PlusStride Smart
Table of ContentsUser Responsibility . 3Contact Information . 4Section 1: Operating Stride Smart . 5Getting Started .5Focusing and Positioning Cameras .5Positioning . 5Focusing. 5Camera views .5Video Recording .6Video Playback .7Video Playback Slow Motion .7Section 2: Cameras Settings . 8Adjusting Camera settings .8Reset Camera to Default Settings.9Reset Cameras .9Section 3: End of Session Reporting . 9Emailing videos and reports .9Extracting with USB . 10Appendix A: Troubleshooting . 11Repairs . 11Appendix B: Warranty . 12D000168 Rev. B2
User ResponsibilityStride Smart for the Pro 200 Plus AlterG Anti-Gravity Treadmill will perform as described inthis Operation Manual and by accompanying labels and/or inserts when it is assembled,operated, maintained and repaired in accordance with the instructions provided. A defectiveStride Smart system should not be used. Parts that are broken, missing, plainly worn, distortedor contaminated should be replaced immediately. Should such repair or replacement becomenecessary, it is recommended that a request for service be made to AlterG, Inc. Stride Smartand the Anti-Gravity Treadmill, or any of its parts, should only be repaired in accordance withinstructions provided by AlterG, Inc., authorized representatives of AlterG, Inc., or by AlterG,Inc. trained personnel. Stride Smart and the Anti-Gravity Treadmill must not be altered withoutthe prior written approval of the AlterG, Inc. Quality Assurance Department.The user of this product shall bear the sole responsibility for any malfunction which results fromimproper use, faulty maintenance, improper repair, damage, or alteration by anyone other thanAlterG, Inc. authorized representatives.Any unauthorized maintenance, repairs or equipment modification activities may void the StrideSmart Product Warranty.D000168 Rev. B3
Contact InformationAlterG welcomes your inquiries and comments. If you have any questions or comments, pleasecontact our service and support. Contact information list is below.AlterG Headquarters48438 Milmont DriveFremont, CA 94538510 270-5900www.alterg.comService and Support48438 Milmont DriveFremont, CA 94538510 270-5369support@alterg.comAlterG Europe, Ltd.The Mill Horton RdStanwell MoorStaines,Middlesex,TW19 6BJMon-.‐Fri: 9am-.‐5pm GMTPhone: 44 02036514293Mobile: 44 07733179187Fax: 44 01753682088support@alterg.comD000168 Rev. B4
Section 1: Operating Stride SmartGetting StartedThe video monitor must be turned on before you power up the Pro 200. All cameras should loadautomatically upon startup.Focusing and Positioning CamerasThere are three cameras provided with your Stride Smart system: front, side, and rear.The cameras will be labeled for each specific use.PositioningThe front camera will be mounted on the inside of the bag.The side camera is meant to be 3’ from the subject or closer.Both the front and side use wide angle lenses. These cameras are not meant to exceeda distance 3’. If you position the cameras closer to the subject than 3’ you will not needto make any adjustments.The rear camera is focused at 7’ from the subject. If the rear camera is positioned anycloser than 7’ you will not need to make any adjustments. If you find the need to moveany of the cameras back further, you may need to readjust.FocusingAll cameras are focused at the factory before shipment. The side and rear camerashave been focused to be placed right next to the window of the bag. Positioning yourcameras this way may help minimize glare from external ambient lighting.If you desire to refocus any of the cameras, or if the cameras becomeunfocused follow these steps:1. Set the cameras to the desired distance.2. Loosen the Lens set screw using a smallscrewdriver (Figure 1).3. Place a subject inside the bag and refocus the lensuntil it is displayed clearly on the monitor.a. Turn the lens clockwise or counter clockwise toestablish your desired focus.4. When satisfied with focus, lightly tight the Lens setscrew with the small screwdriver.Figure 1Camera viewsStride Smart for the Pro 200 Plus uses three cameras. The cameras are meant to bepositioned in the front, side and rear. The video feed will be displayed on the TV monitormounted to the front of the treadmill.D000168 Rev. B5
The front camera is permanently affixed to the electronic box inside of the treadmill bag.The side and rear cameras are attached to adjustable tri-pods and can be movedaround as desired.Figure 2While in a workout session, to select the cameraview, click on the camera button on the left-handside (Figure 2).Figure 3To toggle between the different camera views, clickon the camera you want to see (Figure 3).PlaybackRecordVideo RecordingUsers can record 10 second video clips during their session. To record a video clip,navigate to the camera page (Figure 3) and click the red record button.Figure 4A green spinner and message will appear toconfirm when the video is in the process ofrecording (Figure 4).It will automatically turn red again once therecording is complete. You can adjust any of thetreadmill controls while recording (body weight %,incline, and speed). However, you cannot switchcamera views while recording. Doing so will canceland delete what has been recorded.D000168 Rev. B6
Video PlaybackTo playback video recordings, navigate to the camera page (Figure 3) and click on theplayback button. This is above the red record button, to the left of the Speed buttons.Figure 5Select which video you would like to playback fromthe thumbnails (Figure 5) and press play. Thevideo will be displayed on the TV monitor mountedto the front of the treadmill. The video selected willbe played in a loop until you pause, select anothervideo, or return to the live video page.Video Playback Slow MotionVideos can be played back in normal speed or slow motion.Slow motion speed options: 1x, 1/2 x, 1/4xTo select a slow motion speed, click on the desired speed button (Figure 5).To play a video frame-by-frame, click on the step button (Figure 5). Continue to click onthe step button to go through additional frames.D000168 Rev. B7
Section 2: Cameras SettingsFigure 6To access all setting screens, return to the homescreen and double tap on the right hand fist of theman on the mountain (Figure 6).Figure 7A keypad will pop up (Figure 7). Enter code 5900.Adjusting Camera settingsFigure 8The Stride Smart video system will be installed byan AlterG technician, and will be pre-programmedwith our default camera settings. These settingsare based on our color and contrastrecommendations. If you wish to adjust thecamera image, click on “Cameras” (Figure 8).Select the individual camera you want to adjust.Look for the settings you want to adjust, and tapalong the bar on the screen to increase ordecrease the setting (Figure 9).Figure 9Once you have adjusted the camera settings toyour liking, press save.To adjust another camera, you must exit thispage and select the next camera you would liketo adjust.D000168 Rev. B8
Figure 10Reset Camera to Default SettingsIf you have adjusted the camera settings (color,contrast, etc.) and want to revert back to the originalsettings, you can do so by clicking the “FactoryReset” button (Figure 10), and then clicking “Save.”You will need to do this for each camera.Figure 11Reset CamerasIf any cameras freeze, they can be rebooted byentering the settings page and clicking “Reset Cams”(Figure 11). If problems persist, please contact theAlterG support team.Section 3: End of Session ReportingAny videos or session reports not emailed or saved at the end of the session will bedeleted.Estimated wait time to email or extract videos and reports is approximately 20 secondsper video. Please be patient and confirm all data has been sent before exiting thetreadmill.Emailing videos and reportsFigure 12Once you have hit stop at the end of your session,you will have the opportunity to email yourself a copyof your session report and any videos capturedduring your session. To email videos and the end ofsession report, click on the email icon (Figure 12).D000168 Rev. B9
Figure 13Select which videos you would like to email byclicking on the boxes below the thumbnail of thevideo you want. You will see a green check markappear in the box once selected (Figure 13). Youcan send as many videos as you would like. Theywill all come to your inbox as separate emails.The end of session report is a summary of yoursession details. It will automatically be sent to youalong with the videos in PDF format. There will be nopatient or athlete name on the report.Type your email address into the white text box and press send.Videos will be sent in mp4 format. They will be playable on native players on computersand mobile devices. It is recommended to use VLC player if you wish to view the videoin slow motion on external devices.Extracting with USBIf you do not have wifi or want to save your videos and end of session report on a USBkey, you can do so by clicking on the USB icon (Figure 12).Figure 14Select which videos you would like to extract byclicking on the boxes below the thumbnail of thevideo you want. You will see a green check markappear in the box once selected (Figure 14). Youcan send as many videos as you would like, as longas there is enough space on your thumb drive.The end of session report is a summary of yoursession details. It will automatically be saved to yourthumb drive along with the videos in PDF format.There will be no patient or athlete name on the report.D000168 Rev. B10
Appendix A: TroubleshootingIn most cases any repairs to your Anti-Gravity Treadmill will need to be completed by an AlterGqualified technician. There are however, many things that you can do to troubleshoot problemsbefore a repair technician will be required.RepairsContact your AlterG representative for any repairs. You may also request repairs atsupport@alterg.com. Before doing so, please investigate the following questions, so that weare able to help you as quickly as possible. What is the serial number of the Anti-Gravity Treadmill and Stride Smart? Thisinformation can be found on the base of the machine. Look for the manufacturer’s label. What happened prior to the problem? Did the problem happen unexpectedly or did it get progressively worse over time? If it is a noise problem, from where does the noise originate? Was someone using the treadmill at the time the problem occurred? Explain any other symptoms that you feel are relevant. Does the screen display any other error messages?D000168 Rev. B11
Appendix B: WarrantyYour Stride Smart system is covered by the following warranty: One year parts and labor for the Stride Smart System.Warranty: AlterG warrants to Customer that Stride Smart is free from manufacturing defects fora period of one (1) year from original date of purchase. The Warranty doesn’t cover damage orequipment failure due to misuse, user or other damage, or failure to comply with environmental,electrical requirements and maintenance as outlined in the AlterG Anti-Gravity Treadmill UserManual. Any customer modification of the AlterG Anti-Gravity Treadmill voids the Warranty.Additional extended warranty can be purchased for your Stride Smart system. Please contactyour AlterG representative for more information.D000168 Rev. B12
Stride Smart for the Pro 200 Plus AlterG Anti-Gravity Treadmill will perform as described in this Operation Manual and by accompanying labels and/or inserts when it is assembled, operated, maintained and repaired in accordance with the instructions provided. A defective Stride Smart system should not be used.