Transcription
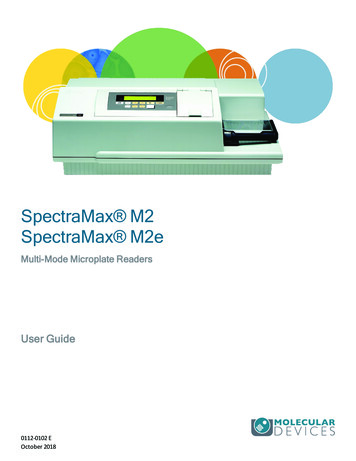
SpectraMax M2SpectraMax M2eMulti-Mode Microplate ReadersUser Guide0112-0102 EOctober 2018
SpectraMax M2 and M2e Microplate Reader User GuideThis document is provided to customers who have purchased Molecular Devices equipment, software,reagents, and consumables to use in the operation of such Molecular Devices equipment, software,reagents, and consumables. This document is copyright protected and any reproduction of thisdocument, in whole or any part, is strictly prohibited, except as Molecular Devices may authorize inwriting.Software that may be described in this document is furnished under a non-transferrable license. It isagainst the law to copy, modify, or distribute the software on any medium, except as specificallyallowed in the license agreement. Furthermore, the license agreement may prohibit the softwarefrom being disassembled, reverse engineered, or decompiled for any purpose.Portions of this document may make reference to other manufacturers and/or their products, whichmay contain parts whose names are registered as trademarks and/or function as trademarks of theirrespective owners. Any such usage is intended only to designate those manufacturers’ products assupplied by Molecular Devices for incorporation into its equipment and does not imply any right and/orlicense to use or permit others to use such manufacturers’ and/or their product names as trademarks.Each product is shipped with documentation stating specifications and other technical information.Molecular Devices products are warranted to meet the stated specifications. Molecular Devices makesno other warranties or representations express or implied, including but not limited to, the fitness ofthis product for any particular purpose and assumes no responsibility or contingent liability, includingindirect or consequential damages, for any use to which the purchaser may put the equipmentdescribed herein, or for any adverse circumstances arising therefrom. The sole obligation of MolecularDevices and the customer's sole remedy are limited to repair or replacement of the product in theevent that the product fails to do as warranted.For research use only. Not for use in diagnostic procedures.The trademarks mentioned herein are the property of Molecular Devices, LLC or their respective owners. These trademarks may notbe used in any type of promotion or advertising without the prior written permission of Molecular Devices, LLC.Patents: http://www.moleculardevices.com/patentsProduct manufactured by Molecular Devices, LLC.3860 N. First Street, San Jose, California, 95134, United States of America.Molecular Devices, LLC is ISO 9001 registered. 2018 Molecular Devices, LLC.All rights reserved.20112-0102 E
ContentsSafety InformationWarnings, Cautions, Notes, and TipsChapter 1: Introduction59Computer Integration10Supported Plates and Cuvettes10Shake11Temperature Regulation11Chapter 2: Setting Up the Instrument12Connecting Instrument Cables13Chapter 3: Getting Started14Control Panel15Cuvette Chamber17Plate Drawer18Plate Adapter19Chapter 4: Operating the Instrument20Temperature Settings20Wavelength Settings21Read a Plate22Read a Cuvette23Chapter 5: Read Modes and Read Types24Absorbance Read Mode24Fluorescence Intensity Read Mode29Luminescence31Time-Resolved Fluorescence Read Mode32Read Types33Chapter 6: Maintenance0112-0102 E535Cleaning the Instrument35Replacing Fuses36Before You Move the Instrument383
SpectraMax M2 and M2e Microplate Reader User GuideChapter 7: TroubleshootingOpening the Drawer Manually43Obtaining Support44Appendix A: Specifications45System Diagrams and Dimensions43951Appendix B: Accessories53Appendix C: Electromagnetic Compatibility560112-0102 E
Safety InformationSafety InformationInformation about the safe use of the instrument from Molecular Devices includes anunderstanding of the user-attention statements in this guide, the safety labels on theinstrument, precautions to follow before you operate the instrument, and precautions tofollow while you operate the instrument.Make sure that everyone involved with the operation of the instrument has:Received instruction in general safety practices for laboratories.Received instruction in specific safety practices for the instrument.Read and understood all Safety Data Sheets (SDS) for all materials being used.Read and observe all warnings, cautions, and instructions. The most important key to safetyis to operate the instrument with care.WARNING! If the instrument is used in a manner not specified by MolecularDevices, the protection provided by the equipment might be impaired.Warnings, Cautions, Notes, and TipsAll warning symbols are framed within a yellow triangle. An exclamation mark is used formost warnings. Other symbols can warn of other types of hazards such as biohazard,electrical, or laser safety warnings as are described in the text of the warning. Follow therelated safety information.The following user attention statements might be displayed in the text of Molecular Devicesuser documentation. Each statement implies the amount of observation or recommendedprocedure.WARNING! A warning indicates a situation or operation that could causepersonal injury if precautions are not followed.CAUTION! A caution indicates a situation or operation that could cause damage tothe instrument or loss of data if correct procedures are not followed.Note: A note calls attention to significant information.Tip: A tip provides useful information or a shortcut, but is not essential to thecompletion of a procedure.0112-0102 E5
SpectraMax M2 and M2e Microplate Reader User GuideSymbols on the InstrumentEach safety label found on the instrument contains an alert symbol that indicates the type ofpotential safety hazard.SymbolIndicationConsult the product documentation.Risk of electrical shock. Refer servicing to qualified personnel only.Potential lifting hazard. To prevent injury, use a minimum of two people to lift theinstrument.Required in accordance with the Waste Electrical and Electronic Equipment (WEEE)Directive of the European Union. It indicates that you must not discard this electrical orelectronic product or its components in domestic household waste or in the municipalwaste collection system.For products under the requirement of the WEEE directive, contact your dealer orlocal Molecular Devices office for the procedures to facilitate the proper collection,treatment, recovery, recycling, and safe disposal of the device.- - California proposition 65 requires businesses to providewarnings to Californians about significant exposures to chemicals that cause cancer, birthdefects, or other reproductive harm.Electrical SafetyTo prevent electrical injuries and property damage, inspect all electrical equipment beforeuse and report all electrical deficiencies. Contact Molecular Devices technical support forequipment service that requires the removal of covers or panels.WARNING! HIGH VOLTAGE. Within the instrument is the potential of anelectrical shock hazard existing from a high voltage source. Read and understandall safety instructions before you install, maintain, and service the instrument.To prevent electrical shock, use the supplied power cord and connect to a properlygrounded wall outlet.60112-0102 E
Safety InformationTo protect against fire hazard, replace the fuses only with the same type and rating as theoriginal factory installed fuses.To ensure sufficient ventilation and provide access to disconnect power from theinstrument, maintain a 20 cm to 30 cm (7.9 in. to 11.8 in.) gap between the rear of theinstrument and the wall.Power off the instrument when not in use.Chemical and Biological SafetyNormal operation of the instrument can involve the use of materials that are toxic,flammable, or otherwise biologically harmful. When you use such materials, observe thefollowing precautions:Handle infectious samples based on good laboratory procedures and methods toprevent the spread of disease.Observe all cautionary information printed on the original containers of solutions beforetheir use.Dispose of all waste solutions based on the waste disposal procedures of your facility.Operate the instrument in accordance with the instructions outlined in this guide, andtake all the required precautions when using pathological, toxic, or radioactive materials.Splashing of liquids can occur. Take applicable safety precautions, such as using safetyglasses and wearing protective clothing, when working with potentially hazardousliquids.Observe the applicable cautionary procedures as defined by your safety officer whenusing hazardous materials, flammable solvents, toxic, pathological, or radioactivematerials in or near a powered-up instrument.WARNING! Never use the instrument in an environment where potentiallydamaging liquids or gases are present.CAUTION! Use of organic solvents can cause harm to the optics in the instrument.Extreme caution is recommended when you use organic solvents. Always use a platelid and do not place a plate that contains these materials in the plate chamber forprolonged periods of time. Damage caused by the use of incompatible or aggressivesolvents is NOT covered by the instrument warranty.CAUTION! When you use aggressive or corrosive reagents, you should have the plateautomatically move out of the instrument after a read.0112-0102 E7
SpectraMax M2 and M2e Microplate Reader User GuideMoving Parts SafetyThe instrument contains moving parts that can cause injury. Under normal conditions, theinstrument is designed to protect you from these moving parts.WARNING! If the instrument is used in a manner not specified by MolecularDevices, the protection provided by the equipment might be impaired.To prevent injury:Never try to exchange labware, reagents, or tools while the instrument is operating.Never try to physically restrict the moving components of the instrument.Keep the instrument work area clear to prevent obstruction of the movement. Provideclearance in front of the instrument of 18 cm (7.1 in.) for the plate drawer.CAUTION! To prevent damage to the instrument, the height of the plate must notexceed 17 mm, including the lid if the plate is lidded.WARNING! Do not attempt to access the interior of the instrument unlessspecifically instructed to do so. The moving parts inside the instrument can causeinjury. Do not operate the instrument with any covers or panels removed.Note: Observe all warnings and cautions listed for all external devices attached to or inuse during the operation of the instrument. See the applicable user guide for theoperating and safety procedures of that device.80112-0102 E
1Chapter 1: IntroductionThe SpectraMax M2 Multi-Mode Microplate Reader and the SpectraMax M2e Multi-ModeMicroplate Reader are dual monochromator, multi-detection instruments with a triple-modecuvette port and a 6-well to 384-well plate read capability.The flexibility and high sensitivity makes these instruments appropriate for applications inthe fields of biochemistry, cell biology, immunology, molecular biology, and microbiology.Typical applications include ELISA, nucleic acid, protein, enzymatic type homogeneous andheterogeneous assays, microbial growth, endotoxin testing, and pipettor calibration.Read ModesRead ModeSpectraMax M2SpectraMax M2eAbsorbanceFluorescence Intensity(Top read only)(Top and bottom read)*Luminescence(Secondary Read Mode)(Secondary Read Mode)*Time-Resolved Fluorescence(Secondary Read Mode)(Secondary Read Mode)*Use secondary read modes for limited development of glow Luminescence or Time-ResolvedFluorescence assays. The performance of these modes is not comparable to dedicated Luminescenceor Time-Resolved Fluorescence instruments or instruments such as the SpectraMax M5 Multi-ModeMicroplate Reader or the SpectraMax iD5 Multi-Mode Microplate Reader.Read types include: See Read Types on page 33.EndpointKineticSpectrumWell ScanThe instrument light source is a high-powered Xenon flash lamp. Two holographic diffractiongrating monochromators allow for individual optimization of wavelengths for both excitationand emission in the Fluorescence read mode. Mirrored optics focus the light in to the samplevolume, and cutoff filters reduce stray light and minimize background interference. You canvary the number of lamp flashes per read to optimize the sensitivity or read speed.-6-12The instrument dynamic range of detection is from 10 to 10 molar fluorescein. Internalcompensation for detector sensitivity, photomultiplier tube voltage and sensitivity, as wellas excitation intensity, effectively eliminates variations in measured fluorescence values. Thephotometric range is 0–4 ODs with a resolution of 0.001 OD.Dual monochromators enable you to select absorbance wavelengths between 200 nm and1000 nm, excitation wavelengths between 250 nm and 850 nm, and emission wavelengthbetween:360 nm and 850 nm (SpectraMax M2).250 nm and 850 nm (SpectraMax M2e).0112-0102 E9
SpectraMax M2 and M2e Microplate Reader User GuideComputer IntegrationEach Molecular Devices microplate reader is shipped with a license key for the SoftMax ProData Acquisition and Analysis Software that you install on the computer that you use tooperate the instrument. The SoftMax Pro Software provides integrated instrument control,data display, and statistical data analysis.You should install the SoftMax Pro Software on the computer before you set up theinstrument. Please be aware that some updates to the SoftMax Pro Software require apurchase. Contact Molecular Devices before you update the software. To download thelatest version of the software, softmax-pro-software#Order.Note: For information about the computer specifications that are required to run thesoftware, the software installation and licensing instructions, and the directions tocreate the software connection between the computer and the instrument, see theSoftMax Pro Data Acquisition and Analysis Software Installation Guide.To prevent data loss, turn off all sleep and hibernation settings for the hard disk, the CPU,and the USB ports. Disable automatic Windows updates. Update Windows manually whenyou do not use the computer to control an instrument. You can set these options inWindows Control Panel.Supported Plates and CuvettesThe instrument accommodates both plates and cuvettes.Note: The supplied plate adapter is required for some applications. See Plate Adapteron page 19.Supported PlatesYou can use 6, 12, 24, 48, 96, and 384-well plates that conform to ANSI/SBS standardmicroplate footprint and dimensions in the instrument. The plate list in the software includeshalf area and low- volume plates. The software enables you to define a new plate type basedon the manufacturer's specifications for well size, spacing, and distance from the plate edge.Use polystyrene plates for absorbance wavelengths above 340 nm.To allow transmission of the deep UV spectra when you do a read at wavelengths below340 nm, you must use special UV-transparent plates or quartz plates.Endpoint, Kinetic, Spectrum, and Well Scan read types are available for the Absorbanceand Fluorescence read modes with any plate model.Top reads are available for the Fluorescence read mode for the SpectraMax M2. Top andbottom reads are available for the Fluorescence read mode for the SpectraMax M2e.100112-0102 E
Chapter 1: IntroductionOne plate drawer adapter is provided with the instrument. The plate adapter is requiredfor optimum performance with standard 96-well and 384-well format plates for all topread applications.Note: Although not recommended, you can also use strip well plates in theinstrument. When you use strip-wells, use high quality support frames or holders. Toavoid warping, you should fill the frame or holder with empty strips.Supported CuvettesFor a cuvette read, you must ensure that the meniscus is above the light beam in a standardcuvette and that the sample chamber is aligned properly with the beam in a microcuvette.The light beam is 0.625 in (15.87 mm) above the cuvette bottom.Use the cuvette port for Absorbance, Fluorescence, and Luminescence (secondarymode) read modes.To allow transmission of the deep UV spectra when you do a read at wavelengths below340 nm, you must use special UV-transparent cuvettes or quartz cuvettes.Endpoint, Kinetic, and Spectrum read types are available for the Absorbance andFluorescence read modes with cuvettes.Note: You can use a 12 x 75 mm test tube with a test tube cover. You can order thetest tube cover from Molecular Devices. See Accessories on page 53.ShakeThe software enables you to define settings to mix of the contents of the wells by shaking theplate linearly along the long axis at preset intervals.For the Endpoint read type, you can shake the plate for 0 to 999 seconds before the readat each wavelength you set.For the Kinetic read type, you can shake the plate for 0 to 999 seconds before the initialread, and/or before each subsequent read.Use of shake is recommended for ELISAs and other solid-phase, enzyme-mediated reactionsto enhance accuracy.Temperature RegulationThe temperature in the plate chamber and cuvette chamber is isothermal, both at ambientand when you turn on the incubator. When you turn on the incubator, you can set thetemperature from 4 C above ambient to 45 C. The ambient temperature must be at least20 C to reach the 45 C operating temperature. The operating humidity must be noncondensing, and can range from 0 to 70%.0112-0102 E11
Chapter 2: Setting Up the Instrument2Before you unpack and set up the instrument, prepare a dry, flat work area that is away fromdirect sunlight, dust, drafts, vibration, and moisture. The work area must have sufficientspace for the instrument, host computer, and required cables. To provide access fordisconnecting power from the instrument, maintain a 20 cm to 30 cm (7.9 in. to 11.8 in.) gapbetween the rear of the instrument and the wall. To ensure sufficient ventilation, do notblock the ventilation grids on the front and rear of the instrument.The package contains the instrument and the following accessories:SoftMax Pro Software, product key, and installation guideInstrument installation guideUSB computer connection cableAC power adapterPlate adapterFor a complete list of the package contents, see the enclosed packing list.Before you set up the instrument, you should install the SoftMax Pro Software on thecomputer that you plan to use to operate the instrument. See the SoftMax Pro DataAcquisition and Analysis Software Installation Guide.Unpacking the InstrumentThe packaging is designed to protect the instrument during shipment. Tape is placed on thecuvette door to protect the instrument from damage during shipment.CAUTION! Do not touch or loosen screws or parts other than those specificallydesignated in the instructions. Doing so could cause misalignment and possibly voidthe warranty.The instrument is packed in a specially designed carton. Before you unpack the instrument,check the box for any damage that might have occurred during transportation. If anydamage is noted, inform the supplier immediately and keep the damaged packaging.Note: Retain the shipping box and all packing materials for future transport needs.To unpack the instrument:1. Open the top of the box.2. Lift the accessories tool box and the instrument from the package, and then place theinstrument on a level surface.3. Remove the cardboard divider from the top of the instrument.4. Remove the packing material from both ends of the instrument, remove the instrumentfrom the plastic bag, and then set the instrument down carefully on a level surface.5. Remove the tape from the cuvette door.0112-0102 E12
SpectraMax M2 and M2e Microplate Reader User GuideConnecting Instrument CablesThe power cord and USB cable connect to the ports on the rear of the instrument.Part NumberDescription1-2100-0548USB computer connection cable, 3 meter (9.8 foot)4400-0002Power cord, 1 meter (3.3 foot) See Accessories on page 53 for internationalpower cord part numbers.Note: Before you connect or disconnect the power cord, make sure that the powerswitch that is on the rear of the instrument is in the Off position.To connect the instrument cables:1. Turn the instrument around so that the rear of the instrument faces you.2. Make sure that the power switch is in the Off position.3. Connect the appropriate end of the supplied USB cable to the USB port, and thenconnect the other end to a USB port on the computer.4. Connect the supplied power adapter to the power cord port, and then connect the otherend to a grounded electrical wall outlet.5. Turn the instrument around so that the front of the instrument faces you.Note: Ensure no cables run beneath the instrument.130112-0102 E
Chapter 3: Getting Started3Now that you have installed the SoftMax Pro Software software on the computer, removedthe tape from the cuvette port, and connected the cables, it is time to get started.Turn on the instrument power switch located on the rear of the instrument. Wait for theinstrument to complete its diagnostic check and the plate drawer opens.The following are the main components of the instrument:Control panel: Enables you to open the plate drawer, control the read chambertemperature, and set the wavelengths.Cuvette chamber: Enables you to read the contents of a cuvette.Plate drawer: Enables you to insert the plate to read.CAUTION! Never touch the internal optic mirrors, lenses, filters, or cables. The opticsare extremely delicate, and critical to the function of the instrument.0112-0102 E14
SpectraMax M2 and M2e Microplate Reader User GuideControl PanelThe instrument control panel works in conjunction with the SoftMax Pro Software to openthe plate drawer, adjust the temperature, and to set the wavelengths for cuvette reads. Seethe SoftMax Pro Data Acquisition and Analysis Software User Guide.To change the contrast of the display, press %T/A/RFU, and then press Temp p or q.The left side of the control panel displays the actual temperature inside the cuvette chamberabove the display of the temperature you set for the cuvette chamber. If the temperatureinside the cuvette chamber is not at the set temperature, the indicator blinks. Thetemperature inside the plate chamber lags slightly behind the temperature inside thecuvette chamber. The temperature inside the plate chamber displays in the software.The center of the control panel displays the absorbance/excitation and emissionwavelengths the instrument uses for a cuvette read.The right side of the control panel displays the data the instrument receives from a cuvettereference read as percent transmission, absorbance, or relative fluorescence units. If you donot do a reference read, the indicator blinks.Note: Settings you enter in the software override the corresponding control panelsetting.Temp On/OffThe Temp On/Off button enables or disables the incubator that controls the temperatureinside the cuvette chamber and the plate chamber.When the incubator is on, the control panel displays the temperature inside the cuvettechamber above the display of the temperature you set.For the Kinetic and Spectrum read types, the temperature buttons on the control panelare disabled.150112-0102 E
Chapter 3: Getting StartedTempThe Temp p and q buttons enable you to enter the set point at which to regulate thetemperature inside the cuvette chamber and the plate chamber. The temperature for theinstrument chambers is isothermal at ambient temperature as well as at elevatedtemperatures. The cuvette chamber temperature displays on the instrument control paneland the plate chamber temperature displays in the software.You cannot set a temperature beyond the upper (45 C) or lower (4 C above ambient)instrument limits. To set the temperature at 45 C, the ambient temperature of the roommust be at least 20 C.Wavelength (λ)The λ p and q buttons enable you to set the wavelengths to read the cuvette. The controlpanel contains two sets of λ wavelength buttons. The left buttons enable you to set theabsorbance/excitation (fluorescence) wavelength and the right buttons enable you to set theemission (fluorescence) wavelength.Note: The control panel does not display the wavelength if you use the software toset the wavelength.%T/A/RFUThe %T/A/RFU button enables you to change the display of the cuvette reference read databetween percent transmittance (%T), absorbance (A) or relative fluorescence units (RFU).Read CuvetteThe Read Cuvette button enables you to start a cuvette read.Note: The Read Cuvette button is disabled when the software does a read.REFThe REF button enables you to do a cuvette reference read of buffer, water, or air. Thesoftware uses this value as I0 to calculate Absorbance or % Transmittance. If you do not do areference read, the instrument uses the I0 value that is stored in the instrument.Note: The REF button is disabled when the software does a read.DrawerThe Drawer button enables you to open and close the plate drawer.0112-0102 E16
SpectraMax M2 and M2e Microplate Reader User GuideCuvette ChamberThe cuvette chamber is located to the right of the control panel. Lift up the lid over thechamber to insert or remove a cuvette. The chamber contains springs that position thecuvette in the proper alignment for a read. You must close the cuvette door before you starta read.The instrument can accommodate standard height (45 mm), 1 cm cuvettes and 12 x 75 mmtest tubes when you use a test tube cover. You can also use semi-microcuvettes and ultramicrocuvettes with an adapter. See Supported Plates and Cuvettes on page 10.Cuvettes for the Absorbance read mode are frosted on two sides. Handle the cuvettes on thefrosted sides only. Place the cuvette in the cuvette chamber so that the read (clear) sides faceleft and right.Cuvettes for the Fluorescence read mode are clear on all four sides and you should handlethese cuvettes carefully.170112-0102 E
Chapter 3: Getting StartedPlate DrawerThe plate drawer is located on the right side of the instrument and slides in and out of theplate chamber. An internal latch positions the plate on the drawer as it closes. You can use 6,12, 24, 48, 96, and 384-well plates that conform to ANSI/SBS standard microplate footprintand dimensions in the instrument. See Supported Plates and Cuvettes on page 10.Note: The supplied plate adapter is required for some applications. See Plate Adapteron page 19.The Drawer button enables you to open and close the plate drawer, or you can use thesoftware. The drawer closes for each read. Subsequent plate drawer operation is dependenton the incubator setting:When you open the drawer, if the incubator is off, the drawer remains open.When you open the drawer, if the incubator is on, the drawer closes after approximately10 seconds to maintain temperature control within the plate chamber.Drainage ports protect the plate drawer mechanism and plate chamber from accidentalspills.CAUTION! Do not obstruct the movement of the plate drawer. If you must retrieve aplate after an error condition or power outage and the plate drawer does not open,you can open the drawer manually. See Opening the Drawer Manually on page 43.CAUTION! To prevent damage to the instrument, the height of the plate must notexceed 17 mm, including the lid if the plate is lidded.0112-0102 E18
SpectraMax M2 and M2e Microplate Reader User GuidePlate AdapterBefore you read standard 96-well or 384-well plates from the top, you must insert the plateadapter in the plate drawer. Before you do a bottom read, or use high profile (6-well, 12-well,24-well, or 48-well) plates, you must remove the plate adapter from the plate drawer.CAUTION! Incorrect insertion or removal of the plate adapter can cause damage tothe instrument plate drawer. To ensure that you do not damage the plate drawer, dothe following procedures.To insert the plate adapter:1. Open the plate drawer.2. Hold the plate adapter so that the label is on the front side facing up.3. Place the top back (Row A) of the plate adapter into the drawer first. The corner cutoutmust be in the lower left corner where the plate pusher is located. While pushing againstthe back edge of the adapter, lower the front of the plate adapter onto the drawer.To remove the plate adapter:1. Open the plate drawer.2. In the lower left corner where the plate pusher is located, carefully lift the front of theplate adapter at the corner cutout. As you lift the plate adapter, make sure to also liftfrom the other end of the front edge, and then completely remove the plate adapterfrom the plate drawer.190112-0102 E
Chapter 4: Operating the Instrument4You do the same basic steps to operate the instrument when you read a plate or you read acuvette.Note: For detailed software instructions, see the SoftMax Pro Data Acquisition andAnalysis Software User Guide or the application help.Temperature SettingsWhen you use the incubator to set the temperature in the cuvette chamber and the platechamber, you should wait at least 60 minutes for the chamber temperature to reach the setpoint before you do the read. You cannot set a temperature beyond the upper (45 C) orlower (4 C above ambient) instrument limits. You can use the instrument control panel orthe software to change the temperature.When you turn on the incubator, the plate drawer closes after approximately 10 secondsto maintain temperature control.The incubator maintains the chamber temperature at the set point until you press TempOn/Off again or you change the temperature from the Temperature Control dialog in thesoftware. When you turn off the incubator the chamber temperature gradually returnsto ambient.When you turn the incubator back on after a momentary shutdown, allow about tenminutes for the control algorithm to fully stabilize the chamber temperature.Software Temperature SettingsIn the software, in the Ribbon, on the Home tab, clickTempe
Sep 5, 2021
