Transcription
Solved Examples inAutoCADLubna ZaghlulBashir2015
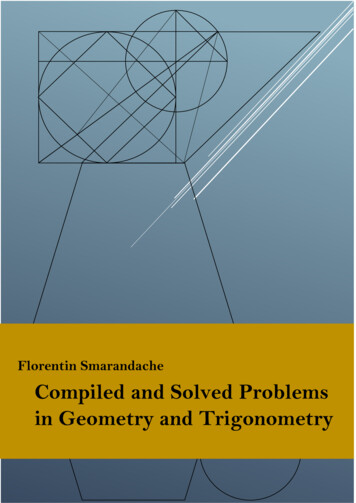
World Scientific News 27 (2016) 1-168Available online at www.worldscientificnews.comWSN 27 (2016) 1-168EISSN 2392-2192Solved Examples in AutoCADLubna Zaghlul BashirTechnology University, Baghdad, IraqE-mail address: lubna zaghlul@yahoo.comABSTRACTLearning to use a CAD system is similar to learning a new language. It is necessary to begin withthe basic alphabet and learn how to use it correctly and effectively through practice. This will requirelearning some new concepts and skills as well as learning a different vocabulary. Today, the majority ofthe Mechanical CAD systems are capable of creating three-dimensional solid models. Nonetheless, allCAD systems create designs using basic geometric entities and many of the constructions used intechnical designs are based upon two-dimensional planar geometry. The method and number ofoperations that are required to accomplish the basic planar constructions are different from one system toanother. AutoCAD provides many different ways to accomplish the same task. For example, to activate acommand, you can select it from a menu or a toolbar, or type the command name at AutoCAD’scommand prompt. There is no right or wrong way to do something in AutoCAD. You will developtechniques that you find most comfortable for the way you work and the types of drawings you create.You may want to customize AutoCAD for your particular needs. There are also many common draftingtasks that can be automated by using scripts and macros, or by writing or purchasing add-on applicationsthat run inside AutoCAD, tailoring the program for specific drafting and design disciplines. In this bookwe illustrate AutoCAD objects line, circle, rectangle, arc, ellipse, and polygon, by drawing differentshapes and apply the three methods of coordinate system and compare between them: AbsoluteCoordinate System, Relative Coordinate System and Polar Coordinate System.Keywords: Cartesian Coordinate System; Absolut; Relative; Polar; Draw Bar; Modify Bar, Line; Arc;Circle; Rectangle; Ellipse; Polygon-1-
World Scientific News 27 (2016) 1-168-2-
World Scientific News 27 (2016) 1-168AcknowledgementsPraise be to god, lord of the whole creationReviewer:Prof. Tadeusz HryniewiczKoszalin University of Technology, Koszalin, Poland-3-
World Scientific News 27 (2016) 1-168List of ContentsChapter 1: AutoCAD -------------------------------------61. AutoCAD 71.1. The States .2. Cartesian and Polar Coordinate ---------------------111.3. Angles In AutoCAD ---------------------------------121.4. Method of Entering ----------------------------------121.5. Methods of er 2: Basic Objects in -------------------------152. Basic Objects in --------------------------------------162.1. ----------162.2. --------242.3. ----------352.4. --------532.5. ----------622.6. --------712.7. ---------802.8. ---------812.9. Construction -------------------------------------------842.10. Poly --852.11. --------862.12. -----86Chapter 3: Modify Commands in -----------------903. Modify Commands in -------------------------------913.1. ----------913.2. ---------913.3. ---------923.4. ----------933.5. ----------933.6. ----------953.7. ---------963.8. ---------96-4-
World Scientific News 27 (2016) 1-1683.9. ---------973.10. --------983.11. ------983.12. --------993.13. ---------993.14. ----1003.15. ------1023.16. -----105Chapter 4: 4. The Layers 4.1. Layers 74.2. Layer Properties Manager Layer -------------------1074.3. Steps of Create --------------------------------------1074.4. Layers . Object 04.5.1. Assigning Colors -----------------------------------1104.5.2. Assigning Line -----------------------------------1114.5.3. Setting Line --------------------------------------111Chapter 5: Solved ------------------------------------1125. Solved 13Conclusions 7References 167-5-
World Scientific News 27 (2016) 1-168-6-
World Scientific News 27 (2016) 1-1681. AutoCAD InterfaceAutoCAD provides countless methods and tools for producing, viewing, and editing 2- dimensionaldrawings and 3- dimensional models. The software permits designers, drafters, engineers, and others tocreate, revise, model, and document industrial parts and assemblies for prototyping, model making, andmanufacturing around the word, organizations also use AutoCAD for the design of maps, buildings,bridges, factories, and about every product imaginable, ranging from car parts and stereo equipment tosnow skis and cellular phones.The AutoCAD screen is divided into six distinct areas: Title bar Menu bar Toolbars Document window or drawing area Command window Status bar-7-
World Scientific News 27 (2016) 1-1681.1. The States BarThe Status Bar is the area below the command line that shows messages as well as coordinates,modes, and the current time. To activate SNAP, GRID, ORTHO, OSNAP, OTRACK, POLAR, DYN,LWT and MODEL you must double-click on the mode to change.a. Alignment GridThe grid command allows you to set an alignment grid of dots of any desired spacing, making iteasier to visualize distances and drawing size. you can turn the grid on and off by pick the grid buttonlocated in the status bar or( by pressing Ctrl g or the F7 function key).The drafting setting dialog boxpermits you to review and make changes to the grid settings: Menu bar Tools drafting settingb. Snap gridThe snap grid is similar to the visual grid, but it is an invisible one. You cannot see the snap feature,but you can see the effects of it as you move the crosshairs. It is like a set of invisible magnetic points.-8-
World Scientific News 27 (2016) 1-168The crosshairs jump from point to point as you move the pointing device. This allows you to layoutdrawings quickly, yet you have the freedom to toggle snap off at any time.Pick the snap buttonin the status bar to turn on the snap grid, (or pressing Ctrl b or the F9 functionkey).c. The Ortho ModeOrtho short for orthogonal, allows you to draw horizontal or vertical lines quickly and easily.Ortho is on when the Ortho buttonon the status bar is depressed. You can toggle Ortho on and off byclicking the Ortho button. (or press F8 function key).d. PolarPolar makes it easy to draw lines at regular angular increments, such as 30, 45, or 90 degree. Usingthe F10 key or polar buttontoggles polar tracking on or off.e. Object Snap (Osnap)AutoCAD provides a capability called "object snap", or OSNAP for short, that enables you to"snap" to existing object end points, midpoints, centers , intersections, etc. available object snap mode areillustrated bellow:-9-
World Scientific News 27 (2016) 1-168f. Object Snap Tracking (Otrack)Object snap tracking is active when the alignment paths appear from one or more acquired objectsnaps. This feature is a part of AutoCAD's Auto tracking. Youcan toggle Auto Tracking on and off with the Otrack buttonon the status bar or by toggling F11.g. DYNDYN, or dynamic input, is a feature that helps you visualize and specify coordinate vales angularvalues when drawing lines, arcs, circles, etc. DYN may display absolute Cartesian coordinates (X and Yvalues) or relative polar coordinates (distance and angle) depending on the current command prompt andthe setting you prefer. Pick the DYN buttonin the status bar to turn on the dynamic, (or press the F12function key).h. LWTLWT short of line weight produces the line weight settings dialog box, this dialog box assigns lineweights to objects.i. ModelModel Space used to construct engineering model where paper space used to print or drawengineering model.j. UnitsThe units command open dialog box to determine measurement units for drawing angles anddirection and precision. Access the command by: Menu bar: format units Length type. Determine length types (scientific, decimal, engineering, architectural,fractional). Angle type. Determine angle type. (The default decimal degree). Precision.determine accuracy of angles and lengths. Precision is the number of places to the rightof the decimal to display. andClock wise. Control angle direction.-10-
World Scientific News 27 (2016) 1-168k. LimitsLimits used to determine the limits of board. To access the command by: Menu bar format Drawing limitsSpecify lower left corner or [on / off] 0.0000, 0.0000 :Specify upper right corner 420,297 :1.2. Cartesian and polar Coordinate SystemAutoCAD provides the user with an infinite two dimensional area to work with. Any entities placeon the working two dimensional plane can be defined relative to the Cartesian coordinate system.The Cartesian coordinate system divides a two dimensional plane with two perpendicular axis. TheX axis runs horizontal across the bottom of the screen. The Y axis runs vertically along the left side of thescreen. These two axis intersect at the bottom left corner of the screen.Each of these axis is further divided into segments. Each segment is given a value. The X axissegments increase in value to the right. The positive X values are to the right of the intersection of the twoaxis. The negative X values are to the left. The positive Y values are above the intersection and increaseup. The negative Y values are below.-11-
World Scientific News 27 (2016) 1-168Polar coordinates use a distance and an angle to locate a point. With both Cartesian and polarcoordinates, can enter absolute coordinates based on the origin (0,0), or relative coordinates based on thelast point specifi
1.3. Angles in AutoCAD Programs Angles measure sets the direction for angle 0. east (x positive) is the AutoCAD default. (Select clock wise from units dialog box if you want to change the AutoCAD default setting for measuring angles). 1.4. Method of Entering Coordinate 1. (Absolute Cartesian Coordinate). Example: 7,3 2. (Relative Cartesian Coordinate). Example
