Transcription
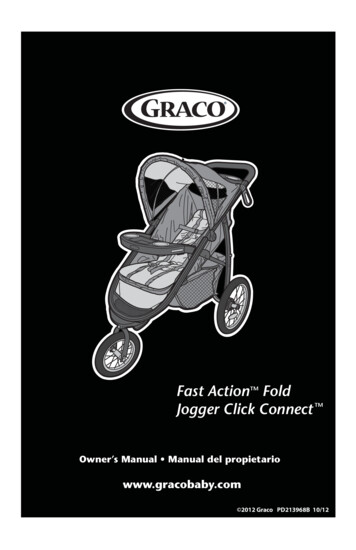
Fast Action FoldJogger Click ConnectTMTMOwner’S -ANUAL s -ANUAL DEL PROPIETARIOwww.gracobaby.com 2012 Graco PD213968B 10/12
Failure to follow these warnings and theassembly instructions could result in serious injury or death.s TO PREVENT TIPPING, do notplace more than 3 lbs (1.4 kg)on the parent’s tray.s TO AVOID BURNS, never puthot liquids in the parent’s tray.s TO PREVENT A HAZARDOUS,UNSTABLE CONDITION, neverplace purses, shopping bags,parcels or accessory items (otherthan approved Graco strollerbags) on the handle. Never placeanything on the canopy.s TO PREVENT A HAZARDOUS,UNSTABLE CONDITION, do notplace more than 10 lbs(4.5 kg) in the storage basket.s DO NOT ALLOW child to standon basket. It may collapse andcause injury.s DO NOT use storage basket as achild carrier.s NEVER PLACE child in thestroller with head towardfront of stroller.s NEVER ALLOW YOURSTROLLER to be used as a toy.s DISCONTINUE USING YOURSTROLLER should it becomedamaged or broken.s PRODUCT NOT INTENDED foruse with roller skates or in-lineskates.s PLEASE SAVE OWNER’SMANUAL FOR FUTURE USE.s ADULT ASSEMBLY REQUIRED.s NEVER LEAVE childunattended. Always keepchild in view while in stroller.s AVOID SERIOUS INJURY fromfalling or sliding out. Always useseat belt. After fastening buckles,adjust belts to get a snug fitaround your child.s AVOID FINGER ENTRAPMENT:Use care when folding andunfolding the stroller. Be certainthe stroller is fully erected andlatched before allowing yourchild near the stroller.s AVOID STRANGULATION.DO NOT place items with astring around your child’sneck, suspend strings fromthis product, or attach stringsto toys.s NEVER USE STROLLER ONSTAIRS or escalators. You maysuddenly lose control of thestroller or your child may fall out.Also, use extra care when goingup or down a step or curb.s USE OF THE STROLLER with achild weighing more than 50 lbs(22.7 kg) or taller than 45 in.(114.3 cm) will cause excessivewear and stress on the stroller.Use the stroller with only onechild at a time.2
USING GRACO INFANT CARSEAT WITH STROLLER:IF YOU ARE JOGGING WITHTHIS STROLLER:s DO NOT INFLATE abovethe maximum recommendedinflation pressure that is writtenon the side of the tire. Overinflation may cause wheel and/or tire to blowout and couldresult in serious injury.s DO NOT use stroller for joggingwhile carrier is in stroller.s BE AWARE of the increasedspeed and greater possibility oflosing control of the stroller.s ALWAYS USE and snuglyadjust the seat belt provided.s ALWAYS ATTACH thetether strap to your wrist whilejogging with this stroller.s BE AWARE of traffic and otherhazardous conditions that maybe present.s USE ONLY AGRACO SNUGRIDE CLICKCONNECT CAR SEAT withthis travel system. (Not intendedfor use with SnugRide ,SnugRide 30, SnugRide 32, SnugRide 35, InfantSafeSeat , AUTOBABY,LOGICO S, JUNIORBABY andASSURA infant car seats.)Improper use of this stroller withother manufacturers’ car seatsmay result in serious injury ordeath.s READ THE MANUAL providedwith your Graco car seat beforeusing it with your stroller.s ALWAYS SECURE your childwith the car seat harness whenusing the car seat in the stroller.If your child is already in thecar seat, check that the child issecured with the harness.3
No observar estas advertencias y las instrucciones de armadopodría resultar en lesiones serias o la muerte.s POR FAVOR, GUARDE ELMANUAL DEL PROPIETARIOPARA USO FUTURO.s REQUIERE QUE LO ARMEUN ADULTO.s NUNCA DEJE al niño sinsupervisión. Mantenga al niñosiempre a la vista cuando estéen el cochecito.s EVITE SERIAS LESIONESde caídas o resbalos. Usesiempre el cinturón deseguridad. Después de ajustarlas hebillas, ajuste las correaspara obtener un calce apretadoalrededor de su niño.s EVITE AGARRARLE LOSDEDOS: Use cuidado cuandopliega y despliega el cochecito.Asegúrese de que el cochecitoesté completamente armado ytrabado antes de permitir queel niño se acerque al mismo.s EVITE LA ESTRANGULACIÓN.NO ponga artículos con uncordón alrededor del cuello delniño, suspenda cordones de esteproducto ni ponga cordones a losjuguetes.s NUNCA USE EL COCHECITOEN ESCALERAS o escalerasmecánicas. Podría perderrepentinamente el control delcochecito o el niño podría caerse.Además, use mucho cuidadocuando sube o bajaun escalón o borde.4s EL COCHECITO DEBEUSARSE solamente a lavelocidad del caminar. Elproducto no debe usarse paracorrer, patinar, etc.s USAR EL COCHECITO con unniño que pesa más de 50 libras(22.7 kg) o más alto de 45pulgadas (114.3 cm) causaráun desgaste y tensión excesivaen el cochecito. Use elcochecito solamente con unniño por vez.s PARA PREVENIR QUE SETUMBE, no ponga más de1.4 kg (3 libras) sobre labandeja.s PARA EVITARQUEMADURAS, nunca pongalíquidos calientes en la bandejapara padres.s PARA PREVENIR UNA PARAPREVENIR UNA SITUACIÓNPELIGROSA E INESTABLE,nunca ponga carteras, bolsas,nunca ponga carteras, bolsas,paquetes o accesorios en lamanija (si no son las bolsaspara cochecito aprobadas porGraco). No ponga nunca nadasobre la capota.s PARA PREVENIR UNASITUACIÓN PELIGROSA EINESTABLE, no ponga más de10 libras (4.5 kg) en la canastade almacenamiento.s NO use la canasta dealmacenamiento comotransportador para niños.
s NUNCA PONGA a un niño en elcochecito con la cabeza hacia elfrente del cochecito.s NUNCA DEJE QUE SUPRODUCTO SE USE comoun juguete.s DEJE DE USAR EL COCHECITOen caso de que esté dañado oroto.s ESTE PRODUCTO NO DEBEusarse con patines o patines enlínea.s SI USTED SALE A CORRERCON ESTE COCHECITO:s NO INFLE los neumáticos conmás de la presión máximarecomendada que se indica enel costado del mismo. Inflarlodemasiado podría causarque la rueda o el neumáticose revienten y causen seriaslesiones.s NO use el cochecito para salir acorrer mientras el transportadorestá en el cochecito.s TENGA EN CUENTA LAMAYOR VELOCIDAD YMAYOR posibilidad de perder elcontrol del cochecito.s USE SIEMPRE y ajusteapretadamente el cinturón deseguridad provisto.s CONECTE SIEMPRE la correa asu muñeca mientras corre coneste cochecito.s TENGA EN CUENTA el tránsitoy otras situaciones peligrosas quepudieran estar presentes.USO DEL TRANSPORTADORPARA BEBÉ GRACO CONEL COCHECITO:s USE SOLAMENTEUN TRANSPORTADORSNUGRIDE CLICKCONNECT DE GRACO en este sistema de viaje. (Nodebe usarse con SnugRide ,SnugRide 30, SnugRide 32, SnugRide 35, InfantSafeSeat , AUTOBABY,LOGICO S, JUNIORBABYy asientos de automóvilpara bebé ASSURA.) El soinadecuado de este cochecitocon asientos para automóvilde otros fabricantes podríaresultar en lesiones serias o lamuerte.s LEA EL MANUAL incluidocon su transportador Gracoantes de usarlo con sucochecito.s ASEGURE SIEMPRE asu niño con el arnés deltransportador cuando usa eltransportador en el cochecito.Si su niño ya está en eltransportador, verifique queesté asegurado con el arnés.5
0ARTS LIST s ,ISTA DE PIEZASCheck that you haveall the parts for thismodel BEFOREassembling yourproduct. If anyparts are missing,call CustomerService.Verifique que tienetodas las piezas deeste modelo ANTESde armar su producto.Si falta alguna pieza,llame a Servicio alCliente.No tools required.No requiereherramientas.!LL MODELS s 4ODOS LOS MODELOS2X6
4O /PEN 3TROLLER s #ØMO ABRIR EL COCHECITOBefore assembly be sure to place stroller on top of a piece ofcardboard or other protective cover to prevent damage to floorsurface.Antes de armarlo, tenga la seguridad de poner el cochecito arriba deun pedazo de cartón u otro tipo de protección para prevenir el dañoa la superficie del piso.1Storage latchTraba de almacenamiento2Pull up on handle as shown.Tire hacia arriba de lamanija como se indica.7
CHECK that the stroller iscompletely latched open everytime you open the stroller andbefore continuing with the restof the assembly steps.3VERIFIQUE que el cochecitoesté completamente abierto ytrabado cada vez que lo abrey antes de continuar los pasosde ensamblaje restantes.SNAP!¡CLIC!8
Canopy s CapotaWARNING ChokingHazard: Remove andimmediately discard foam onthe canopy wire.1ADVERTENCIA Peligrode estrangulamiento: Saquey deseche inmediatamente laespuma de goma del alambrede la capota.Insert canopy wire into thecanopy mounts on each sideof the stroller as shown.Ponga el alambre de lacapota en los montajes de lacapota en cada costado delcochecito como se indica.2SNAP!¡CLIC!3To adjust.Para ajustarlo.9
&RONT 7HEEL s 2UEDA DELANTERACHECK the tire pressure beforeusing the stroller.DO NOT INFLATE abovethe maximum recommendedinflation pressure that iswritten on the side of the tire.Over-inflation may cause wheeland/or tire to blowout and couldresult in serious injury.VERIFIQUE la presión delneumático antes de usar elcochecito.NO INFLE los neumáticos porencima de la presión máximarecomendada que se indica enel costado del mismo. Inflarlodemasiado podría causar que larueda o el neumático reviente ycausar serias lesiones.1SNAP!¡CLIC!2CHECK that wheels aresecurely attached by pullingon wheel assembliesVERIFIQUE que las ruedasestén instaladas debidamentetirando de los ensamblajes delas ruedas.10
3For easy transport or storageremove front wheel bypushing button as shown.Para facilitar el transporte oalmacenamiento, saque larueda delantera empujandoel botón como se indica.411
2EAR 7HEELS s 2UEDAS TRASERASWARNINGChoking Hazard: Removeand immediately discardprotective end cap from eachwheel.DO NOT remove rear wheelsunless replacing them. Childcould fall on exposed rear axleand be injured.ADVERTENCIAPeligro de estrangulamiento:Saque y deseche inmediatamente latapa de protección de cada rueda.NO saque las ruedas traseras amenos que sea para cambiarlas.El niño podría caerse sobre el ejetrasero expuesto y sufrir una lesión.2X1CapTapa2SNAP!¡CLIC!3CHECK that wheels aresecurely attached by pullingon wheel assemblies.VERIFIQUE que las ruedasestén debidamente sujetadastirando del ensamblaje de larueda.12
sParking StandKickstand s 0IE DE APOYOSNAP!¡CLIC!Snap kickstand onto basketas shown.Trabe el pie de apoyo en lacanasta como se indica.Basket Assembly s Ensamblaje de la canastaSNAP!¡CLIC!Fasten basket to tubewith snaps as shown.Sujete la canasta al tubocon las trabas como seindica.13
Removing Rear Wheels #ØMO SACAR LA RUEDA TRASERATo remove wheel, pushbutton and pull wheel off.Repeat with the other wheel.Para sacar la rueda, empujeel botón y saque la rueda.Repita el procedimiento en laotra rueda.Attaching and Removing Arm Restss #ØMO SUJETAR Y SACAR LOS APOYABRAZOSTo remove, push button on theunderside of armrest and pullarmrest off.Para sacarlo, empuje el botónde abajo del apoyabrazos y tiredel mismo.To attach, push on until itsnaps into place.Para sujetarlo, empújelo hastaque se trabe en su lugar.12SNAP!¡CLIC!14
#HILD S 4RAY s "ANDEJA PARA NI OSWARNINGAlways secure your child withthe seat belt. The tray is not arestraint device.DO NOT lift the stroller bythe child’s tray. Use carewhen snapping the tray onthe stroller with a child in thestroller.ADVERTENCIAAsegure siempre a su niño con elcinturón de seguridad. La bandejano es un dispositivo de seguridad.NO levante el cochecito agarrándolode la bandeja para el niño.Use cuidado cuando traba labandeja en el cochecito si hay unniño en el cochecito.SNAP!¡CLIC!12To open the tray.Para abrir labandeja.15
Parent’s Tray s "ANDEJA PARA PADRESParent tray needs to snap over the top of thecanopy wire.La bandeja para padres necesita estar trabadaarriba del alambre de la capota.12CHECK that canopy wireis attached.VERIFIQUE que elalambre de la capotaestá connectadoSNAP!¡CLIC!Parent Tray with MP3 Holders "ANDEJA PARA PADRES CON SOPORTE PARA -0 HookGanchoTo attach your MP3 player(not included), slide the hookon the tray and insert yourMP3 player in either directionas shown.Para sujetar su reproductor deMP3 (no se incluye), deslice elgancho en la bandeja e insertesu reproductor de MP3 en unade las direcciones como seindica.16
0OINT (ARNESS s !RNÏS DE PUNTOS1234Use slide adjuster at shoulder and waistfor tighter adjustment. To changeshoulder harness slots, see page 19.Use el ajustador deslizable delhombro y la cintura para ajustarlomás apretadamente. Para cambiar lasranuras del arnés del hombro, consultela página 19.17
0OINT "UCKLE s (EBILLA DE PUNTOSTo convert to 3-pt harness.Para convertirlo a un arnés de3 puntos.1234Use slide adjuster at waistfor tighter adjustment.Use el ajustador deslizablede la cintura para ajustarlomás apretadamente.518
To Change Shoulder Harness Slotss #ØMO CAMBIAR LAS RANURAS DEL ARNÏS DELhombroShoulder harness anchor—larger childAnclaje del arnés del hombro - niño más grandeShoulder harness anchor—smaller childAnclaje del arnés del hombro - niño pequeñoSlide adjusterAjustador deslizableUse the shoulder harness anchors in theslots that are closest to child’s shoulderheight.Use slide adjuster for further adjustment.Use los sujetadores del arnés delhombro en las ranuras que estén máscerca a la altura del hombro del niño.Use el ajustador deslizable para realizarajustes adicionales.19
"RAKES s &RENOSWARNING CHECK thatADVERTENCIA VERIFIQUEbrakes are on by trying to push que los frenos estén activadosstroller.tratando de empujar el cochecito.213WIVEL 7HEELS s 2UEDAS GIRATORIASFront swivel wheels lock for useLas ruedas giratorias delanterason uneven surfaces such as grass, se traban para el uso enstones or gravel.superficies desparejas talescomo césped, piedras o grava.SNAP!¡CLIC!20
4O 2ECLINE 3EAT s #ØMO RECLINAR EL ASIENTOWARNINGWhen making adjustmentsto the stroller seat, make surechild’s head, arms, and legsare clear of moving seat partsand stroller frame.Fabric caught in the latchesmay prevent them from locking.When returning seat to uprightposition, do not allow fabric tobe pinched in the latch.ADVERTENCIACuando realiza ajustes alasiento del cochecito, tenga laseguridad que la cabeza, brazosy piernas del niño estén alejadosde las piezas móviles del asientoy el armazón del cochecito.La tela que se enganche en lastrabas podría impedir que setraben. Cuando vuelve a ponerel asiento en la posición vertical,no permita que la tela quedeenganchada en la traba.12To recline, squeeze handleand lower seat.Para reclinarlo, apriete lamanija y baje el asiento.To raise, push seat up.Para levantarlo, empujeel asiento hacia arriba.21
To Fold Strollers #ØMO PLEGAR EL COCHECITOWARNINGADVERTENCIA NO dejeque el niño juegue con la manijade plegarlo.DO NOT allow child to playwith the fold handle.FOLD strap is located underthis pocket.La correa de PLIEGUE estáubicada debajo de estebolsillo.12Pull strap up.Tire la correa hacia arriba.3Storage latch will engageand stroller will rest on theparking stand.La traba de almacenamientose activará y el cochecitodescansará en el soporte deestacionamiento.22
To Attach Graco Infant Car Seats #ØMO INSTALAR EL ASIENTO DE AUTOMØVILPARA BEBÏ 'RACO For models that do not come with an infant car seatone may be purchased separately.WARNING Use only a Graco SnugRide ClickConnect car seat with this travel system.(Not intended for use with SnugRide , SnugRide 30, SnugRide 32, SnugRide 35, Infant SafeSeat , AUTOBABY, LOGICO S,JUNIORBABY and ASSURA infant car seats.) If unsure of the model orfor more information please call Graco’s customer service number:1-800-345-4109. Improper use of this stroller with othermanufacturers’ car seats may result in serious injury or death.Read the manual provided with your Graco car seat before using itwith your stroller.s Always secure your child with the car seat harness when using thecar seat in the stroller. If your child is already in the car seat, checkthat the child is secured with the harness.s DO NOT use stroller for jogging while carrier is in stroller.Para los modelos que no vienen con un asiento de automóvil parabebé, se puede comprar uno por separado.ADVERTENCIA Use solamente un asiento para automóvilSnugRide Click Connect de Graco con este sistema para viajes.(No debe usarse con los asientos de automóvil para bebé SnugRide ,SnugRide 30, SnugRide 32, SnugRide 35, Infant SafeSeat ,AUTOBABY, LOGICO S, JUNIORBABY y ASSURA.) Si no está seguro delmodelo o para obtener más información, por favor llame al númerode servicio al cliente de Graco: 1-800-345-4109. El uso inadecuadode este cochecito con el asiento de automóvil de otros fabricantespodría resultar en serias lesiones o la muerte. Lea el manual provistocon su asiento de automóvil Graco antes de usarlo con su cochecito.s 3UJETE SIEMPRE A SU NI O CON EL ARNÏS DEL ASIENTO DE AUTOMØVILcuando usa el asiento de automóvil en el cochecito. Si su niño yaestá en el asiento de automóvil, VERIFIQUE QUE ESTÏ SUJETADOCON EL ARNÏS s NO use el cochecito para salir a correr mientras el transportadorestá en el cochecito.23
1Open flaps insideseating area to exposeClick Connect mounts.Recline el respaldodel Abra las aletas enel interior del lugarpara sentarse paraver los soportes ClickConnect .2Insert carseat into stroller andpush down on car seat untilthe latches snap into the ClickConnect mounts.Ponga el asiento paraautomóvil en el cochecitoy empuje el asiento paraautomóvil hacia abajo hastaque se trabe en los soportesClick Connect .SNAP!¡CLIC!SNAP!¡CLIC!3CHECK that infant car seat issecurely attached by pullingup on it.VERIFIQUE QUE el asientode automóvil para bebé estédebidamente instalado conectadocon firmeza tirando hacia arriba dela misma.24
4To remove car seat:squeeze release handleat back of car seat, andlift car seat out of thestroller.Para sacar el asientoDE AUTOMØVIL aprietela manija de liberaciónde atrás del asiento deautomóvil y levante elasiento de automóvilfuera del cochecito.25
4O 5SE 4ETHER s #ØMO USAR LA CORREAThe tether strap is intended tomaintain control of the stroller inthe case of a fall while running.DO NOT allow tether strap to lieover top of the handle.DO NOT hang items on thetether strap.La correa de sujeción tienela intención de mantener elcontrol del cochecito en casode sufrir una caída mientras estácorriendo.NO deje que la correa de sujeciónpase por arriba de la manija.NO cuelgue artículos de la correade sujeción.To use tether, removetether from the pocketin the basket andattach to your wrist asshown.Para usar la correa,sáquela del bolsillo dela canasta y sujételaa su muñeca comose indica.26
Care and Maintenances DO NOT MACHINE WASH SEAT. It should only be wiped with amild soap, taking care not to soak the material. NO BLEACH.s TO CLEAN STROLLER FRAME, use only household soap and warmwater. NO BLEACH or detergent.s FROM TIME TO TIME CHECK YOUR STROLLER for loose screws,worn parts, torn material or stitching. Replace or repair the parts asneeded. Use only Graco replacement parts.s EXCESSIVE EXPOSURE TO SUN OR HEAT could cause fading orwarping of parts.s IF STROLLER BECOMES WET, open canopy and allow to drythoroughly before storing.s WHEN USING YOUR STROLLER AT THE BEACH completely cleanyour stroller afterward to remove sand and salt from mechanisms andwheel assemblies.!TENCIØN Y MANTENIMIENTOs NO LAVE EL ASIENTO A MÁQUINA. Se debe limpiar solamentecon un jabón suave, teniendo cuidado de no empapar el material.NO USE BLANQUEADOR.s PARA LIMPIAR EL ARMAZÓN DEL COCHECITO, use solamentejabón de uso doméstico y agua tibia. NO USE BLANQUEADOR nidetergentes.s DE VEZ EN CUANDO, INSPECCIONE EL COCHECITO para verificarsi hay tornillos flojos, piezas rotas, material o puntos rotos. Reemplaceo repare las piezas según sea necesario. Use solamente piezas derepuesto Graco.s EL CONTACTO EXCESIVO CON EL SOL O EL CALOR podría causardescoloramiento o torcedura de las piezas.s SI EL COCHECITO SE MOJA, abra la capota y déjelo secarcompletamente antes de guardarlo.s CUANDO USA SU PRODUCTO EN LA PLAYA limpiecompletamente su cochecito después de usarlo para sacar la arena ysal de los mecanismos y ensamblajes de las ruedas.27
2EPLACEMENT 0ARTS s 7ARRANTY )NFORMATION 53!0IEZAS DE REPUESTO s )NFORMACIØN SOBRE LA GARANTÓA %% 55 InTo purchase parts oraccessories or for warrantyinformation in the UnitedStates, please contact us atthe following:0ARA COMPRAR PIEZAS Oaccesorios o para obtenerINFORMACIØN SOBRE LA GARANTÓAen los Estados Unidos, por favorcomuníquese con nosotros en:www.gracobaby.comor/o1-800-345-4109Product Registration (USA)Registro del producto (EE.UU.)To register your Graco product from within the U.S.A. visit usonline at www.gracobaby.com/productregistration. We currently do notaccept product registrations from those living outsidethe United States of America.Para registrar su producto Graco desde dentro de los EE.UU.,visítenos en línea en www.gracobaby.com/productregistration.Actualmente no aceptamos registros de los productos de quienesviven fuera de los Estados Unidos de América.28
Fast Action Fold Jogger Click Connect TM TM 2012 Graco PD213968B 10/12. 2 Failure to follow these warnings and the . de abajo del apoyabrazos y tire del mismo. Para sujetarlo, empújelo hasta que se trabe en su lugar. 15 #HILD S4RAYs"ANDEJAPARANI OS WARNING Always secure your child with