Transcription
dnoSe c!noiEd i tLessons 1-6Copyright 2016 A Journey Through Learning
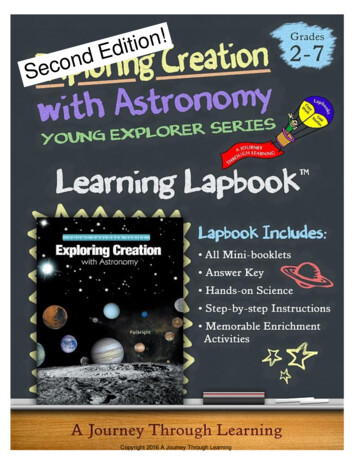
Exploring Creation with AstronomyLearning Lapbook - Full Color Version 2nd EditionAuthors: Nancy Fileccia and Paula WingetCopyright 2016 A Journey Through LearningPages may be copied for other members of household only. For group use,please see our website to purchase a classroom/co-op license.Please visit our website at:www.ajourneythroughlearning.comWhile there, sign up for our email newsletters and receive a FREE lapbook!You’ll also receive great discount codes, special offers, and find outwhat’s new and what’s to come!Join us on Facebook!We would like to give a huge thank you to Jeannie Fulbright and Davis Carmanfor their permission and support of this product.Clip art from www.clipart.comCopyright 2016 A Journey Through Learning
Materials NeededWhat you need to get started*A printed copy of this Exploring Creation with Astronomy 2nd Edition Learning Lapbook - FullColor Version by A Journey Through Learning* Exploring Creation with Astronomy 2nd Edition textbook by Jeannie Fulbright*14 colored file folders*Scissors*Glue (We recommend Elmer’s XTreme)*Hole puncher*Brads*Stapler*Crayons and/or colored pencilsTo make the storage system*Duct tape*One 3-ring binderHow to StartThis Exploring Creation with Astronomy lapbook covers the entire Exploring Creation withAstronomy textbook. Gather your 14 folders and fold them so that they will be ready to use as youget to each lesson. Directions for folding are included on a following page.At the top of each mini-booklet page are directions concerning the construction of your minibooklet, pages to read from the Fulbright book (highlighted in bold text), and what your student willrecord in the mini-booklet after reading to show what is learned. A small key is also here to showyou where to glue each mini-booklet into the folders.When the first two folders are filled up with the mini-booklets, follow the directions for using ducttape and a three-ring binder to make a storage system. Do this for all of your folders as they arecompleted by the student.In the back you will find an answer key, additional reading suggestions for each lesson, andenrichment pages.Hamburger Fold-Fold horizontallyHotdog Fold-Fold verticallyFolds-Labeled with a small line to show where the fold is and the words “hamburger fold” or “hotdog fold.”Dotted Lines-These are the cutting linesTitle Piece-Some of the booklets will have a title piece that will need to be glued to the top of a booklet.Copyright 2016 A Journey Through Learning
Folding the folders1. Gather the number offolders required for yourparticular lapbook.2. Open up each folderand flatten it out.5. When your child hasfilled up the first twofolders with the minibooklets, take the twofolders and apply agenerous amount ofglue to their flaps. Stickthem together. Now youare ready to preparethem for the storagesystem. Do the same forthe rest of the folders asthey are completed.3. Take the right side andfold it all the way overuntil the tab is just beforethe middle crease in thefolder. Do not overlap thiscrease with the tab.4. Fold the left hand-sideover just to the creasebut not overlapping it.Your folder now has twoflaps. We like to run aruler down each fold tomake the fold neater andflatter. Do steps 3 and 4to the remaining folders.Now it is time to beginyour lapbook.Making a storage system for your lapbook(s)This method of storage not only keeps your lapbooks from getting lost but also keeps themneat and readily available to show to dad, grandparents, friends, etc. When they are not beingshown off, just place the binder on your bookshelf!Roll out enough ducttape to go across thefolders lengthwise.Stick duct tape intohole puncher but becareful not to punchholes in your folders.Put duct tape sticky sideup. Place binded edge oflapbook on the duct tape(no more than ¼ inch!).It will look like this.Copyright 2016 A Journey Through LearningThen stick duct tape tothe other side againabout ¼ inch. There willneed to be enough tapeto hole punch.Store folders in 3-ringbinder.
Cut out along the dotted line. Glue onto front of lesson (chapter) 1folder. Color the pictures before the start of each lesson (chapter).Lesson 1- What isAstronomyLesson 2- The SunCopyright 2016 A Journey Through Learning
Lesson 1Cut out the booklet as one piece. Glue into lapbook. ReadWelcome, page 14. Then answer the question on the linesusing your best handwriting.WhatisAstronomy?Copyright 2016 A Journey Through Learning
Lesson 1Cut out the big square. Fold in half along the middle line to forma triangle. Glue into lapbook with title showing. Read The NightSky and also Think about This, page 15. Write your answer asto why God created the planets, moon and stars.Why Did God Create thePlanets, Moonand Stars?Copyright 2016 A Journey Through Learning
Lesson 1Cut out as one piece. Hamburger fold on middle line. Glue intolapbook. Read Stars and Planets, page 15. Inside the booklet,write how you can tell how you can tell the difference between astar and a planet.Stars andPlanetsCopyright 2016 A Journey Through Learning
Lesson 1Hamburger fold in half along the middle line. Cut around shapeof Stonehenge but do not cut the fold line. Glue into lapbook.Read Clocks, Calendars, and Seasons pages 16-17. Color theStonehenge picture. Inside, write the various ways mankind hasused the planets, moons, and stars as a calendar.ClocksCalendarsandSeasonsCopyright 2016 A Journey Through Learning
Lesson 1Cut out this piece and hamburger fold on middle line. (Therewill be a tab sticking out. Do not cut off) Fold tab up andover to keep booklet closed. (Like a matchbook) Glue intofolder. Read Think about This and Navigation, pages 1718. Inside the booklet, explain about navigating with stars, acompass, and a GPS.StarsCompassGPSNavigationCopyright 2016 A Journey Through Learning
Lesson 1Cut out this piece and hamburger fold on middle line. (Therewill be a tab sticking out. Do not cut off) Fold tab up andover to keep booklet closed. (Like a matchbook) Glue intofolder. Read Gravity, page 18. Inside the booklet, tell whatyou know about gravity.Hamburger foldWhat isGravity?Copyright 2016 A Journey Through Learning
Lesson 1Cut out the booklet as one shape. DO NOT CUT OFF FLAPS.Fold bottom square back, then fold back the two flaps overand glue. This will create a pocket. Glue into lapbook. Cut outsquares from the next 5 pages. Hamburger fold each in halfand glue together so that there is a front and a back. ReadOur Solar System, page 19. Directions for using the cardsare on the next page.Glue flap downGlue flap downSolarSystemCopyright 2016 A Journey Through Learning
The planet side can be used to put the planets in order according to their size or in orderfrom the sun. As you go through the book, there is enough room to right down interesting tidbits ofinformation that you learn about each planet.The letter side is to make a mnemonic phrase. In a mnemonic phrase, the first letter ineach planet is made into a different word that makes a sentence. See page 19 for more details.The last card serves as an answer key. On the back of it, write your entire mnemonicphrase. Store cards in the pocket that you just made.MercuryVenusPlanet closet to the SunThe evening StarMVCopyright 2016 A Journey Through Learning
EarthMarsOur own planetThe red planetEMCopyright 2016 A Journey Through Learning
JupiterSaturnThe greatest planetThe planet with the ringsSJCopyright 2016 A Journey Through Learning
UranusNeptuneHerschel’s PlanetThe farthest PlanetUNCopyright 2016 A Journey Through Learning
Answer My Mnemonic PhraseCopyright 2016 A Journey Through Learning
Lesson 1Cut out the rocket. Cut out the four rocket pieces from the nextpage. Stack the four pieces on top of the rocket in any order.Staple at the top. Glue booklet into lapbook. ReadAstronomers, Astronauts, and also Satellites, pages 2022. Answer the questions on each piece.What is a satellite?Copyright 2016 A Journey Through Learning
Two well-knownastronomersWhat does NASAdo?What does NASAstand for?NASAWhat is the HubbleSpace Telescope?Copyright 2016 A Journey Through Learning
Lesson 2Hamburger fold on the middle line. Cut around shape but do notcut fold line. Glue into lapbook. Read The Star of Stars, page 26.Inside the booklet, write how many earths can fit inside the sun.The Starof StarsCopyright 2016 A Journey Through Learning
Lesson 2Hamburger fold on the middle line. Cut out aroundshape but do not cut fold line. Glue into lapbook.Read 92,935,700 page 27. Inside the booklet, tellwhat is important about this number.92,935,700Copyright 2016 A Journey Through Learning
Lesson 2Cut out the magnifying glass. Glue into your lapbook. ReadDon’t Stare, page 28. Should you stare at the sun? Circle yesor no. Explain your answer out loud.Should you stareat the sun?YES NOCopyright 2016 A Journey Through Learning
Lesson 2* This section has TWO booklets. This is booklet #1. Booklet #2is on the next page. Do both of these booklets on the sameday.Cut out all shapes. Stack on top of each other with the titlepiece on top. Fasten together with a brad at the top. Glue intolapbook. Read Revolve and Rotate, page 30-31. Draw orwrite about each of the topics.RevolveandRotateDraw a picture of theearth revolving aroundthe sun.What does revolvemean?What is the earth’s onlynatural satellite?Copyright 2016 A Journey Through Learning
Lesson 2* This is booklet #2 for this section.Cut out as one piece. Accordion (fan) fold so that title is on top.Glue into lapbook. Read Revolve and Rotate, page 30-31.Answer the questions.Draw the orbit path of a planet goingaround the sun. (See image at top of page 30.)When the earth completes one revolutionaround the sun, how much time has passed?When the earth spins (rotates) one time around,how much time has passed?What does rotating mean?Revolve andRotateCopyright 2016 A Journey Through Learning
Lesson 2Cut out as one booklet. Fold down flap and then foldover the other. Cut out the labels and glue onto blanksides of booklet. Glue into lapbook. Read Solar Flares,Auroras, and Sun Spots, pages 32-33. Write abouteach topic.Solar FlaresSun SpotsAurorasSolar Flares, Auroras,and Sun SpotsCopyright 2016 A Journey Through Learning
Lesson 2Cut out both pieces. Hamburger fold smaller booklet inthe middle and glue into white space at top of biggerpiece. Now glue big piece into lapbook. Read Thinkabout This, page 33. Inside the smaller booklet, writethe definition of thermonuclear fusion. On the lines, tellhow thermonuclear fusion proves the earth is notbillions of years old.Glue smaller booklet hereHow does thermonuclear fusion prove theearth is not billions of years old?Copyright 2016 A Journey Through LearningCreationConfirmationWhat isthermonuclearfusion?
Lesson 2How do we getthe colorblack?How do we knowthat light travels ina straight line?How do wecolor?The Color of God’s LoveCut out the 4 pieces. Stack together so that tabsare in order and cover page is on top. Stapletogether down the left hand side. Glue intolapbook. Read The Color of God’s Love, pages34-36. Answer each question on the booklet.Copyright 2016 A Journey Through Learning
Lesson 2Hamburger fold on the middle line. Cut out aroundshape but do not cut fold line. Glue into lapbook.Read Think about This, page 36. Inside thebooklet, answer the question.What isbrighter thanthe sun?Copyright 2016 A Journey Through Learning
Lesson 2Cut out each circle. Stack one on top of theother with title piece on top. Fasten with a brassfastener. Glue into lapbook. Read SolarEclipse, A Spacecraft to Study the Sun, andWho Named the Sun, pages 37-42. Answerthe questions on the circles.SolarEclipseWhat is a solar eclipse?What is anannular eclipse?What is atotal eclipse?Copyright 2016 A Journey Through Learning
Goes with previous bookletWhat is a partial eclipse?What is Bailey’s Beads?Copyright 2016 A Journey Through Learning
Cut out along the dotted line. Glue onto front of lesson (chapter) 3folder. Color the pictures before the start of each lesson (chapter).Lesson 3- MercuryLesson 4- VenusCopyright 2016 A Journey Through Learning
Lesson 3Cut out the booklet as one piece. Hotdog fold in themiddle. Glue into lapbook. Read The Planet Closestto the Sun, pages 44. Write down some of theinteresting things you have learned about Mercuryfrom this reading.ThePlanetClosestto theSunMercuryCopyright 2016 A Journey Through Learning
Lesson 3Cut out all shapes. Stack on top of each other withthe title piece on top. Fasten together with a brad atthe top. Glue into lapbook. Read Rotation andRevolution, pages 45. Draw or write about each ofthe topics.Rotation&RevolutionDraw Mercury revolvingaround the sunA year on Mercury ishow many earth days?A day on Mercury is howmany earth days?Copyright 2016 A Journey Through Learning
Lesson 3Cut out the two pieces on this page and the twopieces on the next page. Stack with title on top.Staple at the top. Glue into lapbook. Read Featuresof the Planet Mercury, pages 46-47. Answer eachof the questions.Features of thePlanet MercuryDescribe the size ofMercuryCopyright 2016 A Journey Through Learning
What is Mercury like?What is a “terrestrial”planet?Copyright 2016 A Journey Through Learning
Lesson 3Hamburger fold on the middle line. Cut out aroundshape but do not cut fold line. Glue into lapbook. ReadA Trip Across the Sun, page 48. Inside of the booklet,draw a picture of the sun and draw the a little dot torepresent Mercury traveling across it. *See image onpage 48.A TripAcrossthe SunCopyright 2016 A Journey Through Learning
Lesson 3Cut out around shape of shoe and wings. Glue intolapbook. Read Who Named Mercury, page 48.Write the answer to this question on the white part ofthe shoe.Who NamedMercury?Copyright 2016 A Journey Through Learni
Solar System Cut out the booklet as one shape. DO NOT CUT OFF FLAPS. Fold bottom square back, then fold back the two flaps over and glue. This will create a pocket. Glue into lapbook. Cut out squares from the next 5 pages. Hamburger fold each in half and glue together so that there is a front and a back. Read Our Solar System, page 19 .