Transcription
5000-seriesSecurity and Remote Start SystemOwner's Guide
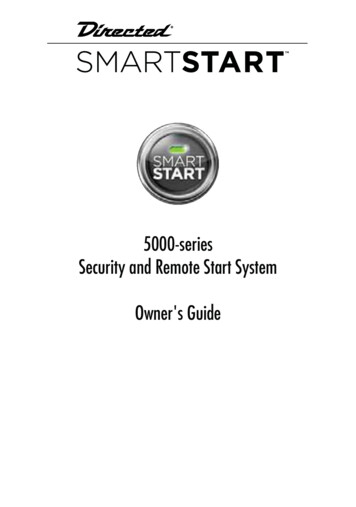
CongratulationsCongratulations on the purchase of your state-of-the-art security andremote start system. Reading this Owner’s Guide prior to using yoursystem will help maximize the use of your system and its many features.For more information please visit us online at:www.directed.com/SmartStartFor any additional questions please contact your authorized Directeddealer or contact Directed at 1-800-753-0600. Additional support isalso available at:http://support.directed.comWhat’s included One 4-button 1-way remote controlYour warranty registrationQuick reference cardThis owner's guideer’sOwn euG idWarrantyCardQuickReference Card 2010 Directed Electronics. All rights reserved.iii
Important informationGovernment Regulations and Safety informationRead the Government Regulations and Warning! SafetyFirst sections of this manual prior to operating this system.Warning! Failure to heed this information can result indeath, personal injury or property damage and may alsoresult in the illegal use of the system beyond its intendedpurpose.Your WarrantyYour system comes with a warranty. Please make sure you receivethe warranty registration card and proof of purchase from your dealerindicating the product was installed by an authorized Directed dealer.Your product warranty must be validated within 10 days of purchase.You can validate online at: www.prodregister.com/directed or complete and return the warranty registration card.Replacement Remote ControlsIf additional remote controls are desired, please see your authorizeddealer or visit us at www.directedstore.com to order. The supplied remote control is part number 474T.iv 2010 Directed Electronics. All rights reserved.
ContentsCongratulations . iiiWhat’s included. iiiImportant information . ivYour Warranty . ivReplacement Remote Controls. ivGetting Started .3System Maintenance .3Battery Replacement.31-way Remote Control .3Basic Commands .4Arm/Lock .4Disarm/Unlock .4AUX .4Remote Start.5Advanced Commands .6Additional Auxiliary functions.6Timer mode .6Short-run turbo mode .6Optional rear window defogger .6Temperature Start Mode .7Remote and System operations .8Passive arming/locking .8Warn away response.8Triggered response .8Multi-level security arming .9Arming while driving .10High security disarm .10System Override .11Valet mode .12Panic Mode .12Remote start .12Optional rear window defogger .14Timer Mode .14Short Run/Turbo Mode .15Temperature Start Mode .15Valet Take-Over .16Safety features .17Starter-anti-grind circuitry .17Disabling the remote start system .17Shut down inputs .17Diagnostics .18
Arming diagnostics .18Disarming diagnostics .18Nuisance Prevention Circuitry .18Programming options.21Government Regulations .24Warning! Safety First .25Caution .26Patent Information .27Limited lifetime consumer warranty .28
Getting StartedSystem MaintenanceThe system requires no specific maintenance beyond battery replacement for the remote controls. Your 1-way remote control is powered bya coin cell battery (CR-2032) that can be purchased at most retailers.The operating range diminishes as the battery weakens.Battery ReplacementLocate the small slot on the side of the remote control. Insert a smallslotted screwdriver or equivalent tool into slot and pry the case apart.Replace battery while verifying the correct polarity and then snap casetogether.1-way Remote ControlFeatureDescriptionTransmit LEDOn (flashes) during remote control activityCommand buttons (4)Used to perform arming/locking, disarming/unlocking, auxiliary channel and remote start commands 2010 Directed Electronics. All rights reserved.3
Basic CommandsArm/LockPress and releaseThe alarm arms, doors lock (if connected), and the siren/horn soundsand parking lights flash once. If Valet mode* is On, the doors lock. ExitValet mode to arm/lock the alarm normally.To Arm/lock and PanicPress and holdThe alarm Arms (or Locks in Valet) and, after 2 seconds, sounds thesiren/horn and flashes the parking lights.Disarm/UnlockPress and releaseThe alarm disarms, doors unlock (if connected), and the siren/hornsounds and parking lights flash twice. Turns panic off if on. If Valetmode* is On, the doors unlock.AUXPress and releasePerform before the Arm/lock or Disarm/unlock command to use theremote control in Silent Mode .Note: The Warn away response to lighter impacts is bypassed if thesystem is armed using silent mode. this ensures that no chirps are emitted by the siren in an area you want chirp -free but the system is fullycapable of triggering.4 2010 Directed Electronics. All rights reserved.
For optional function (trunk release)Press and holdActivates the Aux output, such as trunk release or an expansionfunction that you have added to your system. The auxiliary outputcontrols:.Remote StartPress and releaseActivates (or if On, deactivates) the remote starter. The engine andparking lights turn On.*See Remote and System Operations for details. 2010 Directed Electronics. All rights reserved.5
Advanced CommandsAdditional Auxiliary functions.Pressandbuttons simultaneouslyActivates an optional auxiliary convenience or expansion function thatyou have added to your system.The auxiliary output controlsPressandbuttons simultaneouslyActivates an optional auxiliary convenience or expansion function thatyou have added to your system.The auxiliary output controlsPressandbuttons simultaneouslyActivates an optional auxiliary convenience or expansion function thatyou have added to your system.The auxiliary output controlsTimer modePressandbuttons simultaneouslyActivates timer mode.Short-run turbo modePressandbuttons simultaneouslyActivates short-run timer mode.Optional rear window defoggerPressandandbuttons simultaneouslyActivates the optional Rear window defogger. The parking lights flashtwo times and the rear defogger is no longer active when the vehicle6 2010 Directed Electronics. All rights reserved.
is remote started. When the same procedure is repeated, the defoggeractivates and the parking lights flash three times. If the vehicle interiortemperature is greater than 55 F when the remote start is activated, therear defogger does not turn on.Temperature Start ModePressandandbuttons simultaneouslyActivates the Temperature Start mode. The parking lights flash fast fourtimes to confirm activation. The engine does not start once activated, itstarts when the vehicle interior temperature drops below 0 F.Warning! Car should be parked in a well ventilated areawhen using this feature.Deactivate Temperature Start mode by pressing the same buttons againor turning the vehicle ignition on. The parking lights flash slowly fourtimes to confirm deactivation. 2010 Directed Electronics. All rights reserved.7
Remote and System operationsPassive arming/lockingThe system can be programmed to arm/lock itself automatically (calledpassive arming/locking). If the system is programmed for passive arming/locking, it will automatically arm/lock 30 seconds after the ignition isturned off and the system detects that you have left the vehicle by openingand closing a door. Whenever the system is in its 30-second passive arming/locking countdown, the status LED will flash twice as fast as it doeswhen the system is armed/locked. At the 20-second point of the countdown, the siren/horn will sound to indicate that the system is about toarm/lock. At the 30-second point, the parking lights will flash to indicatethat the system is armed/locked.Note: If any protected entry point (such as a door or a switch-protectedtrunk or hood) is open, the system will not passively arm/lock (unlessforced passive arming/locking is programmed on). See ProgrammingOptions section in the expanded version of this manual online at www.automatecarsecurity.com.Warn away responseA Warn Away Response consists of an alarm page along with theresponses described below. Shock Sensor - Light impacts to the vehicle will flash the vehiclelights and sound the siren/horn for a few seconds.Triggered responseA Triggered Response can be activated by any of the triggers listedbelow. The default Triggered Response duration is 30 seconds but canbe programmed from 1-180 seconds by your installer.8 2010 Directed Electronics. All rights reserved.
Shock Sensor Trigger - Heavy impacts to the vehicle will instantlysound the siren/horn and flash the lights for the programmed duration and report Zone 2.Door Trigger - If a door is opened the siren/horn will sound andlights flash for three seconds, then the siren/horn will sound continuously and the lights will flash for the programmed duration andreport Zone 3. The three seconds allow the user time to disarm/unlock the system with a minimum of noise should a door beopened inadvertently while the system is armed/locked.Hood Trigger - Opening the hood will sound the siren/horn, flashthe lights for the programmed duration, and report Zone 1.Trunk Trigger - Opening the trunk (if connected) will instantly soundthe siren/horn and flash the lights for the programmed durationand report Zone 4.Ignition Trigger - Turning on the ignition key will trip the same progressive response as the door trigger and report Zone 5.Multi-level security armingMulti-Level Security Arming allows you to select which of the system’sinputs or sensors will be active and which will be bypassed when thesystem is armed.Pressingagain within five seconds of arming the system activatesthe Multi-level security feature. Each timeis pressed, a differentsecurity level is selected.To select the security levels:Pressonce: The siren chirps once. The system is armed with allzones active.Pressa second time within five seconds. The siren chirps twice fol- 2010 Directed Electronics. All rights reserved.9
lowed by a long chirp. Zone 2 is now bypassed.Pressa third time within five seconds. The siren chirps three timesfollowed by a long chirp. Zone 4 is now bypassed.Pressa fourth time within five seconds. The siren chirps four timesfollowed by a long chirp. Zones 2 and 4 are now bypassed.Pressa fifth time within five seconds. The siren chirps five timesfollowed by a long chirp. All input zones, except the ignition are nowbypassed.Note: Multi-level security arming only applies to a single arming cycle.Once the system is disarmed and then re-armed, all the zones will beactive again.Arming while drivingYour security system can be armed while driving the vehicle.Presson the remote control for two seconds while the vehicle isrunning. The siren/horn will sound once to indicate that the securitysystem is armed, and then once more to indicate that the ignition is on.The system will not respond to any input except the door triggers, andthe starter kill relay (if installed) will not be activated. Once you havearrived at your destination, the system will disarm when the ignition isturned off. The siren/horn will sound twice and the LED will then stopflashing. The system can also be disarmed at any time by pressingHigh security disarmThis security system offers High Security Disarm. High Security Disarmis a feature that makes it possible to silence and reset the system whileit is triggering, without disarming the system.10 2010 Directed Electronics. All rights reserved.
If the system is triggered and the siren has been sounding for longerthan six seconds, pressingon the remote silences the siren whilekeeping the system in the armed state. The system does not disarm,but resets. Pressingagain after silencing the system will disarm thesystem.If the system is triggered and the siren has been sounding for less thansix seconds, pressingdisarms the system. The six second timer isprovided for your convenience, in case the system is accidentally triggered.System OverrideIf your remote control is lost or damaged, you can manually disarm yourvehicle security system or disable an optional starter kill. To disarm ordisable the system without a remote control, you must have the vehicle’signition key.To disarm/disable the system:1. Turn the ignition to the ON position.2. Press the control center button the preset number of times (one tofive times) within 15 seconds. The factory default setting is 1 press.After five seconds, the system will disarm/disable. If the systemdoes not disarm/disable, you may have waited too long. Startover by turning the ignition off and on.Number of PressesImportant: The control center button can be programmed torespond to 1-5 presses for the disarm/disable function. Youmust check with the installer to verify the programming for yourindividual unit. 2010 Directed Electronics. All rights reserved.11
Valet modeYou can prevent your system from automatically arming/locking andtriggering by using Valet Mode. This is very useful when washing thevehicle or having it serviced. In Valet Mode, the system/starter kill willnot arm/enable, even with the remote control, but all convenience functions (door locks, trunk release, etc.) will continue to work normally.To enter or exit Valet Mode:1. Turn the ignition on.2. Turn the ignition off.3. Press and release the control center button within 10 seconds.To enter or exit Valet Mode using the remote control:4. Open any vehicle door.5. Press .6. Pressand then pressagain.The status LED lights solidly if you are entering Valet Mode, and goesoff when you exit Valet Mode.Panic Modeif you are threatened in or near your vehicle, you can attract attentionby triggering the system with your remote control.Press and holdfor two seconds. The siren sounds and the parkinglights flash for the programmed siren duration. To stop panic made atany time, presson the remote control again.Remote startThis feature allows you to remotely start and run your vehicle for aprogrammable period of time. This makes it possible to warm up theengine, as well as adjust the interior temperature of the vehicle with12 2010 Directed Electronics. All rights reserved.
the climate control system. If interior heating or cooling is desired, theclimate controls must be preset, and the fan blower must be set to thedesired level prior to remote starting the vehicle.Warning! (1) Never remote start your vehicle whenthe keys are in the ignition, except when performingValet Take-Over, and (2) Never start the vehicle if itis not in PARK or NEUTRALTo remote start the vehicle: Presson the remote control once.The parking lights flash to confirm that the vehicle will attempt tostart. With gas vehicles the engine starts 4 seconds after the parking lights flash. With diesel vehicles the engine starts when theWAIT-TO-START indicator on the dashboard goes out or the programmed delay has ended.Once the vehicle has started, it runs for the pre-programmed period of time or until a shutdown input is triggered.Warning! It is unsafe to operate a vehicle’s motor in agarage or other closed off area. Breathing the exhaustfrom the vehicle is hazardous to your health. Neveractivate the remote start in an enclosed space.When you are ready to drive the vehicle:1.2.Insert the ignition key and turn it to the On position.Press the brake pedal.Note: If the brake pedal is pressed before the key is in the ON position,the engine will shut down. 2010 Directed Electronics. All rights reserved.13
While the vehicle is running during remote start operation, the systemmonitors the vehicle and automatically shuts down the engine if thesystem receives any of the following: The brake pedal is pressed The hood is opened The shutdown toggle switch is put into the Off position. Runtime (12,24, or 60 minutes) expires Remote control buttonis pressed once.Optional rear window defoggerPressing the,andsimultaneously activates/deactivatesthe optional rear window defogger. The parking lights flash two timesand the rear defogger is no longer active when the vehicle is remotestarted. When the same procedure is repeated, the defogger activatesand the parking lights flash three times. If the vehicle interior temperature is greater than 55 F when the remote start is activated, the reardefogger does not turn on.Timer ModeWhen you activate timer mode the system automatically starts the vehicle every three hours for a maximum of 6 starts. The pre-programmedengine runtime is 12 minutes. 14Pressandto activate timer mode. The parking lights flashfour times, and after a 1 second delay, the engine starts.To shutdown the engine, press thebutton. The engine will shutdown while the system remains in timer mode and will continue tostart every 3 hours until the system reaches the maximum amountof starts or is cancelled by turning on the ignition, activating thebrake, or turning off the shutdown toggle switch.The parking lights flash 4 times indicating timer mode is exited. 2010 Directed Electronics. All rights reserved.
Important! Timer Mode should be used only in open areas. Never startand run the vehicle in an enclosed space such as a garage or carport.Short Run/Turbo ModeShort run turbo mode keeps the engine running after arriving at yourdestination for a programmable period of 1, 3, 5 or 10 minutes. Thisallows the system’s timer to conveniently cool down the turbo after youhave left the vehicle.To activate:1. Park the vehicle and set the parking brake.2. Remove your foot from the brake pedal and leave the enginerunning.3. Press and release theandbuttons at the same time. Thelights will flash to indicate the remote start has entered short runturbo mode.4. Turn off the key, the engine will keep running.5. Exit and secure the vehicle. The engine will turn off after the programmed run time.Temperature Start ModePressing the,andsimultaneously activates the Temperature Start mode. The parking lights flash fast four times to confirm activation. The engine does not start once activated, it starts when the vehicleinterior temperature drops below 0 F.Deactivate Temperature Start mode by pressing the same buttons againor turning the vehicle ignition on. The parking lights flash slowly fourtimes to confirm deactivation 2010 Directed Electronics. All rights reserved.15
Valet Take-OverThe Valet Take-Over feature allows the vehicle to remain running afterthe key has been removed from the ignition. This feature is useful foroccasions when you wish to exit and lock the vehicle for short periodsof time, but would like to leave the motor running and the climatecontrols on.To perform Valet Take-Over:1. Before turning off the engine, press and releaseon the remotecontrol (or press and release the optional momentary switch). Thenwait five seconds.2. Turn the ignition key to the OFF position. (The engine will stay running.) The engine will run until the pre-programmed time elapsesor a shut-down input is received. (See the previous Remote Startsection for a complete list of shut-down inputs.)This feature will not work if the brake pedal is being pressed.16 2010 Directed Electronics. All rights reserved.
Safety featuresThis system has several important safety features to ensure proper operation of the motor and prevent accidental damage to the engine orits components.Starter-anti-grind circuitryWhenever the vehicle is remote started, advanced anti-grind circuitryprevents the starter from engaging, even if the key is turned to the startposition. This prevents damage to the starter motor if the key is turnedto the start position during remote start operation.Important: The Fail Safe starter kill option must be installed for thisfeature to work.Disabling the remote start systemThis feature allows your system’s remote start unit to be temporarilydisabled to prevent the vehicle from being remote started accidentally.This feature is useful if the vehicle is being serviced or stored in anenclosed area. To disable the remote start, move the shutdown toggleswitch to the OFF position. The switch can be installed in a locationof your choice. Check with your installer for recommended locations.Location of Shutdown SwitchShut down inputsThis security system uses several inputs to shut down the remote start operation of the motor or prevent remote start if certain inputs are active.The two most important are hood and brake inputs. The hood input willprevent the motor from starting, as well as shut it down, any time thehood is opened. The brake pedal will shut down the motor at any timeduring remote start operation, as well as preventing the remote startfrom activating while it is being pressed. 2010 Directed Electronics. All rights reserved.17
DiagnosticsThe microprocessor at the heart of your system is constantly monitoringall of the switches and sensors connected to it. It is designed to detectany faulty switches and sensors and prevents them from disabling theentire system. The microprocessor will also record and report any triggers that occurred during your absence. Refer to the Table of Zonessections of this guide for diagnostic information.Arming diagnosticsIf the security system is armed at the same time that an input is active(such as a door opening or sensor triggering), you will hear one siren/horn sound to indicate arming and a second siren/horn sound to indicate Bypass Notification.A Bypass Notification sound means that the security system ignoresthe input that was active when the system was armed, until that inputceases. For more information, please refer to the expanded version ofthis manual online at www.automatecarsecurity.comDisarming diagnosticsExtra sounds that are heard when disarming the system are the TamperAlert. If four sounds are heard when disarming the system, then thesecurity system was triggered in your absence. If five sounds are heardwhen disarming the system, a zone was triggered so many times thatthe Nuisance Protection Circuitry has bypassed that zone. For moreinformation, please refer to the expanded version of this manual onlineat www.automatecarsecurity.comNuisance Prevention CircuitryYour system has Directed’s Nuisance Prevention Circuitry (NPC). It18 2010 Directed Electronics. All rights reserved.
prevents annoying repetitive trigger sequences due to faulty door pinswitches or environmental conditions such as thunder, jackhammers,airport noise, etc.Example: If the alarm triggers three times within a 60-minute periodand each time the same sensor or switch triggers the alarm, NPC willinterpret those triggers as false alarms. After the third trigger, NPC ignores, or bypasses, that sensor or switch (along with any other sensorsor switches sharing the same zone) for 60 minutes.If the bypassed sensor tries to trigger the security system while it is being bypassed, the 60-minute bypass period will start over. This ensuresthat a sensor that is continually being triggered will remain bypassed.The vehicle doors are protected by NPC differently. If your securitysystem is triggered by an open door for three full cycles, the system willbypass the doors until the trigger ceases.Note: Arming and disarming the system does not reset this function. Theonly way to reset a bypassed zone is to not have it trigger for 60 minutes, or to turn on the ignition. If testing your system, remember that theNPC programming can cause zones to be bypassed and appear tostop working. If five chirps are heard when disarming, NPC has beenengaged. If you wish to clear the NPC memory, turn the ignition on.Table of zonesA zone is represented by the number of LED flashes used by the systemto identify a particular type of input. Standard input assignments arelisted in the following table, along with spaces to write in any optionalsensors or switches that have been installed. 2010 Directed Electronics. All rights reserved.19
ZoneDescription1Trunk PinDealer installed options2Instant trigger: a heavier impact detected by theshock sensor3Door switch trigger4Instant trigger: for optional sensors5Ignition trigger6Hood PinYour system stores the last two triggered zones in memory. If your systemhas been triggered but the LED has been reset by turning on the ignition, your dealer can still recall the last two zones that were triggered.Contact your dealer for details.Interpreting zone diagnosticsWarn Away responses are not reported by arming or disarming diagnostics. If you receive a Bypass notification when arming or a TamperAlert notification when disarming, look at the LED in the vehicle. Activeor triggered zones will be indicated by a pattern of blinks by the LED.For example: If zone 3 was active or triggered, the LED will blink threetimes with a two-second pause. Then it will blink three times again, andrepeat until the ignition is turned on.Your system stores the last two triggered zones in memory. If your systemhas been triggered but the LED has been reset by turning on the ignition, your dealer can still recall the last two zones that were triggered.Contact your dealer for details.20 2010 Directed Electronics. All rights reserved.
Programming optionsProgramming options control your system’s normal, operational set-up.Most options do not require additional parts, but some may requireinstallation labor. See your authorized Directed dealer for more details.The following is a list of the programmable options, with the factorysettings in Bold. Active arming (transmitter only) or Passive arming (automatic arming 30 seconds after the last door has been closed). Arming/disarming siren chirps On or Off. The ignition controlled door lock feature On or Off: When this feature is programmed on, the doors will lock three seconds after theignition is turned on, and unlock when the ignition is turned off. Ifyour installer is programming the security system with the DirectedBitwriter, ignition lock and unlock are independent features thatcan be programmed separately.Important: The vehicle doors must be closed for the ignition lockfeature to work. Passive door locking (with passive arming) or Active door locking(only when arming with the transmitter). Passive locking allows thev
and parking lights flash once. If Valet mode* is On, the doors lock. Exit Valet mode to arm/lock the alarm normally. To Arm/lock and Panic Press and hold The alarm Arms (or Locks in Valet) and, after 2 seconds, sounds the siren/horn and flashes the parking lights. Disarm/Unlock Press and release