Transcription
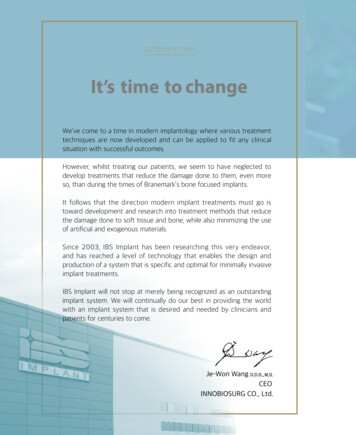
We’ve come to a time in modern implantology where various treatmenttechniques are now developed and can be applied to fit any clinicalsituation with successful outcomes.However, whilst treating our patients, we seem to have neglected todevelop treatments that reduce the damage done to them, even moreso, than during the times of Branemark’s bone focused implants.It follows that the direction modern implant treatments must go istoward development and research into treatment methods that reducethe damage done to soft tissue and bone, while also minimizing the useof artificial and exogenous materials.Since 2003, IBS Implant has been researching this very endeavor,and has reached a level of technology that enables the design andproduction of a system that is specific and optimal for minimally invasiveimplant treatments.IBS Implant will not stop at merely being recognized as an outstandingimplant system. We will continually do our best in providing the worldwith an implant system that is desired and needed by clinicians andpatients for centuries to come.Je-Won WangCEOINNOBIOSURG CO., Ltd.
History of IBS Implant03MagiCore (Product Specification)07MagiCore KIT18MagiCore (Surgical Protocol)27
Growth HistoryHistory ofIBS Implant2003· Start of research for minimally invasiveimplant system2011· Magic Kit FDA certified· Pakistan, Iran, Turkey distribution begins· Research institute established20072012· Magic Surgical System developed· Recognized as promising start-up by KoreanNational Government· Malaysia, Vietnam, Philippines distribution begins2008· A new implant and surgical system developedfor minimally invasive surgery· IBS Implant HQ established2013· MOU with Wonkwang University OsteogenesisResearch Center· First IBS Implant World Symposium held· HQ expansion· Greece, Spain, UAE, India, Egypt distribution begins20092014· Manufacturing plant established· MOU with Wonkwang University· Recognized as venture company· China NMPA Certified· KFDA certified· Bulgaria, Iraq, Czech Rep., Italy, Chiledistribution begins03
2015· 2nd IBS Implant World Symposium held inAntalya, Turkey· GOST-R Russia Certified· U.S.A subsidiary established· Poland, Germany, Thailand, Kyrgyzstan,France, Indonesia distribution begins· 11 national field offices established2018· Kazakhstan GOST-K certified· China factory established· 4th IBS Implant World Symposium held in Seoul· 11th AMII Training Course completed· Laser Marking Machine acquired· Laser Welding Machine acquired· 6 additional CNC machines acquired· FDA Class II Certified· Japan PMDA Certified· Fatigue test machine acquired20192016· 12 national field offices in place· Distribution in 40 nations throughout Asia,Europe, and Middle East· China subsidiary established· Vietnam, Thailand, subsidiary establishment planned· MOU with 3 additional major international universitiesplanned· Bi-annual Symposium in major cities planned· 5th AMII World Symposium planned (November)· 21st AMII Training Course completion planned· Europe subsidiary established· MOU with SSPM Dental University in Russia· MOU with Mustansiria University in Iraq· U.S.A. Clinical Training Center established· Monthly Training Courses held in U.S.A.· 1st IBS Europe meeting held2020 2021· 1st IBS Implant Turkey Congress held· 3rd IBS Implant World Symposium held in Korea· U.S.A factory establishment planned· India, Taiwan, Thailand product registrations· Japan, India, UAE, Africa subsidiaries plannedcertified· IBS Clinical Research Institute established· MOUs with 7 additional major int’l universitiesplanned· Yearly IBS user meetings planned2017· Yearly AMII World Symposium planned· SEM machine acquired· Korea, USA, Europe, and Russia expansion of AMII· India DCG certified· Taiwan TFDA certified· Quarterly Research meetings plannedand research activities· 3rd Main factory establishment planned· Academy of Minimally Invasive Implantology(AMII) established· 3rd AMII national course completed04
IBS Implant Establishing FoundationsWORLDWIDE LOCATIONSFranceHungaryBulgariaChileCzech RepublicEgypt05INNOBIOSURG HQ, KOREA.INNOBIOSURG OF AMERICA.INNOBIOSURG OF EUROPE.INNOBIOSURG OF TurkeyThailandU.A.EU.K
International Recognition· Recognized for the creation of the new 4th original paradigm of implant design.· Recognized by pioneering nations such as the US, Europe, etc. as Korea’s first Premium Brand Implant.· Asia’s first brand to be in mutual research activities with European universities on minimallyinvasive implant surgery.CERTIFICATES06
IBS Implant Product ArchitectureThe World’s 4th Paradigm of Original Implant DesignThe World’s 1st Minimally Invasive ImplantMagic PostResolution ofprosthetic limitationsMagic CuffImplantation in slopedridges without graftImplantation in narrowbone without graftMagic Fin ThreadPrestige Award Winner for "Most Innovative Patent"Korean National Ministry of Science and Technology(Patents: 10-1586082, 10-1388846)07
MagicAbutment*140% of actual size (Exclude Magic Customized Abutment)08
MagiCore Narrow Fixture (uses Ø4.0 abutment)Fixture SizeFixture Diameter Ø3.0[mm]Fixture PartDiameter(D)Length(L)11Ø3.01315Magic 01M30151402M30152403M30153404M30154Magic Cuff임상적용커프Available in selected regions onlyFixture Diameter Ø3.5[mm]Fixture PartDiameter(D)Length(L)11Ø3.51315Available in selected regions only09Magic 01M35151402M35152403M3515404M351534Magic Cuff임상적용커프
MagiCore Fixture (uses Ø4.5 abutment)Fixture SizeFixture Diameter Ø4.0[mm]Fixture PartDiameter(D)Length(L)9Ø4.01113Magic 51M40131452M40132453M40133454M40134Fixture Diameter Ø4.5[mm]Fixture PartDiameter(D)Magic Cuff임상적용커프Length(L)79Ø4.51113Magic 3454M45131234123412341234Magic Cuff임상적용커프10
MagiCore Fixture (uses Ø5.5 Abutment)Fixture SizeFixture Diameter Ø5.0[mm]Fixture PartDiameter(D)Length(L)7Ø5.0911Magic 51M50111552M50112553M50113554M50114Fixture Diameter Ø5.5[mm]Fixture PartDiameter(D)Length(L)7Ø5.591111Magic Cuff임상적용커프Magic 51M55111552M55112553M55113554M55114Magic Cuff임상적용커프
MagiCore Fixture (uses Ø5.5 Abutment)Fixture SizeFixture Diameter Ø6.0[mm]Fixture PartDiameter(D)Length(L)7Ø6.0911Magic 51M60111552M60112553M60113554M60114Fixture Diameter Ø6.5[mm]Fixture PartDiameter(D)Length(L)7Ø6.5Magic Cuff임상적용커프911Magic Cuff234523452345CodeCuff(C)551M65071Magic 112553M65113554M6511412
MagiCore Prosthetic ComponentsHealing CapAbutment DiameterColorCode4.0SilverMP CAP4.04.5YellowMP CAP4.55.5SilverMP CAP5.5Ø4.5Ø4.0Ø5.54.0 abutment available in selected regions onlyLab AnalogAbutment verMPL55Ø4.0Ø4.5Ø5.54.0 abutment available in selected regions onlyClosing ScrewAbutment �4.0Ø4.54.0 abutment available in selected regions onlyImpression Coping (Transfer Type)Abutment LongMTICH55L4mm4.04.0 Short4.5 Short5.5 Short4.0 Long4.5 Long5.5 Long4.58mm5.54.0 abutment available in selected regions only13
H : 12mmMagiCore Prosthetic Components (continued)H : 15mmImpression Coping (Pick-Up Type)Abutment LongMPICH55L4.0Ø4.04.55.54.0 abutment available in selected regions onlyØ4.5Ø5.5Plastic CopingAbutment 0Ø4.5Ø5.54.0 abutment available in selected regions onlyBurn Out Core Cylinder (Screw-Retained Type)Abutment PSR55STHex5.5Ø4.0BlackNon-HexMPSR55BT·Tighten screw to 20N/cmSpecial Order: ø5.0 / ø6.04.0 abutment available in selected regions only14
MagiCore Prosthetic Components (continued)Burn Out Core Cap (Cemented Type)Abutment 0MPLP45BNon-HexBlackMPLP55BNon-HexSpecial Order: ø5.0 / ø6.04.0 abutment available in selected regions onlyMagic Abutment적용 6MMG2H5506MMG2N5506HØ4.0Hex / Non-HexH·For ø4.5, ø5.5, use 1.2 Hex Driver to tighten screw up to 20N/cm.·For ø4.0, use 1.2 Hex Driver to tighten screw up to 15N/cm.4.0 abutment available in selected regions only15Hex / Non-HexHex / Non-HexHØ4.5Ø5.5
MagiCore Prosthetic Components (continued)Short Abutment적용 AbutmentDiameter4.04.55.5Hex / MAH5503MMAN55035MMAH5505MMAN5505HØ4.0Hex / Non-HexHex / Non-HexHHØ4.5·For ø4.5, ø5.5, use 1.2 Hex Driver to tighten screw up to 20N/cm.·For ø4.0, use 1.2 Hex Driver to tighten screw up to 15N/cm.Ø5.54.0 abutment available in selected regions onlyMagiCore Solid Abutment적용Abutment Tightened with 1.2 Hex Driver at 20N/cm4.0 abutment available in selected regions onlyMagiCore Solid Abutment Lab Analog적용Abutment AL555HHØ4.5Ø5.516
MagiCore Prosthetic Components (continued)MagiCore Solid Abutment Impression Cap적용 Abutment DiameterCode4.5MSPC455.5MSPC55Ø5.5Ø4.5CAD / CAM ComponentsMagiCore Scanbody적용 Abutment DiameterCode4.5MSB455.5MSB55Ø5.5Ø4.5MagiCore Link(Ti-base)적용Abutment -HexMLN454HexMLH554Non-HexMLN554Hex / Non-Hex4.04.5Ø4.0Hex / Non-HexHex / Non-HexØ4.5Ø5.55.54.0 abutment available in selected regions only1517
For Minimally InvasiveImplant Surgery1918
Magic Fit Drilling Tech.The Magic Fit Drilling System is a state-of-the-art implant surgery system which allows for high precision from diagnosis to final placement. The tools used in each stepallow for error-free drill path management, and create an osteotomy that minimizes bone removal and dramatically reduces damage to tissues during the process. Theprotocol makes early and immediate loading more predictable and practical.213· Drill speed should be greater than 1,500 2,000rpm.· Intermittent vertical pressure should be applied while maintaining direction (bone dancing).· Do not apply Up & Down technique.· Magic Tap Drill should be used at 20rpm and 40N/cm.B.E.B Tech.(Bone Expansion With Bending of Cortical Bone)The B.E.B Tech. utilizes the biophysical properties of alveolar bone and a patented specially shaped instrument to safely and conveniently expand bone width and alsolift the sinus up to 4mm without the need for grafting. This tech. is highly desirable by clinicians due to its ease of use and effectiveness in achieving desirable effects.213· 2-stage surgery is required and 5 months or more of healing should be allowed.· If the buccal or lingual wall is too thin or cracks occur during procedure, bone grafting should be performed.· Malleting should be done with light wrist action only.· If the instrument shifts or does not advance, drilling should be done to remove dense bone areas before reapplying the Expander.C.M.C Tech.(Crestal Approach With Membrane Control)The C.M.C Tech. is a minimally invasive crestal approach sinus augmentation technique which allows the clinician to directly control the exact height and volume of themembrane lift. Since the instrument lifts the membrane to a controlled height exactly above the placement site, there is no need for excessive bone graft material.Since a miniscule hole is formed to insert the instrument, there is even less chance for complications or failures.12· Make such that the residual bone height is 2mm before applying the Magic Sinus Lifter.· Malleting should be done with light wrist action only.· Advance the instrument at a minimal velocity.· If the instrument does not advance, use the Magic Drill to make further indentation before reapplying the Lifter.1517193
MagiCore Kit ComponentsMagic SplitDiameterCodeØ2.5MS25S· Malleting instrument which connects to the Hand Lever.· Used in the first step of implant surgery to determine bone quality.· Used as an initial tool in cases when Magic Expanders are used forosteotomy.OptionalMS25LØ2.5·Long TypeMagic ExpanderDiameterCode· Malleting instrument which connects to the Hand Lever.Ø3.0ME30· Main tools used for B.E.B Tech.Ø3.5ME35Ø4.0ME40· Patented Star-shape design which reduces condensation forces and minimizesload to bone.Pin DrillLengthDiameterCode29.5mmØ1.0GDL· Initial drill used in the first steps of the Fit Drilling Protocol, which makes spacefor the internal guide to be fixed in place.· Makes space for Guide Pin to be fixed.※ Drill in one-stroke and without Up & Down.·Short TypeGuide PinDiameterCode· Fixed in the space made by the Pin Drill.Ø2.3P23S/P23L· Serves as an initial path confirmation guide.Ø3.3P33S/P33L· Guides the Magic Drill internally, allowing for precise and convenient guided.Ø3.8P38S/P38LØ4.8P48S/P48LOptional (extra long)Ø2.3P23ELØ3.3P33ELØ3.8P38ELø2.3 available in selected regions only1820
MagiCore Kit Components (continued)Magic DrillDiameterCode· Drill used to perform osteotomy in hard and soft bone types.Ø2.3MDN· Hollow design allows for autogenous bone harvesting.Ø3.3MDS· Recommended lifetime of use: 50 usesØ3.8MDMØ4.8MDL· Recommended drill speed: 1,500rpm 2,000rpm.· Excessive vertical force reduces cutting ability of MDN available in selected regions onlyMagic Depth DrillDiameter· Blades only exist at the tip of the drill.Code· Useful tool to determine the condition of the floor of osteotomy.Ø2.0MDDNØ2.4MDD· In case of hard bone, drill can be used todrill deeper without affecting the shape of the osteotomy.Ø3.1MDDW· Useful in confirming the final depth of osteotomy.MDDN available in selected regions onlyMagic Tap GuideCode· Used together with the Magic Body to form the Magic Pin.LengthDiameter15mmØ2.36P415mmØ2.66P5· Guides the Magic Tap Drill, making for precise tap drilling.15mmØ3.30P6※ Must not be used in presence of bone marrow space.· Useful for confirming the path and location of osteotomy.Magic 17.3mmØ4.33BL6BS4· Used together with the Magic Tap Guide to form the Magic Pin.· Useful for confirming the path and location of osteotomy※ Must be used after checking for presence of bone marrowspace. If bone marrow exists, use without connecting withMagic Tap Guide.
MagiCore Kit Components (continued)Magic Tap D45Ø5.0TD50Ø5.5TD55Ø6.0TD60Ø6.5TD65· Used as a final step in “Fit Drilling”, this drill forms the space forimplant threads to follow.· Set the motor at 20rpm and 40N/cm.※ Do not apply vertical or lateral pressure during use.TD30, TD35 available in selected regions onlyMagiCore Machine 3.7MHMDS33mmØ3.7MHMDL· Especially designed for MagiCore, this driver is compatible withboth the handpiece and the Ratchet Driver.MHMDNL available in selected regions onlyRatchet DriverDiameterCodeØ4.5ShortRDSØ4.5LongRDL· Used while connected to the MagiCore Machine Driver to place implantby hand. Can be connected to the Torque Ratchet.1.2 Hex .9HD1.2L· Used to tighten the Cover Screw and Abutment Screw.· Can be connected to the Torque Ratchet.※ Abutment Screws should be tightened to 20N/cm.2022
MagiCore Kit Components (continued)Drill ExtensionCode· Connected to the Magic Drill to extend its reach.DETorque RatchetLengthDiameterCode82.9mmØ7.0TRW· Used to measure exact torque during placement by hand.· Can measure up to 55N/cm.※ Must be disassembled, cleaned and dried after use.Angled Hand LeverCode· Serves as a handle when connected to a malleting instrument.HLABone RemoverLengthCode100mmBR· Used to easily remove bone core from center of Magic Drill.IBS Spoon ExcavatorLengthCode· Laser marked to conveniently confirm depth while removingbone core from osteotomy.166mmEXC· Used to examine the walls of osteotomy.· Useful for minimally invasive GBR methods such as the InternalPocket Tech.15211923
DiameterCodeØ2.5MS25SØ2.5MS25LMagic SplitDiameterCodeAdditional SurgicalInstrumentsMagic �3.8ME38Ø4.3ME43Ø4.8ME48Ø5.3ME53Ø5.8ME58Magic Sinus � Used as a main instrument to perform C.M.C Tech.CodeMagic Expander· Malleting instrument which connects to the Hand Lever.· Patented design has hollow point which enables direct holding ofbone block of sinus 58· Designed with double side blades which acts as a slowing mechanism.Item ordered separatelyBoneMSL PusherCodeMagic Sinus Lifter· Used as a tool to insert graft material evenly into the sinus augmentation.BPBoneCode PusherMSL· Malleting instrument which connects to the Hand Lever.Item ordered separatelyCodeBP1.6 Guide DrillBone PusherCodeDiameterCode1.6 Guide DrillBPDiameterØ1.6CodeØ1.61.6GD1.6GD· Used as an initial drill in hard bone before applying the B.E.B Tech.· Used to make a hole that guides the advancement of the Magic Split.Item ordered separately1.6 Guide DrillCodeMagicMarking DrillDiameterØ1.61.6GD DrillMagic MarkingCode· Used to conveniently mark the location of intended placement location.CodeMMDMMDW· Instrument’s diameter is 5mm, allowing it to be used as a convenient toolfor sensing mesiodistal distance.MMDMagic Marking DrillCodeSpecial OrderItem ordered separatelyMMDWMMDMMDWShort DrillMagicCodeMSDMagic Short DrillMagic Short DrillCodeCode· Used in the posterior region when clearance is not enough toinsert a normal drill length.MSD· Used as a convenient drill to prepare the bone before applying theC.M.C Tech.MSD2.8 Magic DrillDiameterØ2.8CodeMD28Item ordered separately2.8 Magic DrillDiameterØ2.8Code2.8MD28Magic DrillDiameterCodeØ2.8MD28· Used as an initial drill in hard bone before applying the B.E.B Tech.Item ordered separately2224
Additional Surgical Instruments (continued)Drill S079DS0911DS11· Used as a safety guide for drill depth during osteotomy.Item ordered separatelyUltra Short1.2 Hex DriverCodeHD1.2US· Used to remove the Coping Pin during impression coping.· Used for cases with low clearance.Item ordered separatelyIBS MalletCodeHM15· Mallet used with Hand Lever instruments.※ Must use gentle tapping with wrist action only.Item ordered separately2315192125
Instructions for ConnectingMalleting Instruments to the Hand Lever.1Remove from Kit and hold in hand by thehandle.3After engaging the instrument with theconnection, turn the nob counterclockwiseto secure the connection.2Engage the instrument with the HandLever with the connection as shown.4Make sure the instrument is securelyfastened to the connection.Precautions when using the Magic KitㆍPrecaution when securing the malleting instrument to the Hand LeverDo not apply excessive lateral force on the instrument after it is fastened.ㆍOnly use light wrist action when malleting. If the instrument does not advance intobone, use the Magic Drill to remove dense bone parts before reapplying the instrument.ㆍImmediately clean the instrument with cold water after use.- Do not use hydrogen peroxide or saline solution.- Ultrasonic cleaning is recommended. (Use a bar stand so that the blades of the instruments do not touch and damage each other.)ㆍStore instruments in a dry place after cleaning.- If stored in a hot humid place, instruments may experience corrosion.2426
MagiCoreProtocol for UseThe MagiCore system was developed with a whole new concept, different from traditional implant systems. Itfollows that the surgical protocols are significantly different as well. In many cases, when clinicians who are familiarwith traditional implant surgical protocols use MagiCore for the first few times, they tend to use the traditionalsurgical habits, which can damage the inter-thread bone of the MagiCore implant. Until the clinician is fully familiarwith the MagiCore Surgical and Placement Method, we recommend that longer healing time is given beforeprosthetic loading. This extended healing time will ensure that if the inter-thread bone had been damaged, thebone can be fully remodeled and ready for loading.MagiCore Placement Planning1. Determination of Placement LocationWith minimally invasive implant surgery, we must take into account the mobility of the soft tissuearound the implant once the implant has been placed. This is because if the gingiva around the implantis mobile after treatment, the ideal biologic width against the surface of the abutment will detach, andcause an undesirable periodontal result.Thus, after calculating the prediction of the location of placement, evaluate the soft tissue at the siteby using the Periodontal Probe to probe the gingiva 2mm buccal(labial) from the center of that location,and pull on the buccal mucosa to check for soft tissue mobility. If there is no mobility of the gingiva, the locationis suitable for flapless implantation and healthyperio conditions can be maintained after placementeven without the presence of keratinized gingiva.We can skip this step if plenty of keratinized gingivais present in the proposed placement site.1mm1.2mmVerification of Vertical DimensionMeasure the vertical dimension from the proposedplacement location to the opposing tooth.The vertical dimension is enough if thismeasurement is 3.5mm or greater. If not, move theplacement location so that this constraint is met.2. Determination of Osteotomy Method (according to bone quality)ㆍUsing hand pressure only, apply Magic Split to the proposed placement location and push with light hand pressure.ㆍIf the Magic Split enters into the bone without resistance and as far as 4mm into the bone, Drilling should not be used for theosteotomy. Rather, Magic Expanders should be used to perform Bone Marrow Replacement, as this bone is determined tobe very soft (D4).ㆍIf the Magic Split does not enter into the bone more than 2mm by force of hand only, this location is determined to be suitablefor the Fit Drilling and Fit Implantation Method.27
3. Determining the Shape and Path of Alveolar Bone at Placement Site· Determining The Path of Pin DrillingPalpate the alveolar bone with the thumb and forefinger to feel the path and shapeof the bone. In addition, the shape of the alveolar bone can be evaluated by usingthe needle of the anesthetic syringe to penetrate the gingiva along the intendedimplantation site.· Pin Drilling MethodWhile running at 1,500 2,000rpm, use the Pin Drilljust enough to penetrate the cortical bone.Drill in one stroke, and do not apply Up & Downtechnique, in order to prevent occurrence of nonfixation of Guide Pin.1mm5mm4. Installation of Guide Pin and CBCT ScanFix the Guide Pin in the drilled site and make surethat it is securely fixed.If the Guide Pin does not enter, reapply the Pin Drilland try again.With the Guide Pin securely in place, take CBCT,analyze the scan for correctness of path, and makeslight adjustments if needed by reapplying the PinDrill.5. Selection of the MagiCore Implant Diameter and LengthWhile examining the CT scan, measure the buccolingual bone width in 1mmincrements down to 4mm from the crest.- bone width 4.5mm MagiCore Ø 4.0mm or less possible- bone width 5.5mm MagiCore Ø 5.0mm or less possible- bone width 6.5mm MagiCore Ø 6.0mm or less possible Bone width - 0.5mm Possible diameter of MagiCore※ Use 4.0, 5.0, 6.0 as first choice diameter.With soft bone, 4.5, 5.5, 6.5 diameters can be used as a secondary choice.Select a suitable implant length, taking into consideration the location of anatomicalstructures. The length of the MagiCore fixture should be determined from the level atwhich the bone width is sufficient. (left figure example: level at which bone width is4.5mm)28
MagiCoreProtocol for Use6. Diagnosis of Soft Tissue ThicknessFrom the determined placement location (where Guide Pin is nowfixed), probe the depth of the soft tissue 2mm away at 4 points(mesial, distal, buccal, lingual).The greatest depth measurement is determined to be the SoftTissue Thickness.Thick soft tissuethicknessThin soft tissuethickness※ Note : The surface of the gingiva is not always flat, and that the gingiva on the buccal tendsto be relatively thicker, and that the bone level rests relatively lower on the buccal compared to the lingual.7. Selecting the Magic Cuff Height and the Drilling DepthNote: Placing MagiCore using the minimally invasive method allows us to predict the gingival outcomebecause the shape of the gingiva shows little to no change after placement.1) Non-Aesthetic Zone (Posterior)(By standard, select Magic Cuff Height equal to the Soft Tissue Thickness)· Prosthetic Margin: Positioned at the buccal gingival marginMagic Cuff height Soft Tissue Thickness· Drill Depth (starting from the buccal gingival margin) that is,Drill Depth fixture length Soft Tissue Thickness※ Note : Place such that the top platform of the Magic Post sits 2mm above the buccal gingival margin.2) Aesthetic Region (Anterior)(By standard, select Magic Cuff height equal to 1mm less than the Soft TissueThickness, such that the Prosthetic Margin sits 1mm below the labial gingival margin.)· Prosthetic Margin: Positioned 1mm below the labial gingival marginMagic Cuff height Soft Tissue Thickness – 1mm· Drill Depth (starting from the labial gingival margin) that is,Drill Depth Fixture length Soft Tissue Thickness※ Note : Place such that the top platform of the Magic Post sits 1mm above the labial gingival margin.3) In Case of Immediate Placement after Extraction (posterior and anterior)(Similar to aesthetic regions, position the Prosthetic Margin 1mm below thebuccal gingival margin)· Prosthetic Margin: Positioned 1mm below the buccal gingival margin.Magic Cuff height Soft Tissue Thickness – 1mm· Drill Depth (starting from the buccal gingival margin) that is,Drill Depth Fixture length Soft Tissue Thickness※ Note : Place such that the top platform of the Magic Post sits 1mm above the buccal gingival margin.Tip:· The Magic Cuff Height is always selected after measuring the Soft Tissue Thickness, and after determining the intended positioning of the Prosthetic Margin.· Always meaure the drill depth with the buccal(labial) gingival margin as the starting point of measurement.· The positioning of the prosthetic margin should be measured relative to the buccal(labial) margin.2908
8. Fit Drilling- Body Preparation (Main Osteotomy which removes bone in the shape of the core body of the MagiCore)※ Drillingis done in 2 stages.- First, engage the Magic Drill with the Guide Pin which fits the size of the intendedMagiCore diameter, and drill 3 4mm into the bone.- Then, remove the Magic Drill from the osteotomy and remove the Guide Pin fromwithin the Magic Drill.- Reapply the Magic Drill, regaining the same path as before and drill to intended finaldepth.- Do not apply Up & Down technique. Apply intermittent pressure while maintaininguniform path, adjusting pressure to the resistance of bone density conditions.- Keep in mind that the Final Drill Depth is equal to the Soft Tissue Thickness thelength of the chosen MagiCore implant with the starting point of measurementbeing the buccal(labial) gingival margin.- After drilling with Magic Drill is complete, remove bone core from osteotomy usingthe Spoon Excavator, if needed.※ Note : Drill speed should be 1500 2000rpm or more. No Up & Down. Only intermittent pressure.- Apply the Magic Depth Drill and drill to the predetermined final osteotomy depth.- Confirm the final depth of osteotomy starting from the buccal (labial) gingivalmargin.- Apply the Spoon Excavator and feel the walls of the osteotomy to check forexistence of bone marrow spaces or bone perforations.9. Thread Preparation1) Reconfirming The Path of Osteotomy– Connect the Magic Tap Guide with the Magic Body to form the Magic Pin.- Install the Magic Pin into the osteotomy by inserting to the depth of osteotomy.Note: always measure starting from the buccal (labial) gingival margin.- Confirm the path of the osteotomy.※ Note : In cases involving the sinus, or in the presence of bone marrow spaces,only use the Magic Body (not together with the Magic Tap Guide).2) Using the Magic Tap Drill- Set the motor at 20rpm and 40N/cm.- Once the path is set, apply force only to maintain this decided path.- Advance the Magic Tap Drill to 5mm within bone, making sure not to apply verticalforce. (this step is able to further indicate bone quality around the osteotomy).X1mm3mma) if the Tap advances easily to 5mm within bone, place predetermined MagiCore.b) if the motor stops automatically before reaching 5mm into bone, engage Tap Drillwith the Ratchet Driver and Tap the rest of the osteotomy by hand.(up to 2mm from the apex of the osteotomy)- Fit
Since 2003, IBS Implant has been researching this very endeavor, and has reached a level of technology that enables the design and production of a system that is specific and optimal for minimally invasive implant treatments. IBS Implant will not stop at merely being recognized as an outstanding implant system.