Transcription
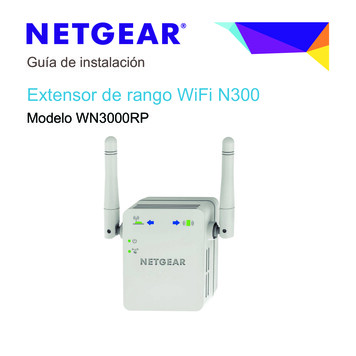
N300 WiFi Range ExtenderModel WN3000RPUser ManualApril 2014202-11346-01350 East Plumeria DriveSan Jose, CA 95134USA
N300 WiFi Range ExtenderSupportThank you for selecting NETGEAR products.After installing your device, locate the serial number on the label of your product and use it to register your product athttps://my.netgear.com. You must register your product before you can use NETGEAR telephone support. NETGEARrecommends registering your product through the NETGEAR website. For product updates and web support, visithttp://support.netgear.com.Phone (US & Canada only): 1-888-NETGEAR.Phone (Other Countries): Check the list of phone numbers at .aspx.ComplianceFor regulatory compliance information, visit http://www.netgear.com/about/regulatory.See the regulatory compliance document before connecting the power supply.TrademarksNETGEAR, the NETGEAR logo, and Connect with Innovation are trademarks and/or registered trademarks of NETGEAR, Inc.and/or its subsidiaries in the United States and/or other countries. Information is subject to change without notice. NETGEAR, Inc. All rights reserved.2
N300 WiFi Range ExtenderContentsChapter 1Get to Know Your ExtenderFront Panel . . . . . . . . . . . . . . . . . . . . . . . . . . . . . . . . . . . . . . . . . . . . . . . . . . . . . . . . . .Extender Side and Bottom Panels . . . . . . . . . . . . . . . . . . . . . . . . . . . . . . . . . . . . . . .How the Extender Works . . . . . . . . . . . . . . . . . . . . . . . . . . . . . . . . . . . . . . . . . . . . . .When to Use Your Extender . . . . . . . . . . . . . . . . . . . . . . . . . . . . . . . . . . . . . . . . . . . .Chapter 25667Install Your ExtenderPlace the Extender . . . . . . . . . . . . . . . . . . . . . . . . . . . . . . . . . . . . . . . . . . . . . . . . . . . 9Connect to an Existing WiFi Network . . . . . . . . . . . . . . . . . . . . . . . . . . . . . . . . . . . . 9Find the Best Location . . . . . . . . . . . . . . . . . . . . . . . . . . . . . . . . . . . . . . . . . . . . . . . 12Extender WiFi Performance . . . . . . . . . . . . . . . . . . . . . . . . . . . . . . . . . . . . . . . . . . . 12Cable a Computer or Device to the Ethernet Port . . . . . . . . . . . . . . . . . . . . . . . . 13Chapter 3Manage the Extender Network and SettingsLog In to the Extender After Initial Setup . . . . . . . . . . . . . . . . . . . . . . . . . . . . . . . 15Change the admin Password . . . . . . . . . . . . . . . . . . . . . . . . . . . . . . . . . . . . . . . . . . 15Use the Setup Wizard to Connect the Extender to a Network. . . . . . . . . . . . . . 16Add a WPS Client to the Extender Network . . . . . . . . . . . . . . . . . . . . . . . . . . . . . 18View or Change Wireless Settings . . . . . . . . . . . . . . . . . . . . . . . . . . . . . . . . . . . . . 18View or Change Advanced Wireless Settings . . . . . . . . . . . . . . . . . . . . . . . . . . . . 19Set Up a Wireless Access List . . . . . . . . . . . . . . . . . . . . . . . . . . . . . . . . . . . . . . . . . . 20Set Up the Extender to Use a Static IP Address . . . . . . . . . . . . . . . . . . . . . . . . . . 22Chapter 4Monitor and Maintain the ExtenderBack Up the Extender Configuration . . . . . . . . . . . . . . . . . . . . . . . . . . . . . . . . . . . 24Restore Saved Configuration Settings . . . . . . . . . . . . . . . . . . . . . . . . . . . . . . . . . . 24Return the Extender to Its Factory Settings . . . . . . . . . . . . . . . . . . . . . . . . . . . . . 25Use the Factory Reset Button to Restore Factory Settings . . . . . . . . . . . . . . 25Erase the Extender Settings and Return to Factory Settings . . . . . . . . . . . . . 26Upgrade the Firmware . . . . . . . . . . . . . . . . . . . . . . . . . . . . . . . . . . . . . . . . . . . . . . . 27View Wired and Wireless Network Devices . . . . . . . . . . . . . . . . . . . . . . . . . . . . . . 28Chapter 5FAQs and TroubleshootingFAQs. . . . . . . . . . . . . . . . . . . . . . . . . . . . . . . . . . . . . . . . . . . . . . . . . . . . . . . . . . . . . . . 31Cannot Log In to the Extender . . . . . . . . . . . . . . . . . . . . . . . . . . . . . . . . . . . . . . . . 32Cannot Join the Extender WiFi Network . . . . . . . . . . . . . . . . . . . . . . . . . . . . . . . . 32Appendix ASupplemental InformationFactory Default Settings . . . . . . . . . . . . . . . . . . . . . . . . . . . . . . . . . . . . . . . . . . . . . 35Technical Specifications . . . . . . . . . . . . . . . . . . . . . . . . . . . . . . . . . . . . . . . . . . . . . . 353
1.Get to Know Your Extender1This chapter covers the following topics: Front Panel Extender Side and Bottom Panels How the Extender Works When to Use Your ExtenderFor more information about the topics covered in this manual, visit the support website athttp://support.netgear.com.Firmware updates with new features and bug fixes are made available from time to time ondownloadcenter.netgear.com. Some products can regularly check the site and download newfirmware, or you can check for and download new firmware manually. If the features or behaviorof your product does not match what is described in this guide, you might need to update yourfirmware.4
N300 WiFi Range ExtenderFront PanelThe front panel has LEDs.Router ClientArrow ArrowLEDLEDRouter LinkLEDClient LinkLEDPower LEDWPS LEDFigure 1. Extender front panelTable 1. LEDsLEDDescriptionRouter Link LEDThe connection between the extender and the router or access point. Solid green. Best connection. Solid amber. Good connection. Solid red. Poor connection. Off. No connection.Client Link LEDThe connection between the extender and a computer or mobile device. Solid green. Best connection. Solid amber. Good connection. Solid red. Poor connection. Off. No connection.Power LED Solid amber. The extender is booting.Solid green. The extender is powered on.Off. The extender is powered off.WPS LED Solid green. WiFi security is enabled (WPA or WPA2).Blinking green. A WPS connection is in progress.Off. WiFi security is not enabled.Router Arrow andClient ArrowIf the Router Arrow or Client Arrow LED blinks, see Find the Best Location onpage 12. If no arrow LEDs are lit, the extender is in a good location.Get to Know Your Extender5
N300 WiFi Range ExtenderExtender Side and Bottom PanelsThe side panel has buttons, and the bottom panel has the Factory Reset button and anEthernet port.Power On/Off buttonWPS buttonFactory Reset buttonEthernet portFigure 2. Extender side and bottom panelsHow the Extender WorksThe extender increases the distance of a WiFi network. The extender connects to yournetwork’s WiFi signal and it broadcasts its own WiFi signal. When you are too far away toconnect to your network’s WiFi signal, you can connect to an extender WiFi signal instead.WiFi RangeExtenderBoosts the range of yourexisting WiFi and createsa stronger signal inhard-to-reach areas.Existing WiFiSometimes your routerdoes not provide the WiFicoverage you need.Figure 3. The extender WiFi signals reach areas outside of the range of your routerGet to Know Your Extender6
N300 WiFi Range ExtenderWhen to Use Your ExtenderNETGEAR recommends that you connect to the extender only when your WiFi networkconnection is poor. Data traffic routed through the extender is inherently slower than trafficrouted directly from the network.Get to Know Your Extender7
2.2Install Your ExtenderThis chapter covers the following topics: Place the Extender Find the Best Location Extender WiFi Performance Cable a Computer or Device to the Ethernet Port8
N300 WiFi Range ExtenderPlace the ExtenderNETGEAR recommends that you place the extender near the router during initial setup. Thenmove it farther away from the router as needed to increase the area that has a WiFi signal. To place the extender:1. Place your extender in the same room as your WiFi router.2. Plug the extender into an electrical outlet.The Power LEDbutton.lights green. If the Power LED does not light, press the PowerConnect to an Existing WiFi NetworkTo extend the range of your WiFi network, you must connect the extender to your existingWiFi network. You can connect with WPS or with NETGEAR genie Smart Setup.Connect with WPSWi-Fi Protected Setup (WPS) lets you connect the extender to a secure WiFi network withouttyping the network name and password. The WPS button is a physical button on the router oraccess point.WPS does not support WEP network security. If you are using WEP security, see Connectwith NETGEAR genie Smart Setup on page 10. To connect with WPS:1. Press the WPS button on the side panel of the extender.The WPS LEDblinks.2. Within two minutes, press the WPS button on your router or access point.The WPS LED on the extender lights solid green, the Router Link LEDthe extender is connected to your existing WiFi network.lights, andNote: If the Router Link LED does not light, try again. If it still does not light,see Connect with NETGEAR genie Smart Setup on page 10.3. On your computer or wireless device, find the new extender network name.The extender’s wireless network name (SSID) changes to your existing WiFi networkname, with EXT at the end of the name.For example: Existing WiFi network name. MyNetworkName New extended network name. MyNetworkName EXTInstall Your Extender9
N300 WiFi Range Extender4. Connect your existing WiFi devices to the new extended network.Use the same WiFi password that you use for your WiFi router.5. Unplug the extender and move it to a new location closer to the area with a poor WiFi signal.The location that you choose must be within the range of your existing WiFi routernetwork.6. Plug the extender into an electrical outlet and wait one minute.The Power LEDbutton.lights green. If the Power LED does not light, press the Power7. Use the Router Link LED on the front panel to help you choose a spot where theextender-to-router connection is optimal.Connect with NETGEAR genie Smart SetupYou can use a web browser to connect to the extender and set it up. To connect with the browser-based Smart Setup:1. Use a WiFi network manager on a computer or mobile device to find and connect to theextender WiFi network.After the connection with the computer or mobile device is established, the Client LinkLEDlights solid green.2. Open a web browser window from the same computer or mobile device.The browser takes you directly to NETGEAR genie smart setup.Note: If you are not automatically directed to NETGEAR genie, launch a webbrowser and enter www.mywifiext.net in the address field. Enteradmin for the user name and password for the password.3. Select a WiFi network to extend and click the Continue button.4. In the Password field, type the network password (also called passphrase or security key)and click the Continue button.Install Your Extender10
N300 WiFi Range Extender5. In the Name field, type a name (SSID) for your new extender WiFi network and click theContinue button.Note: You can use the same security settings as your existing network byselecting the check box.The settings are applied and the following screen displays:6. Use a WiFi network manager on the computer or mobile device to connect to the extender’snewly created WiFi network.7. Enter your password.8. Select the check box and click the Continue button.Install Your Extender11
N300 WiFi Range Extender9. Unplug the extender and move it to a new location closer to the area with a poor WiFi signal.The location you choose must be within the range of your existing WiFi router network.10. Plug the extender into an electrical outlet and wait one minute.The Power LEDbutton.lights green. If the Power LED does not light, press the Power11. Use the Router Link LED on the front panel to help you choose a spot where theextender-to-router connection is optimal.Find the Best LocationIf the WiFi signal is weak, the first time you join the extender network, an arrow LED blinks fortwo minutes. If this happens, adjust the position of the extender. Use the following table tounderstand the arrow LEDs.Table 2. Arrow LEDsArrow LED StateActionNo arrow LEDs are lit.No action is needed. The extender is in a good location.Router arrow blinks.Move the extender closer to the router.Client arrow blinks.Move the computer or mobile device closer to the extender.Extender WiFi PerformanceThe extender LEDs indicate the strength of the extender’s WiFi connections. Use thefollowing table to understand the extender LEDs.Table 3. WiFi Performance LEDsLEDDescriptionRouter Link LED indicates thestrength of the WiFi signal between therouter and the extender.The LEDs are color coded as follows: Green indicates the best connection. Amber indicates a good connection. Red indicates a poor connection.An LED that is off indicates no WiFi connectionClient Link LED indicates the strengthof the WiFi signal between the extenderand the computer or mobile device.Install Your Extender12
N300 WiFi Range ExtenderCable a Computer or Device to the Ethernet PortYou can use an Ethernet cable to connect a computer or device to the Ethernet port on theextender. Here are some examples of when you might want to do this: You want to use a computer to log in to the extender to view or change its settings, butyou are having trouble connecting to the extender WiFi networks. You have already installed the extender and now you want to connect a device to theextender’s Ethernet port.To cable a computer to the extender Ethernet port:1. Install the extender so that it is connected to your existing network with a WiFi link.2. Connect an Ethernet cable to the Ethernet port on the extender and to an Ethernet port onyour computer.The computer connects to the extender. Your computer might display a messagenotifying you of an Ethernet connection. To cable a device to the extender Ethernet port:1. Install the extender so that it is connected to your existing network with a WiFi link.2. Connect an Ethernet cable to the Ethernet port on the extender and to an Ethernet port onyour device.ExtenderBlu-ray playerWiFi routerThe device connects to the extender. Now, the device can access your existing networkthrough the extender.Install Your Extender13
3.Manage the Extender Network andSettingsThis chapter covers the following topics: Log In to the Extender After Initial Setup Change the admin Password Use the Setup Wizard to Connect the Extender to a Network Add a WPS Client to the Extender Network View or Change Wireless Settings View or Change Advanced Wireless Settings Set Up a Wireless Access List Set Up the Extender to Use a Static IP Address143
N300 WiFi Range ExtenderLog In to the Extender After Initial SetupAfter installation, you can log in to the extender to view or change its settings. To log in to the extender after the initial setup:1. Connect a computer or mobile device to the extender’s network.2. Launch a web browser and enter www.mywifiext.net in the address field.A login screen displays.3. Enter admin for the user name and password for the password.If your extender has an Internet connection, the extender automatically checks for newfirmware at the NETGEAR website.The Status screen displays.Change the admin PasswordThe user name to access the extender is admin, and its default password is password.NETGEAR strongly recommends that you set a more secure password. To change the password for the extender:1. On your computer, launch a web browser.2. In the address field of your browser, enter http://www.mywifiext.net.You are prompted to enter a user name and password. If you do not see the login prompt,make sure to include http:// when you type http://www.mywifiext.net in your browser.3. Type admin for the user name and password for the password.Manage the Extender Network and Settings15
N300 WiFi Range ExtenderIf you already changed the password and want to change it again, type your personalizedpassword.4. Select Maintenance Set Password.5. Type the old password.6. Type the new password twice.7. Click the Apply button.Your settings are saved.Use the Setup Wizard to Connect the Extender to aNetworkThe first time that you use a browser to connect to the extender to install it, the NETGEARgenie installation wizard displays. If you want to use a wizard to set up the extender again,you can log in to the extender and use the Setup Wizard. To use the Setup Wizard to connect the extender to a WiFi network:1. On your computer, launch a web browser.2. In the address field of your browser, enter http://www.mywifiext.net.You are prompted to enter a user name and password. If you do not see the login prompt,make sure to include http:// when you type http://www.mywifiext.net in your browser.3. Type admin for the user name and password for the password.If you already changed the password, type your personalized password.4. Select Setup Wizard.The extender finds the wireless networks in your area and displays a list.Manage the Extender Network and Settings16
N300 WiFi Range Extender5. To select the network you want the extender to join, do one of the following: Select the radio button for the network. Select the Manually input my wireless SSID radio button and type the name of thenetwork.6. Enter the security settings for the network that you selected.7. Click the Continue button.You are prompted to name the extender network.By default, the extender network name is the same as the network that you selected withEXT at the end.8. Either change the name or leave it as is, and click the Continue button.The settings are applied to the extender.Note: You can use the same security settings used in your existing networkby selecting the check box.The settings are applied and the following screen displays:9. Use a WiFi network manager on the computer or mobile device to connect to the extender’snewly created WiFi network.10. Enter your password.Your computer or wireless device connects to the network.Manage the Extender Network and Settings17
N300 WiFi Range ExtenderAdd a WPS Client to the Extender NetworkA WPS client is a computer or wireless device. WPS lets you add a wireless computer ordevice to the extender’s WiFi network without typing the WiFi password. WPS does notsupport WEP network security. If you are using WEP security, see Connect with NETGEARgenie Smart Setup on page 10.Note: For instructions about how to use the physical WPS button on theextender, see Connect with WPS on page 9. To add a WPS client:1. Launch a web browser from a computer or wireless device that is connected to thenetwork.2. In the address field of your browser, enter http://www.mywifiext.net.A login screen displays.You are prompted to enter a user name and password. If you do not see the login prompt,make sure to include http:// when you type http://www.mywifiext.net in your browser.3. Type admin for the user name and type your password.If you have not yet personalized your password, type password for the password.4. Select Add WPS Client.5. Click the Next button.6. Select a setup method: Push button. Click the WPS button on this screen. PIN Number. The screen adjusts. Enter the client security PIN, and click the Nextbutton.7. Within two minutes, go to the client device and use its WPS software to connect to the WiFinetwork.The WPS process automatically sets up your wireless computer with the networkpassword when it connects. The extender WPS screen displays a confirmation message.View or Change Wireless SettingsChanging the wireless setting disconnects all computers or wireless devices from the WiFinetwork. To reconnect to the WiFi network, you must use the new settings. To view or change the wireless settings:1. On your computer, launch a web browser.2. In the address field of your browser, enter http://www.mywifiext.net.Manage the Extender Network and Settings18
N300 WiFi Range ExtenderYou are prompted to enter a user name and password. If you do not see the login prompt,make sure to include http:// when you type http://www.mywifiext.net in your browser.3. Type admin for the user name and type your password.If you have not yet personalized your password, type password for the password.4. Select Setup Wireless Settings.5. To change the network name, type a name in the Name (SSID) field.6. To change the region, select the correct region from the Region list.7. To change the WiFi security, select a radio button in the Security Options section.8. To save your settings, click the Apply button.If you changed the settings, the new settings take effect and computers and wirelessdevices on the network are automatically disconnected.View or Change Advanced Wireless SettingsUse care when changing the wireless settings. Incorrect settings might disable the extender’sWiFi networks unexpectedly. To view or change the advanced wireless settings:1. On your computer, launch a web browser.2. In the address field of your browser, enter http://www.mywifiext.net.You are prompted to enter a user name and password. If you do not see the login prompt,make sure to include http:// when you type http://www.mywifiext.net in your browser.3. Type admin for the user name and type your password.If you have not yet personalized your password, type password for the password.Manage the Extender Network and Settings19
N300 WiFi Range Extender4. Select Advanced Wireless Settings.All the check boxes are selected by default.5. In the Advanced Wireless Settings section of the screen, select or clear the check boxes. Enable Wireless Access Point. When this check box is selected, the extenderallows WiFi connections. Clearing this check box prevents wireless devices fromconnecting to the extender. LAN devices can still connect to the extender over anEthernet cable. Enable SSID Broadcast. When this check box is selected, the extender broadcastsits wireless network name (SSID). Clearing this check box hides the extender’snetwork name. In such a situation, this network name does not display in a WiFinetwork manager. A user who wants to join this hidden network must know its networkname. Keep Existing Wireless Settings. This check box is selected so that if you use WPSto connect to the Extender WiFi network, its wireless network name stays the sameinstead of changing to a new, randomly generated network name. NETGEARrecommends that you leave this check box selected.6. Click the Apply button.Your settings are saved.Set Up a Wireless Access ListBy default, any wireless device that is configured with the correct network name (SSID) canaccess the extender’s WiFi networks. For increased security, you can restrict access to theextender’s WiFi networks so that only wireless devices with the MAC addresses that you addto an access list can connect.Each network device has a MAC address, which is a unique 12-character physical address,containing the hexadecimal characters 0–9, a–f, or A–F only, and separated by colons (forexample, 00:09:AB:CD:EF:01). Typically, the MAC address is on the label of the wirelessdevice. If you do not have access to the label, you can display the MAC address using thenetwork configuration utilities of the computer. You might also find the MAC addresses on theNetwork Devices screen (see View Wired and Wireless Network Devices on page 28).Manage the Extender Network and Settings20
N300 WiFi Range ExtenderCAUTION:If you use a wireless device to set up the access list, add your wirelessdevice to the access list. Otherwise, you are disconnected when you clickthe Apply button. To avoid this situation, use a computer with a wiredconnection to access the extender.Before you enable the access list, you must add the MAC addresses of the wireless devicesthat you want to grant access to the WiFi network of the extender. To set up and enable the access list:1. On your computer, launch a web browser.2. In the address field of your browser, enter http://www.mywifiext.net.You are prompted to enter a user name and password. If you do not see the login prompt,make sure to include http:// when you type http://www.mywifiext.net in your browser.3. Type admin for the user name and type your password.If you have not yet personalized your password, type password for the password.4. Select Advanced Wireless Settings and click the Setup Access List button.The Wireless Card Access List screen displays.5. Click the Add button.The screen adjusts.6. In the Device Name field, type a name for the wireless device.7. In the MAC Address field, type the MAC address of the wireless device.8. Click the Apply button.9. Above the Wireless Card Access list, select the Turn Access Control On check box.10. Click the Apply button.Manage the Extender Network and Settings21
N300 WiFi Range ExtenderNow only computers and devices in the Wireless Card Access list can join the extender’sWiFi networks.Set Up the Extender to Use a Static IP AddressBy default, the extender gets its IP address dynamically from the router in your network. Thisis the most common setting and is suitable for most situations. You can set up the extender touse a static IP address. You specify the static IP address and it always stays the same.Working with a static IP address requires networking knowledge. To specify a static IP address:1. On your computer, launch a web browser.2. In the address field of your browser, enter http://www.mywifiext.net.You are prompted to enter a user name and password. If you do not see the login prompt,make sure to include http:// when you type http://www.mywifiext.net in your browser.3. Type admin for the user name and type your password.If you have not yet personalized your password, type password for the password.4. Select Setup IP Address Setup.5. Select the Use Static IP Address radio button and complete the static IP address fields.6. Click the Apply button.Your settings are saved.Manage the Extender Network and Settings22
4.Monitor and Maintain the ExtenderThis chapter covers the following topics: Back Up the Extender Configuration Restore Saved Configuration Settings Return the Extender to Its Factory Settings Upgrade the Firmware View Wired and Wireless Network Devices234
N300 WiFi Range ExtenderBack Up the Extender ConfigurationWhen the extender works correctly after initial setup, NETGEAR recommends that you backup the extender configuration settings. After you have backed up the settings, if you changethe extender settings but are not content with the new settings, you can restore thebacked-up configuration settings. To back up the extender configuration settings:1. On your computer, launch a web browser.2. In the address field of your browser, enter http://www.mywifiext.net.You are prompted to enter a user name and password. If you do not see the login prompt,make sure to include http:// when you type http://www.mywifiext.net in your browser.3. Type admin for the user name and type your password.If you have not yet personalized your password, type password for the password.4. Select Maintenance Backup Settings.5. Click the Backup button.Your browser extracts the configuration file from the extender.6. If you do not have your browser set up to save downloaded files automatically, locate whereyou want to save the file.A copy of the current settings is saved in the location you specified.Restore Saved Configuration SettingsYou can restore the configuration file of the extender to a previously saved configuration file. To restore the extender configuration settings:1. On your computer, launch a web browser.2. In the address field of your browser, enter http://www.mywifiext.net.You are prompted to enter a user name and password. If you do not see the login prompt,make sure to include http:// when you type http://www.mywifiext.net in your browser.Monitor and Maintain the Extender24
N300 WiFi Range Extender3. Type admin for the user name and type your password.If you have not yet personalized your password, type password for the password.4. Select Maintenance Backup Settings.5. Click the Browse button.6. Locate and select the previously saved backup file.By default, the name of the backup file is NETGEAR WN3000RP.cfg.CAUTION:After you click the Restore button, do not try to go online, turn off theextender, shut down the computer, or do anything else to the extenderuntil it finishes restarting!7. Click the Restore button.A confirmation pop-up screen displays.8. Confirm your decision.The extender restarts. This process takes about one minute.Return the Extender to Its Factory SettingsTo reset the extender to factory default settings, you can use either the Factory Reset buttonor the Erase feature. For information about the factory settings, see Factory Default Settingson page 35.Use the Factory Reset Button to Restore Factory SettingsCAUTION:This process erases any settings that you have configured in the extender.Monitor and Maintain the Extender25
N300 WiFi Range Extender To restore factory settings:1. Insert a paper clip into the Factory Reset hole and hold it until the Power LED blinksamber.FactoyResetbutton2. Release the button.All the LEDs turn off for about three seconds.The Power LED lights solid amber for about 30 seconds.The Power LEDlights solid green.The extender returns to its factory settings.Erase the Extender Settings and Return to Factory SettingsCAUTION:This process erases any settings that you have configured in the extender. To erase the extender’s current settings:1. On your computer, launch a web browser.2. In the address field of your browser, enter http://www.mywifiext.net.You are prompted to enter a user name and password. If you do not see the login prompt,make sure to include http:// when you type http://www.mywifiext.net in your browser.3. Type admin for the user name and type your password.If you have not yet personalized your password, type password for the password.Monitor and Maintain the Extender26
N300 WiFi Range Extender4. Select Maintenance Backup Settings.CAUTION:After you click the Erase button, do n
350 East Plumeria Drive San Jose, CA 95134 USA April 2014 202-11346-01 N300 WiFi Range Extender Model WN3000RP. User Manual
