Transcription
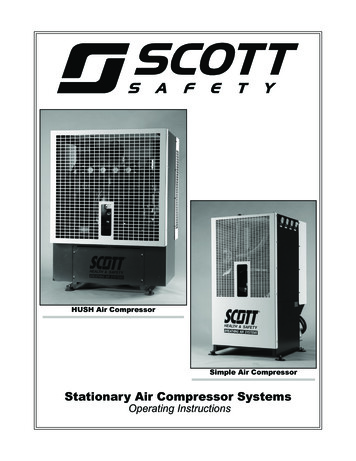
Air CompressorManualModels:Service and Support: 866-869-3114Pt# 1312100743Rev0411
TABLE OF CONTENTSPAGE1Safety Guidelines - DefinitionsBefore Using the Air Compressor2When Installing or Moving the CompressorBefore Each Use3Follow Safety Precautions for Electrical ConnectionPlan Ahead to Protect Your Eyes, Hands, Face & EarsWhen Operating4Spraying PrecautionsPerform These Maintenance Operations5Typical Compressor InstallationGlossary6Wiring7Starting the Compressor8Fully Packaged and QP Compressor Section9Troubleshooting Guide10Troubleshooting (Cont.)
SAFETY GUIDELINES - DEFINITIONSSafety is a combination of common sense, staying alert and knowing how your compressor works.Read this manual to understand this compressor.DANGERmeans if safety information is not followed someone will be seriously injured or killedWARNINGmeans if safety information is not followed someone could be seriously injured or killedCAUTIONmeans if safety information is not followed someone may be seriously injured or killedIMPORTANT SAFETY INSTRUCTIONSSave these instructionsImproper operation or maintenance of this product could result in serious injury and propertydamage. Read and understand all warnings and operation instructions before using this compressor.Before using the air compressorThings you should knowInspect your work areaAir compressors are utilized in a variety of air1. Keep work area clean.system applications. Because air compressorsand other components (hoses, connectors, air2. Cluttered areas and benches invite accidents.tools, spray guns, etc.) make up a high pressureFloors must not be slippery from wax or dust.pumping system, the following safety precautions should be observed at all times.Inspect your compressorOnly persons familiar with these rules ofsafe operation should use the aircompressor.1. To reduce the risk of injury from accidentalstarting, turn switch off and disconnect thepower before checking it.1. Read the instruction manual carefully beforeattempting to assemble, disassemble oroperate your system. Be thoroughly familiarwith the controls and the proper use of theequipment.2. If any part is missing, bent or broken in anyway, or any electrical part does not work properly, keep the compressor off and disconnected.3. Check hoses for weak or worn conditionbefore each use, making certain all connections2. Review and understand all safety instructionsare secure. Do Not use if defect is found.and operating procedures in this manual.WARNING3. Review the maintenance methods for thiscompressor (See “Maintaining YourCompressor” section).Do not operate compressor if damaged duringshipping, handling or use. Damage may resultin bursting and cause injury or property damage.DANGERThis compressor is Not designed for and shouldnot be used in breathing air applications.Page 1
When installing or moving the compressorWARNINGThis compressor is extremely top heavy. Thecompressor must be secured to the floorbefore operating to prevent equipmentdamage, injury or death. The compressor mustbe mounted on vibration pads. Do Not tightenbolts completely as this may cause stress tothe tank welds.To reduce the risk of a dangerousenvironment6. A minimum clearance of 18 inches betweenthe compressor and a wall is requiredbecause objects could obstruct airflow.7. The compressor should be located where it canbe directly wired to a circuit breaker. Thecompressor should be wired by a qualifiedelectrician.8. Never store flammable liquids or gases inthe vicinity of an operating compressor.1. Keep work area well lit.2. Operate compressor in a well-ventilatedarea free from flammable liquids and vapors.3. Operate compressor in a ventilated area sothat compressor may be properly cooled andthe surrounding air temperature will not bemore than 100 F.9. Do Not locate the compressor air inlet nearsteam, paint spray, sandblasting areas orany other source of contamination. Thedebris could damage the motor and pump.WARNINGNever use plastic (PVC) pipe for compressedair. Serious injury or death could result.4. Never use a compressor in a wetenvironment.CAUTION5. Protect material lines and air lines fromdamage or puncture. Keep hose andwires away from sharp objects, chemicalspills, oil, solvents and wet floors.Never use the shipping skid for mounting thecompressor.WARNINGThis compressor is not intended for outdoorinstallation.NOTICEDo Not secure compressor with toggle boltsinto drywall. Drywall sheeting or plaster will notsupport the weight of the compressor.Note:WARNINGNever install a shut off valve between the compressor pump and tank. Personal injury and/orequipment damage could occur.Tank Outlet Size: 30 Gallon Gas Drive- 1/2” NPT80 and 120 Gallon Electric - 3/4” NPTDuplex- 1” NPTBefore each useInspect your work areaInspect your compressor1. Keep work area clean. Cluttered areas andbenches invite accidents.1. To reduce the risk of injury from accidentalstarting, turn the switch off and disconnectpower.2. The floor must not be slippery from wax ordust.2. If any part is missing, bent or broken in anyway, or any electrical part does not workproperly, keep the compressor off and disconnect power. Do Not use if defect is found.3. Check hoses for weak or worn conditionbefore each use, making certain all connections are secure. Do Not use if a defect isfound.Page 2
Follow the safety precautions for electrical connections1. Follow all local electrical and safety codes,as well as the National Electric Code (NEC)and the Occupational Safety and HealthAct (OSHA).3. Protect wires from contact with sharp objects.CAUTION2. Wiring and fuses should follow electricalcodes, current capacity and be properlygrounded.All electrical connections should be made bya qualified electrician.Plan ahead to protect your eyes, hands, face and earsDress for safety1. Wear safety glasses (meeting ANSI Z87.1 orin Canada CSA Z94.3-99) and use hearingprotection when operating the unit. Everydayglasses are not safety glasses.WARNINGBe careful when touching the exterior of compressor, pump, motor and air lines; they maybecome hot enough to cause injury.2. Wear shoes to prevent shock hazards.WARNING3. Tie back long hair.Never operate the compressor without abeltguard. The compressor can start automatically without warning. Personal injury orproperty damage could occur from contactwith moving parts.Pay attention to your handsWARNINGKeep fingers away from running compressor.Fast moving and hot parts may cause injuryand/or burns.CAUTIONThe compressor may be hot even if the unit isstopped.WARNINGUse of a mask or respirator per chemicalmanufacturers’ instructions may be necessary if there is a chance of inhaling toxic fumes.Read mask and respirator instructions carefully. Consult a safety expert if you are notsure about the use of certain masks orrespirators.When operatingWARNING1. Do not exceed the pressure rating of anycomponent of the system.2. Release pressure within the system slowlyto prevent flying dust and debris.3. If the equipment starts to abnormally vibrate,STOP the compressor immediately andcheck for the cause.Never change the safety valve or pressureswitch settings. Keep safety valve free frompaint and other accumulations. See compressorspecification decal for maximum operatingpressure. Do not operate with the pressureswitch set higher than the maximum operatingpressure.Page 3
TYPICAL COMPRESSOR INSTALLATIONWIRINGTo Air SystemAirDryerFlexHoseVibration PadsGLOSSARY OF TERMSAir FilterPressure SwitchPorous element contained within a metal orplastic housing attached to the compressorcylinder head which removes impurity from theintake air of the compressor.Device which automatically controls the on/offcycling of the compressor. It stops thecompressor when the cut-off pressure inthe tank is reached and starts the compressorwhen the air pressure drops below the cut-inpressure.Air TankPSI (Pounds per Square Inch)Cylindrical component which contains thecompressed air.Check ValveMeasurement of the pressure exerted by theforce of air. The actual psi is measured by apressure gauge on the compressor.Device which prevents compressed air fromflowing back from the air tank to the compressor pump.PumpElectric MotorDevice which produces the compressed airwith a reciprocating piston contained within acylinder.Device which provides the rotational forcenecessary to operate the compressor pump.Safety ValvePressure GaugeDevice which prevents air pressure in the airtank from rising over a predetermined limit.Device which shows the tank or regulatedpressure of the compressed air.Thermal Overload SwitchDevice, integrated into the electric motor winding,which automatically “shuts off” the compressorif the temperature of the electric motor exceedsa predetermined limit.Page 5
Spraying precautionsWARNING1. Do Not spray in the vicinity of open flamesor other places where a spark can causeignition. Do Not smoke when sprayingpaint, insecticides, or other flammablesubstances.Never point a spray gun at yourself or anyother person or animal. Accidental dischargemay result in serious injury.Reduce the risk of dangerousenvironmentBe informed about the materials you use1. When spraying with solvents or toxic chemicals, follow the instructions provided by thechemical manufacturer. Consult a safetyexpert if unsure about the use of masks orrespirators.WARNINGExtreme caution should be taken whenspraying flammable liquids as the spark froma motor or pressure switch may cause a fireor explosion. Ample ventilation must beprovided.2. If the material you intend to spray containstrichloreoethane and methylene chloride, donot use accessories that contain aluminum orgalvanized materials, as these chemicals canreact with galvanized components causingcorrosion and weakening equipment. Usestainless steel accessories.WARNINGSpray in a well ventilated area to keep fumesfrom collecting and causing serious injury andfire hazards.Perform these maintenance operations1. Do regular maintenance; keep all nuts, bolts,and screws tight, to be sure equipment is insafe working condition.2. Inspect tank yearly for rust, pin holes or anyother imperfections that could cause it tobecome unsafe.4. Drain tanks of moisture after each day’s use.If unit will not be used for awhile, it is best toleave the drain cock open until such time as itis to be used. This will allow moisture tocompletely drain out and help preventcorrosion of inside of tank.5. Always disconnect from power source beforeworking on or near a motor, or its connectedload. If power disconnect point is out-ofsight, secure it in the “OFF” position and tag itto prevent unexpected application of power.WARNINGNEVER attempt to repair or modify a tank!Welding, drilling or any other modification willweaken the tank resulting in damage fromrupture or explosion. Always replace worn,cracked or damaged tanks.WARNING3. Clean electrical equipment with an approvedcleaning agent, such as a dry, non-flammable cleaning solvent.Disconnect power and depressurize systembefore servicing air compressor. Slightly opendrain cock after shutting off compressor.DailyMonthly(Make sure the main power is off.) Check the beltsfor tension. Belts should not move up and downwhen the compressor runs and when stopped,should not have more than ½ in of play whendepressed. Be careful not to over tighten beltsduring adjustment.Check oil level at sight glass. Oil level shouldbe 1/2 to slightly higher in the oil sight glass.Drain moisture from tank.Verify the pressure switch unloader isworking by listening for a brief hissing soundwhen the compressor shuts off.Visually check the compressor for loose parts,excessive noise or vibration. Tighten anynecessary part.Remove and check air filter, replace if necessary.Change oil every 3 months or 300 hours. Acompressor grade non-detergent oil should beused. Part # 82-6020Page 4
WIRINGWIRINGWARNINGALL ELECTRICAL WIRING SHOULD BE DONEBY A QUALIFIED ELECTRICIANGeneral InformationAdequate wiring and motor protectionIncoming power shouldshould be provided for all stationarybe connected to L1 andcompressors. Wiring used for otherL2 at the Top of themachinery should not be used. AMagnetic Starter.qualified electrician familiar with localelectrical codes in your area should beused. Size supply wiring per NEC (NationalElectric Code) requirements.WARNINGTo reduce the risk of electrical hazards, firehazards or damage to the compressor, useproper circuit protection. Your compressoris wired at the factory for operation usingthe voltage shown. Connect the compressorto a power source with the correct breakersize.WARNINGElectrical connections must be properlygrounded. Ground connections should beconnected at the grounding screw.GroundCAUTIONSingle PhaseOverheating, short circuiting and fire damagewill result from inadequate wiring.Incoming powershould beconnected toL1, L2 & L3 atthe Top of theMagnetic Starter.DO NOT MAKE CONNECTIONSAT THE PRESSURE SWITCHDUPLEXPower should be brought into theleft hand starter. Do not bring powerto both starters.GroundThree PhasePage 6
STARTING THE COMPRESSORSTARTING THE COMPRESSORPrior to running the compressor, checkthe following items:Operate the compressor for a few minutesunloaded (air system open) then allow thecompressor to pump up. Make sure theelectrical pressure switch properly switchesoff the compressor according to the settingdesired. (175 PSI Max)Crankcase oil - Make sure the sight glassshows ½ full or slightly above.Make sure all rags, tools, oil, etc. are awayfrom the unit.CAUTIONOpen the air system to free it of any pressure.Switch the compressor on for a fewrevolutions to make sure the rotation iscorrect. Correct rotation is clockwisewhen facing the sight glass on the pump.Make sure the pressure in the tank doesnot exceed its rating. Maximum of 175 psi. Ifthe pressure gauge indicates a pressure thatis higher than these maximum pressures,shut off compressor immediately and call866-869-3114.(Gas Drive Models)PLEASE REFER TO YOUR ENGINE OPERATION MANUAL FOR PROPER STARTINGINSTRUCTIONS.NAPA GASOLINE DRIVEN COMPRESSORS ARE EQUIPPED WITH A COLD STARTVALVE FOR LOADLESS STARTS. THERE IS NO NEED TO MANUALLY UNLOADAIR PRESSURE.Battery Connection Instructions for Electric Start EnginesNote:Make sure to follow instructions carefully to avoid a short and possible damageto the starter solenoid and/or battery.1. Connect the positive ( ) terminal on the battery to the starter solenoid.2. Connect the negative (-) terminal on the battery to an engine mounting bolt or otheracceptable ground connection.Always connect the positive( ) battery cable to the starter solenoid before connectingthe negative(-) battery cable.NUMBER 2 WIRE OR LARGER IS REQUIRED(-)( )BATTERY(12 Volt)Starter SolenoidGROUNDPage 7
QP CompressorsThe QP comes equipped with sound attenuating enclosure. For maintenance, the canopy andside foam pieces will need to be removed.To remove the canopy, simply remove the 6 fasteners and lift the canopy straight up and off.QP and Fully Packaged CompressorsQP and fully packaged models come equipped with low oil level switches and automatic tankdrains. The QP models also include protection against over-heating.Low Oil Level SwitchThe function of the low oil level switchis to keep the air compressor fromstarting if the oil level drops beyonda certain point.For compressors outfitted with thelow oil level switch, the oil shouldin the top 1/3 of the oil sight glass.Oil VentPlugTarget Oil LevelWhen changing or adding oil, it isimportant to remove the Oil VentPlug to allow for the oil to flowcompletely into the switch.OIL(Please Note: If overfilled, oil will flow outof the oil vent hole)Thermal Protection - QP ModelsIf the cooling fan were to fail orinternal temperature were to reach170 F the QP models are outfittedwith a thermal fuse.When tripped, the fuse can be reset.The canopy will need to be removedto reset the thermal fuse.Press toResetPage 8Location of Fuse(Inside CanopyBehind Fan)
TROUBLESHOOTING GUIDELow discharge pressure 1. Compressor too small forapplication2. Air leaks3. Restricted intake air4. Blown gasket(s)5. Broken or misaligned valves1. Reduce air demand or use a compressorwith more air capacity.2. Listen for air leaks. Apply a soap solutionto all fittings and connections. Bubbleswill form at points of leakage. Tightenor replace fittings or connections.3. Clean or replace air filter.4. Replace necessary gaskets.5. Remove head and inspect for broken ormisaligned valves. Replace valves, ifnecessary.!Excessive noise“knocking”1. Loose drive pulley or flywheel2. Low on oil3. Worn connecting rod orconnecting rod bearing4. Noisy check valveCAUTIONInstall a new head gasketeach time head is removed1. Tighten drive pulley or flywheel bolt.2. Check for proper oil level. Low or dirtyoil may cause bearing damage.3. Replace connecting rod and/or connectingrod bearings.4. Replace check valve.!DANGERDo not remove check valvewith air pressure in tankExcessive oil carryover1. Worn piston rings2. Restricted intake air3. Too much oil in compressor4. Incorrect oil viscosity1. Replace with new piston rings.2. Clean or replace air filter.3. Drain oil to proper oil level.4. Use a quality non-detergent 30 or 40wtoil specified for each model (Page 4).Water in tank and/ordischarge line1. Normal. Amount of water willincrease as humidity in theair increases.1. Drain tank at least once per day.2. Add an inline filter to reduce moisture inin the air line.Will not run or motorhums1. Low voltage1. Check voltage with volt meter across bothlegs of incoming power. Check reset buttonon motor.2. Malfunctioning pressure switch 2. Repair or replace pressure switch.3. Malfunctioning check valve3. Replace check valve or pressure switch.!Breaker or resetrepeatedly tripsDo not remove check valvewith air pressure in tank1. Make sure the breaker is sized properly.See page 6 in this manual.2. Check voltage with volt meter across both2. Low voltagelegs of incoming power.3. Replace motor.3. Malfunctioning motor4. Check all electrical connections.4. Loose electrical connections5. Malfunctioning pressure switch 5. Adjust or replace pressure switch.6. Replace check valve.6. Malfunctioning check valve1. Incorrect breaker size!Tank does not holdpressure when notrunning and shut offvalve is closedDANGER1. Malfunctioning check valvePage 9Do not remove check valvewith air pressure in tank1. Replace check valve.!2. Loose fittings or connections3. Crack or pin hole in tankDANGERnot remove check valveDANGER Dowith air pressure in tank2. Tighten or replace fittings or connections.3. Replace tank. Do not attempt to repair tank.
TROUBLESHOOTING GUIDE (Continued)Pressure switch unloader constantlyleaking air1. Malfunctioning check valvePressure switch notunloading1. Malfunctioning pressureswitch1. Replace check valve if unloader bleedsconstantly.!1. Replace pressure switch if it does not releaseair pressure briefly when unit shuts off.!Excessive vibration1. Improper installation2. Loose belts3. Misaligned flywheel ordrive pulleynot remove check valveDANGER Dowith air pressure in tankDANGERDo not remove pressureswitch with air pressure intank1. Make sure unit is mounted on a level surfacewith vibration pads.2. Replace belts. Align and tighten properly.3. Align flywheel and drive pulley.Overheating1. Compressor too small forapplication2. Cooling surfaces dirty3. Improper cooling1. Reduce air demand or use a compressorwith more air capacity.2. Clean all cooling surfaces of dirt and dust.3. Install compressor in an area with adequatecool dry air.Will Not Start(Elite and QP)1. Unit Low on Oil2. Exhaust Fan Not Working1. Add Oil to Proper Level2. Reset Thermal OverloadPage 10
Warranty StatementThe Company warrants that the Equipment manufactured by it and delivered hereunder shall be free from defects in material andworkmanship for a period of twelve (12) months from the date of initial start-up, or eighteen (18) months from the date of shipmentfrom the manufacturer, whichever occurs first. The foregoing warranty period shall apply to all Equipment, except for the following: (A) alltwo stage reciprocating stationary models are warranted for the earlier of twenty-four (24) months from the date of initial operation or thirty(30) months from date of shipment from the manufacturer. (B) Replacement parts will be warranted for three (3) months from the date ofshipment from the manufacturer. Should the failure to conform to this warranty be reported in writing to the Company within saidperiod, the Company shall, at its option, correct such non - conformity by suitable repair to such Equipment, or furnish areplacement part F.O.B point of shipment, provided that the Purchaser has installed, maintained, and operated such Equipment inaccordance with good industry practices, and has complied with specific recommendations of the Company.Accessories andequipment furnished by the Company, but manufactured by others, shall carry whatever warranty the manufacturer conveyed to theCompany and which can be passed on to the Purchaser. The Company shall not be liable for any repairs, replacements, or adjustmentsto the Equipment, or any costs of labor performed by the Purchaser without the Company’s prior written approval.The Company makes no performance warranty unless specifically stated within its proposal, and the effects of corrosion, erosion, andnormal wear and tear are specifically excluded from the Company’s warranty. In the event performance warranties are expresslyincluded, the Company’s obligation shall be to correct in the manner and for the period of time provided aboveThis warranty does not apply to electric motors or gasoline engines. These are covered by the Original Manufacturer’s Warranty andshould be returned (by the customer) to their authorized service center for service.THE COMPANY MAKES NO OTHER WARRANTY OR REPRESENTATION OF ANY KIND WHATSOEVER,EXPRESSED OR IMPLIED, EXCEPT THAT OF TITLE, AND ALL IMPLIED WARRANTIES OF MERCHANTABILITYAND FITNESS FOR A PARTICULAR PURPOSE, ARE HEREBY DISCLAIMED. THIS WARRANTY SUPERSEDES ALLPREVIOUS WARRANTY STATEMENTS.Correction by the Company of non-conformities, whether patent or latent, in the manner and for the period of time provided above, shallconstitute fulfillment of all liabilities of the Company and its distributors for such non-conformities with respect to, or arising out of suchEquipment.LIMITATION OF LIABILITYTHE REMEDIES OF THE PURCHASER SET FORTH HEREIN ARE EXCLUSIVE, AND THE TOTAL LIABILITY OF THE COMPANY,ITS DISTRIBUTORS AND SUPPLIERS WITH RESPECT TO CONTRACT OR THE EQUIPMENT AND SERVICES FURNISHED INCONNECTION WITH THE PERFORMANCE OR BREACH THEREOF, OR FROM THE MANUFACTURE, SALE, DELIVERY,INSTALLATION, REPAIR OR TECHNICAL DIRECTION COVERED OR FURNISHED UNDER CONTRACT, WHETHER BASEDON CONTRACT, WARRANTY, NEGLIGENCE, INDEMNITY, STRICT LIABILITY OR OTHERWISE, SHALL NOT EXCEED THEPURCHASE PRICE OF THE EQUIPMENT UPON WHICH SUCH LIABILITY IS BASED.THE COMPANY, ITS DISTRIBUTORS AND ITS SUPPLIERS SHALL IN NO EVENT BE LIABLE TO THE PURCHASER, ANYSUCCESSORS IN INTEREST, OR ANY BENEFICIARY OR ASSIGNEE OF THE CONTRACT FOR ANYCONSEQUENTIAL, INCIDENTAL, INDIRECT, SPECIAL OR PUNITIVE DAMAGES ARISING OUT OF THIS CONTRACT OR ANYBREACH THEREOF, OR ANY DEFECT IN, OR FAILURE OF, OR MALFUNCTION OF THE EQUIPMENT, WHETHER OR NOTBASED ON LOSS OF USE, LOST PROFITS OR REVENUE, INTEREST, LOST GOODWILL, WORK STOPPAGE, IMPAIRMENTOF OTHER GOODS, LOSS BY REASON OF SHUTDOWN OR NON-OPERATION, COST OF PURCHASE OF REPLACEMENTPOWER, OR CLAIMS OF PURCHASER OR CUSTOMERS OF PURCHASER FOR SERVICE INTERRUPTION, WHETHER OR NOTSUCH LOSS OR DAMAGE IS BASED ON CONTRACT, WARRANTY, NEGLIGENCE, INDEMNITY, STRICT LIABILITY OR OTHERWISE.Atlas Copco Compressors1800 Overview DriveRock Hill, SC 29730866-869-3114
2. Operate compressor in a well-ventilated area free from flammable liquids and vapors. 3. Operate compressor in a ventilated area so that compressor may be properly cooled and the surrounding air temperature will not be more than 100 F. 4. Never use a compressor in a wet environment. 5. Protect material lines and air lines from damage or .