Transcription
Seagate Backup Plus DesktopUser ManualModel: Click here to access an up-to-date online versionof this document. You will also find the most recent content as well as expandable illustrations, easiernavigation, and search capability.
Cont ent s1 Introduction.4. . . . contentBox. . . . . . . . . . . . . . . . . . . . . . . . . . . . . . . . . . . . . . . . . . . . . . . . . . . . . . . . . . . . . . . . . . . . . . . . . . . . . . . . . . . . . . . . . . . . . . . . . . . . . . . . . . . . .4. . . . . . . . . . . . . . umMinim. . . .system. . . . . . requirem. . . . . . . . ents. . . . . . . . . . . . . . . . . . . . . . . . . . . . . . . . . . . . . . . . . . . . . . . . . . . . . . . . . . . . . . . . . . . . . . . . . . . . . . . . . . . . . . . . .4. . . . . . . . . . . . . . . . . requiremHardware. . . . . . . . ents. . . . . . . . . . . . . . . . . . . . . . . . . . . . . . . . . . . . . . . . . . . . . . . . . . . . . . . . . . . . . . . . . . . . . . . . . . . . . . . . . . . . . . . . . . . . . . . .4. . . . . . . . .2 LED. . . . .indicator. . . . . . . .and. . . .cables.5. . . . . . lightStatus. . . . .inform. . . . . .ation. . . . . . . . . . . . . . . . . . . . . . . . . . . . . . . . . . . . . . . . . . . . . . . . . . . . . . . . . . . . . . . . . . . . . . . . . . . . . . . . . . . . . . . . . . . . . . . .5. . . . . . . . . . . . .3.0USB. . . . . . . . . . . . . . . . . . . . . . . . . . . . . . . . . . . . . . . . . . . . . . . . . . . . . . . . . . . . . . . . . . . . . . . . . . . . . . . . . . . . . . . . . . . . . . . . . . . . . . . . . . . .5. . . . . . . . .3 Connect. . . . . . . . .Backup. . . . . . .Plus. . . .Desktop. . . . . . . .to. . your. . . . .computer. . . . . . . . . . . . . . . . . . . . . . . . . . . . . . . . . . . . . . . . . . . . . . . . .6. . . . .1. -. .ConnectStep. . . . . . . to. . .a. power. . . . . . outlet. . . . . . . . . . . . . . . . . . . . . . . . . . . . . . . . . . . . . . . . . . . . . . . . . . . . . . . . . . . . . . . . . . . . . . . . . . . . . . . . . . . . . . . .6. . . . . . . . . . . . .2. –Step. . Connect. . . . . . . .to. . your. . . . .com. . . .puter. . . . . . . . . . . . . . . . . . . . . . . . . . . . . . . . . . . . . . . . . . . . . . . . . . . . . . . . . . . . . . . . . . . . . . . . . . . . . . . . . . . . . .7. . . . . . . . . . . . .3. –Step. . Registration. . . . . . . . . . .and. . . software. . . . . . . . . . . . . . . . . . . . . . . . . . . . . . . . . . . . . . . . . . . . . . . . . . . . . . . . . . . . . . . . . . . . . . . . . . . . . . . . . . . . . . . . . . .7. . . . . . . . . . . . . . . . . . comMacintosh. . . .puter. . . . . . . . . . . . . . . . . . . . . . . . . . . . . . . . . . . . . . . . . . . . . . . . . . . . . . . . . . . . . . . . . . . . . . . . . . . . . . . . . . . . . . . . . . . . . . . . . . .8. . . . . . . . .4 Safely. . . . . . remove. . . . . . . .your. . . . Backup. . . . . . . Plus. . . . .Desktop. . . . . . . .from. . . . .your. . . . computer. . . . . . . . . . . . . . . . . . . . . . . . . . . . . . . . . . . . .9. . . . . . remSafely. . . .ove. . . external. . . . . . . storage. . . . . . . from. . . . . a. .Windows. . . . . . . . PC. . . . . . . . . . . . . . . . . . . . . . . . . . . . . . . . . . . . . . . . . . . . . . . . . . . . . . . . . . . . . . . . . . . . . . .9. . . . . . . . . . . . . . remSafely. . . .ove. . . external. . . . . . . storage. . . . . . . from. . . . . a. .Mac. . . . . . . . . . . . . . . . . . . . . . . . . . . . . . . . . . . . . . . . . . . . . . . . . . . . . . . . . . . . . . . . . . . . . . . . . . . . . . .9. . . . . . . . . . . . . viaEject. . . Finder. . . . . . .windo.w. . . . . . . . . . . . . . . . . . . . . . . . . . . . . . . . . . . . . . . . . . . . . . . . . . . . . . . . . . . . . . . . . . . . . . . . . . . . . . . . . . . . . . . . . . .9. . . . . . . . . . . . . viaEject. . . Deskto. . . . . . .p. . . . . . . . . . . . . . . . . . . . . . . . . . . . . . . . . . . . . . . . . . . . . . . . . . . . . . . . . . . . . . . . . . . . . . . . . . . . . . . . . . . . . . . . . . . . . . .10.5 Back. . . . . up. . .your. . . . .computer. . . . . . . . .to. . Backup. . . . . . . Plus. . . . Desktop. . . . . . . . . . . . . . . . . . . . . . . . . . . . . . . . . . . . . . . . . . . . . . . . 11. . . . . .is. .a. backup?What. . . . . . . . . . . . . . . . . . . . . . . . . . . . . . . . . . . . . . . . . . . . . . . . . . . . . . . . . . . . . . . . . . . . . . . . . . . . . . . . . . . . . . . . . . . . . . . . . . . . . . .11. . . . . . . optionsBackup. . . . . . . . . . . . . . . . . . . . . . . . . . . . . . . . . . . . . . . . . . . . . . . . . . . . . . . . . . . . . . . . . . . . . . . . . . . . . . . . . . . . . . . . . . . . . . . . . . . . . . . . .11.6 Optional. . . . . . . . .Formatting. . . . . . . . . .and. . . .Partitioning. . . . . . . . . . . . . . . . . . . . . . . . . . . . . . . . . . . . . . . . . . . . . . . . . . . . . . . . . . . . 13. . . . . . fileAbout. . . system. . . . . . .form. . . . ats. . . . . . . . . . . . . . . . . . . . . . . . . . . . . . . . . . . . . . . . . . . . . . . . . . . . . . . . . . . . . . . . . . . . . . . . . . . . . . . . . . . . . . . . . . . .13. . . . . attingForm. . . . . .instructions. . . . . . . . . . . . . . . . . . . . . . . . . . . . . . . . . . . . . . . . . . . . . . . . . . . . . . . . . . . . . . . . . . . . . . . . . . . . . . . . . . . . . . . . . . . . . . . . . . . . .14. . . . . . .wsWindo. . . . . . . . . . . . . . . . . . . . . . . . . . . . . . . . . . . . . . . . . . . . . . . . . . . . . . . . . . . . . . . . . . . . . . . . . . . . . . . . . . . . . . . . . . . . . . . . . . . . . . .14. . . . . . . . . . . . . . . . . . . . . . . . . . . . . . . . . . . . . . . . . . . . . . . . . . . . . . . . . . . . . . . . . . . . . . . . . . . . . . . . . . . . . . . . . . . . . . . . . . . . . . . . . . . . . .14Mac.7 Hard. . . . . drive. . . . . tests. . . . . . . . . . . . . . . . . . . . . . . . . . . . . . . . . . . . . . . . . . . . . . . . . . . . . . . . . . . . . . . . . . . . . . . . . 15. . . . . . . diagnosticSeagate. . . . . . . . . tool. . . . (Windows. . . . . . . . . .only). . . . . . . . . . . . . . . . . . . . . . . . . . . . . . . . . . . . . . . . . . . . . . . . . . . . . . . . . . . . . . . . . . . . . . . . . . . . . . . . . .15. . . . . . . . . diagnosticWindows. . . . . . . . . tool. . . . . . . . . . . . . . . . . . . . . . . . . . . . . . . . . . . . . . . . . . . . . . . . . . . . . . . . . . . . . . . . . . . . . . . . . . . . . . . . . . . . . . . . . . . . . .15. . . . .diagnosticMac. . . . . . . . .tool. . . . . . . . . . . . . . . . . . . . . . . . . . . . . . . . . . . . . . . . . . . . . . . . . . . . . . . . . . . . . . . . . . . . . . . . . . . . . . . . . . . . . . . . . . . . . . . . . 16.
8 Frequently. . . . . . . . . . .asked. . . . . questions. . . . . . . . . . . . . . . . . . . . . . . . . . . . . . . . . . . . . . . . . . . . . . . . . . . . . . . . . . . . . . . . . . . 17.
Introduc onWelcome to the user manual for Seagate Backup Plus Desktop, a hard drive with ample capacity to store allyour important files. Connect your Backup Plus Desktop to a computer that supports USB 3.0 for fasttransfers of all your data.Review this user manual for instructions on how to manage your Backup Plus Desktop. For commonquestions and answers about your drive, please see Frequently asked questions.You can get the latest tips regarding your product and updated technical information at Seagate customersupport.Box contentSeagate Backup Plus DesktopUSB 3.0 cable (Micro-B to Type A)Power cableQuick Start GuideSoftware: Seagate Dashboard (available for download) Important info: Save your packaging. If you experience problems with your hard drive and wantto exchange it, the hard drive must be returned in its original packaging.Minimum system requirementsYou can connect your Backup Plus Desktop to a computer that meets the following minimum requirements:Windows 7 or higherMac OS X 10.7 or higherHardware requirementsBackup Plus Desktop can be connected to computers with USB 3.0 and USB 2.0 ports. However, you canreach transfer rates up to 5Gb/s when connected to a USB 3.0 port. Connecting the Backup Plus Desktop to acomputer with USB 2.0 limits performance to USB 2.0 speeds.Seagate Backup Plus Deskto p3/16/174
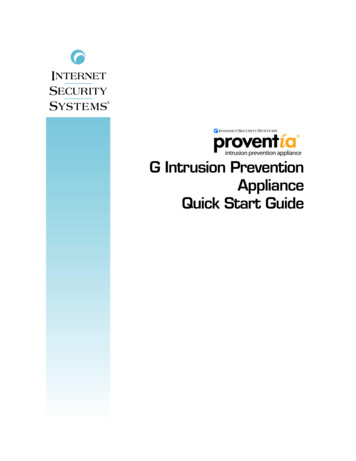
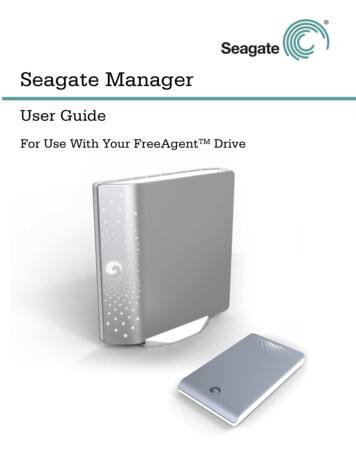
LED indicator and cablesStatus light informa onYour hard drive features a status light that provides general information about the product. Refer to the tablebelow for details.Light colorStatusWhiteDrive is on and readyBlinking whiteDrive activityOffDrive is offUSB 3.0USB is a serial input/output technology for connecting peripheral devices to a computer. USB 3.0 is a recentimplementation of this standard that provides high bandwidth for data transfers.Transfer rates can attain up to 5Gb/s as opposed to USB 2.0's 480Mb/s. This means that USB 3.0 istheoretically up to ten times faster than its predecessor.Make certain to use the USB 3.0 cable included with your Backup Plus Desktop. It features a Micro-Bconnector on one end to plug into the Backup Plus Desktop and a standard Type A connector for universalconnectivity to all PCs.Connector Face(Type A to Computer)Seagate Backup Plus Deskto pCable End(Type A to Computer)Cable End(Micro-B to Hard Drive)3/16/17Connector Face(Micro-B to Hard Drive)5
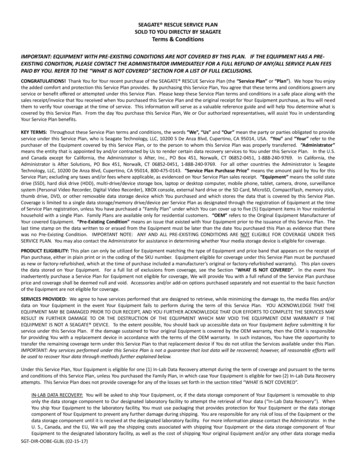
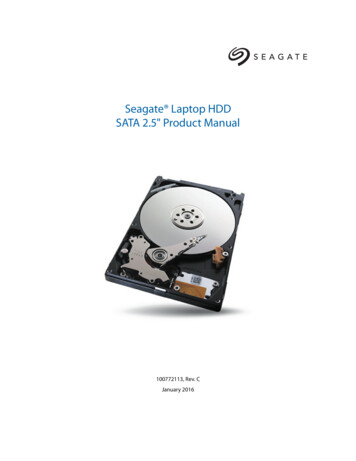
Connect Backup Plus Desktop to yourcomputerYour Backup Plus Desktop is compatible with computers that feature a USB port. Important info regarding USB connections: Your Seagate drive is shipped with a SuperSpeedUSB 3.0 cable to ensure maximum data transfer performance when connected to a compatibleUSB 3.0 port. The cable also works when connected to a USB 2.0 port, but drive performance islimited to USB 2.0 transfer rates.Step 1 - Connect to a power outletAttach one end of the included power cable to Backup Plus Desktop and the other end to a working poweroutlet. The LED turns on when the device receives power.Power adapters can vary by region. Therefore, make certain to only use the power cable included with yourSeagate Backup Plus Desktop. Attaching third-party or other Seagate power cables with incorrect voltage candamage Backup Plus Desktop.Step 2 – Connect to your computer3/16/17Seagate Backup Plus Deskto p6
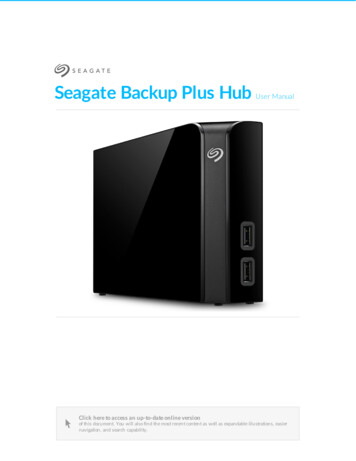
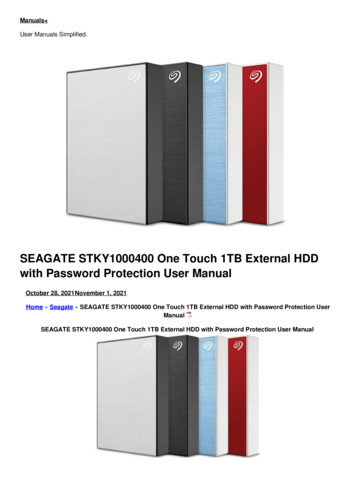
Step 2 – Connect to your computerAttach the USB Micro-B end of the included USB cable to Backup Plus Desktop.Attach the USB Type A end of the included USB cable to a compatible port on your computer.Step 3 – Registra on and so wareRegister your Seagate Backup Plus Desktop to receive the latest news regarding your device. You canregister your device and install Seagate software in a few simple steps.Software included with your Backup Plus Desktop:Dashboard–Backup software for your Windows computers, mobile devices and social media. Fordetails, see Dashboard.1. Open the Seagate Backup Plus Desktop volume in Windows Explorer. Launch the installer by doubleclicking Start Here Win.2. Follow the on-screen instructions to register your hard drive and install Seagate software.If you have questions regarding setup or would like to learn more about your hard drive, visit Seagate BackupPlus Desktop support.Seagate Backup Plus Deskto p3/16/177
Macintosh computerSeagate Backup Plus Desktop is formatted for Windows using NTFS. Mac OS X can read hard drivesformatted as NTFS but write access is not available without the aid of a special driver. If you want to useBackup Plus Desktop with a Macintosh computer, download and install the Paragon driver. For moreinformation, go to Paragon driver for Mac.Seagate Backup Plus Deskto p3/16/178
Safely remove your Backup Plus Desktopfrom your computerAlways eject a storage drive from your computer before physically disconnecting it. Your computer mustperform filing and housekeeping operations on the drive before it is removed. Therefore, if you unplug thedrive without using the operating system’s software, your files can become corrupt or damaged.Safely remove external storage from a Windows PCUse the Safely Remove tool to eject the hard drive you want to remove.1. Click the Safely Remove icon in your Windows System Tray to view the devices you can eject.Windows 7:Windows 8 / Windows 10:2. If you don't see the Safely Remove Hardware icon, click the Show hidden icons arrow in the system trayto display all icons in the notification area.3. In the list of devices, choose the device you want to remove. Windows displays a notification when it issafe to remove the device.4. Disconnect the hard drive from the computer.Safely remove external storage from a MacThere are several ways you can eject your hard drive from a Mac. See below for two options.Eject via Finder window1. Open a Finder window.2. In Devices on the sidebar, locate Seagate Backup Plus Desktop and click the eject symbol to the right ofthe drive name.3. Once the drive disappears from the sidebar or, if the Finder window closes, you can disconnect the harddrive's cable from your Mac.Eject via DesktopSeagate Backup Plus Deskto p3/16/179
Eject via Desktop1. Select the desktop icon for your hard drive and drag it to the Trash.2. When the image is no longer visible on your desktop, you can physically disconnect the hard drive fromyour Mac.Seagate Backup Plus Deskto p3/16/1710
Back up your computer to Backup PlusDesktopWhat is a backup?There are two types of backup:System backup: A system backup copies everything on your computer onto an external storage deviceincluding the operating system, applications and data. If the computer’s hard drive fails, the computer canbe restored to its former state with the backed up system data.File backup: A file backup copies select data files onto an external storage device. If the computer’s harddrive fails, the files are safe on the external storage drive but the operating system and applications mustbe reinstalled. Important info: Windows requires a repair or restore CD/DVD or USB device for full systembackups.Backup op onsThe following table shows how you can back up data from your computer to your Backup Plus Desktop.System backupFile backupxSeagate Dashboard(Windows only)Copy and pasteWindows 7 Backup and RestorexxxWindows 8 File HistorySeagate Backup Plus Deskto px3/16/1711
Windows 10: Backup and Restore orFile HistoryMac Time Machinexx(Backup and Restore)(File History)xxClick the links below for further information regarding each backup solution:Seagate DashboardWindows System Image BackupWindows 7 and 10 Backup and RestoreWindows 8 and 10 File HistoryMac Time MachineWhen initiating a backup task, make certain that your Backup Plus Desktop has sufficient capacity to hold thedata you want to back up.All of the options in the table can be automated except for copy and paste. Copying and pasting is a manualtask that requires your attention with each change to a file on your computer. If you forget to manually copyfiles, you risk losing important data should your computer’s hard drive experience problems. Automatedsolutions, once created, only require that you connect your Backup Plus Desktop to yourcomputer. Therefore, Seagate recommends an automated backup solution.Seagate Backup Plus Deskto p3/16/1712
Op onal Forma ng and ParoningYour Backup Plus Desktop is formatted as NTFS for compatibility with Windows out of the box. Therfore,you can connect Backup Plus Desktop to a Windows PC without formatting the hard drive. However, NTFS isnot fully compatible with Mac computers. If you want to connect Backup Plus Desktop to a Mac as well as aWindows PC, you can install special software that allows Macs to read and write files to NTFS hard drivessimilar to Windows PCs. For details and instructions, see our dedicated support page for the Paragon driverfor Mac.If you want to use Backup Plus Desktop exclusively with Mac computers, it is recommended that you use theformat native to the Mac operating system, HFS (journaled).For further information on hard drive file systems and instructions for formatting hard drives, review thesection below.About file system formatsNTFS: since it is the native file system for Windows, volumes created in NTFS are read and write withcomputers running Windows. Mac OS can read and write to NTFS volumes with the help of the Paragondriver for Windows.Mac OS Extended (HFS ): the native hard drive file system for Mac. Windows users can read and write toHFS (journaled) hard drives by installing the Paragon driver for Mac.exFAT: generally compatible with Mac and Windows. exFAT is not a journaled file system which means it canbe more susceptible to data corruption when errors occur or the drive is not disconnected properly fromthe computer.FAT32: compatible with Mac and Windows. However, FAT32 is a legacy file system designed for lowcapacity hard drives and it is not recommended for modern hard drives or operating systems. A FAT32partition can reach up to 32GB when formatted on a Windows PC.How to choose the file system formatUse NTFS if: the storage device is connected to Windows PCs. Install the Paragon driver for Mac for compatibility withMacs.Use HFS if: the storage device is connected to Macs. Install the Paragon driver for Windows for compatibility withWindows PCs.You can use exFAT if: the storage device is shared between Mac and Windows computers. However, Seagate recommendsinstalling the Paragon driver when sharing hard drives between operating systems.Use FAT32 if: the storage device is connected to older Windows and Mac computers. FAT32 is not recommended forSeagate Backup Plus Deskto p3/16/1713
modern operating systems and computers.Forma ng instruc onsThe steps below help you format and partition a storage device. Caution: Formatting erases everything on the storage device. Seagate highly recommends thatyou back up all data on your storage device before performing the steps below. Seagate is notresponsible for any data lost due to formatting, partitioning or using a Seagate storage device. Note: Refer to your operating system's documentation for more information on formatting andpartitioning storage devices.Windows1. Make sure the storage device is connected to and mounted on the computer.2. Go to Search and then type diskmgmt.msc. In the search results, double click Disk Management.3. From the list of storage devices in the middle of the Disk Management window, locate your Seagatedevice.4. The partition must be available to format. If it is currently formatted, right click on the partion and thenchoose Delete.5. To create a new partition, right click on the volume and select New Simple Volume. Follow the on-screeninstructions when the New Simple Volume Wizard appears.Mac1. Make sure the storage device is connected to and mounted on the computer.2. Select Go Utilities in the Finder menu bar.3. In the Utilities folder, double-click Disk Utility. All connected storage devices, partitions or disk imagesare displayed in the left column.4. Select the Seagate drive in the left column.5. Click the Erase tab.6. Choose a format from the drop-down window.7. Enter a name for the volume.8. Click Erase and confirm your selection in the pop-up window.Seagate Backup Plus Deskto p3/16/1714
Hard drive testsIf you experience problems with your Seagate external storage, you can run diagnostic tests on its harddrive. Windows and Mac offer utilities to test and repair hard drives and Seagate provides utlities forWindows.Seagate diagnos c tool (Windows only)Download Seatools for Windows and follow the steps below to help determine the health of your device.Make certain to back up data on your storage device before running the test.1. Close all open applications before running the hard drive diagnostic tests.2. Before starting the test, make certain that the computer is powered on. The computer must be pluggedinto its power supply and the power supply should receive power from a wall socket.3. Power management controls must be suspended during the tests. To adjust power managementsettings:Click Start or the Windows icon on the bottom left corner of your Windows desktop.Go to Control Panel.Choose Power Options.Choose Change plan settings.Choose Change advanced power settingsExpand the Hard Disks in the window.Confirm that the settingis set to Never.4. Confirm that you have the correct storage device connected to your computer. Seatools for Windowscan be used with Seagate, Samsung, LaCie and Maxtor storage devices. Safely remove all other harddrives.5. If you have not done so, back up data on your storage device before running the test.6. Launch Seatools and choose the tests to run from the menu:Fix allS.M.A.R.T. checkShort Drive Self TestShort GenericLong Generic (progresses at 1% increments and can take several hours to complete)Following the test, a log for each drive is saved to the program installation folder. To read the log, clickHelp View Log File. You can also view a log in Help by clicking Pass Info or Fail Info, depending on yourresults.Windows diagnos c toolWindows includes a utility called Check Disk (ChkDsk) that can be used to repair bad sectors on the hardSeagate Backup Plus Deskto p3/16/1715
drive. Always back up your data before running Check Disk scans on your hard drive. If a bad sector is found,data that had been available can be inaccessible once the bad sector is reallocated.Follow the steps below to run Check Disk:1. Launch Command Prompt. Go to the start menu or start screen to type cmd and then click CommandPrompt.2. Type chkdsk X: /f. “X“ is the letter for your hard driveThe length of time for the test to complete can vary and is usually longer for higher capacity storage devices.Mac diagnos c toolMac OS includes Disk Utility, a tool for formatting, testing and repairing hard drives. Disk Utility’s test andrepair option is called First Aid.Always back up your data before running First Aid scans on your hard drive. If a bad sector is found, data thathad been available can be inaccessible once the bad sector is reallocated.Follow the steps below to run First Aid:1. From the Finder, click Go Utilities Disk Utility.2. Hard drives are listed on the left of the Disk Utility window. Find your Seagate device and click it.Information about the drive is available, including the file system. Additionally, partitions are visible inthe left column as a second indented row under the storage device. There may be cases in which apartition is mounted on the desktop but does not appear in Disk Utility. You can still run the test on thehard drive.3. Click a partition to select it.4. Click the First Aid tab/button.5. To check the volume:Mac OS 10.10 and earlier: click Verify Disk. If Disk Utility reports that the disk needs to be repaired,click Repair Disk.Mac OS 10.11 and later: click Run to begin the test.6. If you have additional partitions, repeat the test on each one.Seagate Backup Plus Deskto p3/16/1716
Frequently asked ques onsFor help setting up and using your Seagate hard drive, review the frequently asked questions below. Foradditional support resources, go to Seagate customer support.Q: What is the hard drive format for the Backup Plus Desktop?A: The default hard drive format for Backup Plus Desktop is NTFS, native to Windows.Q: Can I use my Seagate hard drive without backup software?A: Yes, the hard drive does not require any special software to work. The hard drive can be used asadditional storage space to compliment your computer's hard drive. For example, copy videos, photos,music and documents and then paste them to the Seagate hard drive.Q: Can I use the Backup Plus Desktop with a Mac?A: Yes. However, since it is formatted as NTFS, the Backup Plus Desktop appears as read-only on a Mac. Ifyou want to share files between Windows PCs and Macs, install the Paragon driver for Mac on your Mac. Itallows Macs to write files to hard drives formatted as NTFS.tIf you only want to use Backup Plus Desktop with Macs, you can format it as Mac OS Extended (Journaled).See Optional Formatting and Partitioning for instructions.Q: Will my Seagate hard drive's USB 3.0 port work with my computer's USB 2.0 port?A: Yes, the cable end that plugs into the computer (USB Type A) is compatible with both USB 3.0 and USB2.0. However, the transfer rates are much slower with USB 2.0.Q: Can I use my Seagate hard drive with a USB hub?A: Yes, the hard drive can be connected to a USB hub. If you use a hub and encounter detection problems,slower than normal transfer rates, random disconnection from your computer or other unusual issues, tryconnecting the hard drive directly to the computer's USB port.Some USB hubs are less than efficient with power management, which can be problematic for connecteddevices. In such a case, consider trying a powered USB hub that includes a power cable.Please note that USB 2.0 hubs limit your Seagate hard drive's transfer rates to USB 2.0 speeds.Q: Can I use my Seagate hard drive with a longer cable?A: Yes, provided it is certified according to USB standards. However, Seagate recommends using the cableshipped with your hard drive for the best results. If you use a longer cable and experience problems withdetection, transfer rates or disconnection, use the original cable included with your Seagate hard drive.Seagate Backup Plus Deskto p3/16/1717
Q: Can I protect my Seagate hard drive with a password?A: Yes, it is possible to protect the hard drive or individual folders and files with a password. There aremany third-party solutions for password protection. However, Seagate cannot guarantee them since we donot test third-party applications.Some versions of Windows have a built-in utility called Bitlocker that can protect hard drives with apassword. For more information about Bitlocker, consult Microsoft's support documentation.Q: Can I encrypt my Seagate hard drive?A: Yes, the hard drive can be encrypted. There are many third-party solutions for encryption. However,Seagate cannot guarantee them since we do not test third-party applications.Some versions of Windows have a built-in utility called Bitlocker that can encrypt hard drives. For moreinformation about Bitlocker, consult Microsoft's support documentationSeagate Backup Plus Deskto p3/16/1718
Connect Backup Plus Desktop to your computer Your Backup Plus Desktop is compatible with computers that feature a USB port. Step 1 - Connect to a power outlet Attach one end of the included power cable to Backup Plus Desktop and the other end to a working power outlet. The LED turns on when the device receives power. Power adapters can vary by .