Transcription
Seagate Backup Plus HubUser ManualModel: Click here to access an up-to-date online versionof this document. You will also find the most recent content as well as expandable illustrations, easiernavigation, and search capability.
Cont ent s1 Introduction.4. . . . contentBox. . . . . . . . . . . . . . . . . . . . . . . . . . . . . . . . . . . . . . . . . . . . . . . . . . . . . . . . . . . . . . . . . . . . . . . . . . . . . . . . . . . . . . . . . . . . . . . . . . . . . . . . . . . . .4. . . . . . . . . . . . . . umMinim. . . .system. . . . . . requirem. . . . . . . . ents. . . . . . . . . . . . . . . . . . . . . . . . . . . . . . . . . . . . . . . . . . . . . . . . . . . . . . . . . . . . . . . . . . . . . . . . . . . . . . . . . . . . . . . . .4. . . . . . . . . . . . . . . . . requiremHardware. . . . . . . . ents. . . . . . . . . . . . . . . . . . . . . . . . . . . . . . . . . . . . . . . . . . . . . . . . . . . . . . . . . . . . . . . . . . . . . . . . . . . . . . . . . . . . . . . . . . . . . . . .4. . . . . . . . .2 LED. . . . .indicator. . . . . . . .and. . . .cables. . . . . . . . . . . . . . . . . . . . . . . . . . . . . . . . . . . . . . . . . . . . . . . . . . . . . . . . . . . . . . . . . . .6. . . . . . lightStatus. . . . .inform. . . . . .ation. . . . . . . . . . . . . . . . . . . . . . . . . . . . . . . . . . . . . . . . . . . . . . . . . . . . . . . . . . . . . . . . . . . . . . . . . . . . . . . . . . . . . . . . . . . . . . . .6. . . . . . . . . . . . .3.0USB. . . . . . . . . . . . . . . . . . . . . . . . . . . . . . . . . . . . . . . . . . . . . . . . . . . . . . . . . . . . . . . . . . . . . . . . . . . . . . . . . . . . . . . . . . . . . . . . . . . . . . . . . . . .6. . . . . . . . .3 Connect. . . . . . . . .Backup. . . . . . .Plus. . . .Hub. . . .to. . your. . . . .computer. . . . . . . . . . . . . . . . . . . . . . . . . . . . . . . . . . . . . . . . . . . . . . . . . . . . .7. . . . .1. -. .ConnectStep. . . . . . . to. . .a. power. . . . . . outlet. . . . . . . . . . . . . . . . . . . . . . . . . . . . . . . . . . . . . . . . . . . . . . . . . . . . . . . . . . . . . . . . . . . . . . . . . . . . . . . . . . . . . . . .7. . . . . . . . . . . . .2. –Step. . Connect. . . . . . . .to. . your. . . . .com. . . .puter. . . . . . . . . . . . . . . . . . . . . . . . . . . . . . . . . . . . . . . . . . . . . . . . . . . . . . . . . . . . . . . . . . . . . . . . . . . . . . . . . . . . . .8. . . . . . . . . . . . .3. –Step. . Registration. . . . . . . . . . .and. . . software. . . . . . . . . . . . . . . . . . . . . . . . . . . . . . . . . . . . . . . . . . . . . . . . . . . . . . . . . . . . . . . . . . . . . . . . . . . . . . . . . . . . . . . . . . .8. . . . . . . . . . . . . atsForm. . . for. . . Mac. . . . .and. . . Windows. . . . . . . . . . . . . . . . . . . . . . . . . . . . . . . . . . . . . . . . . . . . . . . . . . . . . . . . . . . . . . . . . . . . . . . . . . . . . . . . . . . . . . . . . . . . . .9. . . . . . . . .4 Connect. . . . . . . . .USB. . . .devices. . . . . . . to. . .Backup. . . . . . .Plus. . . .Hub. . . . . . . . . . . . . . . . . . . . . . . . . . . . . . . . . . . . . . . . . . . . . . . . . 10.5 Safely. . . . . . remove. . . . . . . .Backup. . . . . . .Plus. . . . Hub. . . . from. . . . . your. . . . .computer. . . . . . . . . . . . . . . . . . . . . . . . . . . . . . . . . . . . . . . . . . . . 11. . . . . . remSafely. . . .ove. . . external. . . . . . . storage. . . . . . . from. . . . . a. .Windows. . . . . . . . PC. . . . . . . . . . . . . . . . . . . . . . . . . . . . . . . . . . . . . . . . . . . . . . . . . . . . . . . . . . . . . . . . . . . . . .11. . . . . . remSafely. . . .ove. . . external. . . . . . . storage. . . . . . . from. . . . . a. .Mac. . . . . . . . . . . . . . . . . . . . . . . . . . . . . . . . . . . . . . . . . . . . . . . . . . . . . . . . . . . . . . . . . . . . . . . . . . . . . .11. . . . . viaEject. . . Finder. . . . . . .windo.w. . . . . . . . . . . . . . . . . . . . . . . . . . . . . . . . . . . . . . . . . . . . . . . . . . . . . . . . . . . . . . . . . . . . . . . . . . . . . . . . . . . . . . . . . .11. . . . . viaEject. . . Deskto. . . . . . .p. . . . . . . . . . . . . . . . . . . . . . . . . . . . . . . . . . . . . . . . . . . . . . . . . . . . . . . . . . . . . . . . . . . . . . . . . . . . . . . . . . . . . . . . . . . . . . .12.6 Back. . . . . up. . .your. . . . .computer. . . . . . . . .to. . your. . . . .Backup. . . . . . .Plus. . . . Hub. . . . . . . . . . . . . . . . . . . . . . . . . . . . . . . . . . . . . . . . . . . 13. . . . . . . optionsBackup. . . . . . . . . . . . . . . . . . . . . . . . . . . . . . . . . . . . . . . . . . . . . . . . . . . . . . . . . . . . . . . . . . . . . . . . . . . . . . . . . . . . . . . . . . . . . . . . . . . . . . . . .13.7 Optional. . . . . . . . .Formatting. . . . . . . . . .and. . . .Partitioning. . . . . . . . . . . . . . . . . . . . . . . . . . . . . . . . . . . . . . . . . . . . . . . . . . . . . . . . . . . . 15. . . . . . fileAbout. . . system. . . . . . .form. . . . ats. . . . . . . . . . . . . . . . . . . . . . . . . . . . . . . . . . . . . . . . . . . . . . . . . . . . . . . . . . . . . . . . . . . . . . . . . . . . . . . . . . . . . . . . . . . .15. . . . . attingForm. . . . . .instructions. . . . . . . . . . . . . . . . . . . . . . . . . . . . . . . . . . . . . . . . . . . . . . . . . . . . . . . . . . . . . . . . . . . . . . . . . . . . . . . . . . . . . . . . . . . . . . . . . . . . 16. . . . . . .wsWindo. . . . . . . . . . . . . . . . . . . . . . . . . . . . . . . . . . . . . . . . . . . . . . . . . . . . . . . . . . . . . . . . . . . . . . . . . . . . . . . . . . . . . . . . . . . . . . . . . . . . . . .16. . . . . . . . . . . . . . . . . . . . . . . . . . . . . . . . . . . . . . . . . . . . . . . . . . . . . . . . . . . . . . . . . . . . . . . . . . . . . . . . . . . . . . . . . . . . . . . . . . . . . . . . . . . . . .16Mac.8 Hard. . . . . drive. . . . . tests. . . . . . . . . . . . . . . . . . . . . . . . . . . . . . . . . . . . . . . . . . . . . . . . . . . . . . . . . . . . . . . . . . . . . . . . . 17. . . . . . . diagnosticSeagate. . . . . . . . . tool. . . . (Windows. . . . . . . . . .only). . . . . . . . . . . . . . . . . . . . . . . . . . . . . . . . . . . . . . . . . . . . . . . . . . . . . . . . . . . . . . . . . . . . . . . . . . . . . . . . . .17. . . . . . . . . diagnosticWindows. . . . . . . . . tool. . . . . . . . . . . . . . . . . . . . . . . . . . . . . . . . . . . . . . . . . . . . . . . . . . . . . . . . . . . . . . . . . . . . . . . . . . . . . . . . . . . . . . . . . . . . . .17. . . . .diagnosticMac. . . . . . . . .tool. . . . . . . . . . . . . . . . . . . . . . . . . . . . . . . . . . . . . . . . . . . . . . . . . . . . . . . . . . . . . . . . . . . . . . . . . . . . . . . . . . . . . . . . . . . . . . . . . 18.
9 Frequently. . . . . . . . . . .asked. . . . . questions. . . . . . . . . . . . . . . . . . . . . . . . . . . . . . . . . . . . . . . . . . . . . . . . . . . . . . . . . . . . . . . . . . . 19.10 .Compliance. . . . . . . . . . .Information. . . . . . . . . . . . . . . . . . . . . . . . . . . . . . . . . . . . . . . . . . . . . . . . . . . . . . . . . . . . . . . . . . . . . . . 21. . . . . . RoHSChina. . . . . .2. . . . . . . . . . . . . . . . . . . . . . . . . . . . . . . . . . . . . . . . . . . . . . . . . . . . . . . . . . . . . . . . . . . . . . . . . . . . . . . . . . . . . . . . . . . . . . . . . . . .21. . . . . . . RoHSTaiwan. . . . . . . . . . . . . . . . . . . . . . . . . . . . . . . . . . . . . . . . . . . . . . . . . . . . . . . . . . . . . . . . . . . . . . . . . . . . . . . . . . . . . . . . . . . . . . . . . . . . . . . . .22.
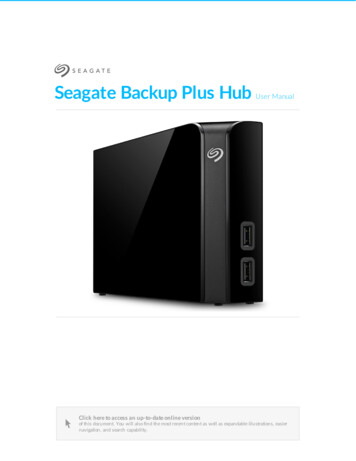
Introduc onWelcome to the user manual for Seagate Backup Plus Hub, a hard drive with ample capacity to store all yourimportant files. Connect your Backup Plus Hub to a computer that supports USB 3.0 for fast transfers of allyour data. You can also use its two additional USB 3.0 ports to connect more devices to your computer or,use them to power compatible devices such as mobile phones and tablets.Review this user manual for instructions on how to manage your Backup Plus Hub. For common questionsand answers about your drive, please see Frequently asked questions.You can get the latest tips regarding your product and updated technical information at Seagate customersupport.Box contentSeagate Backup Plus HubUSB 3.0 cable for connection to a computer (Micro-B to Type A)Power cableQuick Start GuideSoftware: Seagate Dashboard (available for download) Important info: Save your packaging. If you experience problems with your hard drive and wantto exchange it, the hard drive must be returned in its original packaging.Minimum system requirementsYou can connect your Backup Plus Hub to a computer that meets the following minimum requirements:Windows 7 or higherMac OS X 10.7 or higherHardware requirementsBackup Plus Hub can be connected to computers with USB 3.0 and USB 2.0 ports. However, you can reachtransfer rates up to 5Gb/s when connected to a USB 3.0 port. Connecting the Backup Plus Hub to a computerwith USB 2.0 limits performance to USB 2.0 speeds.Seagate Backup Plus Hub1/3/204
Seagate Backup Plus Hub1/3/205
LED indicator and cablesStatus light informa onYour hard drive features a status light that provides general information about the product. Refer to the tablebelow for details.Light colorStatusWhiteDrive is on and readyBlinking whiteDrive activityOffDrive is offUSB 3.0USB is a serial input/output technology for connecting peripheral devices to a computer. USB 3.0 is a recentimplementation of this standard that provides high bandwidth for data transfers.Transfer rates can attain up to 5Gb/s as opposed to USB 2.0's 480Mb/s. This means that USB 3.0 istheoretically up to ten times faster than its predecessor.Make certain to use the USB 3.0 cable included with your Backup Plus Hub. It features a Micro-B connectoron one end to plug into the Backup Plus Hub and a standard Type A connector for universal connectivity to allPCs and Macs.Connector Face(Type A to Computer)Seagate Backup Plus HubCable End(Type A to Computer)Cable End(Micro-B to Hard Drive)1/3/20Connector Face(Micro-B to Hard Drive)6
Connect Backup Plus Hub to yourcomputerYour Backup Plus Hub is compatible with computers that feature a USB port. Important info regarding USB connections: Your Seagate drive is shipped with a SuperSpeedUSB 3.0 cable to ensure maximum data transfer performance when connected to a compatibleUSB 3.0 port. The cable also works when connected to a USB 2.0 port, but drive performance islimited to USB 2.0 transfer rates.Step 1 - Connect to a power outletAttach one end of the included power cable to Backup Plus Hub and the other end to a working poweroutlet. The LED turns on when the device receives power and is connected to your computer (see Step 2).Power adapters can vary by region. Therefore, make certain to only use the power cable included with yourSeagate Backup Plus Hub. Attaching third-party or other Seagate power cables with incorrect voltage candamage the Backup Plus Hub.Seagate Backup Plus Hub1/3/207
Step 2 – Connect to your computerAttach the USB Micro-B end of the included USB cable to Backup Plus Hub.Attach the USB Type A end of the included USB cable to a compatible port on your computer.Step 3 – Registra on and so wareRegister your Backup Plus Hub to receive the latest news regarding your device. You can register yourdevice and install Seagate software in a few simple steps.Software included with your Backup Plus Hub:Dashboard–Backup software for your Windows computers, mobile devices and social media. Fordetails, see Dashboard.1. Open the Backup Plus Hub volume in Windows Explorer or the Mac desktop.2. Launch the installer.Windows: double click Start Here WinSeagate Backup Plus Hub1/3/208
Mac: double click Start Here Mac3. Follow the on-screen instructions to register your Backup Plus Hub and install Seagate software.If you have questions regarding setup or would like to learn more about your hard drive, visit Seagate BackupPlus Hub support.Formats for Mac and WindowsSeagate Backup Plus Hub is available in two models, Windows and Mac. The Windows model is formatted asNTFS while the Mac model is formatted as Mac OS Extended (Journaled), also known as HFS . While Mac OSX can read hard drives formatted as NTFS, write access is not available. Windows cannot read or write tohard drives formatted as HFS .While it is highly recommended to purchase the model targeted for your computer's operating system,there are drivers for Windows and Mac that can provide compatibility with any Backup Plus Hub. To use yourBackup Plus Hub with computers that have another operating system, download and install the Paragondriver. For more information, go to Paragon driver.Seagate Backup Plus Hub1/3/209
Connect USB devices to Backup Plus HubBackup Plus Hub’s additional USB ports allow you to connect more devices to your computer. Simplyconnect compatible USB devices to the two USB Type A ports on the Backup Plus Hub. When Backup PlusHub is connected to your computer, the devices are also available to the computer.Backup Plus Hub uses a 3A power supply and each USB Type A port outputs up to 1.5 Amps / 5 volts. Youcan connect compatible devices that support charging via USB to the USB ports. Backup Plus Hub mustreceive power via its power cable to deliver power to compatible devices. Important info: Seagate is not responsible for devices that experience harm, damaage ormalfunction when connected to Backup Plus Hub.Seagate Backup Plus Hub1/3/2010
Safely remove Backup Plus Hub from yourcomputerAlways eject a storage drive from your computer before physically disconnecting it. Your computer mustperform filing and housekeeping operations on the drive before it is removed. Therefore, if you unplug thedrive without using the operating system’s software, your files can become corrupt or damaged.Safely remove external storage from a Windows PCUse the Safely Remove tool to eject the hard drive you want to remove.1. Click the Safely Remove icon in your Windows System Tray to view the devices you can eject.Windows 7:Windows 8 / Windows 10:2. If you don't see the Safely Remove Hardware icon, click the Show hidden icons arrow in the system trayto display all icons in the notification area.3. In the list of devices, choose the device you want to remove. Windows displays a notification when it issafe to remove the device.4. Disconnect the hard drive from the computer.Safely remove external storage from a MacThere are several ways you can eject your hard drive from a Mac. See below for two options.Eject via Finder window1. Open a Finder window.2. In Devices on the sidebar, locate Seagate Backup Plus Hub and click the eject symbol to the right of thedrive name.3. Once the drive disappears from the sidebar or, if the Finder window closes, you can disconnect the harddrive's cable from your Mac.Seagate Backup Plus Hub1/3/2011
Eject via Desktop1. Select the desktop icon for your hard drive and drag it to the Trash.2. When the image is no longer visible on your desktop, you can physically disconnect the hard drive fromyour Mac.Seagate Backup Plus Hub1/3/2012
Back up your computer to your BackupPlus HubBackup op onsThe following table shows how you can back up data from your computer to your Backup Plus Hub.System backupFile backupxSeagate Dashboard(Windows only)Copy and pasteWindows 7 Backup and RestorexxxWindows 8 File HistoryWindows 10: Backup and Restore orFile HistoryMac Time Machinexxx(Backup and Restore)(File History)xxClick the links below for further information regarding each backup solution:Seagate DashboardWindows System Image BackupWindows 7 Backup and RestoreSeagate Backup Plus Hub1/3/2013
Windows 8 and 10 File HistoryMac Time MachineWhen initiating a backup task, make certain that your Backup Plus Hub has sufficient capacity to hold the datayou want to back up.All of the options in the table can be automated except for copy and paste. Copying and pasting is a manualtask that requires your attention with each change to a file on your computer. If you forget to manually copyfiles, you risk losing important data should your computer’s hard drive experience problems. Automatedsolutions, once created, only require that you connect your Backup Plus Hub to yourcomputer. Therefore, Seagate recommends an automated backup solution.Seagate Backup Plus Hub1/3/2014
Op onal Forma ng and ParoningSeagate Backup Plus Hub is available in two models, Windows and Mac. The Windows model is formatted asNTFS while the Mac model is formatted as Mac OS extended (Journaled), also known as HFS . While Mac OSX can read hard drives formatted as NTFS, write access is not available. Windows cannot read or write tohard drives formatted as Mac OS extended (Journaled).While it is highly recommended that users purchase the model targeted for their computer operatingsystems, there are drivers for Windows and Mac that can provide compatibility with any Backup Plus Hub.To use your Backup Plus Hub with computers that have another operating system, download and install theParagon driver. For more information, go to Paragon driver.About file system formatsNTFS: since it is the native file system for Windows, volumes created in NTFS are read and write withcomputers running Windows. Mac OS can read and write to NTFS volumes with the help of the Paragondriver for Mac.Mac OS Extended (HFS ): the native hard drive file system for Mac. Windows users can read and write toHFS (journaled) hard drives by installing the Paragon driver for Windows.exFAT: generally compatible with Mac and Windows. exFAT is not a journaled file system which means it canbe more susceptible to data corruption when errors occur or the drive is not disconnected properly fromthe computer.FAT32: compatible with Mac and Windows. However, FAT32 is a legacy file system designed for lowcapacity hard drives and it is not recommended for modern hard drives or operating systems. A FAT32partition can reach up to 32GB when formatted on a Windows PC.How to choose the file system formatUse NTFS if: the storage device is connected to Windows PCs. Install the Paragon driver for Mac for compatibility withMacs.Use HFS if: the storage device is connected to Macs. Install the Paragon driver for Windows for compatibility withWindows PCs.You can use exFAT if: the storage device is shared between Mac and Windows computers. However, Seagate recommendsinstalling the Paragon driver when sharing hard drives between operating systems.Use FAT32 if: the storage device is connected to older Windows and Mac computers. FAT32 is not recommended formodern operating systems and computers.Forma ng instruc onsSeagate Backup Plus Hub1/3/2015
Forma ng instruc onsThe steps below help you format and partition a storage device. Caution: Formatting erases everything on the storage device. Seagate highly recommends thatyou back up all data on your storage device before performing the steps below. Seagate is notresponsible for any data lost due to formatting, partitioning or using a Seagate storage device. Note: Refer to your operating system's documentation for more information on formatting andpartitioning storage devices.Windows1. Make sure the storage device is connected to and mounted on the computer.2. Go to Search and then type diskmgmt.msc. In the search results, double click Disk Management.3. From the list of storage devices in the middle of the Disk Management window, locate your Sea
You can connect your Backup Plus Hub to a computer that meets the following minimum requirements: Windows 7 or higher Mac OS X 10.7 or higher Hardware requirements Backup Plus Hub can be connected to computers with USB 3.0 and USB 2.0 ports. However, you can reach transfer rates up to