Transcription
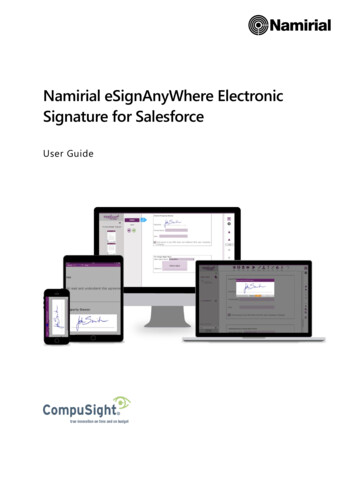
eSignAnyWhere IntegrationforMicrosoft Dynamics CRMUser Guide
Table of Contents1. Overview . 32. Installing and Configuring eSignAnyWhere . 33. Completing Your eSignAnyWhere User Profile .44. Sending for Signature. 65. Sending Reports for Signature . 116. Checking Envelope Status . 117. Viewing Envelopes and Updating Status . 14eSignAnyWhere Integration forMicrosoft Dynamics CRM - User GuidePage 2
1. OvervieweSignAnyWhere offers a plug-and-play integration solution withMicrosoft Dynamics Crm. This integration provides the following benefits: Accelerates the quote-to-cash process by sending envelopes—such as contracts andsales documents—from Dynamics with one click.Automatically merges data from Dynamics entities—such as accounts and contacts—into envelopes and pushes data gathered from signers during the signing process backto Dynamics.Makes it easy for recipients to sign anywhere, anytime, on any device.Makes it possible to track documents sent out for signature from within Dynamics.Eliminates manual steps across the entire process.This integration is available for both Microsoft Dynamics CRM Online deployments andMicrosoft Dynamics CRM on-premises deployments.2. Installing and Configuring eSignAnyWhereThe eSignAnyWhere integration solution package can only be installed by a MicrosoftDynamics CRM System Administrator. Please contact your CRM System Administrator todetermine if the package has already been installed.eSignAnyWhere Integration forMicrosoft Dynamics CRM - User GuidePage 3
3. Completing Your eSignAnyWhere User ProfileBefore you can send documents for signature from Microsoft Dynamics CRM, you mustcomplete your user profile.1. Sign On to Dynamics CRM. Your Microsoft Dynamics CRM dashboard displays.Note: Your particular dashboard view is dependent on your assigned user role. The variouspanes in the dashboard are empty if your CRM System Administrator has just installed yourpackage solution for the first time.2. From the Dynamics Main menu, select the eSignAnyWhere tile then clickOverview.3.Under Document Cloud Overview, click the User Settings link.eSignAnyWhere Integration forMicrosoft Dynamics CRM - User GuidePage 4
4. In the New eSignAnyWhere User page, click in the following fields to update them asrequired: Name—Enter the name of the eSignAnyWhere User Profile. Default Envelope Name - The default envelope name used when you send envelopes. Itcan be overridden. Default Email Subject - The default email subject used when you send envelopes. It canbe overridden. Default Email Body – The default email body used when sending the envelopes.Can have html tags5. In the eSignAnyWhere Provider section enter an email that will appear as a senderemail for the envelopes6. Click Save & Close even if you have not changed any information. Doing so validates(if the user exists on the Namirial side) or creates a new user (if the user is not presenton the Namirial side).7. If there is no error message the record gets saved and the user profile is created. Everytime this user sends the envelope his/her email address entered in theeSignAnyWhere provider section will be taken and user for the Authenticationagains the significant API.eSignAnyWhere Integration forMicrosoft Dynamics CRM - User GuidePage 5
4. Sending for SignatureWhen the eSignAnyWhere integration with Microsoft Dynamics CRM is installed, a Sendfor Signature option is available from the More menu. You can use the Send forSignature option to send envelopes for signature from an entity or from the Envelopespage.To send an envelope from an entity:1. Navigate to a specific entity record (e.g.,Contacts, Opportunity, Orders, Quotes) withinCRM and click to open it (In case you want to associate an entity that is not one of thedefault ones with the envelope you have to add a 1 to Many relationship betweenthat entity and the envelope entity; doing so will show the Send for Signaturebutton).2. Click the More Commands menu.3. Select Send for Signature from the menu.4. If one or more document types (mappings) exist for the entity and record selected instep 1, the default document type displays in the Data Mapping drop-down. Thisdefault can be overridden. If there are no document types (mappings) defined, thedrop-down is empty.Note: eSignAnyWhere Admins can define Data mappings for an entity.Note that if you use the New option to send an envelope from the Envelopes page, theData Mapping drop-down does not display because there is no associated entity.eSignAnyWhere Integration forMicrosoft Dynamics CRM - User GuidePage 6
5. Depending on the record selected in Step 1 above, the first recipient may be automaticallypre- populated. You can click the Add button in the Recipients section to add additionalrecipients.6. In the Add Recipients dialog, do one of the following:a. Find an existing contact by entering your search criteria, selecting a ‘CRM contacts’option (Lead, Opportunity, Contact, Custom Recipient Sources) in the From dropdown, then click the looking glass icon.eSignAnyWhere Integration forMicrosoft Dynamics CRM - User GuidePage 7
Click the check box to select the recipient, then click Add.b. Select New Contact from the CRM Contacts drop-down then enter the recipient’s emailaddress, first name and last name.Click Add to add the contact.eSignAnyWhere Integration forMicrosoft Dynamics CRM - User GuidePage 8
7. Recipients will sign the envelope in the order displayed. To change the order, use thedrop-downs next to the recipient names.8. Click the Add Local button to add one or more envelopes from your to add adocument. You can change the envelope order using the Move up and Move Downcontrols on the right. To remove a document, click the Remove button.9. Optionally, select one or more Signature Options.Each of these options function as follows: Signature Type—Allows selecting the type of signature or the different ways signaturecan be placed : Click to sign, type to sign etc.Preview, position signatures or add form fields—Allows you to preview thedocument and to drag- and-drop form fields on to it before sending it out forsignature.eSignAnyWhere Integration forMicrosoft Dynamics CRM - User GuidePage 9
Days until expiration—Allows you to set the expiration for the envelope.Ifthe envelope is not completed within the given period its status is set toExpired and can only be Restarted at that stage. Reminder Enabled—Allows you to set reminders for an In Progress envelope. Ifthis option is set to True 3 other fields open up below as seen in the pictureabove. Send a reminder to signers after receipt days is setting the firstreminder (how many days after the envelope is sent). Continue to sendreminders every day(s) sets a recurrent reminder, where an email is sent torecipients in a specified interval (every 4 days for example). Warn signersbefore request expires sets the last reminder before the envelope is turnedinto the status of Expired.10. Click the Send. If you selected the Preview, position signatures or add form fieldsoption, a new browser window in which you can drag-and-drop fields on thedocuments opens. When you’ve added the necessary fields, click the Send button inthe upper right hand corner.The envelope or report is sent for signature and will be listed in the Envelopes List with astatus of “In Progress”. The signers will receive an email requesting that they sign theenvelope.eSignAnyWhere Integration forMicrosoft Dynamics CRM - User GuidePage 10
5. Sending Reports for SignatureWhen the eSignAnyWhere integration with Microsoft Dynamics CRM is installed and youhave SQL Server Reporting Services (SSRS) installed and configured, a Send Report forSignature option is available from the More menu. The Send Report for Signatureoption allows you to select an existing report already configured within your CRMsystem for an entity type and send it for signature. The process for Send Report forSignature is similar to the process for Send for Signature with a few notable exceptions.For example, when you send a report, you must choose the report from a submenu ofreports for the selected entity. Also, when you send a report, the generated report will beautomatically attached as the first document for the Envelope.6. Checking Envelope StatusOnce the recipient or recipients sign an envelope, the status of the envelope isupdated to “Completed”.All envelopes that have been sent for signature are listed in the envelopes list for a specificentity. You can view the audit report and the signed document for envelopes that havebeen signed.To view a signed document and its audit report, do the following:1. Navigate to the entity record.2. Click to open the record.3. Click to open the Common menu for the record.eSignAnyWhere Integration forMicrosoft Dynamics CRM - User GuidePage 11
4. From the Common menu, click Envelopes.5. In the selected view, click on the link for the envelope.6. On the Envelope page, you can scroll to view information on Envelope Status, EnvelopeDetails, Email, Recipients, Documents, Signature Options, and Signed Documents.eSignAnyWhere Integration forMicrosoft Dynamics CRM - User GuidePage 12
7. Click in the scrollable Notes area at the bottom of the page to access the EnvelopeAudit Trail and the Signed EnvelopeNote: If your CRM system has been configured to receive automatic updates fromeSignAnyWhere services (CompuSight Update Workflow is started and running), the statusof the envelopes are automatically updated every half and hour if their status changes.Please contact you CRM System Administrator to determine whether your account hasbeen configured for automatic updates.eSignAnyWhere Integration forMicrosoft Dynamics CRM - User GuidePage 13
7. Viewing Envelopes and Updating StatusAll envelopes, regardless of entity, are listed in the envelopes list on the Envelopes page.For signed envelopes, the envelopes lists display the Name, Status, and dates (Sent, Filed[completed envelope], and Signed) of the envelopes. For sent and draft envelopes, onlythe applicable information displays.Information about Created From documents displays where applicable. To view envelopesfrom the Envelopes page, do the following:1. From the Main menu, click the eSignAnyWhere tile then click Envelopes.2. In the Envelopes list, you can sort envelopes by name, status, and so forth using thesort filters in the header row. To view more detailed information and perform optionalactions, click the envelope name.3. On the Envelope page, if the envelope is still in progress, you can click Update toupdate the status if automatic status updates have not been configured.eSignAnyWhere Integration forMicrosoft Dynamics CRM - User GuidePage 14
4. To remind the recipients (via email) once again to sign you can use the SEND REMINDERSbutton on the form ribbon5. If the agrement is in the status of In Progress it can be cancelled using the ribbonaction6. Ultimately we can have an in-place signing (client that needs to sign is sitting next toyou and maybe does not have access to his email) using the HOST option which mimicsthe Open document link he/she would receive in an email. The popup with theenvelopes opens up and the recipient can choose to sign the envelope.Note: For most of the ribbon actions (Cancel, Update and Host) browser popups must beenabled or else these will not be enabled for initiationNamirial GmbHLegal Office: Seilerstätte 16, 1010 Wien, AustriaMain Office: Haider Straße 23, 4025 Ansfelden Phone: 43-7229-88060 www.namirial.comFiscalnumber 09 258/9720 VAT-ID: ATU70125036eSignAnyWhere Integration forMicrosoft Dynamics CRM - User GuidePage 15
This integration is available for both Microsoft Dynamics CRM Online deployments and Microsoft Dynamics CRM on-premises deployments. 2. Installing and Configuring eSignAnyWhere . When the eSignAnyWhere integration with Microsoft Dynamics CRM is installed, a Send for Signature option is available from the More menu.
