Transcription
Namirial eSignAnyWhere ElectronicSignature for SalesforceUser Guide
Table of Contents1. Overview . 32. Application Navigation.43. Home. 64. Configuring Application Settings . 75. Configuring User Settings . 86. Managing Envelope. 97. Managing Recipients . 178. Adding recipients based on Salesforce records . 189. Adding recipient from scratch . 2010. Reordering, editing and deleting recipients . 2211. Managing Documents . 2412. Actions on Envelope . 2512.1 Send . 2512.2 Update . 2912.3 Send Reminder . 2912.4 Cancel . 2912.5 Delete . 3012.6 Host . 3012.7 Restart . 3113. Data Mapping . 3214. Upload Reports . 3815. Managing EnvelopeTemplates . 3916. Managing Recipient Sources. 4317. Salesforce Mobile App . 45Namirial eSignAnyWhere Electronic Signature for Salesforce - User GuidePage 2
1. OverviewNamirial eSignAnyWhere – Electronic Signature for Salesforce (e-Signature) offers aplug-and-play integration solution between with Salesforce and eSignAnyWhere,solution for Digital Transaction Management developed by Namirial GmbH.This integration provides the following benefits: Accelerates the quote-to-cash process by sending envelopes, such as Contactsand Accounts documents, from Salesforce with single clickAutomatically merges data from any Salesforce object into envelope and pushesdata gathered from signers during the signing process back to SalesforceProvides document designer to manager form fields and signature fields directlyon documentsGenerates recipients based on existing leads, contacts, accounts (or any otherSalesforce object)Enables to send Salesforce-generated reports as envelope documentsMakes it easy for recipients to sign anywhere, anytime, on any deviceMakes it possible to track and control signing process from within SalesforceWith all enlisted benefits, eSignAnyWhere app represents one of the most advancesand easiest to use Salesforce applications for electronic signatures. eSignAnyWheredeveloped by Namirial GmbH takes care of confidentiality and security of sentenvelopes, as well as meeting regulations of most of the countries which recognizeelectronic signatures as legally valid signature. Scope of the product covers not onlyclick, draw and type to sign, but also various authentications and biometricsignatures. Combining security and efficiency of eSignAnyWhere with data fromSalesforce produces powerful tool for accelerating sales processes.In this guide, all functionalities of Namirial eSignAnyWhere – Electronic Signature forSalesforce (e- Signature), or just referred as eSignAnyWhere app, are covered withdetailed explanations, use cases and screenshots. Those functionalities include:Namirial eSignAnyWhere Electronic Signature for Salesforce - User GuidePage 3
Application navigation and Home pageApplication Settings configurationUser Settings configurationEnvelope management (create/read/update/delete operations, documentmanagement, recipient management, actions on envelope)Data mapping and envelope template managementRecipient Sources managementTopics that are out of the scope of this guide are topics on initial installation andconfiguration of the application. Topics of downloading from AppExchange andinstalling eSignAnyWhere app, obtaining valid licenses and configuring permissionsets for Salesforce users are part of Installation guide.2. Application NavigationAfter installing eSignAnyWhere from AppExchange and assigning appropriatepermission sets to Salesforce users, the app becomes available in Salesforceorganization. eSignAnyWhere application is available by App Launcher.Figure 1 - App Launcher with eSignAnyWhere applicationApplication consists of several tabs and their final number depend on user’s permission set.Namirial User can see following tabs:Namirial eSignAnyWhere Electronic Signature for Salesforce - User GuidePage 4
Home: tab containing introductory and statistical information on application(“Home” section ofuser guide)Envelopes: object’s tab used for envelope management (sections: “ManagingEnvelope”, “Managing Recipients”, “Managing Documents”, “Actions on Envelope”)User Settings: tab used for registering Salesforce user and defining defaultvalues for envelopes(section “Configuring User Settings”)Envelope Templates: tab used for managing records of custom object Envelopetemplate (section“Managing Envelope Templates”)Salesforce user with permission set of Namirial Administrator can also access all ofthese tabs. Additionally, these users can access these tabs as well: Application Settings: tab used for registering Salesforce organization andvalidating license keys(section “Configuring Application Settings”)Recipient Settings: tab intended for management of recipient sources (section“Managing Recipient Sources”)Namirial eSignAnyWhere Electronic Signature for Salesforce - User GuidePage 5
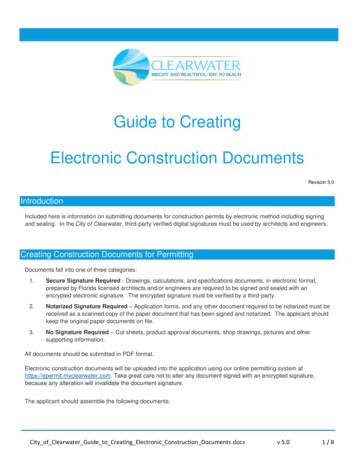
3. HomeFirst tab that is available in eSignAnyWhere application is Home tab. It is basically thelanding page of the application. It contains the following sections: AboutsectionGmbH and thecontaining basic information onNamiriallink to https://www.xyzmo.com/aboutus portalPie chart showing distribution of envelopes by their current status. It isautomatically generated based on corresponding reportThe list of envelopes sorted by their nameGraph showing the distribution of envelopes by the month in which they werecreated. The graph is automatically generated based on corresponding SalesforcereportFigure 2 - Home tabNamirial eSignAnyWhere Electronic Signature for Salesforce - User GuidePage 6
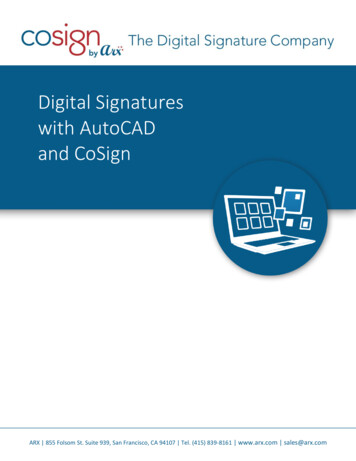
4. Configuring Application SettingsFirst prerequisite of using eSignAnyWhere application is to configure ApplicationSettings. The only users who are permitted to configure Application Settings are userswith Namirial Administrator permission set. Only these users can access ApplicationSettings tab.Clicking on “Application Settings” tab opens page with 3 fields:a. Organization Key –obtainedbyNamirial.Itcan befound onwebsite: https://www.significant.com/Organization/Edit, in field“Application Key”b. User Login Name – email address used to register onhttps://www.significant.com platform. It can be found on the same link, in field“Email”.c. License Key - obtained by CompuSight.Figure 3 - Page for configuring Application SettingsAfter filling these fields, click on Save button. If credentials are correct, theorganization will be registered to use eSignAnyWhere. Each application-relatedcallout will be accompanied with these credentials. Also, each additional click on“Save” button will update the credentials.These credentials are unique for whole organization, meaning that they are sharedamong all users. All users with the permission set of Namirial Administrator areseeing the same set of credentials.Together with registering to use eSignAnyWhere application, “Save” button triggersscheduled job in Salesforce organization that performs update action (more details under“Actions on Envelope” section of this guide) every hour on envelopes that are inNamirial eSignAnyWhere Electronic Signature for Salesforce - User GuidePage 7
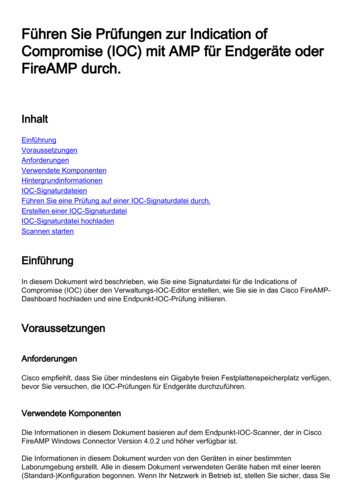
progress status. Further on, it adds three default Recipient Sources: Leads, Contactsand Users, unless they are manually added before (more details under “ManagingRecipient Sources”).5. Configuring User SettingsNext step before starting to use the application is to configure User Settings. Everyuser with the permission set of Namirial Administrator or Namirial User can accesspage for configuring User Settings by clicking on tab “User Settings”. This wouldopen the page with 4 fields:a. User Login Name – unique identifier of the user for specificorganization. It should be in form of e-mail address and will beused to identify the sender.b. Default Envelope Name – value entered in this field will be used asprefilled value of fielda. “Envelope Name” when creating new envelopec. Default Email Subject – value entered in this field will be used asprefilled value of field “Envelope Subject” when creating newenveloped. Default Email Body – value entered in this field will be used asprefilled value of field “Envelope Body” when creating newenvelopeFigure 4 - Page for configuring User SettingsNamirial eSignAnyWhere Electronic Signature for Salesforce - User GuidePage 8
After filling these fields, click on Save button. It would store new data or updateexisting. This set of data is specific for every user in the organization. User Settings can’tbe read or shared among the users.When the new user is entered here, he will receive the confirmation e-mail andtemporary password in it. User can use his/her e-mail address (User Login Name) andtemporary password to login to significant.com portal where he/she can makefurther changes to the account settings and manage all processes available inSalesforce directly on the portal. This will also reserve seat for this user, under currentlicense of the organization.6. Managing EnvelopeFirst step of using eSignAnyWhere is to click on tab envelope and then click button“New”Figure 5 - Button new on list of All EnvelopesIt would open a pop-up for creating envelope which appears as shown below:Namirial eSignAnyWhere Electronic Signature for Salesforce - User GuidePage 9
Figure 6 - Pop-up for creating new envelopeThe pop-up consists of the form containing following fields: Envelope Name: the value in this field will serve as internal uniqueidentifier of each envelope. It is prepopulated with the value from field“Default Envelope Name” on User Settings page which is specific for everyuser in Salesforce. Email Subject: the subject of the email that is sent to recipients of theenvelope. It is also prepopulated with the value from field “Default EmailSubject” on User Settings page which is specific for every user in Salesforce. Email Body: multiple-line field with the value that represents the bodyof the email that will be sent to recipients of the envelope. It is alsoNamirial eSignAnyWhere Electronic Signature for Salesforce - User GuidePage 10
prepopulated with the value from field “Default Email Body” on UserSettings page which is specific for every user in Salesforce. Reminder Enabled: checking this checkbox means that the recipientsof the envelope will receive emails as reminders to sign the envelope.If this checkbox is checked, three additional fields will appear, as shownbelow:Figure 7 - Additional fields if reminders are enabled Amount of Days Before First Reminder: this field defines the number of daysthat will need to pass before first reminder is sent to next recipient. This field willonly accept whole positive numbers and the amount of days needs to be smallerthan amount of days before expiration.Amount of Days Between Each Reminder: this field defines the number of daysbetween each reminder sent to next recipient. This field will only accept wholepositive numbers and the amount of days needs to be smaller than amount ofdays before expiration and smaller than 10 days.Amount of Days Before First Reminder: this field defines the number of daysbetween the last reminder sent to next recipient in row for signing and theexpiration of the envelope. This field will only accept whole positive numbers andthe amount of days needs to be smaller than amount of days before expiration.Days until expiration: the value in this field defines number of days in which theenvelope can be signed by all recipients. If all recipients do not sign the envelope inthis period, envelope’s status changes to “Expired” and the envelope cannot beNamirial eSignAnyWhere Electronic Signature for Salesforce - User GuidePage 11
signed anymore. The field only accepts positive whole number, where 2 is minimumand 28 is maximum value.Preview, position signatures and fields: If this checkbox is checked, designerwill be opened just before envelope is sent for signing (after click on button“Send). In designer, envelope sender can add/modify/reposition/remove formfields and signatures.Signature Type: As Significant platform allows different ways of signingdocuments, the envelope sender can determine the preferred method ofsignature. Possible values for this field are: “Type2Sign”, “Click2Sign”, “Draw2Sign”,“Remote Signature”, “Biometric Signature”, “Local Certificate Signature” and“Disposable Certificate”. Each of these methods is described on this er-guide/Namirial eSignAnyWhere Electronic Signature for Salesforce - User GuidePage 12
When you finish filling the fields, “Save” button should be clicked. If all required fields arefilled and no error occurs, you should be redirected to record page of newly createdenvelope. It should appear like this:1234Figure 8 - Envelope record pageRecord page consists of four main parts:1. Ribbon on the top containing envelope name on the left sideand all quick action buttons on the right side2. Left section containing details about envelope3. Right upper section containing the list of documents (Notes and Attachments)4. Right lower section containing the list of recipients related to this envelopeThis guide will explore envelope details (2) in this section and then address optionsand ways of usage of other three sections: managing recipients (4), managingdocuments (3) and finally actions on envelope (1).Envelope details contain all data entered on the previously seen popup. The onlyadditional field is Status field. Status field is one of the most important fields on theEnvelope, as it determines possible actions on the envelope. Users cannot change thestatus; the status is rather changed automatically by actions of the sender andrecipients of the envelope. Envelope can be in one of the following statuses: Not sent: this is the initial status of the envelope. Envelope in status “not sent” in theenvelope that is created and exists only in Salesforce – it is not sent to Significantplatform yet and consequentially, not sent to any of recipients. When theNamirial eSignAnyWhere Electronic Signature for Salesforce - User GuidePage 13
envelope is in this status, the user can change all envelope details, canadd/modify/remove recipients and add/modify/remove documents. Availableactions are “Send” and “Delete”. Draft: Under condition that checkbox “Preview, Position Signatures And Fields” ischecked, when the user clicks on “Send” action the designer opens. In the designer,user can make modifications on signatures, fields and envelope details and decidewhether to send envelope instantly or to do it sometimes later. If the user doesn’tsend the envelope through designer and closes it, envelope will change to “Draft”status. It means that it exists on Significant platform, but it still isn’t sent to recipients.Just as with “Not sent” status, the user can change all envelope details, canadd/modify/remove recipients and add/modify/remove documents when theenvelope is in “Draft” status. Available actions are “Send” and “Delete”. In progress: When the envelope is sent, whether directly from Salesforce (checkbox“Preview, Position Signatures And Fields” is unchecked and button “Send” clicked) orthrough designer, status of the envelope changes to “In progress”. This status meansthat the envelope is sent and waiting for recipients to sign it. It prevents users frommaking any additional change to the envelope: no recipients or documents canbe added or removed, nor the envelope details can be changed any more. Allenvelopes in this status are automatically updated every hour. Available actionsare “Update”, “Cancel”, “Send Reminder”, “Host” and “Delete”. Canceled: The envelope comes to this status when the sender of the envelopeclicks on the button “Cancel”. The next recipient in the row for signing receives thenotification that the envelope is canceled and cannot be signed. All changes toenvelope are again being prevented. The only available action is “Delete”. Rejected: The envelope gets to this status when the recipient who is the next inthe row for signing, rejects the envelope instead of signing it. The users cannotmake any further changes to the envelope. The only available action is “Delete”. Expired: Envelope gets expired when the number of days between date ofsending the envelope and the current date excides the value from field “Days UntilExpiration” and the envelope is not signed by all users. In this status, all changes toenvelope are still locked and two actions are available: “Restart” and “Delete”.When the “Restart” button is clicked, the enveloper returns to “In progress” status. Complete: This is the final and desired state of the envelope. It means that theenvelope is sent and all recipients signed it. All fields are locked in this state andthe only available action is “Delete” action.Namirial eSignAnyWhere Electronic Signature for Salesforce - User GuidePage 14
State diagram of the envelope would look like this:Figure 9 - State diagram for envelopesNamirial eSignAnyWhere Electronic Signature for Salesforce - User GuidePage 15
Besides “Status” field, some other fields can appear as well in Envelope detailssection of the record page.If the envelope is in statuses of “In progress”, “Canceled”, “Expired”, “Rejected” or“Complete”, following fields will appear: Date of Sending: the field keeps the date and time of sending the envelope. It isfilled when the envelope is sent.Date of Expiration: the field keeps the date and time of envelope expiration,calculated based onfield “Days Until Expiration”. It is filled when the envelope is sent.Date of Completion: the field keeps the date and time of completion of theenvelope. It is filled when the envelope is completed.All three fields are disabled for editing and are only used to display information to theuser. Besides these three fields, field “Envelope template” might also appear with the listof all existing envelope templates in Salesforce. More details about this can be found inthe “Data Mapping” section of the guide.With change made in any of the fields within Envelope Details section, ribbon in thelowest part of the record page will appear containing the button “Save” which saveschanges made to the envelope. Keep in mind when the user clicks on “Send” button, allunsaved changes will be automatically saved and the envelope will be sent with regardsto those changes.Figure 10 - Envelope record page with footer containing "Save" optionNamirial eSignAnyWhere Electronic Signature for Salesforce - User GuidePage 16
7. Managing RecipientsAfter creating envelope and defining its fundamental details, next step would be toadd recipients. In the lower right frame on the envelope’s record page, there is the list ofcurrently added recipients. If you have created the envelope from the tab, the list shouldbe empty. If created from certain record page, by clicking on “Send for signature”and if the recipient source is created for the respective object, one recipient shouldbe added automatically. Recipients added to the envelope are shown in table, whereeach recipient is shown in one row. The table contains following columns: Order column: column containing buttons for moving recipient up and down inthe row of signing. Buttons will be visible only if there are more than one recipientsand if the envelope is in “Not sent” or “Draft” status.Last Name: last name of the recipientFirst Name: first name of the recipientEmail: e-mail address of the recipient. Value entered in this field needs to followvalid format of e-mail address. Envelope will be sent to this e-mail address.Recipient Type: this field determines whether the recipient will be added assigner or he/she will receive the envelope as a carbon copy.Signing Date: date and time when the recipient signed the envelope. It willappear automatically with update of the envelope, under condition that recipientsigned the envelope.Action column: column containing down arrow icon (if recipient actions areavailable for the envelope). Click on the icon will open the menu with twopossible actions on the recipient: Edit and Delete.There are two buttons which can be used to add recipients. First one is “Add Existing”and second one is “Add New”. “Add Existing” button will open dialog for addingrecipients based on existing Salesforce records such as leads or contacts. On the otherside, “Add New” button will open dialog for creating new recipient from the scratch – byentering his/her name and e-mail address. Important notice is that these buttons areonly visible if the envelope is not sent or if it is in “draft” status. Otherwise, if the envelopeis already sent, new recipients can’t be added.Figure 11 - Part of envelope record page containing the list of recipientsNamirial eSignAnyWhere Electronic Signature for Salesforce - User GuidePage 17
8. Adding recipients based on Salesforce recordsLet’s first explore “Add Existing” option. Clicking on button “Add Existing” opensdialog for selecting recipients.Figure 12 - Dialog for adding recipients based on existing Salesforce recordsRecipients can only be selected from the list of configured recipient sources, which isdone under tab “Recipient Settings”. Recipient sources are Salesforce built-in orcustom objects whose records can be converted to recipients using this dialog.Configuration of a recipient source means choosing Salesforce object anddetermining which fields of that object will serve as first name, last name and e-mailaddress of the recipients. By default, three recipient sources are configured: Lead,Contact and User. This means that, without any additional configuration, recipientscan be selected from contacts, leads or users existing in Salesforce organization. Toenable using other objects such as accounts or some custom object as recipientsources, additional configuration is required. This is explained in further details undersection “Managing Recipient Sources”. Additional restrictions on selection of records ofrecipient sources which are to be added as recipients are: Record of recipient source needs to have value in e-mail address fieldValue in e-mail address field needs to correspond to format of e-mail addressRestrictions are enforced whether as hiding records whose addition would violaterestrictions or with error message if attempt to do so is made.The list of potential recipients could be additionally filtered by keyword entered in“Search” field. If the keyword is entered, records of recipient sources will be visible ifthe entered keyword is contained in the first name, last name or e-mail address ofthe record.Namirial eSignAnyWhere Electronic Signature for Salesforce - User GuidePage 18
Figure 13 - Selecting Salesforce records for creating new recipientsFor each potential recipient, first name, last name and e-mail address are shown aslocked fields which can’t be changed. There are also two additional fields for each of them:Recipient Type and Signature Field Name. Recipient Type determines whether therecipient will be added as signer or he/she will receive the envelope as carbon copy.Also, recipient should have unique signature field on document and “Signature FieldName” is used to enter the name of that signature field. It should correspond to thename of signature field existing on added documents to the parent envelope. Thisoption is used to associate signature fields with recipients before sending theenvelope.A recipient is selected by clicking on checkbox at the beginning of its row (column“Select”). In one iteration, multiple recipients can be added by selecting all desiredrecipients and clicking on “Save” button. Otherwise, to cancel all changes, click onbutton “Cancel”. Both buttons will close dialog and if changes are made, newly addedrecipients will be visible on the list on main record page of the envelope.Namirial eSignAnyWhere Electronic Signature for Salesforce - User GuidePage 19
9. Adding recipient from scratchAnother approach to adding recipient is to create it from scratch, without referencingexisting Salesforce records. Click on button “Add New” will open dialog for filling dataabout recipient. This option supports only adding one by one recipient. Dialog willappears as shown on picture and will contain following fields: Last Name: last name of the recipientFirst Name: first name of the recipientEmail: e-mail address of the recipient. Value entered in this field needs to followvalid format of e-mail address. Envelope will be sent to this e-mail address.Recipient Type: this field determines whether the recipient will be added assigner or he/she will receive the envelope as a carbon copy.Signature Field Name: value in this field should correspond to the name ofsignature field existing on added documents to the parent envelope. This option isused to associate signature fields with recipients before sending the envelope.Allow Delegation: checkbox which determines whether recipient will be allowedto delegate signing to another person. If this option is checked, recipient will haveability to forward envelope to person with another e-mail address. New recipientwill be able to sign the envelope instead of this specific recipient.Disable Email: checkbox that determines if the recipient will receive e-mail withthe link to signing interface (interface using which he/she can preview documents,fill form fields and sign the documents). If this checkbox is checked, the recipientwill not receive the e-mail. In this case, the only way to sign the document is byhost signing (more details under section “Actions on Envelope”, subsection“Host”).Require Authentication: this option determines whether the specific recipientwill be required to authenticate before previewing and signing the document. Ifthis option is checked, additional fields will appear:o Authentication Method: dropdown with two options: SMS and PIN. If PINoption is selected, new field will appear with label PIN Code. This optionwill require recipient to enter PIN code before previewing documents andentered PIN code needs to correspond to one specified in “PIN Code” field.Transmission of PIN Code from envelope sender to the recipient is not partof the application – it assumes that the sender and recipient are bothfamiliar with PIN Code. Another option is SMS and if selected, it will sendapplication- generated PIN Code to the recipient via SMS when specificrecipient becomes next in the signing row. If this option is selected, thenfield with label Mobile Phone Number will appear and phone number ofrecipient is expected. SMS will be sent to that specified phone number.Namirial eSignAnyWhere Electronic Signature for Salesforce - User GuidePage 20
Expected format of Mobile Phone Number is: Country Code PhoneNumber .Language Code: dropdown that determines the language of the signinginterface for this specific recipient. When the recipient receives the e-mail, he/sheopens the link with the signing interface using which they can preview document,fill down form fields and finally sign it. Signing interface will be previewed torecipient in language selected in this dropdown. Default language is English.Important thing to keep in mind is that, even though the list contains all availablelanguages, the only selectable are those that are manually added atsignificant.com platform. They can be added on Localization x. If the language of the reci
Salesforce produces powerful tool for accelerating sales processes. In this guide, all functionalities of Namirial eSignAnyWhere – Electronic Signature for Salesforce (e- Signature), or just referred as eSignAnyWhere app, are covered with detailed explanations, u