Transcription
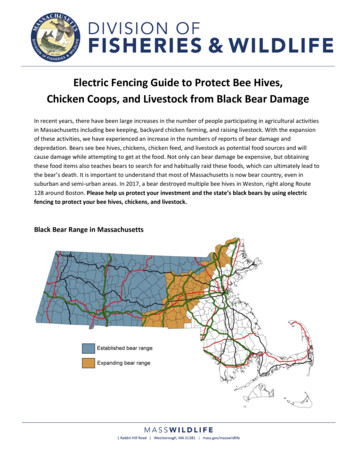
Electric Fencing Guide to Protect Bee Hives,Chicken Coops, and Livestock from Black Bear DamageIn recent years, there have been large increases in the number of people participating in agricultural activitiesin Massachusetts including bee keeping, backyard chicken farming, and raising livestock. With the expansionof these activities, we have experienced an increase in the numbers of reports of bear damage anddepredation. Bears see bee hives, chickens, chicken feed, and livestock as potential food sources and willcause damage while attempting to get at the food. Not only can bear damage be expensive, but obtainingthese food items also teaches bears to search for and habitually raid these foods, which can ultimately lead tothe bear’s death. It is important to understand that most of Massachusetts is now bear country, even insuburban and semi-urban areas. In 2017, a bear destroyed multiple bee hives in Weston, right along Route128 around Boston. Please help us protect your investment and the state’s black bears by using electricfencing to protect your bee hives, chickens, and livestock.Black Bear Range in Massachusetts
Electric fencing is an essential and effective tool to protect bee hives, chickens, and other livestock fromdamage or depredation by black bears. When using electric fencing, it is important to design and maintain afence that is capable of keeping bears out. This guide provides information and recommendations of how toinstall and maintain an electric fence that will be an effective deterrent to black bears. We provide instructionsfor the commonly used design, which uses single strands of electrified wire, as well as a design usingelectrified panels of fencing, which is even more effective. Electric fencing does require an initial investmenton your part, however even a single bear damage incident can greatly exceed these upfront costs.SafetyPeople often have concerns about the safety of using electric fencing around children and pets, as well as forwildlife. While electric fencing does provide a painful shock, it does not cause injury or permanent damageand is safe for use around people, pets, and wildlife.Electric FencingElectric fencing is not complicated. There are 4 major components of an electric fence; 1) the charger orenergizer and a power source, 2) fence posts and insulators, 3) wires or wire fence panels, and 4) a groundingrod.Basic single wire electric fencing design.
Materials ListThe materials below are everything you need to build the electric fence shown above. A/C (household electricity) or solar powered fence charger or energizer. Minimum of 0.7-1 joule and 5,0006,000 volt output with a pulse rate of 45-60 pulses per minute. Larger fencing projects will require chargerswith a higher joule output. Power source - A/C power or a 12 volt deep cycle or marine battery and solar panel. Posts - Pressure treated 4x4’s or 5 ft metal T-posts. One for each corner and 1 for every 8 ft of fence.Fiberglas or plastic posts can be used as well, but are not as sturdy or durable and not recommended forpermanent locations. Post insulators - One for every post multiplied by the number of strands. Example - 10 posts and 5 strands,50 insulators. 12 gauge steel wire or 14 gauge aluminum wire. Use high tensile wire if possible. Enough wire for at least 5strands. For total length, multiply the perimeter of your fence by 5. Insulated gate handle - One for every strand. Insulated 12-gauge wire - Approximately 10 feet depending on your set up. 3/4” galvanized steel grounding rod, 6.5’ in length or longer. Grounding rod clamp. Voltage meter. Warning signs. Aluminum foil and bait.Installation Instructions Locate your fence in an appropriate location. An open space away from trees, shrubs, and other vegetationthat provide cover for bears is ideal. Drive or bury your fence posts a minimum of 1 foot in the ground. You should have a post on each cornerand one for every 8 feet of fencing. Your fence should be large enough to keep 4 feet of spacing between the wires and what you are trying toprotect. Mow or remove grass and other vegetation in an 18” strip centered below where the wires will bepositioned. Install weed matt if desired. Attach plastic insulators to the outside face of the fence posts. The bottom insulator should be 6” abovethe ground surface and then spaced every 8” above that. Insulators are needed for all wood or metal posts.
Wires should be connected to the insulators and not the posts themselves. Wires that touch the posts willcreate a short circuit and reduce the effectiveness of the fence. Begin attaching wire to the bottom insulator beginning at one of the posts where the gate will be located.Leave a loop of wire attached to that insulator on the inside of the gate opening, this is the loop the gatehandles will connect to. Connect the wire successively to each bottom insulator around the fence. Keep thewire as tight as possible as you go. Stretch the wire around to the loop at the first insulator and cut thewire. Connect the end of the wire to the loop on the insulated gate handle, so that the hook of the handlecan reach the wire loop you created at the first post. Connect each successive wire in the same way. Use a piece of the insulated wire to connect each wire to the wires above and below it. Locate where INSIDE your fence you want to place your fence charger and solar panel. Placing them insidethe fence prevents a curious bear from damaging or disconnecting them. Connect the bottom wire to the positive terminal of the fence charger using a piece of insulated wire. Nowall the wires are connected together and to the charger. Drive the grounding rod a minimum of 6 feet in the ground. It should be positioned close to the charger. Connect the clamp to the end of the grounding rod and connect the grounding rod to the negative terminalof the charger using a piece of insulated wire. Hang electric fence warning signs on each side of the fence. Place your baited aluminum foil on the hot wires, at least one on each side of the fence. Connect the charger to either the A/C power source or to the battery and solar panel. Test each wire of the fence to make sure it is hot and carrying a 5,000-6,000 volt charge.Improved design using woven wire hog panels instead of single wires.Using woven wire hog panels or livestock fencing can improve the effectiveness of electric fencing as itprovides both a physical and electrical barrier. Wherever possible this is the recommended design to use.Installation of this design is the same as for the single wire design; except that you connect the fence panelsrather than single strands of wire to the post insulators and then connect the panels to each other and to thepositive terminal of the charger using pieces of insulated wire. The fence panels should not be directlytouching the fence posts.
Temporary FencingFor bee keepers deploying hives at remote locations, for example at farm fields or orchards, temporary netfencing can be used. These fences use fiberglass posts and are not as sturdy or durable as fence designs usingmetal or wood posts and metal wire. Special care should be used to carefully install these fences, use extrafence posts and attempt to have the wires/net as tight as possible. If you bring your hives to the samelocation each year, consider building a fence with metal T-posts and wires that can be reconnected to acharger and power source each year, rather than using net fencing.Important tips to make your electric fence as effective as possible One of the most important things is to bait the wires of your fence to draw the bear’s nose directly to theelectrified wires. Thick fur can prevent a bear from being shocked if other parts of its body contact thewires. Bait the wires with aluminum foil covered in bacon grease or peanut butter. Attaching tuna fish cansto the wires will also work. It is important to refresh the bait regularly. Bait each section of fencing. A/C power sources are recommended where available. They are cheaper, require less maintenance, andprovide a more consistent and reliable source of power. Check the output of your fence with a voltage meter regularly, it should read 5,000-6,000 volts. Check eachwire. Check each time you visit your hives, chickens, or livestock. If it doesn’t read the appropriate voltageyou probably have a short.
Build a large enough fence to keep 4 feet between the electrified wires and whatever you are protecting.This is to prevent bears reaching what you are protecting from outside the fence. Lay chicken wire or hog wire panels on the ground around your fence and connect them to the groundingrod and charger. A bear standing on the panels on the ground will immediately be grounded, complete thecircuit, and get a shock, when it touches the hot wire. It is important to get a solar panel suitable for weather in the northeast, to insure it provides enoughenergy to keep the battery charged. Maintain grass and other vegetation under the bottom wire to prevent electrical shorts. Keep a stripcleared 18” wide centered under the wires. Mowing, herbicide, or weed mat can be used to achieve this.Also keep shrubs and vegetation adjacent to the fence away from the wires. In dry or sandy soils, install more than one grounding rod. Conductivity improves with damp soils. During dry periods keep the ground around the grounding rodmoist. A 5-gallon bucket with a small hole in it can be used for this. Large fences surrounding extensive areas will require more powerful chargers and additional groundingrods, 1 grounding rod per joule of charger output. Using high tensile wire and adding tensioning springs will increase the durability of your fence, especiallyfor long term permanent fences.AssistanceFor assistance contact the wildlife biologist in your region or call MassWildlife field headquarters. Field Headquarters, Westborough 508-389-6359 Western District, Dalton 413-684-1646 Connecticut River Valley District, Belchertown 413-323-7632 Central District, West Boylston 508-835-3607 Northeast District, Ayer 978-772-2145 Southeast District, Bourne 508-759-3406Resources from the Montana Fish Wildlife & Parks, Virginia Department of Game & Inland Fisheries, andFlorida Fish and Wildlife Conservation Commission were used to create this guide.
10.05.2018 · Materials List The materials below are everything you need to build the electric fence shown above. A/C (household electricity) or solar powered fence charger or energizer. Minimum of 0.7-1 joule and 5,000-6,000 volt output with a pulse rate of 45-60 pulses per minute. Larger fencing projects will require chargers with a higher joule output.