Transcription
Adafruit Motor Shield V2Created by lady adaLast updated on 2020-01-20 05:44:57 PM UTC
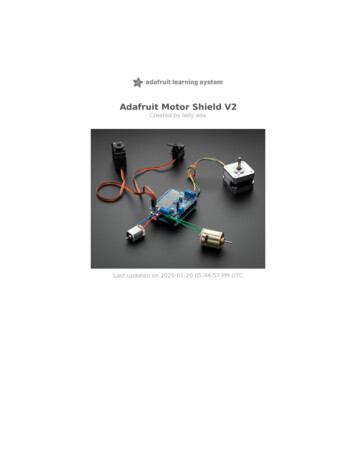
OverviewThe original Adafruit Motorshield kit is one of our most beloved kits, which is why we decided to make something evenbetter. We have upgraded the shield kit to make the bestest, easiest way to drive DC and Stepper motors. This shieldwill make quick work of your next robotics project! We kept the ability to drive up to 4 DC motors or 2 stepper motors,but added many improvements:Instead of a L293D darlington driver, we now have the TB6612 MOSFET drivers with 1.2A per channel currentcapability (you can draw up to 3A peak for approx 20ms at a time). It also has much lower voltage drops across themotor so you get more torque out of your batteries, and there are built-in flyback diodes as well.Instead of using a latch and the Arduino's PWM pins, we have a fully-dedicated PWM driver chip onboard. This chiphandles all the motor and speed controls over I2C. Only two GPIO pins (SDA & SCL) plus 5v and GND. are required todrive the multiple motors, and since it's I2C you can also connect any other I2C devices or shields to the same pins.This also makes it drop-in compatible with any Arduino, such as the Uno, Leonardo, Due and Mega R3.Completely stackable design: 5 address-select pins means up to 32 stackable shields: that's 64 steppers or 128 DCmotors! What on earth could you do with that many steppers? I have no idea but if you come up with something sendus a photo because that would be a pretty glorious project.Lots of other little improvements such as a polarity protection FET on the power pins and a big prototyping area. Andthe shield is assembled and tested here at Adafruit so all you have to do is solder on straight or stacking headers andthe terminal blocks.Lets check out these specs again:2 connections for 5V 'hobby' servos connected to the Arduino's high-resolution dedicated timer - no jitter!4 H-Bridges: TB6612 chipset provides 1.2A per bridge (3A for brief 20ms peaks) with thermal shutdown Adafruit r-shield-v2-for-arduinoPage 4 of 67
protection, internal kickback protection diodes. Can run motors on 4.5VDC to 13.5VDC.Up to 4 bi-directional DC motors with individual 8-bit speed selection (so, about 0.5% resolution)Up to 2 stepper motors (unipolar or bipolar) with single coil, double coil, interleaved or micro-stepping.Motors automatically disabled on power-upBig terminal block connectors to easily hook up wires (18-26AWG) and powerArduino reset button brought up topPolarity protected 2-pin terminal block and jumper to connect external power, for separate logic/motor suppliesTested compatible with Arduino UNO, Leonardo, ADK/Mega R3, Diecimila & Duemilanove. Works with Due with3.3v logic jumper. Works with Mega/ADK R2 and earlier with 2 wire jumpers.Download the easy-to-use Arduino software library, check out the examples and you're ready to go!5v or 3.3v compatible logic levels - jumper configurable.As of Arduino 1.5.6-r2 BETA, there is a bug in the Due Wire library that prevents multiple Motor Shields fromworking properly with the Due! Adafruit r-shield-v2-for-arduinoPage 5 of 67
FAQHow many motors can I use with this shield?You can use 2 DC hobby servos that run on 5V and up to 4 DC motors or 2 stepper motors (or 1 stepper and up to 2DC motors) that run on 5-12VDC Adafruit r-shield-v2-for-arduinoPage 6 of 67
Can I connect more motors?Yes, by stacking shields! Every shield you stack on will add 4 DC motors or 2 stepper motors (or 1 more stepper and2 more DC motors).You will not gain more servo connections as the servo contacts go to pin #9 and #10 on the Arduino. Adafruit r-shield-v2-for-arduinoPage 7 of 67
What if I also need some more servos?Check out our lovely servo shield, also stackable with this motor shield and adds 16 free-running servos per l-pwm-slash-servo-shield Adafruit r-shield-v2-for-arduinoPage 8 of 67
What Arduinos is this shield compatible with?It is tested to work with Duemilanove, Diecimila, Uno (all revisions), Leonardo and Mega/ADK R3 and higher.It can work with Mega R2 and lower if you solder a jumper wire from the shield's SDA pin to Digital 20 and the SCLpin to Digital 21For use with the Due or other 3.3v processors, you must configure the board for 3.3v logic levels. Find the set of 3pads labeled "Logic". Cut the small trace between the center pad and 5v and add a jumper from 3.3v to the center. Adafruit r-shield-v2-for-arduinoPage 9 of 67
As of Arduino 1.5.6-r2 BETA, there is a bug in the Due Wire library that prevents multiple Motor Shields fromworking properly!I get the following error trying to run the example code: "error: Adafruit MotorShield.h: No such file ordirectory."Make sure you have installed the Adafruit MotorShield library Adafruit r-shield-v2-for-arduinoPage 10 of 67
How do I install the library?Check the tutorial page on the subject here -for-arduino/installsoftware Adafruit r-shield-v2-for-arduinoPage 11 of 67
HELP! My motor doesnt work! - HELP! My motor doesnt work!.But the servos work FINE!Is the power LED lit? The Stepper and DC motor connections will not work if the onboard green Power LED is not litbrightly!You must connect 5-12VDC power to the shield through the POWER terminal blocks or through the DC barrel jackon the Arduino and VIN jumper. Adafruit r-shield-v2-for-arduinoPage 12 of 67
What is the green Power LED for?The LED indicates the DC/Stepper motor power supply is working. If it is not lit brightly, then the DC/Stepper motorswill not run. The servo ports are 5V powered and does not use the DC motor supply Adafruit r-shield-v2-for-arduinoPage 13 of 67
What pins are/are not used on the motor shield?GND and either 5v (default) or 3.3v are required to power the logic on-board. (5v or 3v operation is selectable viajumper)The shield uses the SDA and SCL i2c pins to control DC and stepper motors. On the Arduino UNO these are alsoknown as A4 and A5. On the Mega these are also known as Digital 20 and 21. On the Leonardo these are alsoknown as digital 2 and 3. Do not use those pins on those Arduinos with this shield with anything other than an i2csensor/driver.Since the shield uses I2C to communicate, you can connect any other i2c sensor or driver to the SDA/SCL pins aslong as they do not use address 0x60 (the default address of the shield) or 0x70 (the 'all call' address that this chipuses for group-control)If you want to use the servo connections, they are on pins #9 and #10. If you do not use the connector then thosepins are simply not used.You can use any other pins for any other use Adafruit r-shield-v2-for-arduinoPage 14 of 67
Note that pins A4 and A5 are connected to SDA and SCL for compatibility with classic Arduinos. These pinsare not available for use on other processors.How can I connect to the unused pins?All pins are broken out into 0.1" spaced header along the edges of the shield Adafruit r-shield-v2-for-arduinoPage 15 of 67
My Arduino freaks out when the motors are running! Is the shield broken?Motors take a lot of power, and can cause 'brownouts' that reset the Arduino. For that reason the shield is designedfor seperate (split) supplies - one for the electronics and one for the motor. Doing this will prevent brownouts. Pleaseread the user manual for information about appropriate power supplies. Adafruit r-shield-v2-for-arduinoPage 16 of 67
I'm trying to build this robot and it doesn't seem to run on a 9V battery.You cannot power motors from a 9V battery. You must use AA batteries or a lead acid battery for motors. Adafruit r-shield-v2-for-arduinoPage 17 of 67
Can this shield control small 3V motors?Not really, its meant for larger, 5V motors. It does not work for 3V motors unless you overdrive them at 5V and thenthey will burn out faster Adafruit r-shield-v2-for-arduinoPage 18 of 67
I have good solid power supplies, but the DC motors seem to 'cut out' or 'skip'.Try soldering a ceramic or disc 0.1uF capacitor between the motor tabs (on the motor itself!) this will reduce noisethat could be feeding back into the circuit (thanks macegr!) Adafruit r-shield-v2-for-arduinoPage 19 of 67
When the motors start running nothing else works.Many small DC motor have a lot of "brush noise". This feeds back into the Arduino circuitry and causes unstableoperation. This problem can be solved by soldering some 0.1uF ceramic noise suppression capacitors to the motor.You will need 3 total. 1 between the motor terminals, and one from each terminal to the motor casing. Adafruit r-shield-v2-for-arduinoPage 20 of 67
Adafruit r-shield-v2-for-arduinoPage 21 of 67
But my motor already has a capacitor on it and it still doesn't work.These motors generate a lot of brush noise and usually need the full 3-capacitor treatment for adequatesuppression. Adafruit r-shield-v2-for-arduinoPage 22 of 67
Why don't you just design capacitors into the shield?They would not be effective there. The noise must be suppressed at the source or the motor leads will act likeantennae and broadcast it to the rest of the system! Adafruit r-shield-v2-for-arduinoPage 23 of 67
Why won't my stepper motor go any faster?Since the shield is controlled by i2c, the maximum step rate is limited by the i2c bus speed. The default bus speed is100KHz and can be increased to 400KHz by editing the library file in your Arduino installation folder. The file can befound in hardware/libraries/wire/utility/twi.h.Find the line with: "#define TWI FREQ 100000L"and change it to "#define TWI FREQ 400000L"Or, you can add the following code to your setup() function: (Note: this line must be inserted after the call to begin())TWBR ((F CPU /400000l) - 16) / 2; // Change the i2c clock to 400KHz Adafruit r-shield-v2-for-arduinoPage 24 of 67
What I2C addresses are used by this shield?The shield is addressable from 0x60-0x7F. 0x70 is an "all call" address that all boards will answer to. Adafruit r-shield-v2-for-arduinoPage 25 of 67
My shield doesn't work with my LED backpack.Some backpacks have a default address of 0x70. This is the "all call" address of the controller chip on the motorshield. If you re-address your backpack, it will work with the shield. Adafruit r-shield-v2-for-arduinoPage 26 of 67
Adafruit r-shield-v2-for-arduinoPage 27 of 67
Install Headers &TerminalsInstalling Standard HeadersThe shield comes with 0.1" standard header. Standard header does not permit stacking but it is mechanically strongerand they're much less expensive too! If you want to stack a shield on top, do not perform this step as it is not possibleto uninstall the headers once soldered in! Skip down to the bottom for the stacking tutorialBreak apart the 0.1" header into 6, 8 and/or 10-pin longpieces and slip the long ends into the headers of yourArduino Adafruit r-shield-v2-for-arduinoPage 28 of 67
Place the assembled shield on top of the header-edArduino so that all of the short parts of the header aresticking through the outer set of padsSolder each one of the pins into the shield to make asecure connectionNext, you will attach the terminal blocks, power jumperand servo connections Adafruit r-shield-v2-for-arduinoPage 29 of 67
Adafruit r-shield-v2-for-arduinoPage 30 of 67
That's it! Now you can install the terminal blocks andjumper.Installing Terminal Blocks and moreAfter you have installed either normal or stacking headers, you must install the terminal blocks.Next we will install the terminal blocks. These are howwe will connect power and motors to the shield. They'remuch easier to use than soldering direct, just use a smallscrewdriver to release/attach wires!First, though, we must solder them in.Slide the 3-pin terminal blocks into 2-pin terminal blocksso that you have 2 x 5-pin and 1 x 2-pin blocks. The two5-pin sets go on either side. The 2-pin piece goes nearthe bottom of the shield. Make sure that the open holesof the terminal blocks face out!Flip the board over so that you can see & solder the pinsof the terminal blocks Adafruit r-shield-v2-for-arduinoPage 31 of 67
Solder in the two pins of the external power terminalblock Adafruit r-shield-v2-for-arduinoPage 32 of 67
Solder in both motor blocks, 5 pads each Adafruit r-shield-v2-for-arduinoPage 33 of 67
That's it for the terminal blocks. Next up, servocon
20.01.2020 · Arduino reset button brought up top Polarity protected 2-pin terminal block and jumper to connect external power, for separate logic/motor supplies Tested compatible with Arduino UNO, Leonardo, ADK/Mega R3, Diecimila & Duemilanove. Works with Due with 3.3v logic jumper. Works with Mega/ADK R2 and earlier with 2 wire jumpers.
