Transcription
CertainTeed Low-Slope Roof SystemsFLINTLASTIC SASelf-Adhered SBS-Modified Bitumen Roof SystemsIncludes Application Instructions for Ambient Temperatures, 20 F – 49 FFastenersISO ColdFlintEDGE For more information on CertainTeed Commercial Roofing Products, go to www.certainteed.com.CertainTeed Flintlastic roofing products are intended for use by professional roofing contractors only. It is the responsibility of the installer tofollow all appropriate and required safety precautions in conjunction with the installation of any CertainTeed roofing product.Meets or exceeds ASTM D6164 (SA Mid Ply and SA Cap), ASTM D6163 (SA Cap FR) and ASTM D4601 (SA NailBase and PlyBase).UL 2218 Class 4 Impact Resistance – Certain systems areUL classified as to impact resistance as described in theUL Roofing Materials and Systems Directory.ICC-ES ESR-1388CertainTeed CorporationROOFING SIDING TRIM DECKING RAILING FENCE GYPSUM CEILINGS INSULATION20 Moores Road Malvern, PA 19355Professional: 800-233-8990Consumer: 800-782-8777certainteed.com 06/19 CertainTeed Corporation, Printed in the USA, Code No. COMM-123
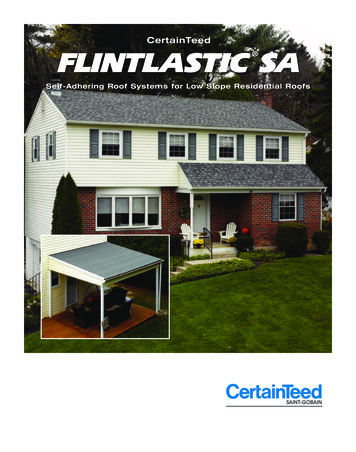
Self Adhered SBS-Modified BitumenRoofing System For Low Slope RoofsConsiderations for Intended UseIf multiple SA products are listed, products arelisted in order of warranty duration from shortestto longest, with the exception of SA Cap and SACap-FR; SA Cap FR is intended for use where ClassA fire rating is required (see iq.ulprospector.com forClass A system specification). NOTE: Removal of theroof system (at end of life) may be difficult whenadhering PlyBase or MidPly direct to a roof deck(i.e. wood, concrete).CertainTeed Flintlastic SA is a premium,self-adhered SBS-modified bitumen roofingsystem. With high quality materials bottom to top,components of the Flintlastic SA system include:Flintlastic SA NailBase(base/anchor–mechanically attached)Flintlastic SA PlyBase(base or interply, self-adhered)Flintlastic SA MidPly(premium base or interply, self-adhered)Flintlastic SA Cap (self-adhered)Flintlastic SA Cap FR (fire-rated, self-adhered)Flintlastic SA Cap CoolStar(highly reflective, self-adhered)Flintlastic SA Cap FR CoolStar(fire-rated, highly reflective, self-adhered)FlintPrime AerosolFlintPrime SA(quick-dry water-based primer as needed)FlintBond SBS-Modified Adhesive, Caulk orTrowel Grade (only, for construction details)Energy SavingsFlintlastic SA Cap and SA Cap FR are availablewith CoolStar highly reflective granules, and canbe used to comply with the 2016 California Title 24Part 6 Cool Roof Requirements, CRRC productID 0668-0146. Specific product details can be foundon product technical data sheets or by viewingwww.coolroofs.org.The Flintlastic SA Family Of ProductsCertainTeed offers two types of primers for use withFlintlastic SA systems. FlintPrime asphalt primer andFlintPrime SA quick-dry, water-based primer aredesigned to enhance the adhesion of self-adheredroofing membranes. Available in 14 oz spray cans,1-gallon cans, 3.5-gallon buckets, and 5-gallon pails.What Are The Advantages?After more than a century of making reliable, durable roofingmaterials, CertainTeed remains a leading trusted brand forroofing distributors and contractors. We’re rated #1 withAmerica’s building and remodeling professionals.So whether you have a residential or commercial project, youcan turn to CertainTeed with confidence. We’ve been arounda long time, and our expertise goes into giving you betterproducts.We manufacture complete systems and protectyou with strong warranties. We use the highest qualitymaterials, and that makes for better roofs — not to mentionlower life-cycle costs.It’s all a part of our promise to you.Quality made certain. Satisfaction guaranteed. Self-adhered roofing offers the time-testedprotection of modified bitumen roof systems fora fraction of the labor with no fumes, flame, asphaltkettle or occupant disturbance. The application ofself-adhered low-slope roof systems is also easierto master than traditional bituminous applicationmethods.Flintlastic SA systems are valued for: Superior initial and long-term bonds; E xcellent applicator handleability in hot or coldtemperatures; A llowed application temperatures as low as20 F (cold weather application instructions mustbe followed when ambient temperatures arebetween 20 F - 49 F);FlintBond SBS-Modified Bitumen Adhesive is apremium grade adhesive. With Flintlastic SAmembranes, the Trowel and Caulk grade may beused for endlap, sidelap bead and vertical flashingdetails. Available in 10.3 oz caulk tube, 3 gallon, and5 gallon drums. A hot air welder, in combinationwith a hand-held silicone roller, may also be used forthese details in lieu of FlintBond and is required forcold weather application. W ide array of cap sheet colors true-blended tocomplement popular CertainTeed shingles N ational stocking at all CertainTeed facilitieswith mix-truck allowance (shingles/FlintlasticSA); Excellent sales and applicator support.Where can I use it?The value associated with labor savings and safetycan be applied to any roof project. In addition,Flintlastic SA roof systems are ideal when access tothe roof is limited, such as high-rise buildings. Andno asphalt kettle means no odor, which makes SAsystems an ideal solution on healthcare, education,hospitality and residences/condos where occupantcomfort is tremendously desirable.1
S ubstrates must be free of dust, dirt, oil, debrisand moisture.SA SYSTEMS BY DECK TYPEDeckInsulation/Coverboard*SA Anchor/BaseSA InterplySA CapSteelRequiredNailBase (MF)PlyBase, MidPly (SA)OptionalPlyBase,MidPly (SA)SA Cap,SA Cap FR(SA)OptionalRequired if base isself-adheredNailBase (MF)PlyBase, MidPly (SA)OptionalOptional, if "no", self-adheredbase requires FlintPrime SANailBase (MF)PlyBase, MidPly (SA)Wood/LWIC Other, i.e.Gypsum, CementitiousWood Fiber, Wood PlanksStructural Wood Fiber, etcConcrete S tore Flintlastic SA rolls indoors on uprightpallets, protected from the elements. Rolls thatare improperly stored or have been warehousedfor prolonged periods of time may lose theirtack and should not be used. In cold weatherrolls MUST be stored indoors, minimum 60 F,or in warming huts prior to application;DO NOT INSTALL COLD ROLLS. A hot air welder, in combination with ahand-held silicone roller, should be utilized toheat and seal sidelaps, endlaps and details.Specific “heat and roll” instructions are includedwithin subsections of this Chapter. DO NOToverheat or attempt to weld laps with a torch. I f the material isn’t bonding, STOP theapplication! A lways remember to put safety first and followall OSHA safety guidelines with any roofinginstallation.*FlintPrime or FlintPrime SA may be recommended, contact CertainTeed Technical Services for more information.Application Of Base SheetFlintlastic SA NailBase may be used as an anchorsheet (mechanically fastened); PlyBase or MidPlymay be used as a base ply (fully adhered, watertight). NOTE: PlyBase or MidPly may also be used asinterply layers in three-ply systems, see Applicationof Interply (Optional). P rimer, if used, must be applied at the specifiedrate and must be allowed to cure as specified.System Warranties At A GlanceSA SYSTEM WITH ADHERED BASE PLYWarrantyDurationWarranty Fee(100 SQ Min.)Insulation/CoverboardBase15 years20 years25 years 7.50/SQ 12.50/SQ 12.50/SQSA PlyBaseSA MidPlySA PlyBase25 years 15.00/SQOptionalOptionalDouble layer,2nd layer adheredDouble layer,2nd layer adheredInterplyCapRe-CoverSpec*SA CapSA Cap FRPriorapprovalrequired �SSA–I–3–SCapRe-CoverSpec*SA CapSA Cap �IN–3–SSA PlyBaseSA MidPlySA SYSTEM WITH MECHANICALLY ATTACHED ANCHOR SHEETWarranty Fee(100 SQ Min.)Insulation/CoverboardBase12 years 4.00/SQOptionalSA NailBase15 years20 years 7.50/SQ 12.50/SQOptionalOptionalSA NailBaseSA NailBaseSA PlyBaseSA PlyBase25 years 15.00/SQSingle layer,minimum 1.5"SA NailBaseSA MidPlyWarrantyDurationCOLD WEATHER APPLICATION: Store materials in a heated location and drawmaterials as needed. If the materials have beenexposed to cold temperatures, allow a sufficientperiod of time in a heated environment forthem to warm to 50 F. DO NOT INSTALLCOLD ROLLS.InterplyPriorapprovalrequired byCertainTeedTechnicalDepartmentNOTE: Gold Star contractors have the option to offer their customers a 25% warranty duration extension with the CertainTeed IntegrityMaintenance Coverage program. *Refer to CertainTeed Commercial Systems Specifications.Important Application Considerations H ot Air Welder for cold weather applications or,if preferred, for flashing details year round;Every professional roofer is familiar with the toolsneeded to complete a roof installation, but just as arecap, specific tools you’ll need to install FlintlasticSA include: A S NEEDED: Long-handled (standing) rollerwith 1/8"- 1/4" nap for applying primer (1/8" napfor smooth surfaces, 1/4" nap for more poroussurfaces). A weighted roller for pressing the membraneinto place, 2" to 4" in diameter (70 lbs.);Please Keep in Mind: Do not attempt application if ice, snow, moistureor dew are present. As noted throughoutthe chapter, when ambient temperatures arebetween 20 F and 49 F, cold weatherapplication instructions must be followed. S uitable trowel for applying FlintBond toflashing details; R oofer’s knife with hooked blade; C aulk gun for applying beads of FlintBond; Seam probing tool to check for voids;2 W ork with manageable lengths of base, ply andcap membranes for the particular job. Whereappropriate, cut rolls into 1/3- or 1/2 -roll lengths.Mechanically Attached BaseBeginning at the low point of the roof, mechanically fasten Flintlastic SA NailBase to nailable deckusing appropriate fasteners (see Fasteners chart).Start with an appropriate roll width (see Field DetailsReference) to accommodate offsetting of sidelaps ofsubsequent layers in the roof system for increasedwater protection. Install so that no sidelaps areagainst the flow of water. A minimum fasteningpattern is every 9" on center on sidelaps and every18" on center in two staggered rows in the field ofthe sheet. Overlap base sheet sidelaps a minimum2" and endlaps 4". A llow material to relax a minimum of 15 minutesprior to installation. In cold weather allow rollsto relax indoors or in warming huts if possible;avoid allowing rolls to fall below 50 F (avoidmaterial contraction). A ll plies of the assembly should be installedin one day. If blue film must be exposed forlonger periods of time, cover with tarp orsuitable alternate protection. D o not mix Flintlastic SA membranes withother types of roof membranes. Flintlastic SAmembranes are specifically designed to beapplied together. The permanent top film of thebase and ply sheets cannot receive torching, hotasphalt or other non self-adhered applicationmethods. The Flintlastic SA Cap (or SA Cap FR),PlyBase and MidPly cannot be applied to anysurfaces other than as described herein. W hen applying Flintlastic SA on slopesexceeding 1" in 12", membranes shall be backnailed. When applied parallel to the slope,Flintlastic SA shall be blind-nailed at end laps 2"in from top edge, 6" o.c. through tin discs and towood nailers. See General Requirements Sectionof CertainTeed Commercial Roof SystemsSpecifications for details.FIELD DETAILS REFERENCE W hen using FlintBond for flashing details,target 1/4" FlintBond bleed out at endlap areas.Use caution not to roll weighted roller into bleedout.” Additional application details and recommendations can be found in the CertainTeedCommercial Roof Systems Specifications.33-PLY SYSTEMSCapBase19-11/16"(1/2 roll)39-3/8"(full roll)26-1/4"(2/3 roll)Side laps2"3"2"2"3"End laps, staggered 36"4"6"4"4"6"Starter row width D o not use cold adhesives, such as FlintBond,with Flintlastic SA membranes other thanfor flashing details and cap sheet overlaps asdescribed herein.2-PLY SYSTEMSBasePlyCap19-11/16" 39-3/8"(1/2 roll) (full roll)
Turn base sheet over facia by 2" and fasten. Offsetendlaps of adjacent courses a minimum of 3'. Do NotLeave Base Sheet Exposed To The Weather. Coverin the same day with optional SA interply and/or SACap (FR).FASTENER REFERENCEStandard (Round Head) Roofing Nails and Cap (Note:CertainTeed does not permit the use of plastic caps)For use with Base Sheet, Flash/Termination Bar onPlywood Decks, Non Veneer Decks, Wood Plank DecksLarge Head Roofing NailsFor use with Base Sheet, Flash/Termination Bar onPlywood Decks, Non Veneer Decks, Wood Plank DecksBase Sheet Fasteners for some Cementitious Roof DecksFor use with Base Sheet on Light Weight InsulationConcrete, Poured GypsumSelf-Adhered BaseSA PlyBase or SA MidPly may be self-adhered toapproved substrates such as mechanically fastenedor adhered FlintBoard ISO/FlintBoard ISO Cold, orprimed substrates (i.e. concrete roof decks, gypsumcoverboards, etc).Self-Locking FastenersFor use with Base Sheet on Cement/Wood FiberWhen using FlintPrime SA, allow to dry thoroughly,but no more than four hours to retain tack-enhancing properties. If substrate (i.e. FlintBond ISO)is attached with fasteners, prime exposed metalwith FlintPrime Aerosol before adhering either SAPlyBase or SA MidPly. Before adhering a base ply,sweep the surface of the deck or insulation to remove any debris that could interfere with adhesion.Begin application at the low point of the roof.Start with an appropriate roll width (see Field DetailsReference) to accommodate offsetting of sidelapsof subsequent layers in the roof system for increasedwater protection. Install flush to roof edge. Designlayout so that no sidelaps are against the flowof water.Insulation FastenersFigure 5-2: Fastener layout for 36-inch-wide base sheetFigure 5-3: Insulation fasteners and plates used with rigid board insulationseams. Apply a bead or small trowel dab (quartersize) of FlintBond SBS Modified BitumenAdhesive,111Caulk or Trowel grade, at the edge of the angled cutto avoid a capillary. Use of a hand-held hot air gunat the joint area prior to rolling the membrane willmaximize adhesion. It is recommended to apply abead of FlintBond SBS Modified Bitumen Adhesive,Caulk grade, at all SA PlyBase or SA MidPly side andendlaps edges to eliminate a capillary.111The NRCA Roofing Manual: Membrane Roof Systems—2011Chapter 5—FastenersCut rolls into manageable lengths and allow to relaxa minimum of 15 minutes. Fold the membrane backhalfway lengthwise to remove the split release film.Figure 5-2: Fastener layout for 36-inch-wide base sheetFigure 5-3: Insulation fasteners and plates used with rigid board insulationThe NRCA Roofing Manual: Membrane Roof Systems—2011Chapter 5—FastenersPress membrane securely into place and repeat withthe opposite half of the membrane. Use a heavy,weighted roller over the entire surface of thePlyBase or MidPly to secure the membrane. Workfrom the center of the roll outwards across the widthto eliminate air pockets; DO NOT roll lengthwise asit can cause the roll to stretch.Figure 5-2: Fastener layout for 36-inch-wide base sheetDo Not Leave Base Sheet Exposed To The Weather.Cover in the same day with optional SA interplyand/or SA Cap/SA Cap FR.111Figure 5-3: Insulation fasteners and plates used with rigid board insulationThe NRCA Roofing Manual: Membrane Roof Systems—2011Chapter 5—FastenersCold Weather Application Instructions,Base SheetFigure 5-2: Fastener layout for 36-inch-wide base sheetWhen ambient temperatures are between20 F - 49 F;Figure 5-3: Insulation fasteners and plates used with rigid board insulationOverlap sidelaps of subsequent SA PlyBase or SAMidPly membrane courses a minimum 2" and endlaps 4". Offset (stagger) endlaps of adjacent coursesa minimum 3'. Cut endlaps at opposing diagonalcorners at an angle approximately 5-1/2" long by theselvage dimension from the corners to minimize “T”-111 W hether base sheet is mechanicallyattachedor self-adhered, store materials in a heatedlocation and draw materials as needed.If the materials have been exposed to coldtemperatures, allow a sufficient period of timeThe NRCA Roofing Manual: Membrane Roof Systems—2011Chapter 5—Fasteners4in a heated environment for them to warmto 50 F. DO NOT INSTALL COLD ROLLS.sufficient period of time in a heated environmentfor them to warm to 50 F.DO NOT INSTALL COLD ROLLS. N o additional cold weather applicationprecautions are required for base sheets. N o additional cold weather applicationprecautions are required for interply sheets.Application Of Interply (Optional)Note: Proceed to “Before Installing Flintlastic SACap (or SA Cap FR)” if installing a 2-ply system.Before Installing Flintlastic SA CapOr SA Cap FRBefore installing Flintlastic SA PlyBase or SA MidPlysweep the underlying anchor sheet or base ply toremove any debris that could interfere with adhesion.Cut rolls to manageable lengths and allow to relaxfor a minimum of 15 minutes. Start with SA PlyBaseor SA MidPly at the low point of the roof withappropriate roll width to offset sidelaps 18" fromsidelaps of underlying anchor sheet or base ply(see Field Details chart) all flush to roof edge.Design layout so that no sidelaps are against theflow of water.If roof edge detail utilizes edge metal, proceed asfollows.Fold the membrane back halfway lengthwise toremove the split release film. Press membranesecurely into place and repeat with the opposite halfof the membrane. Use a heavy, weighted roller overthe entire surface of the SA PlyBase or SA MidPlyto secure the membrane. Work from the center ofthe roll outwards across the width to eliminate airpockets; DO NOT roll lengthwise as it can cause theroll to stretch.Edge Metal for Two-Ply Systems (with no interply)If an interply is not installed, install a 9" wideflashing strip of SA PlyBase or SA MidPly (materialassumed to match base sheet if fully adhered)onto the field of the roof and flush to the roofedge, self-adhered. Install minimum 26 gauge edgemetal using appropriate fasteners, set entirely ina uniform 1/8" - 1/4" thick troweling of FlintBondTrowel. Fasten edge metal through the surface,through the anchor and flashing strip, into thedeck using appropriate fasteners (see FastenerReference), spaced 4" on center in two staggeredrows. Remove any oil from the metal surface usinga vinegar and water solution. Prime the horizontalsurface of the metal with FlintPrime Aerosol andallow primer to dry/tackify. Apply a bead of caulkgrade FlintBond at the roof side edge of the metalwhere it meets the flashing strip.Overlap sidelaps of subsequent SA PlyBase orSA MidPly membrane courses a minimum 2" andendlaps 4". Offset (stagger) endlaps of adjacentcourses a minimum 3'.Cut endlaps at opposing diagonal corners at anangle approximately 5-1/2" long by the selvagedimension from the corners to minimize potentialwater incursion at T-Seams (see T-Seam Detail).Apply a bead or small trowel dab (quarter size) ofFlintBond SBS Modified Bitumen Adhesive, Caulk orTrowel grade, at the edge of the angled cut to avoida capillary. Use of a hand-held hot air gun at the jointarea prior to rolling the membrane will maximizeadhesion. It is recommended to apply a bead ofFlintBond SBS Modified Bitumen Adhesive, Caulkgrade, at all SA PlyBase or SA MidPly side andendlap edges to eliminate a capillary.Edge Metal for Three-Ply Systems (with interply)If an interply has been installed over the basesheet, install minimum 26 gauge edge metalusing appropriate fasteners and set in 1/8" - 1/4"bed of FlintBond Trowel adhesive. Fasten edgemetal through the metal surface, through thebase/interply and into the deck using appropriatefasteners (see Fastener Reference), spaced 4" oncenter in two staggered rows. Remove any oilfrom the metal surface using a vinegar and watersolution. Prime the horizontal surface of the metalwith FlintPrime Aerosol and allow to dry/tackify.Apply a bead of caulk grade FlintBond to the edgeof the metal where it meets the SA PlyBase orSA MidPly.Do Not Leave Base Sheet Exposed To The Weather.Cover in the same day with SA Cap (FR).Cold Weather Application Instructions,Interply SheetWhen ambient temperatures are between20 F - 49 F; S tore materials in a heated location and drawmaterials as needed. If the materials havebeen exposed to cold temperatures, allow aProceed to installing SA Cap or SA Cap FR.5
elap2” SidFollow the same layout and split release filmprocedures as for SA PlyBase or SA MidPly, butoverlap sidelaps 3" and endlaps 6". Install inweather-lapped fashion, with no laps against theflow of water. Use a weighted roller over the entiresurface of Flintlastic SA Cap or SA Cap FR to secureit in place and prevent voids, from the center ofthe roll outwards across the width to eliminate airpockets; DO NOT roll lengthwise as it can cause theroll to stretch.dlap4” EnAs subsequent membrane lengths are installed,remove the selvage edge release strip just prior tooverlapping to keep the adhesive area protectedand clean.Application Of Flintlastic SA Cap(Or SA Cap FR)Before installing Flintlastic SA Cap or SA Cap FR,sweep the underlying sheet to remove any debristhat could interfere with adhesion. Then start at theCut endlaps at opposing diagonal corners at anangle approx. 3" by 5-1/2" from the corners tominimize water incursion at T-seams (see T-SeamDetail below). Treat rake edge application similarly,cutting diagonal corners off Cap selvage edgeabove rake metal.low point of the roof with a full roll width to offsetsidelaps from the underlying membrane a minimumof 18" (see Field Details Reference). Cut rolls intomanageable lengths and allow to relax for aminimum of 15 minutes.One of the following options must be followed forany granule over granule overlap, such as an endlap: F or edge metal details apply heat from a hot-airwelder with a 2" tip to the overlapped, primedmetal surface while applying rolling pressurefrom a silicone roller to the overlapping SA Cap.With the hot air welder set between 300 F 500 F (setting 2-3), apply heat to the lapinterface while bonding SA Cap with rollingpressure on the granulated surface. Roll the lapin place, moving the hot air welder to allow forforward progress. Avoid applying so much heator moving at a pace that results in smoke. Applya bead of FlintBond Caulk along the edge.1. A pply a uniform 1/8" - 1/4" troweling ofFlintBond Trowel to the entire 6” width of theunderlying sheet, extending beyond underlyinglap 1/4" or;2. A pply heat from a hot-air welder with a 2"tip to the overlapped sheet while applyingrolling pressure from a silicone roller to theoverlapping sheet. With the hot air welder setbetween 900 F-1,100 F (setting 8-10), applyheat to the overlapped granulated surface whilebonding the overlapping SA Cap or SA Cap FRwith rolling pressure. Roll the overlapping SACap in place, moving the hot air welder to allowfor forward progress. Avoid applying so muchheat or moving at a pace that results in smoke.A 6" endlap requires three passes. Apply a beadof FlintBond Caulk along the edge.WHEN AMBIENT TEMPERATURES AREBETWEEN 20 F - 49 F THE HOT-AIR WELDERMETHOD MUST BE APPLIED. A pply the same “heat and roll” technique asdescribed above at all sidelaps. Apply a bead ofFlintBond Caulk along the edge. A pply a similar “heat and roll” to endlaps withthe hot air welder set between 900 F-1,100 F(setting 8-10). A 6" endlap requires three passes.Apply a bead of FlintBond Caulk along the edge.For more information on cold weather application,please droof-systems-cold-temperatures/Once the membrane has had a chance to bond,check all laps and joints for full adhesion. If themembrane can be lifted at any area it is notproperly adhered. A seam probing tool can behelpful to check for voids at laps. If necessary, useappropriate hand-held hot air welding tool andseam roller or an application of FlintBond to sealunbonded areas if they exist.Construction DetailsIncluded in this manual are a few commonconstruction details. Please refer to CertainTeedCommercial System Specifications or certainteed.com for complete details, or the NRCA for detailsnot found within this manual. Important to notewith all details, all metal must be primed and set inFlintBond Trowel adhesive and all overlaps overmineral surfacing must utilize either FlintBondTrowel or the combination of a hot-air welder andsilicone roller (cold weather requirement).Cold Weather Application Instructions,Cap SheetWhen ambient temperatures are between20 F - 49 F: S tore materials in a heated location and drawmaterials as needed. If the materials havebeen exposed to cold temperatures, allow asufficient period of time in a heated environmentfor them to warm to 50 F.DO NOT INSTALL COLD ROLLS.Position SA Cap or SA Cap FR with selvage edgerelease strip at high side of roof and the oppositeside flush to the roof’s edge. Once positioned, liftand fold back (lengthwise) the lower half of themembrane. Remove the split release film and pressfirmly into place. Then repeat with the other (highside of the roof) half of the membrane.67
Typical Construction Details – Flintlastic SA 2 Ply SystemsTypical Construction Details – Flintlastic SA 2 Ply SystemsCT-01A Edge FlashingCT-09 Base Flashing on Parapet Wall, Inside Corner6. Flintlastic SA PlyBase or MidPly Flashing CollarFinished DetailField Membrane,Corner Cuts7. Flintlastic SA Cap (FR)3. Flintlastic SAPlyBase or MidPlyMinimum 4"– 6"Between Nails9"Base Sheet Base Flashing,Corner Cuts4"2. FlintBoard ISO/ CoverboardAssembly (Optional, WarrantyDependent)2"1. Wood Nailer (Optional,Insulation Dependent)5. Minimum 26 Gauge EdgeMetal, Set in FlintBond Trowel and MechanicallyAttached, Surfaced Primed –FlintPrime Aerosol4. Cleat, Mechanically Attached9. CopingRepresentsVarying WallHeight7. Flintlastic SA PlyBase orMidPly WeatherproofingStrip – 2" over Wall Both Sides12"9"8. Cleat4"Base Flashing Height 8"–12"4. Flintlastic SAPlyBase or MidPly,Base FlashingCant StripCap Sheet Base Flashing,Corner Cuts6"2"4"1. FlintBoard ISO/CoverboardAssembly (Optional,Warranty Dependent)Field Membrane,Corner Cuts6. FlintlasticSA Cap (FR),Wall Covering(only whenwall heightexceeds 24")Base SheetBase Flashing,Corner Cuts5. Flintlastic SACap (FR),Base Flashing3. Flintlastic SACap (FR), FieldCap SheetBase Flashing,Corner Cuts2. Flintlastic SAPlyBase orMidPly, FieldFinished DetailCT-06 Base Flashing and Wall Covering on Parapet WallCT-10 Base Flashing on Parapet Wall, Outside Corner89
Typical Construction Details – Flintlastic SA 2 Ply SystemsTypical Construction Details – Flintlastic SA 2 Ply SystemsCT-22 End Lap DetailCT-11 Through-Wall Scupper FlashingTermination of Membrane Flashing will vary3"UnderlyingSheetOverlapping Sheet6" past theunderlying sheet3. Flintlastic SAPlyBase or MidPly,Base FlashingOverlappingSheetPrime ConcreteDeck/Wall orGypsumCoverboardif Base Layer isFully Adhered3"6"6. Flintlastic SACap (FR),Base Flashing5-1/2"2. Set in Cold-Adhesive (ColdProcess). Apply Min. 1/8" FlintBond Trowel or Heat Weld with FlintBondCaulk at Edge6" MinimumBetween MetalFlange and Edgeof Base Layer2"4" Minimum2"4. Scupper Flange,Set in FlintBond Trowel andMechanicallyAttached to Wall,3" o.c.Cant Strip1. Trim CornersVoid is shown without mastic toillustrate the cut; apply FlintBond Caulkor Trowel Grade to all trimmed corner voids2. Flintlastic SAPlyBase orMidPly, Field1. FlintBoard ISO/CoverboardAssembly (Optional,Warranty Dependent)5. Flintlastic SACap (FR)8"6. FlintBondCaulk4"1. FlintBoard ISO/CoverboardAssembly (Optional,Warranty Dependent)3. Lead or SheetMetal Sleeve Set inFlintBond , SurfacePrimed – FlintPrime Aerosol5. Flintlastic SA Cap (FR)4. Flintlastic SAPlyBase or MidPlyFlashing Collar2. Flintlastic SAPlyBase or MidPly6. DrainClampingRing4. Flintlastic SAPlyBase or MidPlyFlashing Collar4"3. Lead or Copper Flashing Setin FlintBond Trowel, FlintPrime Aerosol SurfaceCT-13 Pipe Flashing — Lead or Sheet Metal1. Tapered FlintBoard ISO/Coverboard Assembly to DrainCT-12 Drain Flashing105. Flintlastic SACap (FR), Field112. FlintlasticSA PlyBaseor MidPly
Typical Construction Details – Flintlastic SA 3 Ply SystemsTypical Construction Details – Flintlastic SA 3 Ply SystemsCT-01 Edge FlashingCT-09 Base Flashing on Parapet Wall, Inside CornerFinished Detail4. Flintlastic SA Cap (FR)Field Membrane,Corner CutsBase Sheet Base Flashing,Corner Cuts4"1. Flintlastic SA NailBase2. Flintlastic SAPlyBase or MidPlyMinimum 4"– 6"Between Nails3. Minimum 26 Gauge Edge Metal, Set in FlintBond Trowel andMechanically Attached, Surfaced Primed – FlintPrime Aerosol9. CopingRepresentsVarying WallHeight7. Flintlastic SA PlyBase orMidPly WeatherproofingStrip – 2" over Wall Both Sides12"9"8. Cleat4"Base Flashing Height 8"–12"4. Flintlastic SAPlyBase or MidPly,Base FlashingCap Sheet Base Flashing,Corner CutsField Membrane,Corner Cuts6. FlintlasticSA Cap (FR),Wall Covering(only whenwall heightexceeds 24")5. Flintlastic SACap (FR),Base Flashing2"4"Cant StripBase SheetBase Flashing,Corner Cuts6"3. Flintlastic SACap (FR), Field2. Flintlastic SAPlyBase or MidPly1. Flintlastic SA NailBaseCap SheetBase Flashing,Corner CutsCT-06 Base Flashing and Wall Covering on Wood Parapet WallFinished DetailCT-10 Base Flashing on Parapet Wall, Outside Corner1213
Typical Construction Details – Flintlastic SA 3 Ply SystemsTypical Construction Details – Flintlastic SA 3 Ply SystemsCT-13 Pipe Flashing — Lead or Sheet MetalCT-12 Drain Flashing5. Flintlastic SA Cap (FR)4. Flintlastic SACap (FR)5. FlintBond Caulk4"3. Flintlastic SAPlyBase or MidPly2. Lead or Sheet MetalSleeve Set in FlintBond ,Surface Primed –FlintPrime Aerosol1. Flintlastic SA NailBase4. Flintlastic SAPlyBase or MidPlyFlashing Collar4"3. Lead or Copper Flashing Setin FlintBond Trowel, FlintPrime Aerosol Surface1. Tapered FlintBoard ISO/Coverboard Assembly to DrainTermination of Membrane Flashing will vary3. Flintlastic SA NailBase,Base
ROOFING SIDING TRIM DECKING RAILING FENCE GYPSUM CEILINGS INSULATION 20 Moores Road Malvern, PA 19355 Professional: 800-233-8990 Consumer: 800-782-8777 certainteed.com 06/19 CertainTeed Corporation, Printed in the USA, Code No. COMM-123 Self-Adhered SBS-Modified Bitumen Roof Systems .