Transcription
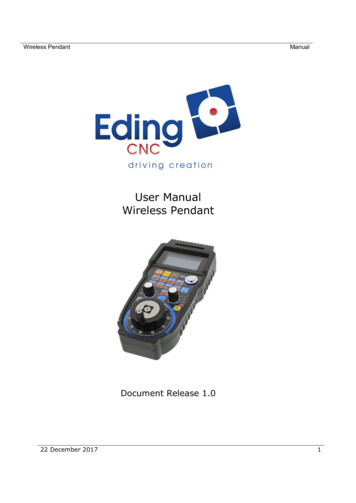
XHC Wireless PendantManualUser ManualXHC Wireless PendantDocument Release 1.0212 December 20191
XHC Wireless PendantManualPublished by: Bert EdingEindhovenThe NetherlandsTitle:Author:Date:Manual XHC Wireless PendantBert EdingThursday, 12 December 2019Document -2016AuthorBert EdingBert EdingBert Eding1.0312-12-2019Jan HummelCommentInitial versionAdd example of usage of macro buttonAdded zero axis function for GOTOZERO button if axis selected.Updated instructions for activating thependant. Copyright Eding CNC Holding B.V.All rights reserved. Reproduction in whole or in part prohibited without the prior writtenconsent of the copyright owner.12 December 20192
XHC Wireless PendantManualTable of contentsTable of contents . 31Introduction and intended use . 42Operating instructions . 52.1Installing the Pendant . 52.2Obtaining the activation code .Error! Bookmark not defined.2.3Using the pendant . 82.4the buttons . 102.5Example of how to use a macro button . 112.6Rebinding . 122.7Time out . 122.8Setup and behavior of the MPG . 1312 December 20193
XHC Wireless PendantManual1 Introduction and intended useThe MPG is useful for positioning and zeroing and other functions on themachine, it is not really suited for milling because there is no feel of the force,the milling bit will break easily. The moment may not be entirely smooth. Thependant is easy to use, and of course wireless.It operates with batteries, according to the supplier (XHC) the batteries will lastseveral months in normal operation.Due to the resolution of the Pendant MPG, 100 pulses/revolution loweracceleration must be used to get smooth movement. The movement with thewired Pendant can so smooth motion with higher acceleration. The wiredPendant has 400 pulses/revolution.12 December 20194
XHC Wireless PendantManual2 Operating instructions2.1 INSTALLING THE PENDANT1. Put 2 AA batteries in the Pendant.2. Connect USB RECEIVER to USB port of PC. The USB receiver must havemore or less free sight to the pendant. This means, it will not work well ifthe USB receiver is built into a metal cabinet and the pendant is outside12 December 20195
XHC Wireless PendantManual2.2 ENABLING THE PENDANTIn Setup 2/2, you can find the button for setting up the pendant.After clicking, you will see an overview of the supported pendant models. Selectthe correct model.12 December 20196
XHC Wireless PendantManualObtaining the activation code (Model 1 only)To enable you CPU for the pendant you must obtain an activation code to beable to use it. This works as follows, press the Setup Licences button on the 2ndsetup screen:In the next screen, enable the XHC Pendant, put your name, press “Get requestCode” button. Send the code to EdingCNC to obtain the activation code.12 December 20197
XHC Wireless PendantManualYou will receive an activation code by email. Put this code in the lower text boxand press “Activate”. You can now use the XHC Wireless PendantThe activation code is free for Pendant’s that are obtained from EdingCNC. Forexternally bought Pendants there is a Fee to be paid. Ask EdingCNC for theprice.2.3 USING THE PENDANTStart the software as normally. An additional program that communicates to thependant is also started, it looks lik this and shows some info from the Pendant:12 December 20198
XHC Wireless PendantManualIt shows Pendant found if everything is OK.You can leave this running on the background; it will perform the Pendant functionalityfor EdingCNC.12 December 20199
XHC Wireless Pendant2.4ManualTHE BUTTONSButton From upper left to lower right pendantbutton explanationResetStopM-HomeW-HomeStart/pauseFN ContinuousContinuousStepProbe-ZS on/offFeed /Spindle /Safe-ZTo o-7Macro-8Macro-9Macro-10Step MPG ModeSame function as Reset (F1) in EdingCNC.Pause running JobHome all sequenceMove to work zeroStart/Pause JobToggle between machine and work coordinatesContinuous modeSingle Step modeExecutes sub routine xhc probe z, you are free to implementthis function inside marco.cnc or user macro.cncSwitch Spindle ON/OFFIncrease/decrease feed overrideIncrease/decrease spindle overrideZ to safe heightIf axis selector is off: G0 X0 Y0If axis selector is on X, Y, Z, A, B, C, zero axis work position.Tool radius of actual tool in spindle is taken into account for Xand Y. So if lower left corner of material is touched in X or Y, theposition is set to –Tool Radius, the result is that the materialcorner will be 0 and that is what we need.Executes xhc macro 1, you are free to implement his functioninside macro.cnc or user macro.cnc.Executes xhc macro 2, you are free to implement his functioninside macro.cnc or user macro.cnc.Executes xhc macro 3, you are free to implement his functioninside macro.cnc or user macro.cnc.Executes xhc macro 4, you are free to implement his functioninside macro.cnc or user macro.cnc.Executes xhc macro 5, you are free to implement his functioninside macro.cnc or user macro.cnc.Executes xhc macro 6, you are free to implement his functioninside macro.cnc or user macro.cnc.Executes xhc macro 7, you are free to implement his functioninside macro.cnc or user macro.cnc.Executes xhc macro 8, you are free to implement his functioninside macro.cnc or user macro.cnc.Executes xhc macro 9, you are free to implement his functioninside macro.cnc or user macro.cnc.Executes xhc macro 10, you are free to implement his functioninside macro.cnc or user macro.cnc.Increment multiplication factor for MPGDecrement multiplication factor for MPG12 December 201910
XHC Wireless PendantAxisSelectorswitchStep sizeselectorswitchMPGManualOFF,X, Y, Z, A, B, C axis on MPG0.001, 0.01, 0.1, 1 appUnits per stepSpindle override on MPGFeed override on MPGOFFMove the selected by MPG rotation2.5 EXAMPLE OF HOW TO USE A MACRO BUTTONAdd a subroutine with the right name in the macro.cnc and execute what youwant there:Sub xhc macro 1Msg “Hallo this is xhc macro 1 button is pressed”;Add any EdingCNC compatible g-code you want hereEndSubYou can do this for all pendant macro buttons.12 December 201911
XHC Wireless PendantManual2.6 REBINDINGBinding is the process of pairing the USB receiver with the Pendant. Similar aswith Bluetooth devices.REBINDING RECEIVER, IN CASE CONNECTION IS NOT POSSIBLE1. Remove battery and disconnectreceiver from computer. Thenre-connect receiver tocomputer and put batteries intothe Pendant.2. Press pendant Power button3. Press RESET and STEP atthe same time until the LCDshows numbers.4. If the display shows numbers,it is OK.The display shows numbers veryshortly.Try this 3-5 times if neededIf the display does not show numbers,change the receiver/pendant2.7 TIME OUTThe Pendant itself has a timeout; this is to preserve the batteries. It isimportant to know that after a few seconds of not pressing a button ornot rotating the MPG, that the Pendant goes to a sleep situation wherethere is no longer communication with the PC.In sleep situation the positions on the display no longer match the actualmachine position and the software goes automatically out of hand wheeloperation. When a button is pressed or the MPG is rotated, it goes backto normal operation and the positions are updated.12 December 201912
XHC Wireless PendantManual2.8 SETUP AND BEHAVIOR OF THE MPGThe resolution of the MPG is 100 pulses per revolution. This is relatively low foran MPG, but in practice not a big issue. If you have a machine with highacceleration there may be noticed that the move is not smooth. This is becauseevery count of the MPG gives a small displacement and if your machine has highacceleration the displacement is already done when the next count pulse isread. This can be smoothed out by setting the speed and accelerationpercentage lower, such that the movement is smooth enough for normal MPGoperation.The parameters are in the setup of the software:Cnt/Rev:The number of counts of the hand wheel for one revolution,usually 400 for most CNC hand wheels.Count:Counter for wired hand wheel, not used for the XHC Pendant,normally 100 pulses/rev.V[%]:Percentage of velocity from selected axis, this is themaximum velocity the axis will move when using the handwheel.A[%]:Percentage of acceleration from selected axis, this is themaximum acceleration the axis will move when using thehand wheel.12 December 201913
XHC Wireless PendantManualX1.X100 Vel Mode:In velocity mode the most important is that themovement stops immediately when the rotation of the handwheel stops. The position of the hand wheel will not bemaintained if velocity mode is on. The position of thehandheld is maintained if velocity mode is off. This alsomeans that the axis may not immediately stop if the handwheel rotation stops. When turning beyond the limits of theaxis, you have to turn back the hand wheel the sameamount before the axis starts moving again.My own experience is that it works best to use velocitymode at X100 only. Just play with it to experience thebehavior and make your own choice.These parameters allow you to tune the motion behavior such that it hasacceptable smoothness and speed.12 December 201914
XHC Wireless Pendant Manual 12 December 2019 8 You will receive an activation code by email. Put this code in the lower text box and press "Activate". You can now use the XHC Wireless Pendant The activation code is free for Pendant's that are obtained from EdingCNC. For externally bought Pendants there is a Fee to be paid.