Transcription
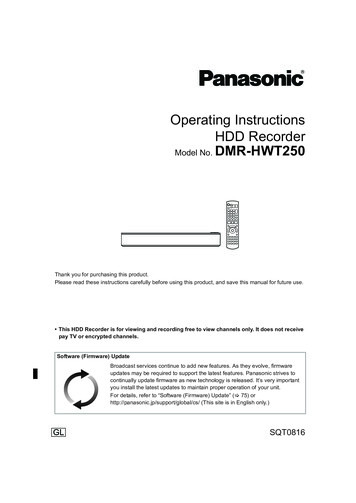
DMRHWT250GL eng.book 1 �4時34分Operating InstructionsHDD RecorderModel No. DMR-HWT250Thank you for purchasing this product.Please read these instructions carefully before using this product, and save this manual for future use. This HDD Recorder is for viewing and recording free to view channels only. It does not receivepay TV or encrypted channels.Software (Firmware) UpdateBroadcast services continue to add new features. As they evolve, firmwareupdates may be required to support the latest features. Panasonic strives tocontinually update firmware as new technology is released. It’s very importantyou install the latest updates to maintain proper operation of your unit.For details, refer to “Software (Firmware) Update” ( 75) orhttp://panasonic.jp/support/global/cs/ (This site is in English only.)SQT0816GLuntil2015/03/25
DMRHWT250GL eng.book 2 �4時34分Safety precautionsWARNINGCAUTIONUnit To reduce the risk of fire, electric shock orproduct damage,- Do not expose this unit to rain, moisture,dripping or splashing.- Do not place objects filled with liquids, such asvases, on this unit.- Use only the recommended accessories.- Do not remove covers.- Do not repair this unit by yourself. Referservicing to qualified service personnel.- Do not let metal objects fall inside this unit.- Do not place heavy items on this unit.Unit Do not place sources of naked flames, such aslighted candles, on this unit. This unit may receive radio interference causedby mobile telephones during use. If suchinterference occurs, please increase separationbetween this unit and the mobile telephone. This unit is intended for use in moderateclimates.AC mains lead To reduce the risk of fire, electric shock orproduct damage,- Ensure that the power supply voltagecorresponds to the voltage printed on this unit.- Insert the mains plug fully into the socketoutlet.- Do not pull, bend, or place heavy items on thelead.- Do not handle the plug with wet hands.- Hold onto the mains plug body whendisconnecting the plug.- Do not use a damaged mains plug or socketoutlet. The mains plug is the disconnecting device.Install this unit so that the mains plug can beunplugged from the socket outlet immediately.2SQT0816Placement Place this unit on an even surface. To reduce the risk of fire, electric shock orproduct damage,- Do not install or place this unit in a bookcase,built-in cabinet or in another confined space.Ensure this unit is well ventilated.- Do not obstruct this unit’s ventilation openingswith newspapers, tablecloths, curtains, andsimilar items.- Do not expose this unit to direct sunlight, hightemperatures, high humidity, and excessivevibration.
DMRHWT250GL eng.book 3 ページ2015年2月4日Batteries Danger of explosion if battery is incorrectlyreplaced. Replace only with the typerecommended by the manufacturer. Mishandling of batteries can cause electrolyteleakage and may cause a fire.- Do not mix old and new batteries or differenttypes at the same time.- Do not heat or expose to flame.- Do not leave the battery(ies) in a car exposedto direct sunlight for a long period of time withdoors and windows closed.- Do not take apart or short circuit.- Do not recharge alkaline or manganesebatteries.- Do not use batteries if the covering has beenpeeled off.- Remove batteries if you do not intend to usethe remote control for a long period of time.Store in a cool, dark place. When disposing of the batteries, please contactyour local authorities or dealer and ask for thecorrect method of disposal.水曜日午後4時34分Supplied accessoriesPlease check and identify the suppliedaccessories.(Product numbers are correct as of February2015. These may be subject to change.)Remote control (N2QAYB001042):Batteries for remote control:AC mains lead:RF coaxial cable:HDMI cable:1 pc.2 pcs.1 pc.1 pc.1 pc. Do not use AC mains lead with other equipment.Insert batteriesInsert so the poles (i and j) match those in theremote control.R6/LR6, AA(Alkaline or manganese batteries)Indemnity concerning recorded contentPanasonic does not accept any responsibility fordamages directly or indirectly due to any type ofproblems that result in loss of recording or editedcontent (data), and does not guarantee anycontent if recording or editing does not workproperly. Likewise, the above also applies in acase where any type of repair is made to the unit(including any other non-HDD relatedcomponent).SQT08163
DMRHWT250GL eng.book 4 �4時34分Table of contentsSafety precautions . . . . . . . . . . . . . . . . . . . . . .2Supplied accessories . . . . . . . . . . . . . . . . . . . .3Getting startedHDD and media information . . . . . . . . . . . . . . .6- Recordable/playable contents . . . . . . . . . . . . . . . . .6- Recording mode . . . . . . . . . . . . . . . . . . . . . . . . .8- Notes . . . . . . . . . . . . . . . . . . . . . . . . . . . . . . . .9Unit care . . . . . . . . . . . . . . . . . . . . . . . . . . . . .10Control reference guide . . . . . . . . . . . . . . . . .11Connection . . . . . . . . . . . . . . . . . . . . . . . . . . .13- Basic connections . . . . . . . . . . . . . . . . . . . . . . .13- Amplifier/receiver connections . . . . . . . . . . . . . . .14- Network connection . . . . . . . . . . . . . . . . . . . . . .15Settings . . . . . . . . . . . . . . . . . . . . . . . . . . . . . .16- TV operation buttons . . . . . . . . . . . . . . . . . . . . .16- Easy Setting . . . . . . . . . . . . . . . . . . . . . . . . . . .17- Easy Network Setting . . . . . . . . . . . . . . . . . . . . .18FUNCTION MENU screen . . . . . . . . . . . . . . .20Watching broadcastsWatching broadcasts . . . . . . . . . . . . . . . . . . .21- Using Channel List . . . . . . . . . . . . . . . . . . . . . . .21- Using TV Guide system . . . . . . . . . . . . . . . . . . . .22- Using channel information . . . . . . . . . . . . . . . . . .22- Operations while watching broadcast . . . . . . . . . . .23- REWIND LIVE TV/PAUSE LIVE TV . . . . . . . . . . . .23RecordingRecording TV programmes. . . . . . . . . . . . . . .25- Operation during Recording . . . . . . . . . . . . . . . . .26Timer recording. . . . . . . . . . . . . . . . . . . . . . . .28- Manually programming timer recording . . . . . . . . . .30- Timer recording options . . . . . . . . . . . . . . . . . . . .30- Timer recording from channel information . . . . . . . .31- Notes on timer recording . . . . . . . . . . . . . . . . . . .31- To confirm and edit a timer programme . . . . . . . . . .32Playing back videoPlaying titles on the HDD . . . . . . . . . . . . . . . .33- Video Menu screen . . . . . . . . . . . . . . . . . . . . . .33- Video list screen . . . . . . . . . . . . . . . . . . . . . . . .35Playing titles on the media . . . . . . . . . . . . . . .36Operation during play . . . . . . . . . . . . . . . . . . .37- General operations. . . . . . . . . . . . . . . . . . . . . . .37- 3D video playback . . . . . . . . . . . . . . . . . . . . . . .39Editing videoDeleting/Editing titles . . . . . . . . . . . . . . . . . . .40- Deleting recorded titles . . . . . . . . . . . . . . . . . . . .40- Editing recorded titles . . . . . . . . . . . . . . . . . . . . .40- Deleting video files on the HDD . . . . . . . . . . . . . . .434SQT0816Copying videoCopying titles . . . . . . . . . . . . . . . . . . . . . . . . .44- Copying video files . . . . . . . . . . . . . . . . . . . . . . .45Photo and MusicPlaying photos . . . . . . . . . . . . . . . . . . . . . . . .46- Photo Menu screen . . . . . . . . . . . . . . . . . . . . . .46- Photo play option . . . . . . . . . . . . . . . . . . . . . . . .47- Slideshow settings . . . . . . . . . . . . . . . . . . . . . . .47Editing photos . . . . . . . . . . . . . . . . . . . . . . . . .48Copying photos. . . . . . . . . . . . . . . . . . . . . . . .49- Selecting and copying the photos . . . . . . . . . . . . .49- Copying automatically . . . . . . . . . . . . . . . . . . . . .49Playing music . . . . . . . . . . . . . . . . . . . . . . . . .50- Playing music file on the media . . . . . . . . . . . . . . .50- Playing music file on the HDD . . . . . . . . . . . . . . . .50- Operations during music play . . . . . . . . . . . . . . . .50Copying/Deleting music . . . . . . . . . . . . . . . . .51- Copying. . . . . . . . . . . . . . . . . . . . . . . . . . . . . .51- Deleting. . . . . . . . . . . . . . . . . . . . . . . . . . . . . .51NetworkSmart Home Networking (DLNA) . . . . . . . . . .52- Using this unit as Server . . . . . . . . . . . . . . . . . . .52- Using this unit as Client . . . . . . . . . . . . . . . . . . . .53- Using this unit as Media Renderer . . . . . . . . . . . . .54- Using MiracastTM . . . . . . . . . . . . . . . . . . . . . . . .54- Using Smart Home Networking (DLNA)with Wi-Fi Direct . . . . . . . . . . . . . . . . . . . . . . .55TV Anytime . . . . . . . . . . . . . . . . . . . . . . . . . . .56Enjoying Network Service. . . . . . . . . . . . . . . .56With Other EquipmentCopying the HD Video (AVCHD) . . . . . . . . . .57Registering the external HDD (USB HDD) . . .58- Connecting the USB HDD . . . . . . . . . . . . . . . . . .58- Disconnecting the USB HDD . . . . . . . . . . . . . . . .58- Registering the USB HDD . . . . . . . . . . . . . . . . . .59Convenient functionsPlayback menu . . . . . . . . . . . . . . . . . . . . . . . .60Basic Settings . . . . . . . . . . . . . . . . . . . . . . . . .62- Common procedures . . . . . . . . . . . . . . . . . . . . .62- Digital TV Tuning . . . . . . . . . . . . . . . . . . . . . . . .64- HDD / USB HDD . . . . . . . . . . . . . . . . . . . . . . . .65- Picture . . . . . . . . . . . . . . . . . . . . . . . . . . . . . .67- Sound . . . . . . . . . . . . . . . . . . . . . . . . . . . . . . .67- Display . . . . . . . . . . . . . . . . . . . . . . . . . . . . . .68- Connection . . . . . . . . . . . . . . . . . . . . . . . . . . .68- Network. . . . . . . . . . . . . . . . . . . . . . . . . . . . . .69- Others . . . . . . . . . . . . . . . . . . . . . . . . . . . . . .72VIERA Link functions . . . . . . . . . . . . . . . . . . .74
DMRHWT250GL eng.book 5 ページ2015年2月4日Software (Firmware) Update . . . . . . . . . . . . .Other operations . . . . . . . . . . . . . . . . . . . . . .- Entering text . . . . . . . . . . . . . . . . . . . . . . . . . .- Switching the aspect ratio of the screen . . . . . . . . .- HOLD function . . . . . . . . . . . . . . . . . . . . . . . . .7576767676水曜日午後4時34分About descriptions in these operatinginstructions Pages to be referred to are indicated as “ ”.TroubleshootingTroubleshooting guide . . . . . . . . . . . . . . . . . .- General operation . . . . . . . . . . . . . . . . . . . . . . .- Displays . . . . . . . . . . . . . . . . . . . . . . . . . . . . .- TV screen and video . . . . . . . . . . . . . . . . . . . . .- Sound . . . . . . . . . . . . . . . . . . . . . . . . . . . . . .- Recording, timer recording and copying . . . . . . . . .- Play . . . . . . . . . . . . . . . . . . . . . . . . . . . . . . .- Edit . . . . . . . . . . . . . . . . . . . . . . . . . . . . . . . .- Photo . . . . . . . . . . . . . . . . . . . . . . . . . . . . . .- USB . . . . . . . . . . . . . . . . . . . . . . . . . . . . . . .- TV Guide . . . . . . . . . . . . . . . . . . . . . . . . . . . .- Broadcast . . . . . . . . . . . . . . . . . . . . . . . . . . . .- VIERA Link . . . . . . . . . . . . . . . . . . . . . . . . . . .- Network . . . . . . . . . . . . . . . . . . . . . . . . . . . . .- Reset . . . . . . . . . . . . . . . . . . . . . . . . . . . . . .- Messages on the front panel display . . . . . . . . . . .- When you experience problems with Easy NetworkSetting . . . . . . . . . . . . . . . . . . . . . . . . . . . . .77777878798080818181818282828283. 84ReferenceSpecifications . . . . . . . . . . . . . . . . . . . . . . . .- Language code list . . . . . . . . . . . . . . . . . . . . . .Licenses . . . . . . . . . . . . . . . . . . . . . . . . . . . .Limited Warranty . . . . . . . . . . . . . . . . . . . . . .Index . . . . . . . . . . . . . . . . . . . . . . . . . . . . . . .8586878990Getting startedWatching broadcastsRecordingPlaying back videoEditing videoCopying videoPhoto and MusicNetworkWith Other EquipmentConvenient functionsTroubleshootingReferenceSQT08165
DMRHWT250GL eng.book 6 �4時34分Getting startedGetting startedHDD and media informationFor more details, refer also to the specifications. ( 85)Recordable/playable contents(–: Impossible)Media typeStandard symbolBuilt-in hard disk drive(HDD)[HDD]Playable contents VideoAVCHD/AVCHD 3DMP4MPEG2XvidMKVRecordable contents WAVFLACAACMP3WMAJPEGMPO (3D photo) Video§1 AVCHD/AVCHD 3D§2, 3External hard disk drive(USB HDD)( 9) MP4[USB HDD] MPEG2 Xvid MKV JPEG WAVFLACAACMP3WMA– MPO (3D photo) AVCHD/AVCHD 3D§2, 3USB memory[USB] MP4MPEG2XvidMKVJPEG WAVFLACAACMP3WMA– MPO (3D photo)Playable contents as DLNA clientRefer to “Playable contents”. ( 53)§1§2§3It cannot be recorded directly. (Only compatible with copying from the built-in HDD)Recorded with AVCHD format compatible devices (Panasonic video camera, etc.). It may not beable to play back depending on the device.It cannot be played back directly from the USB HDD or USB memory. Playback is possible bycopying to the built-in HDD. ( 57) With certain recording states and folder structures, the play order may differ or playback may not be possible. It may not be possible to play the above media in some cases due to the type of media, the condition of the recording, therecording method, and how the files were created.6SQT0816
DMRHWT250GL eng.book 7 �4時34分Getting startedInformation about contents Broadcast RecordingsNumbers of titles that can be recorded:Maximumtitles3000MediaHDD Photo filesCompatible pixels:Between 34k34 and 8192k8192 pixelsSub sampling:4:2:2, 4:2:0(Motion JPEG is not supported.)Maximum numbers of contents: Maximum numbers of titles are including recordings ofHD CAMCODER. HD CAMCODER RecordingsMPEG-4 AVC/H.264 (based on AVCHD)Numbers of titles that can be recorded:Maximumtitles3000MediaHDDMediaHDDUSB deviceFolders–500Files2000010000 Video files/Audio filesNumbers of contents that can be copied tointernal HDD:Contents Maximum numbers of titles are including recordings ofBroadcast.VideoAudioMaximum numbers offolders and files2000020000USB device: Each folder can store up to 1000 files. We recommend that you limit the depth offolder trees to about five levels.About extension of filesMP4:MPEG2:Xvid:Subtitle text files:MKV:Subtitle text “.sub”“.TXT”“.txt” The video file and subtitle text files are inside the same folder, and the file names are the same except for the file extensions. Some files may not be played back even if they have these extensions.SQT08167
DMRHWT250GL eng.book 8 �4時34分Getting startedHDD and media informationRecording modeRecording ModeDRFeatureProgrammes can berecorded in a nearlyperfect broadcasted state.QualityQuality as the broadcastMultiple audio Record all multiple audioSubtitlesCan be recordedSurround audio Surround audio as ng can be doneRecording can be donewith reduced recordingwith reduced recordingvolume in HD quality.volume in SD quality.Standard definitionHigh definition§1Record only one audioCan be recorded (only one subtitle)§2Stereo audioStereo audioThe SD quality programme cannot be converted to HD quality.You cannot select during play whether it appears or disappears.Approximate recording timesRefer to “Recording modes and approximate recording times”. ( 85)8SQT0816
DMRHWT250GL eng.book 9 �4時34分Getting startedNotesNotes for the USB memoriesNotes for an External HDD (USB HDD) This unit supports USB 2.0 High Speed. This unit supports USB mass storage deviceclass. Format: FAT12, FAT16, FAT32 and NTFSYou can use an external HDD in the following twoways. (A single HDD cannot handle those twoways simultaneously.) For recorded titlesMoving titles in the built-in HDD to a USB HDDto save the capacity of the built-in HDD. The USB HDD must first be registered on thisunit. ( 58) The USB HDD over 3 TB is not usable. For data filesPlaying back MP4, JPEG, MP3, etc. (data files)in a USB HDD with this unit. The USB HDD must be formatted in FAT12,FAT16, FAT32 and NTFS file system. The USB HDD over 2 TB is not usable. The USB memory over 2 TB is not usable. This unit does not guarantee connection with all USBdevices. This unit supports USB 2.0 High Speed. Although this unit can use USB 3.0 devices as USB 2.0devices, in certain cases USB 3.0 devices cannot be useddue to differing connector shape, larger current ratings, etc.(Use of USB 2.0 devices is recommended.) This unit does not recognize USB HDDs other than those inwhich the size of one sector is 512-bytes or 4096-bytes.(For details, consult the dealer of your USB HDD.) This unit supports USB mass storage device class. This unit does not guarantee connection with all USBdevices.SQT08169
DMRHWT250GL eng.book 10 �4時34分Getting startedUnit careHDD/USB HDD handling careWhen moving the unit The HDD is a high precision deviceThe HDD is a high precision recordinginstrument and is easily susceptible to damage.Therefore, be careful of the following pointswhile the unit is turned on, especially duringoperation, otherwise the HDD and the recordedcontent may be damaged:- Do not subject the unit to any vibration andshock.- Do not remove the AC mains lead from thehousehold mains socket.1 Switch the unit to standby mode. (Wait until“BYE” disappears from the display.)2 Remove the AC mains lead from thehousehold mains socket.3 Move only after the unit has come to acomplete stop (approx. 3 minutes) in order toavoid subjecting to vibration and shock. (Evenafter the unit is switched to standby mode, theHDD continues operating for a short time.) The HDD is a temporary storage deviceThis unit cannot save (backup) the HDD titles tomedia. You have to be very careful whenhandling the unit and editing the title.Cleaning If the HDD or USB HDD is damaged, therecorded content cannot be recovered. Wipe with a soft, dry cloth. Never use alcohol, paint thinner or benzine toclean this unit. Before using chemically treated cloth, carefullyread the instructions that came with the cloth.Setup precautionsWhen requesting this unit for repair Place the unit on a surface that is flat andnot subject to vibration or impact. Do not place on anything that generates heatlike a Set Top Box, etc. Place in an area where condensation doesnot occur. Conditions where condensationmay occur- When there is an extreme change intemperature (e.g., when subjected to an airconditioner or when cooled air directly impactsthe unit).- When there is high humidity or a lot of steamin the room.In the above situation, without turning the uniton, let the unit adjust to the room temperatureand wait 2–3 hours until condensation is gone. The unit may breakdown if cigarette smokeor bug spray/vapour, etc. gets inside theunit.10SQT0816The registration of the USB HDD may becancelled in the process of repairing this unit.You can use the USB HDD again byre-registering, but all recorded content already onthe USB HDD will be lost. In such cases, therecorded content (data) cannot be recovered.To dispose or transfer this unitThis unit may contain private information. Beforedisposing of or transferring this unit, perform thefollowing to delete the data, including personal orsecret information:- Format HDD ( 62, 66)- Perform “Shipping Condition” ( 62, 73)
DMRHWT250GL eng.book 11 �4時34分Getting startedControl reference guideInstructions for operations are generally described using the remote control.Remote control TV VOLDRIVE INPUTSELECT AVCH PAGE2abc 3def1 4ghi 5jkl 6mno7pqrs 8 tuv 9wxyz0 SKIPSTATUSPAUSE LIVE TVMECTION NUFUN EXITGUIDEOPTIONR PLAY/x1.3OK REWIND LIVE TVPAUSE INTERNETSLOW/SEARCHSTOP RADIO/TVLAST VIEW CHRETURNGYREC REC MODE TEXTSTTLMANUAL SKIP-10s BPROG/CHECK CHAPTER TIME SLIP AUDIODISPLAY DELETE 60s 1 Transmit the remote control signal Point it at remote control signal sensor onthis unit. ( 12)2 Switch the unit from on to standby mode orvice versa3 Select drive (HDD or USB)4 Select channels and title numbers, etc./Enternumbers or characters5 Switch to the previously watched channel( 21)6 Basic operations for recording and play,REWIND LIVE TV/PAUSE LIVE TV ( 23)7 Show Information ( 22, 34, 37)8 Selection/OK, Frame-by-frame ( 37)9 Show Video Menu ( 33): Show OPTION menu ( 40, 48); Colour buttons (Use in accordance withinstruction on the screen.) Start recording ( 25) Select a conversion mode/recording mode( 25) Show the Timer Recording screen ( 30)? Create chapter ( 38)@ Show Playback Menu ( 60)A To delete unwanted recorded titles, timerprogrammes, video or music ( 40)B TV operation buttons ( 16)C Channel select ( 21)/Change pages in theVideo Menu screen etc.D Show the Network Service screen ( 56)E Show NETFLIX screenF Switching to the radio channel list ( 21)G Exit the menu screenH Show the TV Guide screen ( 22)I Show the FUNCTION MENU screen ( 20)J Return to previous screenK Show subtitles ( 23, 38)L Show Teletext ( 23)M Select audio ( 23, 38)N Skip the specified time ( 38)O Skip approx. 1 minute forward ( 38)P Skip approx. 10 seconds backward ( 38)SQT081611
DMRHWT250GL eng.book 12 �4時34分Getting startedControl reference guideMain unitDisplayDisplay 1 HDD2345COPY USBPLAY6 USB memoryPull to flip downthe front panel.1 Remote control signal sensor Angle: Approx. 20 up and down, 30 left andright Distance: Within approx. 7 m in front of theunit2 Start play3 Standby/on switch (Í/I)Press to switch the unit from on to standbymode or vice versa. In standby mode, the unitis still consuming a small amount of power.4 USB port While writing to/reading from the media, do not switch theunit to standby mode or remove the media. Such actionmay result in loss of the media contents. When inserting the media, ensure that it is facing the rightway up.12SQT08161234578Drive (HDD) indicatorCopying indicatorUSB port indicatorRemote control signal indicatorTimer recording indicatorThis indicator lights up when the timerrecording standby is activated.6 Main display section indicator- Current time- Playback counter- Various messages ( 83), etc.7 Playback indicator8 Recording indicator The indicator will light up while recording. The indicator will blink while recording ispaused and before recording starts.
DMRHWT250GL eng.book 13 �4時34分Getting startedConnection3D programmes can be played back when this unit is connected to a 3D compatible TV. Before connection, turn off all equipment and read the appropriate operating instructions. When outputting 1080p or 24p signal, please use HDMI cables 5.0 meters or less.It is recommended that you use Panasonic’s HDMI cable.Basic connectionsTo the aerialCooling fanAerial cable ۂ This unit’s rear panelRF coaxial cable(supplied)AC mains lead(supplied) Connect only after all otherconnections are complete.HDMI cable(supplied)VHF/UHFRF INHDMITV’s rear panelHousehold mains socket(AC 220 to 240 V, 50 Hz) This unit cannot connect the TV that does not have the HDMI terminal.Keep the RF coaxial cables as far away as possible from other cables.The HDMI connection supports VIERA Link ( 74).You cannot connect this unit to DVI devices that are incompatible with HDCP.Depending on the device, images may not display properly or at all when connecting with a DVI/HDMI switching cable. (Audiocannot be output.) If you are connecting to a TV that is only compatible with 2 channel audio output, audio with 3 channels or more will be downmixed and output as 2 channels, even if connecting with an HDMI cable.SQT081613
DMRHWT250GL eng.book 14 �4時34分Getting startedConnectionTo connect and register the USB HDD(optional)Refer to “Registering the external HDD(USB HDD)”. ( 58)About HDMI cableIf you use an optional HDMI cable, use the HighSpeed HDMI cables. Non-HDMI-compliant cablescannot be utilized.It is recommended that you use Panasonic’sHDMI cable.When outputting 1080p signal or 24p signal,please use HDMI Cables 5.0 meters or less.When the unit is not to be used for a longtimeTo save power, unplug it from the householdmains socket. This unit consumes a smallamount of power, even when the unit is instandby mode.[approx. 0.2 W (“Quick Start” is not activatedand “RF OUT ( Aerial Signal )” is set to “Off”)]Amplifier/receiver connectionsHDMI terminal You will not be able to view 3D programmes withthis connection if your amplifier/receiver is not3D HDMI cable(supplied) ۂ VIERA Link function is possible by connecting to a TV oramplifier/receiver compatible with VIERA Link. When using a TV or an amplifier/receiver that does notdisplay “ARC” on the HDMI terminal, it is necessary toconnect the TV and the amplifier/receiver with a digitalaudio cable to enjoy the TV audio on the amplifier/receiver.DIGITAL AUDIO OUT terminalCOAXIAL INAmplifier/receiverCoaxial cable ۂ When you do not want the audio to be output from the TV,set “HDMI Audio Output” to “Off” ( 62, 69).14SQT0816
DMRHWT250GL eng.book 15 �4時34分Getting startedNetwork connectionWireless LAN connectionWhen this unit is connected to the network, youcan enjoy network functions (DLNA function,Network Service, TV Anytime, etc.).For details about connection method, refer to theinstructions supplied with the connectedequipment.After you make the Wireless LAN/LAN cableconnection, the network setting is needed.( 18, Easy Network Setting) Precautions of Wireless LAN connectionThe following limits are in place regarding theusage of this unit. You must be aware of theselimits before using this unit.Panasonic will in no way be responsible for anyincidental damage which may arise due to afailure to obey these limits, or to any condition ofuse or disuse of this unit. Data transmitted and received over radiowaves may be intercepted and monitored. This unit contains delicate electroniccomponents.Please use this unit in the manner in which itwas intended and follow the following points:- Do not expose this unit to high temperaturesor direct sunlight.- Do not bend, or subject this unit to strongimpacts.- Keep this unit away from moisture.- Do not disassemble or alter this unit in anyway.InternetWireless router, etc. For up-to-date compatibility information on your Wirelessrouter, refer tohttp://panasonic.jp/support/global/cs/(This site is in English only.) The unit is not compatible with public wireless LANservices.LAN cable connectionInternetBroadband router, etc.LAN (ethernet)cable ۂ Use category 5 or above straight LAN cables (STP) whenconnecting to peripheral devices. Inserting any cable other than a LAN cable in the LANterminal can damage the unit.SQT081615
DMRHWT250GL eng.book 16 �4時34分Getting startedSettingsTV operation buttonsThe TV can be operated from the TV operationbuttons of the remote control. Perform the setting if you cannot operate the TVwith the TV operation buttons.While pressing [TV Í], enter the code withthe number buttons.TV VOLDRIVE INPUTSELECT AVCHPAGE21abc3def4ghi 5jkl 6mnopw8 tuv 9xyz7qrs0CHINTERNETRADIO/TVSLOW/SEARCHLAST VIEWSKIPREWIND LIVE TVPAUSESTOPSTATUSPLAY/x1.3PAUSE LIVE TVEXITGUIDEMECTION NUFUNOKOPTIONRTV operation buttons( right)RETURNGYREC REC MODE TEXTBSTTLPROG/CHECK CHAPTER TIME SLIP AUDIODISPLAY DELETEMANUAL SKIP-10s 60sTo exit the screenSelect and enter buttonsFUNCTION MENU ( 20)To return to the previousscreenManufacturer and Code AR24YAMAHA18/41 If your TV brand has more than one code listed, select theone that allows correct operation. If the brand of your TV is not listed or the code number isinvalid for your TV, this remote control is not compatiblewith your TV.16SQT0816
DMRHWT250GL eng.book 17 �4時34分Getting startedEasy Setting123To stop partwayTurn on the TV, then select the appropriateAV input to suit the connections to this unit.Press [Í] on the remote control or [Í/I] onthis unit. The Easy Setting will start at the initial power on.Follow the on-screen instructions andperform the settings. When the Download from TV screen appears, thesetting information on the TV is acquired by this unit.( 74)Auto Setup starts.(This operation may take some time.)Press [RETURN].To restart setup1 Press [FUNCTION MENU]. ( 16)2 Select “Basic Settings” in “Setup”, then press[OK].3 Select “Auto Setup” in “Digital TV Tuning”,then press [OK].4 Select “Yes”, then press [OK]. If tuning is cancelled partway through, it may not bepossible to receive the channels. Restart setup again.e.g.,Digital TV Auto TuningProgressCH 6This will take about 3 minutes.Channel NameRF Ch353569TypeDigital TVD
pay TV or encrypted channels. HDD Recorder Model No. DMR-HWT250 Software (Firmware) Update Broadcast services continue to add new features. As they evolve, firmware updates may be required to support the latest features. Panasonic strives to continually update firmware as new technology is released. It's very important
