Transcription
MailEnable Installation GuideMailEnable Messaging Servicesfor Windows Server 2008/2012/2016/2019Installation Guide for:MailEnable Standard EditionMailEnable Professional EditionMailEnable Enterprise EditionMailEnable Enterprise Premium EditionMailEnable Pty. Ltd.59 Murrumbeena RoadMurrumbeenaVIC 3163Australiat: 61 3 9563 4177https://www.mailenable.com/Date last modified 2/5/2020 4:27:00 PMMailEnable Installation Guide - Page 1 of 32
Table of Contents1Before You Install . 31.11.21.31.42MailEnable System Requirements . 3Conflicting Applications or Services . 3Configuring TCP/IP and DNS Settings . 4Downloading the Installation Program . 4Running the Installation Program . 52.12.22.3Installing Standard Edition. 5Installing Professional Edition . 14Installing Enterprise and Enterprise Premium Editions . 24MailEnable Installation Guide - Page 2 of 32
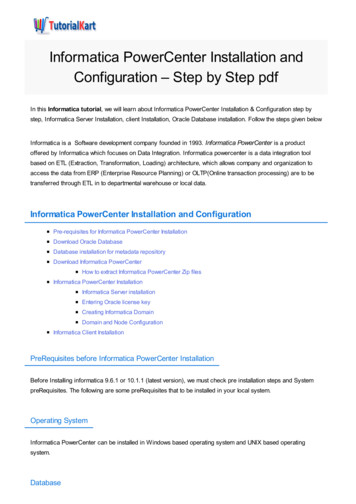
1Before You InstallThis section outlines any preparation you should consider before installing MailEnable.1.1MailEnable System Requirements1.1.1Operating System Windows 2008/2012/2016/2019 (either 32-bit or 64-bit versions)Note: While the MailEnable product suite can be installed and has been tested on Windows workstationenvironments the company does not support these platforms.1.1.21.2Platform Requirements 4GB RAM, minimum 100MB hard disk space Microsoft IIS v7.0 or greater for webmail, web administration, CalDAV, CardDAV, ActiveSync .NET framework 3.5 or later Dedicated Internet connection recommendedConflicting Applications or ServicesMailEnable has integrated SMTP and POP services. For this reason, you should ensure that the computer is not alreadyrunning POP or SMTP services. The installation program will complete, even if there are conflicting services orapplications installed, but ideally, you should check the service control manager to ensure that they are not running orhave not been configured to start automatically.SMTP and POP services use TCP/IP ports 25 and 110 respectively. You can determine if a service or agent is usingthese ports by using the NETSTAT utility at the command prompt. For help using the NETSTAT application pleaserefer to the Microsoft Web Site.MailEnable Installation Guide - Page 3 of 32
1.3Configuring TCP/IP and DNS SettingsMailEnable use the servers configured IP address for resolving domains for outbound mail. It is important that theserver can resolve host names to IP addresses.As a test, you should attempt to ping the following address:www.mailenable.comIf the address cannot be resolved, you will need to adjust your networking settings and ensure that your DNS settingsare configured correctly. If you are using the Google Public DNS service (8.8.8.8) for your server then be aware thatreverse DNS blacklisting may not function correctly, due to lookup limitations by Google.1.4Downloading the Installation ProgramThe MailEnable Installation Program is approximately 100 MB in size depending on the version. It can be downloadedfrom: https://www.mailenable.comMailEnable Installation Guide - Page 4 of 32
Standard Edition2Running the Installation Program2.1Installing Standard Edition2.1.1Installation OverviewNote: In order to install MailEnable Standard, you require administrative privileges of the server MailEnable isinstalling upon.Run the installation executable by double clicking on the install program. The installation program will then guide youthrough the rest of the installation process. Each screen of the installation program is likely to contain data entry fields,Next, Back and Cancel control buttons.The [Next] button allows you to proceed to the next step of the installation process.To exit the installation at any time, you can click on the [Cancel] button.Likewise, the [Back] button allows you to step back through the installation process. At any time the [Cancel] buttonis pressed you will be shown an exit screen as shown below verifying that you do in fact want to exit the installer.2.1.2Installation noteOnce you commence installation the following note will appear. This is just to inform you that MailEnable will try toaccess the internet once installation is completed. Read the note and click [OK] to continue.2.1.3Welcome ScreenThe welcome screen informs that you are installing MailEnable Messaging Services. It also provides a warningoutlining the copyright protection of the MailEnable product suite.If you wish to continue installing the application, click on the Next button.MailEnable Installation Guide - Page 5 of 32
Standard EditionPlease click the [Next] button to continue.2.1.4Registration DetailsThe following dialog box may appear to inform you that a previous version of MailEnable has been installed (and whoit was installed by).Please click the [Next] button to continue.MailEnable Installation Guide - Page 6 of 32
Standard Edition2.1.5Terms and ConditionsThe ‘Terms and Conditions’ dialog box explains the licensing terms and conditions of installing and using theMailEnable product suite.You should read this carefully as it outlines all conceptual and legal issues relating between the agreement betweenMailEnable and the End User in relation to the way the program can be used.Please click the [Next] button to continue.2.1.6Select ComponentsThe installation program will always install the core mail services, such as SMTP, POP and IMAP. For the web mailclient, the web administration and migration services, these are optional. If you are not needing to use these services,unselect the options. You can add them later if needed by reinstalling the software over the top of an existinginstallation.MailEnable Installation Guide - Page 7 of 32
Standard Edition2.1.7Choose Program Installation LocationSetup will now prompt you to nominate where it will install its program files. By default, MailEnable will install itselfunder the “Program Files” directory. You can change to a different directory by clicking on the Browse button.Please click the [Next] button to continue.2.1.8Selecting Program GroupThe installation wizard will now prompt you for the program group where you want the MailEnable icons and shortcutsinstalled.Please click the [Next] button to continue.2.1.9Selecting Configuration RepositorySetup will now prompt you to nominate where to install its configuration data. By default, MailEnable will install itselfunder the “Program Files” directory. You can change to a different directory by clicking on the Browse button. Theconfiguration data is where the domain, user options, and other configuration settings are stored.MailEnable Installation Guide - Page 8 of 32
Standard EditionPlease click the [Next] button to continue.2.1.10Replace Configuration FilesIf you have installed MailEnable previously, or are upgrading the software, then the existing installation will bedetected. At this point you have the option to overwrite the configuration data, and backup the existing configurationdirectory. If you are upgrading, you should leave the settings as is.2.1.11Selecting data repositoryYou need to select a location to store the email data.MailEnable Installation Guide - Page 9 of 32
Standard Edition2.1.12Creating an Initial Post OfficeSetup will now prompt you to nominate at least one Post Office to deliver mail to and from. You will also need toprovide a password for the Postmaster mailbox for the post office.Please click the [Next] button to continue.2.1.13SMTP Connector ConfigurationThe installation will now prompt you to enter specific details for its SMTP Connector. The options can be changedunder the SMTP settings in the administration program.MailEnable Installation Guide - Page 10 of 32
Standard EditionThese settings are outlined in the following table:SettingDescriptionDomain NameThe domain name should be the domain name of the organization that owns or is operating theserver. If you are using this server on the Internet, it is important that this domain name isregistered.DNS HostThe DNS host used by the SMTP Connector to locate mail servers. If you wish to use multiple DNSaddresses, you can enter these here, and separate the IP addresses with a space. In most cases, youshould include the same DNS host(s) as configured under the network TCP/IP settings for thecomputer.SMTP PortThe SMTP port is almost always set to 25. Very rarely is another port number used and it isrecommended that this setting remain as 25.Please click the [Next] button to continue.2.1.14Commence InstallationThe installation program will prompt you a final time before it commences installing files and registering theapplication.MailEnable Installation Guide - Page 11 of 32
Standard EditionPlease click the [Next] button to continue.The installation will now install files and display a progress window whilst the components are installed andconfigured.2.1.15Select Webmail and web administration web rootDuring installation you have the option of creating a virtual directory under the default IIS site called “mewebmail” and“meadmin”. This can be used to access webmail and the web administration sites. If you prefer to just use a domainname to access these sites, unselect the option and after installation add a host name to the web mail site.MailEnable Installation Guide - Page 12 of 32
Standard Edition2.1.16Completing InstallationFinally, setup will inform you the installation procedure completed successfully.Now that MailEnable is installed on the server, you are able to use the Administration program to manage it. You willfind the icon for MailEnable Administration under the Program Group you nominated in the setup program.Please click the [Finish] button to complete installation of MailEnableYou may need to reboot the server to replace files in use. Please click the OK button to automatically reboot.MailEnable Installation Guide - Page 13 of 32
Professional Edition2.2Installing Professional Edition2.2.1Installation OverviewNote: In order to install MailEnable Professional, you require administrative privileges of the server MailEnable isinstalling upon.Run the installation executable by double clicking on the install program. The installation program will then guide youthrough the rest of the installation process. Each screen of the installation program is likely to contain data entry fields,Next, Back and Cancel control buttons.The [Next] button allows you to proceed to the next step of the installation process.To exit the installation at any time, you can click on the [Cancel] button.Likewise, the [Back] button allows you to step back through the installation process. At any time the [Cancel] buttonis pressed you will be shown an exit screen as shown below verifying that you do in fact want to exit the installer.2.2.2Welcome ScreenThe welcome screen informs that you are installing MailEnable Messaging Services. It also provides a warningoutlining the copyright protection of the MailEnable product suite.If you wish to continue installing the application, click on the Next button.Please click the [Next] button to continue.MailEnable Installation Guide - Page 14 of 32
Professional Edition2.2.3Terms and ConditionsThe ‘Terms and Conditions’ dialog box explains the licensing terms and conditions of installing and using theMailEnable product suite.You should read this carefully as it outlines all conceptual and legal issues relating between the agreement betweenMailEnable and the End User in relation to the way the program can be used.Please click the [Yes] button to continue.2.2.4Upgrade Existing InstallationThe following dialog box may appear to inform you that a previous version of MailEnable has been installed. If you arereinstalling the same version you can select the repair option, otherwise leave the update web applications optionenabled.Please click the [Next] button to continue.MailEnable Installation Guide - Page 15 of 32
Professional Edition2.2.5Registration DetailsThe following dialog box may appear to inform you that a previous version of MailEnable has been installed (and whoit was installed by).2.2.6Selecting Installation ComponentsThe next part of the installation process is to select the MailEnable components you want to install.Web Mail Service (Server) – This will install web mail for MailEnable. This option requires that you have MicrosoftInternet Information Services (IIS) installed.Web Administration Service (Server) – This service will install web administration for MailEnable. This option requiresthat you have Microsoft Internet Information Services (IIS) installed.Migration Utilities – This will install migration utilities to migration from another mail server.ClamAV Integrated Virus Scanning – This will install a virus checker to allow you to scan emails passing through theserver.Please click the [Next] button to continue.MailEnable Installation Guide - Page 16 of 32
Professional Edition2.2.7Replace Configuration Files (when upgrading)If you have installed MailEnable previously, or are upgrading the software, then the existing installation will bedetected. At this point you have the option to overwrite the configuration data, and backup the existing configurationdirectory. If you are upgrading, you should leave the settings as is.2.2.8Choose Program Installation LocationSetup will now prompt you to nominate where it will install its program files. By default, MailEnable will install itselfunder the “Program Files” directory. You can change to a different directory by clicking on the Browse button.2.2.9Selecting Program GroupThe installation wizard will now prompt you for the program group where you want the MailEnable icons and shortcutsinstalled.MailEnable Installation Guide - Page 17 of 32
Professional EditionPlease click the [Next] button to continue.2.2.10Selecting RepositorySetup will now prompt you to nominate where to install its configuration data. By default, MailEnable will install itselfunder the “Program Files” directory. You can change to a different directory by clicking on the Browse button. Theconfiguration data is where the domain, user options, and other configuration settings are stored.Please click the [Next] button to continue.2.2.11Selecting data repositoryYou need to select a location to store the email data.MailEnable Installation Guide - Page 18 of 32
Professional Edition2.2.12Creating an Initial Post OfficeMailEnable requires that at least one post office is created. A MailEnable post office should be created for eachcompany or organisation that is hosted under MailEnable. A MailEnable post office can own multiple domain names, itis therefore advised that post offices are named to be something more generic than the domain name. For example,MailEnable Pty Ltd owns domains mailenable.com, mailenable.com.au and mailenable.co.uk so the chosen name forthe post office for MailEnable Pty. Ltd. could therefore be MailEnable. The domains owned by MailEnable Pty. Ltd.would then be assigned to the MailEnable post office. On this subject, another common configuration for this section isto name the post office the actual domain name. This simplifies mailbox logon, as users are often aware of the domainthey log into.As depicted below you need to assign a password for the post office Administrator. The mailbox for the administratorof a post office is postmaster@Postoffice name. You can use this account to access Web Administration. It is importantthat you realize that users will authenticate as Mailbox@Postoffice name when they access their mail.MailEnable Installation Guide - Page 19 of 32
Professional EditionPlease click the [Next] button to continue.2.2.13SMTP Connector ConfigurationThe installation will now prompt you to enter specific details for its SMTP Connector.These settings are outlined in the following table:SettingDescriptionDomain NameThe domain name should be the domain name of the organization that owns or is operating theserver. If you are using this server on the Internet, it is important that this domain name isregistered.DNS HostThe DNS host used by the SMTP Connector to locate mail servers. If you wish to use multiple DNSaddresses, you can enter these here, and separate the IP addresses with a space. In most cases, youshould include the same DNS host(s) as configured under the network TCP/IP settings for thecomputer.MailEnable Installation Guide - Page 20 of 32
Professional EditionSMTP PortThe SMTP port is almost always set to 25. Very rarely is another port number used and it isrecommended that this setting remain as 25.Please click the [Next] button to continue.2.2.14Commence InstallationThe installation program will prompt you a final time before it commences installing files and registering theapplication.Please click the [Next] button to continue.The installation will now install files and display a progress window whilst the components are installed andconfigured.2.2.15Select Web Mail Web SiteDuring installation you have the option of creating a virtual directory under the default IIS site called “mewebmail” and“meadmin”. This can be used to access webmail and the web administration sites. If you prefer to just use a domainname to access these sites, unselect the option and after installation add a host name to the web mail site.MailEnable Installation Guide - Page 21 of 32
Professional EditionPlease select the desired web site and click the button for a Default Web Site for MailEnable web mail to be configured.Please click the [Next] button to continue.The installation application will now display a dialog box while it configures web mail. The configuration of web mailmay take several minutes, so please be patient.2.2.16Web AdministrationWeb Administration is installed if you have selected Web Administration as an option from the component list asdepicted earlier. If you have more than one web site configured under IIS, the setup application will ask you underwhich web site you want to install the Webadmin Virtual Directory. You should install the web administration under the“Default Web Site” or an alternate site that you have configured under IIS.Note: This functionality can be re-configured to another web site if required after the initial installation has beencompleted.Please click the [Next] button to continue.MailEnable Installation Guide - Page 22 of 32
Professional Edition2.2.17Completing InstallationFinally, setup will inform you the installation procedure completed successfully.Please click the [Finish] button to complete installation of MailEnableMailEnable Installation Guide - Page 23 of 32
Enterprise Edition2.3Installing Enterprise and Enterprise Premium Editions2.3.1Installation OverviewNote: In order to install MailEnable Enterprise, you will require administrative privileges on the serverMailEnable is to be installed on.Firstly, run the installation executable by double clicking on the install program. The installation program will thenguide you through the rest of the installation process. Each screen of the installation program is likely to contain dataentry fields, Next, Back and Cancel control buttons.The Next button allows you to proceed to the next step of the installation process.To exit the installation at any time, you can click on the Cancel button.Likewise, the Back button allows you to step back through the installation process. At any time the Cancel button ispressed you will be see an exit screen as shown below verifying that you do want to exit the installer.2.3.2Welcome ScreenThe welcome screen informs that you are installing MailEnable Messaging Services. It also provides a warningoutlining the copyright protection of the MailEnable product suite.If you wish to continue installing the application, click on the Next button.Please click the Next button to continue.2.3.3Terms and ConditionsThe ‘Terms and Conditions’ dialog box explains the licensing terms and conditions of installing and using theMailEnable product suite.MailEnable Installation Guide - Page 24 of 32
Enterprise EditionYou should read this carefully as it outlines all conceptual and legal issues between MailEnable and the End User inrelation to the way the program can be used.Please click the Yes button to continue.2.3.4Registration DetailsThe following screen allows you to enter your registration details, which will be used and displayed in the DiagnosticUtility that will be outlined later in this document.Please click the Next button to continue.2.3.5Selecting Installation ComponentsThe next part of the installation process is to select the MailEnable components you want to install.MailEnable Installation Guide - Page 25 of 32
Enterprise EditionWeb Mail Service (Server) – This will install web mail for MailEnable. This option requires that you have MicrosoftInternet Information Services (IIS) installed.Web Administration Service (Server) – This service will install web administration for MailEnable. This optionrequires that you have Microsoft Internet Information Services (IIS) installed.Migration Utilities – This will install migration utilities to migration from another mail server.SMS Connector – This will install the SMS service which allows the mail server to email to SMS recipient.ClamAV Integrated Virus Scanning – This will install a virus checker to allow you to scan emails passing through theserver.Please click the Next button to continue.2.3.6Selecting RepositoryMailEnable uses a file system as a repository; this effectively allows front-end servers to reference a common repository(hence promoting scalability). MailEnable Enterprise Edition needs you to confirm the location of this directory so thatits various services can access the repository. MailEnable will detect the repository location if you are using the localrepository. You can also nominate a repository on a backend server by pointing at the directory on this server thatcontains the \CONFIG, \POSTOFFICES or \QUEUES directories.MailEnable Installation Guide - Page 26 of 32
Enterprise EditionPlease click the Next button to continue.2.3.7Selecting Program GroupThe installation wizard will now prompt you for the program group in your Windows system where you want theMailEnable icons and shortcuts installed.Please click the Next button to continue.2.3.8Selecting Configuration Repository LocationThe Configuration Repository is a place to store the configuration files of MailEnable. By default MailEnable uses aTAB Delimited file structure (flat file structure), and since the configuration files are accessed continually you mayconsider using a fast disk I/O sub system for this storage path to improve performance.MailEnable Installation Guide - Page 27 of 32
Enterprise EditionPlease click the Next button to continue.2.3.9Creating an Initial Post OfficeWhen you install MailEnable for the first time you are required to create a post office. A MailEnable post office shouldbe created for each company or organization that is hosted under MailEnable. A MailEnable post office can ownmultiple domain names. It is therefore advised that post offices are named to be something more generic than thedomain name. For example, MailEnable Pty. Ltd. owns domains mailenable.com, mailenable.com.au andmailenable.co.uk so the chosen name for the post office for MailEnable Pty. Ltd. could therefore be MailEnable. Thedomains owned by MailEnable Pty. Ltd. would then be assigned to the MailEnable post office. Another commonconfiguration is to name the post office the actual domain name as this simplifies mailbox log-on as users are oftenaware of the domain they log into.As depicted below, you need to assign a password for the postmaster of this new post office. The mailbox for thepostmaster of a post office is called postmaster and is given administrative privileges for that post office (this allows thepostmaster to administer the post office via web administration). It is advisable to use a complex password for thismailbox, and this password can be changed later. It is important that you realize that users will authenticate asMailbox@Postoffice name when they access their mail.Please click the Next button to continue.MailEnable Installation Guide - Page 28 of 32
Enterprise Edition2.3.10Selecting Message Store Repository LocationThe message store repository is where all the email data is stored. E-mail data can take up a large amount of disk space.Ensure that you select a drive with plenty of space for future expansion. As advised with the configuration data storagelocation a fast disk I/O sub system should be considered if planning on a high mail usage environment.Please click the Next button to continue.2.3.11SMTP Connector ConfigurationThe installation will now prompt you to enter specific details for the SMTP Connector.These settings are outlined in the following table (all these settings can be changed later):SettingExplanationMailEnable Installation Guide - Page 29 of 32
Enterprise EditionDomain NameThe first configuration setting is the Domain Name for this server. The domain name should be thedomain name of the organization that owns or is operating the server. If you are using this server onthe Internet, it is important that this domain name is registered. When MailEnable is sending outemail to remote servers, it will announce itself as this domain.DNS HostThe DNS host used by the SMTP Connector to locate mail servers. If you wish to use multiple DNSaddresses, you can enter these here, and separate the IP addresses with a space. In most cases, youshould include the same DNS host(s) as configured under the network TCP/IP settings for thecomputer.SMTP PortThe SMTP port is almost always set to 25. Very rarely is another port number used and it isrecommended that this setting remain as 25.Please click the Next button to continue.2.3.12Commence InstallationThe installation program will prompt you a final time before it commences installing files and registering theapplication.Please click the Next button to continue.The installation will now install files and display a progress window whilst the components are installed andconfigured.2.3.13Selecting Web Mail Web SiteIf you have more than one web site configured under IIS, the setup application will ask you which web site you want toinstall the web mail Virtual Directory. You should install MailEnable under the “Default Web Site” or an alternate sitethat you may have configured under IIS. Once you have completed your installation of MailEnable Enterprise you willbe able to add or remove web mail from each of the sites you have configured under IIS.Note: Do not install MailEnable web mail under the “Administration Web Site”MailEnable Installation Guide - Page 30 of 32
Enterprise EditionPlease click the Next button to continue.The installation application will now display a dialog box while it configures web mail. The configuration of web mailmay take several minutes, so please be patient.2.3.14Web AdministrationWeb administration is installed if you have selected web administration as an option from the component list asdepicted earlier. If you have more than one web site configured under IIS, the setup application will ask you underwhich web site you want to install the WebAdmin Virtual Directory. You should install the web administration underthe “Default Web Site” or an alternate site that you have configured under IIS.Note: This functionality can be re-configured to another web site if required after the initial installation has beencompleted.Please click the Next button to continue.2.3.15Completing InstallationFinally, set-up will inform you the installation procedure completed successfully.MailEnable Installation Guide - Page 31 of 32
Enterprise EditionPlease click the Finish button to complete installation of MailEnable.MailEnable Installation Guide - Page 32 of 32
DNS Host The DNS host used by the SMTP Connector to locate mail servers. If you wish to use multiple DNS addresses, you can enter these here, and separate the IP addresses with a space. In most cases, you should include the same DNS host(s) as configured under the network TCP/IP settings for the computer.


