Transcription
WebNowGraduate Program Directors(AKA: Program Coordinators)&Committee MembersQuick Reference GuideSupport ContactsDaniel Bedard, PMPProject ManagerAdministrative Systems Integration ( ASI)Olsen 100Barbara DoughertyGA ImageNow SpecialistGraduate AdmissionsDugan Hall 110P: (978) 934-2718 (North) 4227 (South)Daniel Bedard@UML.eduP (987) 934 4227 (South)Barbara Dougherty@UML.eduVersion 6.0Page 1
OverviewImageNow is a document Imaging application being implemented at UMass Lowell in partnership withthe UMass Presidents Office, UMass Boston and UMass Dartmouth. In addition to the many time savingand cost benefits resulting from a mechanized document imaging process, this new approach to thehandling of student information will help us to become more compliant with laws governing thesafeguarding of sensitive information Within Graduate Admissions, ImageNow will be used for thepurposes of scanning and processing student applications and related documents. Graduate ProgramCoordinators (known within ImageNow context as Graduate Program Directors (GPD)) will be using theweb version of ImageNow (called WebNow) to review, annotate and approve/ deny studentapplications.Graduate Program Directors (GPDs), will have access to documents as they are entered into the systemand cleared through the Graduate Admissions process. As documents are received by the GraduateAdmissions Office, they will be scanned and stored in a central repository. The applications themselvesare stored in one of two queues (directories) that correspond to each of the Plan/SubPlans to which thestudent has applied.UMLGA Applied & Processing Directories: Directories appended with “UMLGA Applied &Processing” are used to store incomplete applications packets until such time as all of therequired documents are received. Incomplete applications are accessible in this queue for thepurposes of allowing GPDs to pursue the applicant based on the documentation on hand. Insuch cases, GPDs must contact the Graduate Admissions office and request that the incompleteapplication packet be moved to the “Ready for Review” queue for immediate processing. In thetypical sequence of events, applications will be moved out of the “Applied & Processing” queueand into the “Ready for Review” queue once all necessary documents are received and a ProfileSheet is created.UMLGA Ready for Review Directories: Once all of the documents required to complete anApplication are received and a Profile Sheet generated, the Application will be moved to the“UMLGA Ready for Review” queue. It is from this queue that GPDs will approve/denyapplications and return them to the Graduate Admissions office for final processing.Example: The documents of a student applying to the Masters of BusinessAdministration plan with a concentration in Accounting would be stored in a queue(directory) named “BusAd MBA-Accounting (UMLGA Applied and Processing) until theprofile Sheet is created at which time they would be moved to a queue named “BusAdMBA-Accounting (UMLGA Ready for Review).Version 6.0Page 2
Graduate Program Director (GPD) Process SummaryThe process which GPDs will follow to review and decide graduate student application consists of thefollowing steps.Log Review /AnnoteDocumentsRouteApplication Backto GraduateAdmissionsCtrl Click the heading to navigate to each section for greater detail and instruction.Log into Web Now: Log into WebNow by entering the URL: https://di-prd.umasscs.net/webnow/ intoyour web browser and clicking Enter.Select Plan / Sub-plan: Double click the Plan / Sub-plan (e.g. “Business Administration (MBA) /Accounting”) to display the list of applicants for that particular program.Select Application: Select an application by double-clicking on the Application. The Application willopen in the WebNow Viewer.Review / Annotate Document: As part of each application, there are several accompanying documentssuch as Transcripts, Letters of Reference, etc. These documents are linked to the application as “RelatedDocuments”. Open any of these related documents by double-clicking the document. The documentwill appear in a new WebNow Viewer window. (Note: see section 6.4 for configuring your system todisplay Related Documents)Route Application back to Graduate Admissions: Once you (GPD) have signed the Profile Sheetindicating Accept or Deny, etc, route the Application back to Graduate Admissions by clicking the “RouteForward”Version 6.0button at the bottom of the WebNow Viewer screen.Page 3
1. Logging in to Web NowAccess to WebNow is gained through the University’s Information technology web page.1.1 Enter the following URL into your web browser.http://www.uml.edu/it/DI/default.aspxThe following screen will appearNote: The Document Imaging Blog will display information relating to the WebNowapplication. It is here that Application outages due to upgrades, maintenance, etc. willbe posted.1.2 Click the WebNow Login button to access the WebNow application.The following screen will appear.1.3: Enter your User Name and Password:User Names and Passwords have been set to be the same as your UML EmailVersion 6.0Page 4
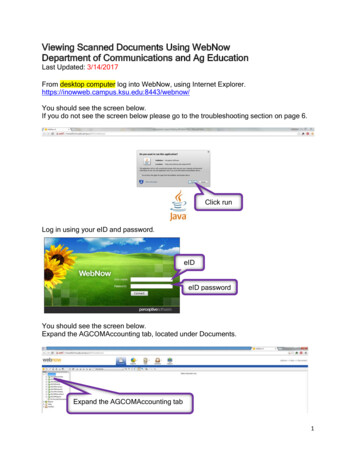
2. Home page of WebNowThe WebNow Homepage provides you with two options; “Documents” and “Workflow”.Documents: Used to view Applications that have been processed by the Coordinator androuted back to Graduate Admissions. They are no longer in the Workflow.Workflow: Used to locate documents that are still in the workflow meaning that theycurrently reside in an “Applied and Processing” or “Ready for Review” queue.3. Selecting the Workflow Plan/Sub-Plan DirectoryTo view applications for a particular Plan/Sub-plan, you must first select the Plan/Sub-Plan3.1: Select the Plan whose applications you wish to review by double clicking on the Plan/SubPlan name listed beneath the Workflow heading.Remember: The applications contained in the “Applied and Processing” queues are incompleteapplications while those in the “Ready for Review” queues are complete.Version 6.0Page 5
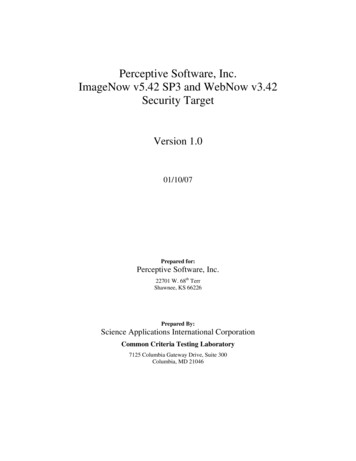
4. Selecting Applications in the WorkflowOnce you select a Plan/Sub-Plan directory, any applications for that Plan/Sub-Plan will appearin the panel on the right side of the screen.Each row representsan application to thatPlan/Sub-PlanNote: If there are no applicants for a Plan/Sub-Plan, the right panel will remain unpopulatedand will display the message “No Items Found”.4.1: Double click on the row representing the Application you wish to view.Version 6.0Page 6
5. ImageNow ViewerOnce you have selected the Application to be processed, it will appear in the ImageNowViewer where you can review it and add annotations as needed.5.1 Setting View DefaultsWebNow allows you to personalize the default viewing settings to suit your preferences.To do this, open the viewer (as per above) and select File Options and the followingscreen will appear.Version 6.0Page 7
Viewer OptionsGeneral TabImages SectionSmoothDefault SizeEnabled: (Suggested) Smoothes out the edges of the textcharacters within a document.Disabled: Presents the text as is when the document isdisplayed.Fit Window: Scales the view such that the entire document(width and height) fits within the Viewer pane.Fit Width: (Suggested) Scales the document such that width ofthe document fits within the Viewer window. This setting willrequire scrolling up and down to view the entire document.Fit Height: Scales the document such that Height of thedocument fits within the Viewer window. This setting willrequire scrolling right and left to view the entire document.Pages SectionAutomatically TitleThis feature has been disabledLaunching SectionPage to Display when launchingLaunch New Viewer when Opening adocument from:First: Opens a document to the first page when viewing.Last: Opens to the Last page for the document when viewingChecking the boxes beside each option will result in documentsopened from that source being opened in a new window ratherthan replacing the document displayed in the current window.Text File SectionFont TypeFont Size:Page Fetching TabVersion Control TabIf a document is checked out when aviewer closes:This option has been disabled as the images being viewed arescanned and therefore have a set font.This option has been disabled as the images being viewed arescanned and therefore have a set size.These options are disabled.Prompt: displays a message indicating that the document iscurrently checked out asking if the viewer would like to savechanges.Check In: checks the document being closed back into thesystem storing any changes to be added to the changes beingmade by the other viewer.Leave Checked out: Leaves the document checked out to beclosed once the first viewer has closed his copy.Note: When closing the Viewer Options Window, you will be prompted that any changes willonly take effect once the Viewer is re-opened.Version 6.0Page 8
6. Reviewing & Annotating Related Workflow Documents6.1: Press View Related Documents on the toolbar to access the documents associatedwith that Application displayed.A new window will appear on the lower half of the screen listing the related documents.6.2: Click thearrow key on the Relationship bar and double click on the “GraduateAdmissions Documentation UML” option. . The related documents will appear in the lowerpane. Double click the document you wish to view and it will open in a new window.List of RelatedDocuments for thatstudentNote: Depending on your PC settings you may need to manually expand the Related Documentswindow. To do so, use your mouse and hover over the separation between the upper and lowerwindows until a double arrow appears. Once it does, press and hold the left mouse buttonand drag the separator upward.Version 6.0Page 9
Note: If more than one person attempts to open the same Application (or a related Document –See below), an error message will appear indicating that the file is already open and offering aPreview Mode. Simply select Yes and review/Annotate as desired. When the 2 copies of thedocument are saved, the annotations will all be saved. A third viewer will thus see both sets ofannotations when viewing the document.6.3: Setting the “Fit Width” and “Relationship” Options:In order that documents opened are diplayedin the full width of the screen and that the documents relating to the selected Application appearwithout having to manually size or refresh the Relationshipbar setting on each Application;6.3.1 Open the Viewer by double clicking on any document6.3.2 Click on File Options to display the View Options window.6.3.3 Set the Default size to the “Fit Width” option.6.3.4: Check the “Run last viewed relationship” checkbox under the Launching section of thiswindow.Each time a new application is displayed, the related documents window will refresh to display thedocuments associated with that applicationVersion 6.0Page 10
7. Adding AnnotationsImageNow allows you to add annotations in a variety of forms. Remember that onceannotations are made and saved, they are viewable by other committee memebers reviewingthe documents as well as being permantly stored as part of that document.The ToolBar below lists the availabe Annotation Tools. Those that are Grayed out are toolsthat have been disabled according to University Policy.IconFunctionSave:Print:Properties:Zoom In & Out:Rotate Right & Left:Fit Width & Height:Fit Window:Show/HideNavigate Page:Digital Signature:Version 6.0DescriptionClick this to save any annotations you have made to a document. Failure tosave before closing a document will result in annotations being lost.Click this to print the displayed document to your local printer. In order tosafeguard applicant privacy, please be certain to properly dispose of all printeddocuments after review.Click this to view the document’s origin, creation date and other information.Click this to enlarge or decrease the view of the displayed document. EachClick will result in an increased/decreased view.Click these to rotate the document view 90 in a clockwise or counterclockwisedirection. As a rule, the Graduate Admissions team will properly orientdocuments during their QA process.Use these to adjust the width or height of the displayed document equal tothat of the window width or height.Click this to adjust the document size to that of the window in which it is beingdisplayed. In some instances documents may appear in a reduced size whenfirst opened.Annotations: Click this to display any annotations that have been made to thedocument being displayed. Click this again to hide these annotations.Click this to switch your cursor/pointer to a hand which can be used to grabthe sheet and move it up or down. In general this performs the same functionas the Up and Down arrows alongside the document window.Click this to apply your electronic signature to the document. There are 4options associated with a digital signature: Approved, Denied, No Decision atthis Time and Approved with Conditions. Once you click this button you mustthen click on the document in the location you want the signature to appear.Note that you will be required to enter a password each time you attempt toapply a signature. (See “Digital Signature – Creating a Password and ChangingDesignation” below for directions on how to create a Signature password & tochange the designation). Digital Signatures are available to GPDs(Coordinators) only.Page 11
IconFunctionStamp:Sticky Note:Text:Highlight:Check:Pen:Line:Arrow:Box & Circle:Version 6.0DescriptionClick this and then click on the document to apply a stamp to the document.Right click this button to view the various stamp options available to you.GPDs have access to apply the “Deferred Consideration”, “PreviouslyAccepted”, and “Waitlisted” stamps. Committee members have access toapply the reviewer “Approved” and Reviewer “Denied” stamps.Click this and then click on the document to apply an electronic sticky note. Atext window will appear allowing you to add notations. In cases whereprevious reviewers have added sticky note notations, you can add to the samesticky note by double clicking on the note located on the document and thesystem will keep a history of the different notations made.Click this and then click the document to add text comments directly to thedocument. Though a text window will appear allowing you to type notes, thenote will appear directly on the document when OK is clicked.Click this to change your cursor to a highlighter. Once the highlighter is visible,move it to the text you wish highlighted, press and hold the left mouse keyand drag the highlighter across the text to be highlighted. When you releasethe mouse button, your cursor will revert to a pointer and the highlight will bein place along with sizing tabs. Use your mouse pointer to grab the sizinghandle and drag it till the desired size is reached. Right clicking the Highlightbutton will display a list of available highlighting colors.Click this to change your cursor to a check mark, move the check mark to thelocation desired and press the left mouse button to apply the check. Thecheck will appear with sizing tabs. Right clicking the Check button displays alist of the check colors available.Click this to convert your cursor to a pen which will allow you to add free formannotations to the document. Move the pen to the area desired, hold downthe left mouse button and annotate as desired. Right clicking the Pen buttondisplays a list of the pen colors available.Pen: Click this to convert your cursor to a line which will allow you to drawstraight lines on the document. Move the line cursor to the area desired, holddown the left mouse button and annotate as desired. Right clicking the Linebutton displays a list of the line colors available.Click this to convert your cursor to an arrow which will allow you to drawstraight arrows on the document. Move the arrow cursor to the area desired,hold down the left mouse button and annotate as desired. Right clicking theArrow button displays a list of the arrow colors available.Click either of these to change your cursor to a box/circle which will allow youto draw boxes/circles around selected text. Move the box cursor to theanchor point desired, press and hold the left mouse button and drag thecursor to the desired end point. Release the mouse button and a box/circlewill appear. Right clicking the Box/Circle button to see the list of the boxcolors available.Page 12
Additional CommandsIn addition to the functions above which are located at the top of the editing screen, there is acommand toolbar located at the bottom of the editing screen. These commands are used tomove from one page to the next or from one document to the next. It is with this toolbar thatyou will route the Applications back to the graduate Admissions office.IconFunctionPrevious & Next Item:Previous & Next Page:First & last Page:Route Forward:Recall Last WorkflowItem:On Hold:View Workflow History:View Recently RoutedItems:Version 6.0DescriptionUse these commands to navigate away from theApplication currently being displayed to either theprevious or next application. When either of thesecommands is used, a prompt will appear asking whatshould be done with the Application currently beingdisplayed. You may place the application on hold orroute it back to the queue for future action. Cancel willremove the prompt cancelling the command.Use these commands to navigate between pages of theApplication currently being displayed. Documentscontaining only one page will result in these commandbuttons being grayed out.Use these commands to navigate to the first and lastpages of the currently displayed Application.Use this key to move the Application back to thegraduate Admissions office once you have reviewed thepertinent documents and digitally signed the ProfileSheet.Use this command to recall the last item processed.Use this command to flag the Application as On Hold.When clicked. A window will appear in which you cannote the reasons for placing the document on hold.This command will display a window detailing theactions that have been applied to that particularApplication. Through this history, you can see who haveviewed and processed the application to date.This command will display a window listing all of theitems that have been routed forward during this log-onsession.Page 13
8. Digital Signature – Creating Password and Changing Designation:The first time each user attempts to apply a digital signature, a Digital SignatureAuthentication window will appear. In order to digitally sign documents, each user must create andconfirm a password. ImageNow will allow you to add a password hint for use in the event that youforget your password as well as to add a prefix or suffix to your signature.Click here toaccess ReasonsoptionsEach time you apply a digital signature to a document, you can choose 3 “reasons” which willbe made part of your signature on that document. To access these options, simply click thedown arrow and select the option.Remember: Once you apply your signature, the document is locked from any additionaannotations. Remember to indicate all note and conditions before applying your signature.Version 6.0Page 14
9. Routing Application Back to Graduate Admissions OfficeOnce you have reviewed the necessary documents related to a particular Application and haveDigitally signed the Profile Sheet accordingly, you must forward the approved/deniedApplication back to the Graduate Admissions Office for final processing. To do this, simplyclick the Route Forward button at the bottom of the screen.Note: Upon forwarding the application back to the Graduate Admissions office, theapplication will be replaced with the next application waiting to be reviewed and the RelatedDocuments pane will refresh to display those document related to the new applicationdisplayed.Version 6.0Page 15
10.Viewing Documents No Longer in the WorkflowOnce Applications have been fully processed by the program Coordinator (AKA : GPD), androuted back to, and processed by Graduate Admissions, the documents exit the Workflow andare sent to a central Document Rapository. In order to view documents residing in theRepository, you must use the Document option found on the WebNow homepage.10.1 Searching for Applications when you know the Plan/Sub-PlanTo search for an application where the Plan/Sub-Plan is known, double-click the Plan/Subplanto which the applicant or student belongs and then use the Quick Search functionality foundon the first tab of the right-hand pane. There are three main fields used to search.:Search Criteria,OperatorValueSearch CriteriaSearch Criteria OptionsDrawerStudent IDStudent NameTermPlanDate ScannedDocument TypeCustom PropertyFull TextVersion 6.0DescriptionDefault: This virtual file drawer is where all Graduate Application documents are stored.This is the peiopleSoft student ID assigned when the studen applied.The convention for this name is Last,FirstAllows you to serach for applications by semester.Allows you to search for application documents by program attended.Graduate Admissions use only.Allows you to seach for documents by type (e.g. Letter of Reference, Transcript, etc.)Predominately used by Graduate AdmissionsSearch for specific document content. (e.g. document containing the text “management”)Page 16
Operators: These options are self explanitory and link the Criteria and the ValueValue: It is here you would enter the specific item on which you want to serach.(e.g. Student ID, Nme, etc.)10.2 Searching for Applications when you do NOT know the Plan/Sub-Plan10.2.110.2.2To search for an application where the Plan/Sub-Plan is unknown, use theSearch functionality on the second tab of the the right-hand pane.To begin a general search, click the Addbutton to display the “AddCondition” window. Enter the Field, Operator and Value criteria as describedin section 10.1. Click OK to begin the search.AddButtonAdd ConditionWindowVersion 6.0Page 17
WebNow . Graduate Program Directors (AKA: Program Coordinators) & Committee Members . Quick Reference Guide . Support Contacts Daniel Bedard, PMP . GA ImageNow Specialist . Graduate Admissions . Dugan Hall 110 . P (987) 934 4227 (South) Barbara_Dougherty@UML.edu . Version 6.0 Page 2 Overview ImageNow is a document Imaging application being .