Transcription
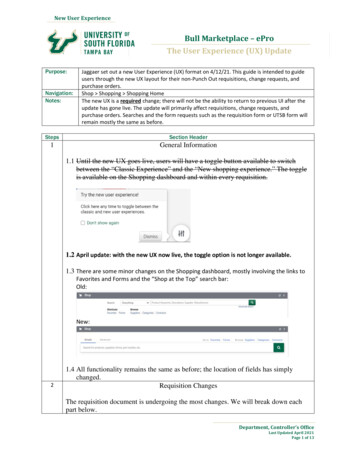
New User ExperienceBull Marketplace – eProThe User Experience (UX) UpdatePurpose:Navigation:Notes:Jaggaer set out a new User Experience (UX) format on 4/12/21. This guide is intended to guideusers through the new UX layout for their non-Punch Out requisitions, change requests, andpurchase orders.Shop Shopping Shopping HomeThe new UX is a required change; there will not be the ability to return to previous UI after theupdate has gone live. The update will primarily affect requisitions, change requests, andpurchase orders. Searches and the form requests such as the requisition form or UTSB form willremain mostly the same as before.StepsSection Header1General Information1.1 Until the new UX goes live, users will have a toggle button available to switchbetween the “Classic Experience” and the “New shopping experience.” The toggleis available on the Shopping dashboard and within every requisition.1.2 April update: with the new UX now live, the toggle option is not longer available.1.3 There are some minor changes on the Shopping dashboard, mostly involving the links toFavorites and Forms and the “Shop at the Top” search bar:Old:New:21.4 All functionality remains the same as before; the location of fields has simplychanged.Requisition ChangesThe requisition document is undergoing the most changes. We will break down eachpart below.Department, Controller’s OfficeLast Updated April 2021Page 1 of 13
New User ExperienceStepsSection Header2.1 In the Classic Experience UI, the requisition document looks like this:The sections of the requisition document are listed on the left-hand side in grey; clicking eachwill open the section on the right.2.2 The new shopping experience (UX) will look like this:Each of the sections previously in the grey bar on the left-hand side are now shown in onegeneral Summary screen on the left (you can scroll down to see more). On the right-hand side,the workflow status is shown by default, rather than needing to navigate to “PR Approvals”2.3 The “Document Actions” area on the old PO is now a drop-down arrow next to therequisition number at the top of the screen:Department, Controller’s OfficeLast Updated April 2021Page 2 of 13
New User ExperienceStepsSection HeaderThis is also where Approvers will see the options to approve the requisition. Or if they assign itto themselves, the option to Reject or Return the requisition to the submitter.2.4 Below the requisition number are the following page tabs:All of these tabs formerly were in the grey box on the left of the old UI except for History,which was a hyperlink in the upper-left hand corner.2.5 In the upper-right hand corner of the requisition you will see the following: allows the user filter the view of the Summary tab: allows the user to print a copy of their requisition brings up a general glossary of termsThe results tab allows the user to navigate between recent requisitions, or return totheir search page:2.6 The General, Shipping, and Billing sections of the Summary page all function similarly:Each has the same type of icons:is the edit icon, allowing the user to update the information in the section (provided theyhave the appropriate permissions to do so). Clicking this icon will pop up an edit section. Forthe General tab, for example, the user will see:Department, Controller’s OfficeLast Updated April 2021Page 3 of 13
New User ExperienceStepsSection Headerallows for two options:Hide optional fields will simply hide everything in the section. Help is a general glossary ofterms.icon. This simply collapses the three tabs, hiding theAt the edge of the tabs is theinformation so the user can shorten the page they’re reviewing. Press the icon to restorethe tabs to full length.2.7 Accounting Codes (Header level) are displayed next. This is your Chartfield information atthe header level, meaning it would apply to all lines of your requisition. If your chartfieldvaries by line or has multiple distributions, this section will be empty and individual chartfieldstrings will be listed further below:Department, Controller’s OfficeLast Updated April 2021Page 4 of 13
New User ExperienceStepsSection Header2.8 Internal and External Attachments are grouped together like some of the previous tabs:Like with previous tabs, thefor attachments.icon allows you to edit these sections. There also Add buttonsPlease note Internal Notes and Comments are NOT the same. An Internal Note will not showup in the Comments section at the top, and vice-versa. Internal Notes should typically be usedfor review by Approvers, while Comments are used for workflow discussions or to bringattention to something.2.9 Next is the requisition form and line information sections. The first section has a link to therequisition form request:The items listed at the top refers to the total quantity across all lines.The Requisition Form hyperlink will take the user to the requisition form request used tocreate the line information. Note that the requisition form request will still maintain the“Classic experience” style.Below this we have the individual line information:Department, Controller’s OfficeLast Updated April 2021Page 5 of 13
New User ExperienceStepsSection HeaderLike with other section tabs, the icon allows editing of the Item Details and Account Codesareas. Some of these values can also be edited within the Requisition Form request itself.Note: if the full item description cannot be seen, the user may need to hover over theon the right-hand side of the Item Details section. A box will show the full description:iconThe full description can also be seen in the requisition form request.2.10 Finally, ever-present on the right-hand side of the screen is the requisition workflow.Please note that it has a separate scroll bar on its right-hand side:Users can also navigate with their keyboard arrows if they click within the Workflow section.Department, Controller’s OfficeLast Updated April 2021Page 6 of 13
New User ExperienceStepsSection HeaderIf a workflow step Approver has been assigned, their name will appear below the step. If thestep is active but not yet assigned, clicking on the step will show a list of potential Approvers:Once the requisition has been approved, the Purchase order and any change requests orinvoices will be viewable as links in this area:Department, Controller’s OfficeLast Updated April 2021Page 7 of 13
New User ExperienceSteps3Section HeaderPurchase Order Changes3.1 In the classic user experience, the PO document looked like this:In the new PO experience, the document now looks like this:Each of the sections previously in the grey bar on the left-hand side are now shown in onegeneral Summary screen on the left (you can scroll down to see more). On the right-hand side,the related documents and PO workflow status are shown by default.3.2 The “Document Actions” area on the Classic Experience PO has been replaced with a dropdown next to the PO number:Department, Controller’s OfficeLast Updated April 2021Page 8 of 13
New User ExperienceStepsSection Header(Note that this screenshot is from a Spend Administrator account; Requestors and Approverswill not see all of these options).3.3 Below the PO Number are the following page tabs:All of these were formerly found in the grey side bar area of the PO, although Confirmationswas included in the Shipments area. History was found as its own hyperlink in the upper-righthand corner of the screen.Change Requests and Receipts can be added either through the drop-down menu mentionedabove, or by going to the relevant tab and pushing the button:3.4 In the upper-right hand corner of the PO screen you will see the following icons:As with the requisition screen, the icons work the same way. Please see section 2.5 for moreinformation3.5 The next section groups together General, Shipping, and Billing/Payment, with theirassociated subsections as well.Department, Controller’s OfficeLast Updated April 2021Page 9 of 13
New User ExperienceStepsSection HeaderUnlike with requisitions, Requestors and Approvers do NOT have the option to edit thesesections with theRequest first.icon. Only Procurement Agents may do, after processing a Change3.6 The new section groups Distribution Information, Supplier Information, and Internal Notes& Attachments, with their associated subsections as well.Again, any changes here can be done only by Procurement Agents, and must be submitted viaa Change Request first.3.7 Accounting Codes (Header level) are displayed next. This is your Chartfield information atthe header level, meaning it would apply to all lines of your Purchase Order. If your chartfieldvaries by line or has multiple distributions, this section will only show default values (or beempty) and individual chartfield strings will be listed further below:3.8 Below the Accounting Codes section is the PO information and Lines section.The PO information contains a link to the original Requisition Form Request, whichcan be viewed (but not edited):Below this are the PO Lines. There is another link to the Requisition Form, as well as the linedetail informationDepartment, Controller’s OfficeLast Updated April 2021Page 10 of 13
New User ExperienceStepsSection HeaderExternal attachments can also be added at the line level if needed, though a ProcurementAgent needs to be the one to do so. Requestors and Approvers should not have permission toedit this area; any changes should be submitted via a Change Request.3.9 Finally, there is a static area on the right-hand side of the screen that houses the RelatedDocuments and Workflow Status of the PO. This area has its own separate scroll bar:PO workflow is very abbreviated compared to requisition workflow, usually consistingonly of automated revision, distribution, and export to FAST for steps (Punch Outorders also have a 60 day Delay Closure step to allow time for reconciliation).If you have a question on the PO workflow, please contact eProHelp@usf.edu.Department, Controller’s OfficeLast Updated April 2021Page 11 of 13
New User ExperienceSteps4Section HeaderChange Request Changes4.1 The Change Request document is also updated, but it follows the same mold as theRequisition document’s new shopping experience. The only big difference is anadditional section in the Summary tab for External Communication Options:Much like with the other sections, these can be edited with theicon:Generally this area will be edited by a Procurement Agent in case they don’t want anupdated copy of the PO to go to the supplier (eg, an After the Fact PO, or a replacementPO), or if they don’t want the data to go to FAST (eg, a close request, which theymanually process from the PO page after approving the Change Request).Department, Controller’s OfficeLast Updated April 2021Page 12 of 13
New User ExperienceStepsSection Header4.2 One additional small difference is in the Internal Notes & Attachments section,where there is now a check-box in case the Change Request submitter wants to closethe PO:This should be flipped to on (a green check mark) if the PO should be closed. The boxis used to flag a specific value in FAST to update the account date; a requirement forAP. If the user doesn’t check the box, a Procurement Agent should do so.5Additional support?For any questions, please contact eProHelp@usf.edu, or reach out to one of ourProcurement Agents ontactus/index.aspx).Thank you!Department, Controller’s OfficeLast Updated April 2021Page 13 of 13
1.2 April update: with the new UX now live, the toggle option is not longer available. 1.3 There are some minor changes on the Shopping dashboard, mostly involving the links to Favorites and Forms and the "Shop at the Top" search bar: Old: New: 1.4 All functionality remains the same as before; the location of fields has simply
