Transcription
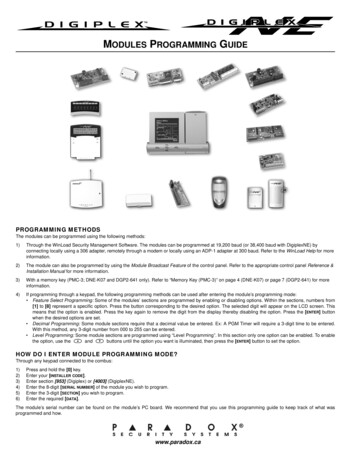
MODULES PROGRAMMING GUIDEPROGRAMMING METHODSThe modules can be programmed using the following methods:1)Through the WinLoad Security Management Software. The modules can be programmed at 19,200 baud (or 38,400 baud with DigiplexNE) byconnecting locally using a 306 adapter, remotely through a modem or locally using an ADP-1 adapter at 300 baud. Refer to the WinLoad Help for moreinformation.2)The module can also be programmed by using the Module Broadcast Feature of the control panel. Refer to the appropriate control panel Reference &Installation Manual for more information.3)With a memory key (PMC-3; DNE-K07 and DGP2-641 only). Refer to “Memory Key (PMC-3)” on page 4 (DNE-K07) or page 7 (DGP2-641) for moreinformation.4)If programming through a keypad, the following programming methods can be used after entering the module’s programming mode: Feature Select Programming: Some of the modules’ sections are programmed by enabling or disabling options. Within the sections, numbers from[1] to [8] represent a specific option. Press the button corresponding to the desired option. The selected digit will appear on the LCD screen. Thismeans that the option is enabled. Press the key again to remove the digit from the display thereby disabling the option. Press the [ENTER] buttonwhen the desired options are set. Decimal Programming: Some module sections require that a decimal value be entered. Ex: A PGM Timer will require a 3-digit time to be entered.With this method, any 3-digit number from 000 to 255 can be entered. Level Programming: Some module sections are programmed using “Level Programming”. In this section only one option can be enabled. To enablethe option, use theandbuttons until the option you want is illuminated, then press the [ENTER] button to set the option.HOW DO I ENTER MODULE PROGRAMMING MODE?Through any keypad connected to the combus:1)2)3)4)5)6)Press and hold the [0] key.Enter your [INSTALLER CODE].Enter section [953] (Digiplex) or [4003] (DigiplexNE).Enter the 8-digit [SERIAL NUMBER] of the module you wish to program.Enter the 3-digit [SECTION] you wish to program.Enter the required [DATA].The module’s serial number can be found on the module’s PC board. We recommend that you use this programming guide to keep track of what wasprogrammed and how.www.paradox.ca
TABLE OF CONTENTSGRAFICA GRAPHIC LCD KEYPAD MODULE . 3LCD KEYPAD MODULE . 548-ZONE LED KEYPAD MODULE . 8ANNUNCIATOR MODULE . 10OUTDOOR HIGH-SECURITY DIGITAL MOTION DETECTOR MODULES. 11MOTION DETECTOR MODULES . 12OMNIA WIRELESS EXPANSION MODULE . 134-PGM EXPANSION MODULE . 151-PGM EXPANSION MODULE . 168-ZONE EXPANSION MODULE . 174-ZONE EXPANSION MODULE . 181-ZONE EXPANSION MODULE . 19PRINTER MODULE . 20INTOUCH VOICE-ASSISTED ARM/DISARM MODULE . 24ACCESS CONTROL MODULE . 25POWER SUPPLY MODULE . 28MODULE CONNECTION DRAWINGS. 29Module Connection Overview.Grafica Graphic LCD Keypad Module (DNE-K07).LCD Keypad Module (DGP2-641) .48-Zone LED Keypad MOdule (DGP2-648) .Annunciator Module (DGP2-ANC1).Motion Detector Modules (DGP2-50/60/70) .Outdoor High-Security Digital Motion Detector Module (DG85) .Omnia Wireless Expansion Module (OMN-RCV3) .4-PGM Expansion Module (APR3-PGM4) .1-PGM Expansion Module (APR3-PGM1) .8-Zone Expansion Module (APR3-ZX8) .4-zone Expansion Module (APR3-ZX4) .One-zone Expansion Module (DGP2-ZX1) .Printer Module (APR3-PRT1) .InTouch Voice-Assisted Arm/Disarm Module (APR3-ADM2) .Access Control Module (DGP2-ACM1P).Power Supply Module (DGP2-PS17) .Door Contact Module (DGP2-ZC1) .Hub and Bus Isolator Module APPENDIX 1: PROGRAMMING PGMS . 39
Grafica Graphic LCD Keypad ModuleDNE-K07Grafica Keypads can be used with DGP-848 and DGP-NE96 control panels only. Grafica will not function with DGP-48 control panels.The keypad’s serial number can be found on the keypad’s PC board. The keypad’s serial number can also be viewed by pressing and holding the [0] key,entering the [INSTALLER CODE] and then entering section [000].U Default settingSECTION [001] : Keypad Partition AssignmentSECTION [002] : System OptionsOptionOFFN Disabled[1]Partition 1[2]Partition 2[3]Partition 3[4]Partition 4N Disabled[5]Partition 5 (DGP-NE96 only)N Disabled[6]Partition 6 (DGP-NE96 only)[7]Partition 7 (DGP-NE96 only)[8]Partition 8 (DGP-NE96 only)N DisabledN DisabledN DisabledN DisabledN DisabledONOptionOFFU DisabledON N EnabledU Enabled[1]Display Code EntryU Enabled[2]Display Exit DelayU Enabled[3]Display Entry DelayU Enabled[4]Confidential Mode(not for UL installations)U DisabledN EnabledU Enabled[5]To exit Confidential ModeU Enter codeU Enabled[6]Exit Delay Beep N DisabledN Press Button[7]Future UseN N/AU EnabledU EnabledU Enabled[8]Keypad TamperU DisabledN Enabled N Disabled N DisabledU EnabledU EnabledN N/ASECTION [003] : Beep on TroubleOptionOFF[1]System & Clock Trouble BeepU Disabled[2]Communicator Trouble BeepU Disabled[3]Module & Combus Trouble BeepU Disabled[4]All Zone Trouble BeepU DisabledN N/A[5] to [8] Future UseONN EnabledN EnabledN EnabledN EnabledN N/ASection #[004]Confidential Mode Timer/ / (005 to 255 seconds; Default: 120 seconds)USING THE MEMORY KEY[100]Download all from the Memory Key (Grafica keypad sections [001] to [004] and all user, zone, door and area labels) to the Grafica keypad.[110]Copy the Grafica keypad sections [001] to [004] and all user, zone, door and area labels to the Memory Key.Download Contents of the Memory Key to the Grafica Keypad.1) Insert the Memory Key onto the keypad’s connector (refer to “Memory Key Connector” on page 4).2) To download the contents of the Memory Key, enter the keypad’s programming mode and enter section [100].3) Once the keypad emits a confirmation beep, wait for a second confirmation beep and then remove the Memory Key.Digiplex & DigiplexNE - 3 - Modules Programming Guide
Copy Contents of the Grafica Keypad to the Memory Key.1) Insert the Memory Key onto the keypad’s connector (refer to “Memory Key Connector” on page 4). Ensure that the write protect jumper is on (refer to"Memory Key (PMC-3)" below).2) To copy the contents to the Memory Key, enter the keypad’s programming mode and enter section [110].3) Once the keypad emits a confirmation beep, wait for a second confirmation beep and then remove the Memory Key. Remove the Memory Key’s jumperif you do not wish to accidentally overwrite its contents.MEMORY KEY CONNECTORMEMORY KEY (PMC-3)Jumper ON:Can copy and downloadcontents.PMC-3Jumper OFF:Cannot override the contentsof the memory key.The memory key will only function with a keypad that has the DGP2 or DNE prefix in the model number. Only the PMC-3 memory key willfunction with DGP2 and DNE keypads.Digiplex & DigiplexNE - 4 - Modules Programming Guide
LCD Keypad ModuleDGP2-641The keypad’s serial number can be found on the keypad’s PC board. The keypad’s serial number can also be viewed by pressing and holding the [0] key,entering the [INSTALLER CODE] and then entering section [000].U Default settingSECTION [001] : Keypad Partition AssignmentOptionSECTION [002]: Future UseOFF[1]Partition 1[2]Partition 2[3]Partition 3[4]Partition 4[5]Partition 5 (DGP-NE96 only)[6]Partition 6 (DGP-NE96 only)[7]Partition 7 (DGP-NE96 only)[8]Partition 8 (DGP-NE96 only)N DisabledN DisabledN DisabledN DisabledN DisabledN DisabledN DisabledN DisabledONU Enabled[1]Future UseU Enabled[2]Future UseU Enabled[3]Future UseU Enabled[4]Future UseU Enabled[5]Future UseU Enabled[6]Future UseU Enabled[7]Future UseU Enabled[8]Future UseSECTION [003]: General Options 1OptionOFFONN N/AN N/AN N/AN N/AN N/AN N/AN N/AN N/AN N/AOFFDisplay code entryU Disabled[2]Display exit delayU Disabled[3]Display entry delayU Disabled[4]Confidential Mode(not for UL installations)U Disabled[5]To exit Confidential Mode[6]Future Use[7]Future UseN N/A[8]Time display optionU yy/mm/ddONN EnabledN EnabledN EnabledN EnabledU Enter code N Press ButtonN N/A N N/A N N/AN dd/mm/yySECTION [005] : Beep on TroubleOptionN N/AN N/AN N/AN N/AN N/AOFFU DisabledONN EnabledMuting[2]Exit Delay BeepN DisabledFuture UseN N/AU Enabled[3][4]Chime on Zone ClosureU DisabledN Enabled[5]Future UseN N/AN N/A[6]Future Use[7]Future UseN N/AN N/A[8]Future UseN N/AN N/AN N/AN N/AN N/ASECTION [006]: PGM and Tamper OptionsOFFONOptionOFFSystem & Clock Trouble BeepU DisabledN Enabled[2]Communicator Trouble BeepU DisabledN Enabled[2][3]Module & Combus Trouble BeepU DisabledN Enabled[3]PGM Base TimeU 1 secondAll Zone Trouble BeepU Disabled[4]PGM OverrideU Disabled[5]Keypad TamperU Disabled[5] to [8] Future UseN N/A[1][1][4]N N/ASECTION [004]: General Options 2[1]OptionOptionN N/AN EnabledN N/A[1]PGM StateU N.O.PGM Deactivation ModeU Deactivation Event[6] to [8] Future UseDigiplex & DigiplexNE - 5 - Modules Programming GuideN N/AONN N.C.N PGM TimerN 1 minuteN EnabledN EnabledN N/A
SectionDataDescriptionDefault[007]/ / (005 to 255 seconds)Confidential Mode Timer120[008]/ / (000 to 255; see option [3] in section [006])PGM Timer005Event GroupSectionFeature GroupSectionStart #SectionEnd #SectionPGM Activation[009]/ /[010]/ /[011]/ /[012]/ /PGM Deactivation[013]/ /[014]/ /[015]/ /[016]/ /Only Event Groups 000 to 055 and 070 can be used to program the module’s PGM. Refer to “Appendix 1: Programming PGMs” onpage 39 for the PGM Table.MESSAGE PROGRAMMINGEach section from [101] to [148], [200] to [204] and [301] to [396] contains one message with a maximum of 16 characters. The sections contain thefollowing messages:Sections [101] to [148] “Zone 01” to “Zone 48” respectivelySection [200] “Paradox Security”Sections [201] to [204] “First Area”, “Second Area”, “Third Area”, and “Fourth Area”Sections [301] to [396] “Code 01” to “Code 96” respectivelyAfter entering the section corresponding to the desired message, the message can be re-programmed to suit your installation needs as detailed in Table 1.For example, section [101] “Zone 01” can be changed to “FRONT DOOR”.Table 1: Message Programming Special Function KeysKey[STAY][FORCE][ARM]FunctionDetailsInsert SpacePress the [STAY] key to insert a blank space at the current cursor’s position.DeletePress the [FORCE] key to delete the character or blank space found at the current cursor’s position.Delete Until the EndPress the [ARM] key to delete all characters and spaces to the right of the cursor and at the cursor’s position.[DISARM] Numeric/AlphanumericPress the [DISARM] key to toggle the numeric keys to alphanumeric keys and vice versa. Numeric: Keys [0] to [9]represent numbers 0 to 9. Alphanumeric: refer to Table 2 below.[BYP]Lower/Upper CasePress the [BYP] key to toggle from lower to upper case and vice versa.[MEM]Special CharactersAfter pressing the [MEM] key, the cursor will turn into a flashing black square. Using Table 3 below, enter the 3-digitnumber for the desired character.Table 2: Alphanumeric KeysKeyPress Key OncePress Key TwicePress Key Three VWX[9]YZDigiplex & DigiplexNE - 6 - Modules Programming Guide
Table 3: Special CharactersUSING THE MEMORY KEY[510]Download all from the Memory Key (LCD keypad sections [001] to [396] and all labels and messages) to the LCD keypad.[520]Copy the LCD keypad sections [001] to [396] and all labels and messages to the Memory Key.Download Contents of the Memory Key to the LCD Keypad1) Insert the Memory Key onto the keypad’s connector labelled “KEY”.2) To download the contents of the Memory Key, enter the keypad’s programming mode and enter section [510].3) Once the keypad emits a confirmation beep, wait for a second confirmation beep and then remove the Memory Key.Copy Contents of the LCD Keypad to the Memory Key1) Insert Memory Key onto the keypad’s connector labelled “KEY”. Ensure that the write protect jumper is on (refer to "MemoryKey (PMC-3)" below).2) To copy the contents to the Memory Key, enter the keypad’s programming mode and enter section [520].3) Once the keypad emits a confirmation beep, wait for a second confirmation beep and then remove the Memory Key.Remove the Memory Key’s jumper if you do not wish to accidentally overwrite its contents.MEMORY KEY (PMC-3)Jumper ON:Can copy and downloadcontents.PMC-3Jumper OFF:Cannot override the contentsof the memory key.The memory key will only function with a keypad that has the DGP2 or DNE prefix in the model number. Only the PMC-3 memory key willfunction with DGP2 and DNE keypads.COMBUS VOLTMETERTo verify if the combus is supplying sufficient power, press and hold the [0] key, enter the [INSTALLER CODE] and press the [ACC] button. A reading of 10.5V orlower indicates that the voltage is too low. The voltage may drop during the control panel battery test.Digiplex & DigiplexNE - 7 - Modules Programming Guide
48-Zone LED Keypad ModuleDGP2-648This model does not support installer programming capabilities, therefore you cannot program other modules or the panel on thecombus using this unit.SectionDataDescriptionDefault[001]/ / (000 to 004)*Partition 1 Display001 (LED A1)[002]/ / (000 to 004)*Partition 2 Display002 (LED A2)[003]/ / (000 to 004)*Partition 3 Display003 (LED A3)[004]/ / (000 to 004)*Partition 4 Display004 (LED A4)[005]/ / (000 to 004)*Partition 5 Display000[006]/ / (000 to 004)*Partition 6 Display000[007]/ / (000 to 004)*Partition 7 Display000[008]/ / (000 to 004)*Partition 8 Display000*000 disabled; 001 A1; 002 A2; 003 A3; 004 A4.Do not assign the same display number to more than one section. A maximum of 4 partitions can be displayed on the keypad.U Default SettingsSECTION [009] : Keypad OptionsOptionSECTION [010] : Beep on TroubleOFF[1]Confidential Mode[2]Exit Confidential Mode[3]Muting[4]Beep on Exit Delay[5]Chime on Zone Closure[6] to [8] Future UseONU Disabled N EnabledU Press key N Enter codeU Disabled N EnabledN DisabledU EnabledU Disabled N EnabledN N/AN N/AOptionOFFBeep on System Trouble/Clock Loss U Disabled N Enabled[2]Beep on Communicator Trouble[3]Beep on Module/Combus Trouble[4]Beep on Zone Trouble[5] to [8] Future UseSECTION [011] : PGM & Keypad Tamper OptionsOptionOFFU N.O.ONN N.C.[1]PGM State[2]PGM Deactivation ModeU Deactiva- N PGM TimerU 1 second N 1 minute[3]PGM Base Time[4]Future Use[5]Keypad Tamper[6] to [8] Future Usetion EventN N/A N N/AN N/AN N/AON[1]U Disabled N EnabledDigiplex & DigiplexNE - 8 - Modules Programming GuideU Disabled N EnabledU Disabled N EnabledU Disabled N EnabledN N/AN N/A
SectionDataDescriptionDefault[012]/ / (005 to 255 seconds)Confidential Mode Timer120[013]/ / (001 to 255; see option [3] in section [011])PGM Timer005Event GroupFeature GroupSectionStart #SectionEnd #SectionSectionPGM Activation[014]/ /[015]/ /[016]/ /[017]/ /PGM Deactivation[018]/ /[019]/ /[020]/ /[021]/ /Refer to “Appendix 1: Programming PGMs” on page 39 for the PGM Table. Only Event Groups 000 to 055 can be used to program themodule’s PGM.SectionDescription[030]Test PGM: Activates the PGM for 8 seconds to verify if the PGM is functioning properly.[040]Zone Display Reset: Resets zone display sections [101] to [196] to default values.Zone isplayedDefault[101]/ /Zone 1001[133]/ /Zone 33033[165]/ /Zone 65000[102]/ /Zone 2002[134]/ /Zone 34034[166]/ /Zone 66000[103]/ /Zone 3003[135]/ /Zone 35035[167]/ /Zone 67000[104]/ /Zone 4004[136]/ /Zone 36036[168]/ /Zone 68000[105]/ /Zone 5005[137]/ /Zone 37037[169]/ /Zone 69000[106]/ /Zone 6006[138]/ /Zone 38038[170]/ /Zone 70000[107]/ /Zone 7007[139]/ /Zone 39039[171]/ /Zone 71000[108]/ /Zone 8008[140]/ /Zone 40040[172]/ /Zone 72000[109]/ /Zone 9009[141]/ /Zone 41041[173]/ /Zone 73000[110]/ /Zone 10010[142]/ /Zone 42042[174]/ /Zone 74000[111]/ /Zone 11011[143]/ /Zone 43043[175]/ /Zone 75000[112]/ /Zone 12012[144]/ /Zone 44044[176]/ /Zone 76000[113]/ /Zone 13013[145]/ /Zone 45045[177]/ /Zone 77000[114]/ /Zone 14014[146]/ /Zone 46046[178]/ /Zone 78000[115]/ /Zone 15015[147]/ /Zone 47047[179]/ /Zone 79000[116]/ /Zone 16016[148]/ /Zone 48048[180]/ /Zone 80000[117]/ /Zone 17017[149]/ /Zone 49000[181]/ /Zone 81000[118]/ /Zone 18018[150]/ /Zone 50000[182]/ /Zone 82000[119]/ /Zone 19019[151]/ /Zone 51000[183]/ /Zone 83000[120]/ /Zone 20020[152]/ /Zone 52000[184]/ /Zone 84000[121]/ /Zone 21021[153]/ /Zone 53000[185]/ /Zone 85000[122]/ /Zone 22022[154]/ /Zone 54000[186]/ /Zone 86000[123]/ /Zone 23023[155]/ /Zone 55000[187]/ /Zone 87000[124]/ /Zone 24024[156]/ /Zone 56000[188]/ /Zone 88000[125]/ /Zone 25025[157]/ /Zone 57000[189]/ /Zone 89000[126]/ /Zone 26026[158]/ /Zone 58000[190]/ /Zone 90000[127]/ /Zone 27027[159]/ /Zone 59000[191]/ /Zone 91000[128]/ /Zone 28028[160]/ /Zone 60000[192]/ /Zone 92000[129]/ /Zone 29029[161]/ /Zone 61000[193]/ /Zone 93000[130]/ /Zone 30030[162]/ /Zone 62000[194]/ /Zone 94000[131]/ /Zone 31031[163]/ /Zone 63000[195]/ /Zone 95000[132]/ /Zone 32032[164]/ /Zone 64000[196]/ /Zone 96000The keypad will display up to a total of 48 zones, however any zone from 1 to 96 can be selected. Do not assign more than one LEDNumber to a zone.Digiplex & DigiplexNE - 9 - Modules Programming Guide
Annunciator ModuleDGP2-ANC1Program the DGP2-ANC1 using the Winload Software or the control panel’s Module Broadcast feature. Refer to the Digiplex orDigiplexNE Reference & Installation Manual for more details. The DGP2-ANC1’s serial number is located on the module’s PC board.U Default SettingsSECTION [001] : Partition AssignmentOptionSECTION [002] : General Options 1OFF[1]Partition 1[2]Partition 2[3]Partition 3[4]Partition 4[5]Partition 5 (DGP-NE96 only)[6]Partition 6 (DGP-NE96 only)[7]Partition 7 (DGP-NE96 only)[8]Partition 8 (DGP-NE96 only)N DisabledN DisabledN DisabledN DisabledN DisabledONOptionOFFU Enabled[1]Beeper Mute Mode*U Enabled[2]Beep on System TroubleU Enabled[3]Beep on Communicator TroubleU Enabled[4]Beep on Combus/Module Trouble[5]Zone TroubleU Enabled N Disabled U Enabled N Disabled U Enabled N Disabled U Enabled[6] to [8] Future UseU Disabled N EnabledU Disabled N EnabledU Disabled N EnabledU Disabled N EnabledU Disabled N EnabledN N/AN N/A*In order for options [2] to [5] to function, option [1] must be disabled.Section #[003]ONStatus Display Mode/ / (Enter a value between 000 and 005 to set which status the Annunciator will display; Default: 000)000 Partition Status, 001 - 003 Future Use, 004 Zones 01 to 48, 005 Zones 49 to 96Digiplex & DigiplexNE - 10 - Modules Programming Guide
Outdoor High-Security Digital Motion Detector ModulesDG85OPERATIONAL MODEDigigard DG85 can function in two operational modes (see Table 4 below): DGP2 Mode or Relay Mode. When set to Relay Mode, DG85 functions as wouldany standard motion detector by communicating its alarm and tamper signals via relays. When set to DGP2 Mode, DG85 functions like a DGP2 motiondetector module by communicating alarm signals, tamper signals, data and detector settings via the combus. In DGP2 Mode, both section programming andmanual programming can be used to program the settings. In Relay Mode, only manual programming can be used to program the settings (see Table 4below). Refer to DG85’s connection drawing on page 33 for the location of the DIP switches.DIP Switch 1:OFF Relay Mode (default)ON DGP2 ModeSETTINGSRefer to DG85’s connection drawing on page 33 for the location of the DIP switches and Trimpot.Table 4: DG85 SettingsProgrammingFeatureSettingSignal Processing ModeLEDMovement Signal IndicationTamper Recognition3SensitivitySection Programming1Manual Settings2Single[001]J[1] OFFDIP switch 2 OFFDual U[001]J[1] ONDIP switch 2 ONDisabled[001]J[2] OFFDIP switch 3 OFFEnabled U[001]J[2] ONDIP switch 3 ONDisabled[001]J[3] OFFEnabled U[001]J[3] ONDisabled U[001]J[5] OFFN/AEnabled[001]J[5] ONN/AU 10 seconds[002]J001-010TrimpotJ0-104Enabled when DIP switch 3 ONU Default Setting1When in DGP2 Mode only (see Operational Mode above).2When in DGP2 Mode or Relay Mode (see Operational Mode above).3This feature is always enabled in Relay Mode.4To set the sensitivity manually, remove the front cover and, using a screwdriver, turn the trimpot clockwise to increase the detector’s sensitivity orcounter-clockwise to decrease it. You can turn the trimpot 360 in both directions. To determine the sensitivity setting, remove the cover and view howmany times the LED flashes. The number of times the LED flashes corresponds to the sensitivity setting. Thus if the sensitivity is set to 6, the LED will flash6 times.In instances where a particular setting can be set either manually or through section programming, a discrepancy may exist between thesetting of the DIP switches and the setting in the appropriate sections. In such cases, the last change that is made will dictate the setting.For example, if you disable the LED from within section programming, the DIP switch will still show that it is enabled, however the LED isactually disabled.Digiplex & DigiplexNE - 11 - Modules Programming Guide
Motion Detector ModulesDGP2-50DGP2-60U Default settingSECTION [001] : General OptionsOptionOFFN Dual Edge[1]Single/Dual Edge Processing[2]Alarm Indication(red LED illuminates for 5 secs.)[3]Movement Signal Indication(red LED will flash)[4]Non-movement Signal Indication(green LED will flash)[5]Tamper Recognition[6]Future Use[7]Future Use[8]Future UseN DisabledONU Single EdgeU EnabledN DisabledU EnabledN DisabledU EnabledU DisabledN EnabledN N/AN N/AN N/AN N/AN N/AN N/ASection #[002]Digital Shield Setting/ / (000 to 003 sensitivity; Default: 002)000 Very Low Shield, 001 Low Shield, 002 Normal Shield, 003 High ShieldDigiplex & DigiplexNE - 12 - Modules Programming GuideDGP2-70
Omnia Wireless Expansion ModuleOMN-RCV3The Module Broadcast feature of the Digiplex and DigiplexNE control panels is not supported by the Omnia Wireless Expansion Module.U Default settingSECTION [001] : SupervisionOption[1]OFFONLow battery supervisionU Disabled[2]Check-in supervision*U Disabled[3]Check-in base timeU Hours[4]Check-in time valueU 12[5]Receiver’s on-board anti-tamperU Disabled[6]PGM1 Deactivation[7]PGM2 Deactivation‡[8]Future Use‡N EnabledN EnabledN MinutesN6N EnabledWARNING: With an Omnia module V1.2 or lower, use the sameCheck-in supervision setting as set in the Omnia module.With an Omnia module V2.0 or higher, the module automaticallydetects the check-in time set in each of its assigned transmitters.As a result, the transmitters can have different check-in times.U 2 sec. Timer N ManuallyU 2 sec. Timer N ManuallyN N/AN N/A*For UL installations, check-in supervision must be enabled (ON).‡ Omnia’s PGM outputs are always enabled and are activated through the Omnia Remote Control (OMN-RCT1). Remote control button “C” (refer topage 14) controls PGM1 and remote control button “D” controls PGM2 (if PGM2 is available). Press the appropriate button to activate the PGM that itcontrols. Options [6] and [7] determine how the respective PGM will deactivate. If the option is OFF, the activated PGM will automatically deactivate after 2seconds. If the option is ON, each activated PGM can only be deactivated by pressing the appropriate button on an Omnia Remote Control that controls aPGM.Section(s)Description[030]View unknown serial numbers of transmitters: By entering this section and by pressing the anti-tamper switch on the unknownwireless detector or door contact, the module’s unknown serial number will be displayed.[040]View and/or delete remote controls assigned in sections [201] to [208].[041]View and/or delete remote controls assigned in sections [209] to [216].[601] to [616]View the actual signal strength of the assigned wireless detectors and door contacts.[701] to [716]View the actual battery life of the assigned wireless detectors and door contacts.[801] to [816]View the previous battery life of the assigned wireless detectors and door contacts.ASSIGNING WIRELESS DETECTORS AND DOOR CONTACTS TO THE RECEIVERSectionInputSerial Number(Detectors & Door Contacts)[101]001/ / / / /[102]002/ / / / /[103]003/ / / / /[104]004/ / / / /[105]005/ / / / /[106]006/ / / / /[107]007/ / / / /[108]008/ / / / nputSerial Number(Detectors & Door Contacts)[109]009/ / / / /[110]010/ / / / /[111]011/ / / / /[112]012/ / / / /[113]013/ / / / /[114]014/ / / / /[115]015/ / / / /[116]016/ / / / /Digiplex & DigiplexNE - 13 - Modules Programming GuideMotionDetectorDoorContactNNNNNNNNNNNNNNNN
REMOTE CONTROL PROGRAMMINGRemote Control Assignment to the ReceiverSection & User NameRemote Control Assignmentto a User Access CodeSectionUser #Remote Control Button Programming(refer to Tables 5 and 6 below)Section(A / B)(C / D)(A B / C D)(A C / B D)[201] :[301]/ /[401]( / )( / )( / )( / )[202] :[302]/ /[402]( / )( / )( / )( / )[203] :[303]/ /[403]( / )( / )( / )( / )[204] :[304]/ /[404]( / )( / )( / )( / )[205] :[305]/ /[405]( / )( / )( / )( / )[206] :[306]/ /[406]( / )( / )( / )( / )[207] :[307]/ /[407]( / )( / )( / )( / )[208] :[308]/ /[408]( / )( / )( / )( / )[209] :[309]/ /[409]( / )( / )( / )( / )[210] :[310]/ /[410]( / )( / )( / )( / )[211] :[311]/ /[411]( / )( / )( / )( / )[212] :[312]/ /[412]( / )( / )( / )( / )[213] :[313]/ /[413]( / )( / )( / )( / )[214] :[314]/ /[414]( / )( / )( / )( / )[215] :[315]/ /[415]( / )( / )( / )( / )[216] :[316]/ /[416]( / )( / )( / )( / )Table 5: Remote Control Button Choice[0] Button disabled[8] Panic 2[1] Regular Arm[9] Panic 3[2] Stay Arm[A] Smoke reset[3] Instant Ar
[8] Time display option Uyy/mm/dd N dd/mm/yy [8] Future Use N N/A SECTION [005] : Beep on Trouble SECTION [006]: PGM and Tamper Options Option OFF ON Option OFF ON [1] System & Clock Trouble Beep U Disabled N Enabled [1] PGM State N.O. N N.C. [2] Communicator Trouble Beep U Disabled N Enabled [2] PGM Deactivation Mode UDeactiva-tion Event