Transcription
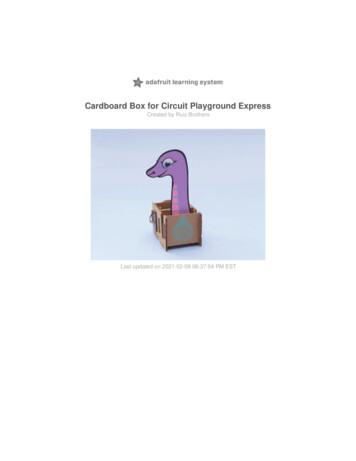
Cardboard Box for Circuit Playground ExpressCreated by Ruiz BrothersLast updated on 2021-02-08 06:37:54 PM EST
Guide ContentsGuide ContentsOverview23Cardboard Project for StudentsFun PaperCraft!Electronic PartsTools & SuppliesPrerequisite GuidesMakeCodeSoftware3445589Button InputsServo PinsDisplay NeoPixel LEDsExperiment9999Circuit Diagram10Circuit DiagramWired Connections1010Cardboard Template11Download FilesEnclosure TemplatePaper TemplateCutting PartsFor Inkjet PrintersFor Cutter BotsExplode Wireframe11111212121313Assembly14Along The GrainMaking CutoutsMount HolesInstall StandoffsSecure CPXInstall Micro ServoAlligator ClipsConnect Micro ServoBox AssemblyInstall Battery14141415151516161717Next Steps18Servo MovementsInteractionModify & Remix Adafruit rd-box-for-circuit-playground-expressPage 2 of 19
OverviewCardboard Project for StudentsIn this guide we'll show you how you can make a project box that will house an Adafruit Circuit PlaygroundExpress, micro servo and 3xAAA battery pack. We'll use a paper template to create cardboard panels thatsnap fit together. Print the design on paper, stick it on cardboard and cut away!Students will learn an assortment of skills by accomplishing this project. Cater this project to yourcurriculum and let your students customize the details to make it theirs!Using cardboard as a material to make stuff allows for experimentation and rapid prototyping. It's easily towork with, dirt cheap and normally gets thrown out. So this stuff is great for teaching young students andkids how to build projects.Companies like Nintendo and Google have shown how precisely cut pieces of cardboard can formintricate project enclosures that are sturdy enough to house components snugly and look neatlypackaged.Designing and creating your own templates is a fun exercise in engineering. Using low-cost materials andmethods allows for wide spread adoption for open sourced projects because it's easy to make. Adafruit -for-circuit-playground-expressPage 3 of 19
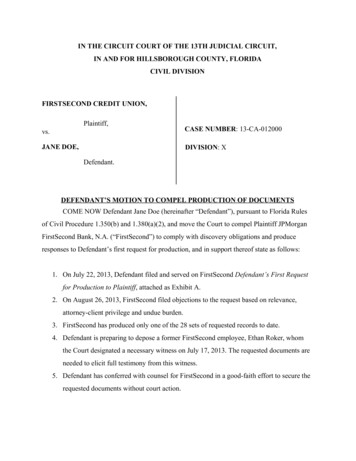
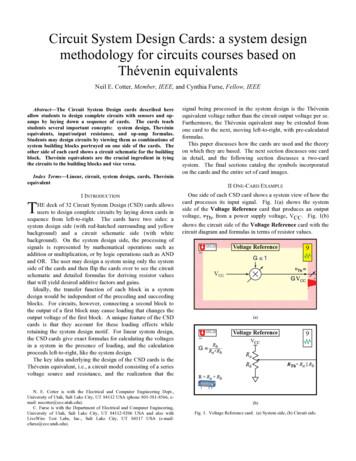
Fun PaperCraft!Get creative and turn this project into a playful creation withcolorful paper cutouts. Papercraft is an art form that usespaper as a medium to create three dimensional objects. Herewe made Blink The Python Snake move with the help of amicro-servo and Circuit Playground Express.Electronic PartsWe'll be using the Adafruit Circuit Playground to control amicro servo and power our project using a 3x AAA batterypack. This is all we need to create simple movements. Butthats not all! Circuit Playground Express has tons of sensors(like accelerometer, light, sound and temperature sensors) toexperiment with, not to mention the radiant glow of 10xNeoPixels! Adafruit -for-circuit-playground-expressPage 4 of 19
Tools & SuppliesAssortment of materials and hand tools to work with.Cardboard – 8.5x11 (2.6mm)Office paper – 8.5x11Cutting MatRuler / T-SquareScissorsX-Acto Knife3x AAA BatteriesPrerequisite GuidesThere's resources in these guides that go beyond what's covered in this tutorial. MakeCode guide is allabout setting up your CPX board. The main CPX guide walks you through all of the pinouts, sensors andeverything you need to know.MakeCode for Circuit Playground Express (https://adafru.it/wWd)Introducing Circuit Playground Express (https://adafru.it/adafruit-cpx)Circuit Playground ExpressCircuit Playground Express is the next step towards a perfect introduction to electronics and programming.We've taken the original Circuit Playground Classic and. 24.95In StockAdd to Cart Adafruit -for-circuit-playground-expressPage 5 of 19
Small Alligator Clip to Male Jumper Wire Bundle - 12 PiecesFor bread-boarding with unusual non-header-friendly surfaces, these cables will be your best friends! Nolonger will you have long strands of alligator clips that are grabbing little. 7.95In StockAdd to Cart Adafruit -for-circuit-playground-expressPage 6 of 19
Micro servoTiny little servo can rotate approximately 180 degrees (90 in each direction), and works just like thestandard kinds you're used to but smaller. You can use any servo. 5.95In StockAdd to Cart3 x AAA Battery Holder with On/Off Switch and 2-Pin JSTThis battery holder connects 3 AAA batteries together in series for powering all kinds of projects. Wespec'd these out because the box is slim, and 3 AAA's add up to about. 1.95In StockAdd to Cart Adafruit -for-circuit-playground-expressPage 7 of 19
MakeCodeOne of the beautiful things about Circuit Playground Express is that you can make three ways:1. MakeCode (https://adafru.it/wmd)2. CircuitPython (https://adafru.it/BeW)3. Arduino IDE (or direct ARM GCC programming)If this is your very first time programming or coding, we suggest starting withMakeCode (https://adafru.it/wmd) - it is the super fast to get started not just with Circuit PlaygroundExpress, but coding in general! (Once you've got the hang of MakeCode (https://adafru.it/wmd) you canthen take a look at CircuitPython or Arduino.)MakeCode does not require any software installation, it works on any computer with a web-browser. Youcan use it with Mac, Windows, Linux, Chromebooks.MakeCode uses drag-and-drop blocks just like Scratch, there is no syntax or semicolons. The blockssnap together to create larger and more complex projectsMakeCode lets you get started in 5 minutes or less, there are built in guides and projects, but its also justfun to play around.MakeCode has surprisingly advanced runtime, despite looking very simple it can do very complex tasksthat normally would require advanced programming. You can get creative very very quickly.Read on to learn how to use MakeCode (https://adafru.it/wmd) and build your first project! Adafruit -for-circuit-playground-expressPage 8 of 19
SoftwareButton InputsThis demonstrates how to control servo movements with button inputs. Three main inputs are laid out forproducing three different events. These input blocks are color coded in purple. These do something whenbutton A, B or A and B are pressed. You can also change the type of input by choosing long click, upor down.Servo PinsUnder the advanced option, the pin menu has several blocks for controlling servos. The servo write pinblock allows you to choose a pin and degree value. Pick any analog pin (A1 in this project) and enter avalue from 0-180 for determining how far the servo should rotate/move.Display NeoPixel LEDsUnder the light menu, you can choose the show ring block to display LEDs. Here you can pick how manypixels to display and which color to be.ExperimentFeel free to add more blocks to this project to make more interaction. For example, you can add soundeffects to play when pressing buttons. Trigger servo movements using sound or light. Activate lights andsound by using shake detection. There's so many things you can do with different combinations of blocks! Adafruit -for-circuit-playground-expressPage 9 of 19
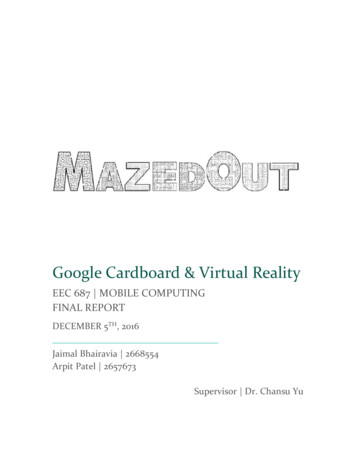
Circuit DiagramCircuit DiagramThis provides a visual reference for wiring of the components. They aren't true to scale, just meant to beused as reference. The vibration switch wasn't available in Fritzing so instead we have a tilt switch – Theseare basically the same pin layout.Wired ConnectionsThe micro servo has three connections. Most common servos has ground and signal on the left or rightand voltage in the middle.Yellow wire from servo to Pin A1 on Circuit Playground ExpressBrown/Black wire from servo to GND on Circuit Playground ExpressRed wire from servo to VOUT on Circuit Playground Express Adafruit -for-circuit-playground-expressPage 10 of 19
Cardboard TemplateDownload FilesOur Template Sheet is a PDF designed to fit standard 8.5 x 11 inch paper. For direct cutting, we provide aFlat Pack SVG files of just the parts. The Fusion 360 archive file is available to download in STL, STEP,OBJ, and other formats. The F360 archive contains original sketches and editable user parameters forcreating custom afru.it/BfOhttps://adafru.it/BfOEnclosure TemplateThe enclosure is made out of 5 pieces that snap fit together via tabs and slots. Two main side wallsfeature slots that allow tabbed pieces to snugly fit together. Each part is designed to secure a componentor become a structural piece of the enclosure. The template for this design was made in Autodesk Fusion360 with user driven parameters so it can be customized to fit specific projects. Adafruit -for-circuit-playground-expressPage 11 of 19
The enclosure is similar to cases that are designed to bemade on a laser cutter. This design doesn't require screws orglue because of the tight tolerances in slots. Cardboard has abit of flex so it can compress and fit through tight openings.The tabs extend beyond the slots to accommodate for slopduring the cutting process.Paper TemplateWe designed the enclosure to be made out of cardboard. Thisis the type of cardboard most commonly used by UPSshipping boxes. It's around 2.6mm thick. If you're using amaterial that is thinner or thicker, it might not fit perfectlywhen assembling. The tabs and slots are designed for 2.6mm clearances.Cutting PartsThe template can be printed with an office/home inkjet printer.This can then be transferred to cardboard by cutting each partout and tracing it with a marker or sticking it to the surface.Either way, you can cut it out by hand or use a vinyl cutter likea Cricut or Silhouette.For Inkjet PrintersIf you're using an inkjet printer to print the template, you can use common office paper. Use scissors to cut Adafruit -for-circuit-playground-expressPage 12 of 19
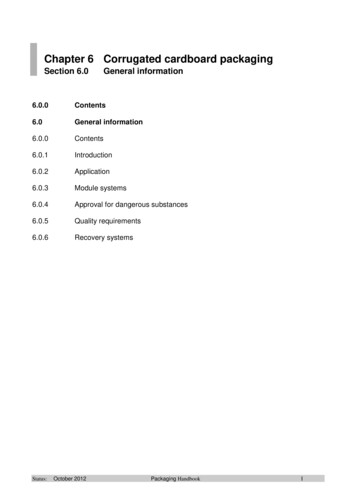
around the outline of each part. Then, use a knife pen to carefully remove the inner cutouts like the slotsand mounting holes. Place each part over a piece of cardboard and trace the outlines using a sharpie,marker, pen or pencil. Once the parts have been transferred to cardboard, cut them out using aretractable blade or x-acto knife.For Cutter BotsA laser or vinyl cutter can help speed up the process so if you have access to one definitely take theopportunity to learn how to operate it. The SVG and DXF files contain the vector shapes for precise cuttingmachines. Each machine has a different software for processing these files so we won't cover them indetail here.Explode WireframeThis animated GIF showcases the assembly of the case.Here's how the pieces fit together. Start with the left wall andinsert the tabs from the three non-slotted parts. Then, insertthe longer part to the bottom. Fit the remaining tabs into theslots of the right wall to hold everything together. Adafruit -for-circuit-playground-expressPage 13 of 19
AssemblyAlong The GrainWhen cutting the left and right pieces, it's important to orientthe paper template so the corrugations are going along thelength of the sides. This way the cardboard is a bit strongerand less likely to bend when cutting and handling.Making CutoutsThe slots and cutouts for the tabs and components can be alittle tricky. I found it easier to freehand cut than using a ruler.Slowly insert the tip of the blade and cut in a reciprocatingmanner. Doing this several times will cut through the internalcorrugations. Flip the part over and follow the cut by slightlyscoring the outline.Mount HolesThe Circuit Playground Express board can be secured to thiscardboard piece using M3 sized standoffs, screws and hexnuts. To make the holes I used a Dremel rotary tool with a1/8in drill bit. You could also use a hand awl (commonly usedfor making holes in fabric when sewing or stitching). Adafruit -for-circuit-playground-expressPage 14 of 19
Install StandoffsThese M3 female/male brass standoffs are 10mm in height. Igot a variety pack (https://adafru.it/Blg) from amazon. Thesehave a threaded hole on one side and a male threaded endon the other. Insert the male end into the cardboard andfasten a hex nut to secure it in place. Repeat this process forall four mounting holes.Secure CPXPlace the CPX over the four standoffs and orient the PCB sothe mounting holes line up. Depending on your project, you'llwant to orient the board so it's easy to access the JST andUSB ports for connectivity. In my case I had the ports facing"right-side up". Insert and fasten 4x M3 machine screwsthrough the top of the CPX going into the brass standoffs.Install Micro ServoStart by inserting the cable from the micro servo into thecutout. Then, carefully press the body of the servo through. Itshould have a tight fitting. Using the two mounting screws thatcame with the micro servo, insert and fasten them to securethe servo. Adafruit -for-circuit-playground-expressPage 15 of 19
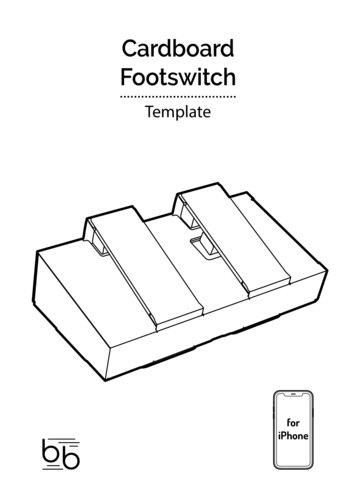
Alligator ClipsBefore we assemble the rest of the case, we'll need to hookup the wires. Connect three mini alligator clips to VOUT, A1and GND labeled pads on the Circuit Playground Expressboard. Grab the male jumper connectors and thread themthrough the bottom cutout in the center of the CPX. This willmake it easier to connect the micro servo to the mini alligatorclips.Connect Micro ServoGrab the male jumper cables from the alligator clips andconnect them to the female jumper cables on the micro servo.Make sure the connections are correct. Yellow (siginal) to A1,Blue (ground) to GND, and red(voltage) to VO
Cardboard Template Download Files Our Template Sheet is a PDF designed to fit standard 8.5 x 11 inch paper. For direct cutting, we provide a Flat Pack SVG files of just the parts. The Fusion 360 archive file is available to download in STL, STEP, OBJ, and other formats. The F360 archive contains original sketches and editable user parameters for