Transcription
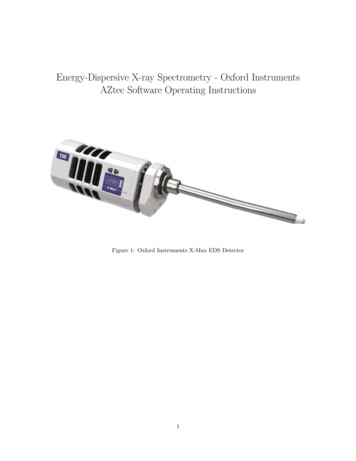
Hitachi S-3400N VP-SEMOperation InstructionsFeb, 2014For additional assistance, please contact the facility manager.Please contact in emergency:SEM manager: Mr. Ben Myers, 1-3439 (O), 312-218-2427 (mobile)b-myers3@northwestern.eduSEM microscopist: Mr. Eric Miller, 7-0789 (O), 209-872-1851 (mobile)eric-miller@northwestern.eduEPIC director: Prof. Vinayak P Dravid, 7-1363 (O), 847-486-1705 (h)v-dravid@northwestern.eduS-4800 reservations are made using the EPIC FOM online reservation system. Please follow allEPIC facility rules for using this system. There is a hardware control system on the 3400, so thesystem will NOT function unless you are logged in. Tampering with or disabling the hardware controlmay result in revocation of your EPIC privileges.Saving Your Data: During your session, you may store image data and EDS data to your own folderwithin the S3400 folder on the SEM Server (U:\). The SEM server is accessible through a computerin the lab that is labeled “SEM server”. You can transfer your data from the SEM server computer toa USB, etc. You should NEVER take your data directly from either the SEM or EDS computers.Contents:I.II.III.IV.V.VI.VII.Sample LoadingStart UpAlignmentBackscatterImage CaptureEDS with INCAShutdown and Sample RemovalBefore getting started:1. It is imperative that gloves be worn during all sample exchange procedures. If youcannot find any gloves, please ask!2. NEVER install any software onto the SEM’s PC.3. NEVER insert any flash drives into any microscope computer!1
I.Sample Loading1. Log into the FOM system.2. Prepare the sample as necessary and mount on a sample holder.3. Verify that the Hitachi PC SEM software is running.Note: To log into the PC and PC-SEM software, the username and password are set by default to“semuser”Note: You will get no EDS or BSE signal with the camera on. Except for sample loading/unloading, thisshould be left OFF.4. Use the sample gauge to measure both the sample Height and Size (width).a. Measure the width FROM the line labeled “standard.”b. Put the sample at eye level to measure the height of the highest portion of the sample.c. Enter these values into the dialog box, rounding up to the next value if it is between two choices. This iscritical so you don’t crash your sample into fragile components around the objective lens.5. Vent the chamber by pressing the AIR button in the upper right corner of the PC-SEM interface.a. The stage will automatically be sent to the Home Z65 position and the chamber will vent.b. The chamber is vented when it beeps THREE times.6. Carefully open the SEM door and load your sample holder onto the stage.117. Hold the chamber door shut and press the EVAC button on the front of the SEM.8. Turn on Chamber Scope with the Camera On/Off button below the chamberscope monitor to the left of the PC monitors.9. A dialog box will appear on the screen. Input the size (width) and height of thesample and click OK.10. When the chamber is at high vacuum ( 90 seconds), the light by the EVAC button will stop blinking and the SEMwill beep.11. Ensure the proper Vacuum Mode is selected.1314a. High Vacuum Users: ensure SEM mode is selected under the COND tab(right side of screen).b. Low Vacuum Users: ensure VP-SEM mode is selected under the CONDtab (right side of screen).12. If the Setup tab on the left side of the screen is NOT open, select Setup OpticsSetup13. Choose your accelerating voltage level (Vacc).14. Set probe current to 50 to start. (This can be changed later.)a. The probe current controls the strength of the condenser lenses in thecolumn.15i. Higher values of probe current will result in greater signalstrength but poor resolution.ii. Lower values will give greater resolution, but reduced signalstrength and a noisier image.15. Turn the beam on by pressing ON in the upper left corner of the control16screen.16. As soon as the high voltage is on, in the Optics Setup window, press AFS toauto-saturate the tungsten filament source.IMPORTANT: Whenever the kV or Probe Current is changed, always re-saturate the filament bypressing AFS.1II.Start Up1. Under the Image tab o nthe right side of the screen, ensure the SE detector isselected.a) Low Vacuum Users: choose either the BSE or ESED detector. The Slow 1 scan speed will help whenviewing the sample in these modes.2. Ensure the scan speed is set to Fast 1 (in the top left part of the screen).2
23.4.5.6.7.III.4Lower the magnification all the way (Mag knob CCW until it beeps).Adjust brightness and contrast (ABCC button).Use the trackball to move that stage X/Y and locate your sample.Focus on the surface of your sample.For higher resolution imaging or EDS, you will need to move the sample closer to the lens.a) From the Stage menu on the right of the screen, select the Analysis button to send the stage to a 10mm.b) Hit the STOP button (upper right corner of the screen) to stop movement of the stage if your sample getstoo close to the lens.c) Focus on the surface of the sample.7dd) If WD is less than 10mm, send sample back to HOME Z65 position. Removesample from chamber and measure it again. Having a correct sample height willprevent you from crashing the lens.e) If WD is equal or greater than 10mm, you may continue to decrease the WD by going to the Stage taband adjusting the Z value. (5 mm is the minimum.)Alignmnet1. Insert the desired aperture by turning the aperture knob.a. Turn knob CW for smaller aperture.b. Turn knob CCW for larger aperture.c. 1 is the largest aperture, 4 is the smallest.d. Typically aperture 2 or 3 is used.2. Increase magnification to at least 5,000x and find a small round feature on your sample to use for alignment.3. Focus your area of interest.44. Click the Alignment button.5. Select Aperture Alignment.a. The focus wobble will turn on automatically.b. Adjust the X and Y Stigma/Alignment knobs on thecontrol surface to minimize translation of the image.6. Select Beam Align. Tilt and hit the Auto button.a. This will align both the Beam Tilt and Shift.7. Select Stigma Align. X and use the X and Y Stigmator/Alignmentknobs on the control surface to minimize translation of the image.a. YES, adjust BOTH X and Y knobs to align each of the Xand Y stigmators.8. Select Stigma Align. Y and repeat step 7.9. Do nothing for AFC Align.10. Close the alignment menu.11. Focus the image with the Focus knob and adjust for astigmatismusing the X and Y Stigma/Alignment knobs on the control surface.Note: You can set the scan speed to Red 1 to get areduced screen to help you see better.2IV.Backscatter Detector1. Ensure the Chamber Scope is turned OFF.2. Select the BSE detector by choosing BSE on the Image tab.3. The BSE detector has 5 segments, which can be turned on and off independentlyfor different modes of operation.a. Comp mode uses all 4 axially mounted segments for good compositionalcontrast.b. Topo and 3D modes have different configurations to enhance topographiccontrast.c. If you press the Detail button, you can fully configure the detector.43c3
34. The BSE Gain setting is used to control the preamplifier gain on the detector, withthe default setting in the third position.a. For low signal applications (ie, low kV, low Probe Current, etc.) you mayneed to increase the gain to get a good image.b. If the contrast is saturated (too bright), decrease the gain.V.Image Capture1. Ensure Image has been properly focused and the Stigmators adjusted.2. Adjust Brightness/Contrast using ABCC button and Brightness and Contrast knobson the control surface.3. To set the capture scan speed, right-click the Image Capture button.a. For slow scan image capture: select Slow, the resolution and the time of the scan. The default setting isshown in the example.b. For frame integration, select Fast scan mode and the number of frames to integrate.4. Click OK.5. Left-click the Image Capture button to acquire the image.6. Images taken will appear in the Captured Images window at the bottom leftof the screen.7. Select images you want to save and click the PCI button.8. If not open already, Quartz PCI will open automatically.9. From PCI, you can save multiple ways.a. To save the PCI and TIF file at the same time, select File SaveAs.7b. To save only the TIF or JPG, select File Export.c. To Export all images at once as a .TIF or .JPG, select File Export All.Note: PCI is available on other computers in the main lab. If you save the PCI version of the file you can edityour images or take measurements later.Extra Special Note: If you are taking multiple images of the same sample and don’t want to save each imageindividually:a. Open the Quartz PCI software from the Windows Start Menu.b. From the PCI software File Series Name and enter a project name. All images transferred to PCI fromthe SEM software will be named: series01, series02, etc.c. File Export All to save all images to the SemServer.VI.EDS with INCA1. Turn OFF chamber camera.2. Accelerating Voltage set to appropriate level.a. Usually 15-30keV, but can be lower depending on your sample.3. Larger Aperture selected to increase current. (Usually #1 or #2, though no Aperture may be selected as well.)4. Area to be analyzed at 10mm.a. This IS NOT the Z height of the stage displayed on the right side of the screen under the Stage tab.b. The WD should read 10mm ( /- 0.2mm) when the area of analysis is in focus.5. Probe Current may be increased to increase x-ray signal. Realign SEM after changing Probe Current.VII.1.2.3.4.5.6.7.Shut Down and Sample Removal1Click the OFF button in the upper left corner of the screen.Click the AIR button to automatically send the stage to the Home Z65 position and vent the chamber.After the chamber vents (you will hear 3 quiet beeps), gently open the door and remove your sample.If you were using low vacuum mode, switch the SEM is back to SEM mode under the Conditions tab.While holding the door firmly shut, press the EVAC button to evacuate the sample chamber.Clean up your mess.Log out in the FOM system.4
5
Hitachi S-3400Frequently Asked QuestionsSEM computer username/pass – semuserEDS computer username/pass – INCA1.PROBLEM:ANSWER:2.PROBLEM:ANSWER:The INCA EDS software has frozen up.a. Close all software on BOTH SEM and EDS computers and restart them both.I turn the HV on and can’t see anything.Try each of these in turn. If one doesn’t work, go to the next one.a. Ensure Ie is reading something (other than 0)i. If the Ie reads 0, the filament is blown OR there is a communication issuesomewhere. Restart the SEM computer. If it recurs find Eric or Ben.b. Turn down Mag all the way.c. Click ABCCd. Remove the Aperture all the way.i. If you can see things now it means the Aperture alignment is way off, eitherphysically or electronically. Find Eric or Ben.e. The EDS software may have control of the SEM. Close all software on BOTH SEMand EDS computers and restart them both.6
Hitachi S-3400 Frequently Asked Questions . SEM computer username/pass - semuser. EDS computer username/pass - INCA . 1. PROBLEM: The INCA EDS software has frozen up. ANSWER: a. Close all software on . BOTH. SEM and EDS computers and restart them both. 2. PROBLEM: I turn the HV on and can't see anything. ANSWER: Try each of these in turn.