Transcription
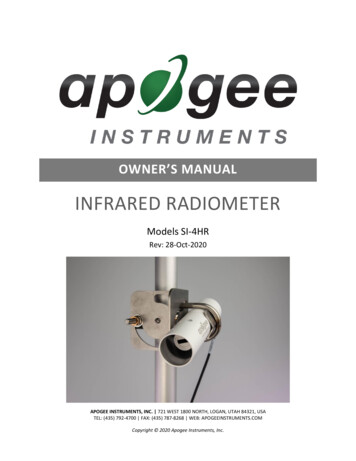
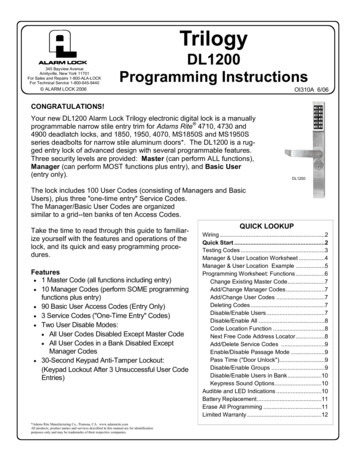
Trilogy345 Bayview AvenueAmityville, New York 11701For Sales and Repairs 1-800-ALA-LOCKFor Technical Service 1-800-645-9440DL1200Programming InstructionsOI310A 6/06 ALARM LOCK 2006CONGRATULATIONS!Your new DL1200 Alarm Lock Trilogy electronic digital lock is a manuallyprogrammable narrow stile entry trim for Adams Rite 4710, 4730 and4900 deadlatch locks, and 1850, 1950, 4070, MS1850S and MS1950Sseries deadbolts for narrow stile aluminum doors*. The DL1200 is a rugged entry lock of advanced design with several programmable features.Three security levels are provided: Master (can perform ALL functions),Manager (can perform MOST functions plus entry), and Basic User(entry only).DL1200The lock includes 100 User Codes (consisting of Managers and BasicUsers), plus three "one-time entry" Service Codes.The Manager/Basic User Codes are organizedsimilar to a grid--ten banks of ten Access Codes.Take the time to read through this guide to familiarize yourself with the features and operations of thelock, and its quick and easy programming procedures.Features 1 Master Code (all functions including entry) 10 Manager Codes (perform SOME programmingfunctions plus entry) 90 Basic User Access Codes (Entry Only) 3 Service Codes ("One-Time Entry" Codes) Two User Disable Modes: All User Codes Disabled Except Master Code All User Codes in a Bank Disabled ExceptManager Codes 30-Second Keypad Anti-Tamper Lockout:(Keypad Lockout After 3 Unsuccessful User CodeEntries)QUICK LOOKUPWiring .2Quick Start .2Testing Codes .3Manager & User Location Worksheet .4Manager & User Location Example .5Programming Worksheet: Functions .6Change Existing Master Code .7Add/Change Manager Codes .7Add/Change User Codes .7Deleting Codes .7Disable/Enable Users .7Disable/Enable All .8Code Location Function .8Next Free Code Address Locator .8Add/Delete Service Codes .9Enable/Disable Passage Mode .9Pass Time ("Door Unlock") .9Disable/Enable Groups .9Disable/Enable Users in Bank .10Keypress Sound Options .10Audible and LED Indications .10Battery Replacement .11Erase All Programming .11Limited Warranty .12*Adams Rite Manufacturing Co., Pomona, CA. www.adamsrite.comAll products, product names and services described in this manual are for identificationpurposes only and may be trademarks of their respective companies.1
WiringWiring:See the Installation Instructions for more information.Batteries:Use only two '123' Type Lithium batteries (DuracellP/N CR17345).Quick StartFirst Time Start Up1. Unpack the lock from its factory packaging.2. Connect the battery pack.3. Listen for 3 beeps. The lock is now ready to accept programming. Note: Failure to follow this exact procedure can result in erratic lock behavior.Important Note: When entering any key sequence below, do not pause more than 5 seconds between anykey presses--otherwise you must start again. (Note: If you wish, this 5-second delay between key pressescan be extended--see Pass Time on page 9 after completing this section).No other programming commands will be accepted until the Factory Master Code has been changed.Change Factory Master CodeThe Master Code is a "secret" code (entered at the keypad) that allows you to change ALL programming functionsand options. Because all locks are manufactured identically (and leave the factory with the same Master Code),this "factory Master Code" is not very secret--and MUST be changed to your own personal Master Code to ensuresecurity. A 5 digit Code is recommended.1. Press the factory Master Code: 1 2 3 4 5. A beep will sound and the lock will open (if thelock does not unlock, refer to section "Erase All Programming" on page 11).2. Within 5 seconds, press ; 1 ;.3. Within 5 seconds, enter a new Master Code. This new Master Code may consist of 3 to 5 digits*, however, thenumber selected determines the number required for all subsequent Manager and User Access Codes.4. Press ;.5. Re-enter the new Master Code again to validate. A 6-beep acknowledgement (with a red LED) will sound.Wait 5 seconds for lock to re-lock.6. Test the new Master Code. Enter the new Master Code; a beep will sound and the lock will unlock. Now thatthe Master Code has been changed, there is no need to change it again (unless you want to).For example, if you want your new Master Code to be "44444", press:1 2 3 4 5 ; 1 ; 44444 ; 44444.If you wish, write your new Master Code in the spaces provided:1 2 3 4 5 ; 1 ; ;(Write your new Master Code)(Repeat)(Continued)* Once the number of digits is selected, it cannot be changed unless all programming is erased and the Factory Default settings are re-loadedusing the "Erase All Programming, Alternative Method" procedure found on page 11.2
Quick Start (cont’d)Enter a Manager CodeManager Codes are located at locations 00, 10, 20, 30, 40, 50, 60, 70, 80, and 90 (see grid on page 4). Note:New Manager Codes MUST use the same number of digits as the (new) Master Code. Enter as follows.1. Press the (new) Master Code.2. Press ; [press a Manager location i.e. 00, 10, 20, 30, 40, 50, 60, 70, 80, or 90] ;.3. Press a new Manager Code using the same number of digits as the (new) Master Code. A 6-beep acknowledgement (with a red LED) will sound. Wait 5 seconds for lock to re-lock.For example, if you want to add a Manager Code of "33333" in location 00,[Press the (new) Master Code] ; 00 ; 33333.4. If lock remains open, repeat from step 2; otherwise restart from step 1 for each new Manager Code.Enter Basic User Access CodesSee the grid on page 4 for more information regarding User locations. You can choose to enter your User Codesin many possible locations, and in any order you wish. User Codes do not have programming privileges (entryonly). Duplicate User Codes are not allowed.1. Press the (new) Master Code or associated Manager Code.2. Press ; [press a 2-digit location number] ;.3. Press a new User Access Code using the same number of digits as the (new) Master Code. A six-beep acknowledgement (with a red LED) will sound. Wait 5 seconds for lock to re-lock. The new User Access Code isnow entered in that location number.For example, if you want to add a User Access Code of "22222" in User Number 01, press:[(New) Master Code] ; 01 ; 22222.4. If lock remains open, repeat from step 2; otherwise restart from step 1 for each new User Access Code.Delete a User Access CodeThe Master Code cannot be deleted. Manager Codes can only be deleted with the Master Code. If the location(User Number) of the Code is unknown, use the Code Location Function (page 8).1. Press the (new) Master Code or Manager Code.2. Press ; [press the 2-digit location number] ; :. A six-beep acknowledgement (with a red LED) willsound. Wait 5 seconds for lock to re-lock. The User Access Code is now deleted.For example, if you want to delete a User Access Code located in location 47, press:[(New) Master/Manager Code] ; 4 7 ; :.3. If lock remains open, repeat from step 2; otherwise restart from step 1 for each User Access Code you want todelete.Testing CodesVALID CODE - The Green LED will flash (with 1 beep) after a valid code is entered. The lock will unlock immediately andremain unlocked for about 5 seconds (this "unlocked" time is the "Pass Time"). To make the Pass Time longer orshorter, use the Pass Time Function on page 9. Note: While the lever or knob may be rotated at any time, the latchwill not be engaged to unlock the door unless a valid User Access Code is entered at the keypad.INVALID CODE - The Red LED will flash 5 times (with 5 beeps) after an invalid code is entered. (To quickly clear an invalidUser Access Code, press ; and immediately re-enter the correct Code).KEYPAD ANTI-TAMPER LOCKOUT - If 3 invalid User Access Codes are entered in succession, the lock will turn off forapproximately 30 seconds to prevent tampering. The DL1200 will emit 2 beeps with a Red LED flash warning at theend of the anti-tamper period. The lock will exit Anti-Tamper mode in 30 seconds or upon activation of the RemoteSwitch Input (white wires). Note: The lock will go into Anti-Tamper after 3 unsuccessful Code entries even if enteredby different users and spaced apart in time. Therefore, the lock may “appear” to go into Anti-Tamper Lockout evenafter the entry of just one invalid User Access Code.3
Manager & User Location WorksheetThe DL1200 lock provides three "security levels": Master (can perform ALL functions), Manager (can perform SOME programming functions plus entry), and Basic User (entry only). In total, there are 104 "locations" inside the DL1200 lock: one MasterCode, 10 Manager and 90 User Access Codes, and three "one-time entry" Service Codes. Where the Access Code is locatedwill determine its security level. From the factory, all locations (except for the Master Code) are empty; each location can then beprogrammed to contain an Access Code, and these Access Codes enable Users to program and/or unlock the lock. As a visualaid, the 100 Manager/User Access Code locations are detailed in the grid below, with ten "Banks" (columns) of ten "Managers/Users" (rows). Each of the 100 squares in the grid is identified by a unique two-digit location (00) through (99). Notice that thesetwo digits also specify its Bank (column) and Manager/User (row) location in the grid. Also notice that all Managers are in the toprow, their locations all ending in a zero (locations 00, 10, 20, 30 and so on through 90). Note: Use the blank grid below as a Programming Worksheet for preparing all programming in advance. Store this worksheet in a safe place for future reference.Each square represents a location inside the lock (excluding the Master Code and the 3 ServiceCodes). Each location can hold one "User Access Code" which can unlock the lock.MANAGERS BANK 0BANK 1BANK 2BANK 3BANK 4BANK 5BANK 6BANK 7BANK 8BANK 9MGR 00MGR 10MGR 20MGR 30MGR 40MGR 50MGR 60MGR 70MGR 80MGR 90USER 01USER 11USER 21USER 31USER 41USER 51USER 61USER 71USER 81USER 91USER 02USER 12USER 22USER 32USER 42USER 52USER 62USER 72USER 82USER 92USER 03USER 13USER 23USER 33USER 43USER 53USER 63USER 73USER 83USER 93USER 04USER 14USER 24USER 34USER 44USER 54USER 64USER 74USER 84USER 94USER 05USER 15USER 25USER 35USER 45USER 55USER 65USER 75USER 85USER 95USER 06USER 16USER 26USER 36USER 46USER 56USER 66USER 76USER 86USER 96USER 07USER 17USER 27USER 37USER 47USER 57USER 67USER 77USER 87USER 97USER 08USER 18USER 28USER 38USER 48USER 58USER 68USER 78USER 88USER 98USER 09USER 19USER 29USER 39USER 49USER 59USER 69USER 79USER 89USER 99USERS USERS USERS USERS USERS USERS USERS USERS USERS MASTER CODELOCK DESCRIPTION4SERVICE CODE 1SERVICE CODE 2SERVICE CODE 3
Manager & User Location ExampleUser Access Codes allow access only; Manager Codes allow more: Manager Codes have the ability to program and deleteUser Access Codes within that Manager's Bank (column). The DL1200 lock can hold up to 10 Manager Codes, one foreach Bank (locations (00), (10), (20), (30), (40), (50), (60), (70), (80), (90)), and are all found at the top row of the grid below. Note: Only the Master Code can add or delete a Manager Code.In addition, Managers not only possess programming abilities for User Access Codes residing in their own Bank, but alsofor all higher Banks until the next programmed Manager Code appears.For example (see shaded grid below), if Manager Codes are programmed for locations (00) and (60), then the Manager inlocation (00) has control of the gray-shaded locations (00-09, 11-19, 21-29, 31-39, 41-49, and 51-59). The Manager in location (60) then has control over the black-shaded locations (61-69, 71-79, 81-89, and 91-99).Note: If you wish to grant any Manager the ability to program any User, use the "Disable Groups" Function on page 9(Enter the Master Code, then press ; 211 ;).Manager CodeProgrammed hereManager CodeProgrammed here(BANK 0)(BANK 1)(BANK 2)(BANK 3)(BANK 4)(BANK 5)(BANK 6)(BANK 7)(BANK 8)(BANK 9)MGR 00MGR 10MGR 20MGR 30MGR 40MGR 50MGR 60MGR 70MGR 80MGR )(BLANK)USER 01USER 11USER 21USER 31USER 41USER 51USER 61USER 71USER 81USER 91USER 02USER 12USER 22USER 32USER 42USER 52USER 62USER 72USER 82USER 92USER 03USER 13USER 23USER 33USER 43USER 53USER 63USER 73USER 83USER 93USER 04USER 14USER 24USER 34USER 44USER 54USER 64USER 74USER 84USER 94USER 05USER 15USER 25USER 35USER 45USER 55USER 65USER 75USER 85USER 95USER 06USER 16USER 26USER 36USER 46USER 56USER 66USER 76USER 86USER 96USER 07USER 17USER 27USER 37USER 47USER 57USER 67USER 77USER 87USER 97USER 08USER 18USER 28USER 38USER 48USER 58USER 68USER 78USER 88USER 98USER 09USER 19USER 29USER 39USER 49USER 59USER 69USER 79USER 89USER 99MANAGERS USERS USERS USERS USERS USERS USERS USERS USERS USERS Manager Location Example5
Programming Worksheet: FunctionsDirections: The Factory Master Code (1-2-3-4-5) must first be reprogrammed as a new Master Code before any other programmingcan take place. All new Access Codes must have the same number of digits as the new Master Code. Choose new Access Codesand write them in spaces provided (in pencil) before programming the lock. 6 beeps will usually be heard after an acceptable entry.FUNCTIONChange Existing Master CodePRESS THESE BUTTONS ON KEYPAD[Enter Factory or Existing Master Code] ;1; [Enter New Master Code ] ;[Re-enter New Master Code ] [6 beeps OK]Add/Change Manager Codes (up to 10) [Enter Master Code] ; [Enter 2-digit Manager Location ] ;[Enter new Manager Code ] [6 beeps OK]Add/Change User Codes (up to 90)Press Master or Manager Code ; [Enter 2-digit Location ] ; [Enter new User Code ][6 beeps OK]Deleting Manager & User CodesPress Master or Manager Code ; [Enter Bank Number] [Enter User Number] ;:Disable User NumberPress Master or Manager Code ; [Enter Bank Number] [Enter User Number] ;Enable User NumberPress Master or Manager Code ; [Enter Bank Number] [Enter User Number] ;Disable AllPress Master or Manager Code ; 9 5 5 ; (Reset with Function 944)Enable AllPress Master or Manager Code ; 9 4 4 ;Disable Users OnlyPress Master or Manager Code ; 9 5 0 ; (Reset with Function 944)Code Location FunctionPress Master or Manager Code ; 6 ; [Enter Code to be located]Next Free Code--Address LocatorPress Master or Manager Code ; 7 ; [Responds with Bank # and User #]Service Code 1Press Master or Manager Code ; 3 0 1 ; [Enter new Service Code ]Service Code 2Press Master or Manager Code ; 3 0 2 ; [Enter new Service Code ]Service Code 3Press Master or Manager Code ; 3 0 3 ; [Enter new Service Code ]Clear Service CodesPress Master or Manager Code ; 3 0 0 ;Enable Passage ModePress Master or Manager Code ; 4 ;Disable Passage ModePress Master or Manager Code ; 5 ;Pass Time ("Door Unlock")Press Master Code ; 4 [Enter "02" - "20" seconds] ;Enable GroupsPress Master Code ; 2 1 0 ;Disable GroupsPress Master Code ; 2 1 1 ;Disable Users In BankPress Master or Manager Code ; 8 5 [Enter Bank Number (0-9)] ;Enable Users in BankPress Master or Manager Code ; 8 4 [Enter Bank Number (0-9)] ;High Freq KP Feedback LedPress Master Code ; 2 2 0 ;Low Freq KP Feedback LedPress Master Code ; 2 2 1 ;Click! KP Feedback LedPress Master Code ; 2 2 2 ;Led OnlyPress Master Code ; 2 2 3 ;Erase All ProgrammingPress Master Code ; 0 0 0 ; [Listen for 6 beeps OK]Note: Managers do not have the ability to add/delete/enable/disable Users outside their Bank, unless Groups are disabled.6
Programming FunctionsChange Existing Master Code* ; 1 ;For new locks, follow the "Quick Start" on page 2.[ ];1;Old (or "Factory") Master Code[ ] ; [ ]New Master Code*Confirm New Master Code*Add/Change Manager Codes ; [ ] 0 ;Follow the "Quick Start" on page 3. Note: You can also add/change the Manager Code in location00 by entering the Master Code, ; 2 ; then the new Manager Code.[ ]; [] 0 ; [ ]Master Code**New Manager CodeManager Bank (Column) 0-9User (Row) Always zero for ManagersAdd/Change User Codes ; [ ] ;Follow the "Quick Start" on page 3.[ ]Master Code orManager Code**;[ ] ; [ ]New User CodeBank (Column)0-9User (Row)1-9Deleting Manager & User Codes ; [ ] ; :Follow the "Quick Start" on page 3.[ ]; [ ] ; :Master or Manager Code**Manager Bank (Column)0-9User (Row) Always zero for Managers0-9Disable/Enable UsersEnter the Master Code to disable/enable any Manager or User, or enter a Manager Code to disable any Userwithin the Manager's Bank.Disable User Number[ ]Master or Manager CodeEnable User Number[ ]Master or Manager Code;;[ ]; (Allow system to relock)Bank/User Number[ ]; (Allow system to relock)Bank/User Number* Once the number of digits is selected, it cannot be changed unless all programming is erased and the Factory Default settings are re-loaded(power must be removed and re-applied as per the "Erase All Programming" procedure found on page 11.** Required only if DL1200 is locked.7
Programming Functions (cont'd)Enable/Disable AllDisable All: If Master Code is used, disables all 100 User\Manager Codes and clears all 3 Service Codes. Ifa Manager Code is used, disables all Users (even across multiple Banks) under that Manager.Disable Users Only: If Master Code is used, disables all 90 Users and clears all 3 Service Codes, while Managers remain active. If a Manager Code is used, disables all Users (even across multiple banks) under that Manager.Enable All: If Master Code is used, re-enables all 100 User/Manager Codes (Service Codes must be reprogrammed). If a Manager Code is used, re-enables all Users (even across multiple Banks) under that Manager. Note: Managers cannot disable themselves. Use Function 944 to restore Functions 955 and 950. Inaddition, if Codes are disabled using Function 955 or 950, and a new User Code is subsequently added (or anexisting Code changed), the new (or changed) User Code will automatically become enabled.Disable All[ ] ;955;Master/Manager Code**Disable Users Only[ ] ;950;Master/Manager Code**Enable All[ ] ;944;Master/Manager Code**Code Location Function ; 6 ;Be sure to record all Code locations in the blank worksheet (page 4) for future reference. If the location of a Code isnot known, use this function to find the Code. The lock will identify the BANK (0-9) and USER (0-9) by beeping andflashing the GREEN LED 0 to 9 times as detailed below.[ ] ; 6 ; [ ]Master/Manager Code**Code 2 - 5 digitsIf the code entered is recognized, the following sequence will occur:1. At the start of the Code Location sequence, the lock will Flash both the GREEN and RED LEDs and will emit a low tone.2. The lock will identify the Bank number by flashing the GREEN LED and beeping the sounder from 0 -9 times.3. To signify the end of the Bank number ID sequence, the lock will flash both the GREEN and RED LEDs and will emit a low tone.4. The lock will identify the User number by flashing the GREEN LED and beeping the sounder from 0-9 times.5. To signify the end of the Code Location function, the lock will flash both the GREEN and RED LEDs and will emit a low tone.Note: Should the Code not be recognized, the lock will sound 5 beeps with a RED LED. When the Bank and/or slot numbers arezero, the GREEN LED will not flash and the sounder will not beep.Next Free Code Address Locator ; 7 ;Using the same method of beeps and flashes used in the Code Location Function, and dependent on the Master or Managers Code entered, the lock will report the next available address for User Access Code programming.[ ];7;Master/Manager Code**Report SequenceAt the start of the Next Free Code Location function, the lock will Flash both the GREEN and RED LEDs and will emit a low tone.The lock will identify the Bank number by flashing the GREEN LED and beeping the sounder from 0 -9 times.To signify the end of the Bank number ID sequence, the lock will flash both the GREEN and RED LEDs and will emit a low tone.The lock will identify the User number by flashing the GREEN LED and beeping the sounder from 0-9 times.To signify the end of the Code Location function, the lock will flash both the GREEN and RED LEDs and will emit a low tone. If no freeaddress is found, then the lock will emit a programming error tone sequence. No LED flashes/sounder beeps represent the numberzero.1.2.3.4.5.** Required only if DL1200 is locked.8
Programming Functions (cont'd)Add/Delete Service CodesService Codes are one-time-only Codes; once entered into the keypad, it is deleted. Use the same Code upto 3 times by programming all three Service Codes with the same Code. Note: Service Codes are lost ifpower is removed. To delete a single Service Code, press ;, enter Service Code number (301, 302 or303), then press ; :.Service Code 1[ ]Master/Manager Code**Service Code 2[ ]; 301 ;[ ]; 302 ;[ ]Master/Manager Code**Service Code 3[ ]Master/Manager Code**Delete All Service CodesNew Service CodeNew Service Code; 303 ;[ ]Master/Manager Code**[ ]New Service Code; 300 ;Enable/Disable Passage ModeAllows passage without the need to enter a Code into the keypad.Enable Passage Mode[ ]Master or Manager Code**Disable Passage Mode[ ]Master or Manager Code**; 4 ; ("Unlocked"); 5 ; ("Normal Operation")Pass Time ("Door Unlock")The Pass Time is the time the lock stays unlocked after a valid Code entry. Use the function below to changethe Pass Time from 02 to 20 seconds. The Pass Time factory default is 5 seconds. NOTE: The Pass Timewill also determine the amount of time allowed between keypresses during programming.Pass Time[ ]Master Code**;4[ ] ;Pass TimeDisable/Enable GroupsDisable Groups: All Managers can program all User Access Codes, regardless of Bank.Enable Groups: (Factory default) Managers restricted to controlling only those User Access Codes withintheir own Bank (column), and all following Banks until another Manager appears. User Access Codes inBanks outside of that Manager's Bank cannot be programmed.Disable Groups[ ]Master Code**Enable Groups[ ]Master Code**; 211 ;; 210 ;** Required only if DL1200 is locked.9
Programming Functions (cont'd)Disable/Enable Users in BankEnter Bank number (0-9) to Enable/Disable all Users in Bank. Entering a disabled Code will result in anaccented five beep error tone (indicating the User Access Code is valid but disabled).Disable Users in Bank[ ]Master/Manager Code**Enable Users in Bank[ ]Master/Manager Code**; 8 5 [];Bank Number; 8 4 [];Bank NumberKeypress Sound OptionsThe DL1200 is capable of emitting 1 of 4 possible keypress sounds: High Frequency Keypad Feedback Led Low Frequency Keypad Feedback Led "Click!" Keypad Feedback Led Led OnlyHigh Freq KP Keypress Sound Led(Default)[ ]Low Freq KP Keypress Sound Led[ ]Master Code**Master Code**Click! KP Keypress Sound Led[ ]Master Code**Led Only[ ]Master Code**; 220 ;; 221 ;; 222 ;; 223 ;Audible and LED IndicationsWhen a key is pressed, a beep will sound and a Red LED will flash. Other indications are: Access Granted: 1 beep and a Green LED flash. (When Pass Time ends, the DL1200 locks with a beep and aRed LED flash). Invalid Code Entered: 5 beeps and 5 Red LED flashes. Disabled Code Entered: 5 beeps (with extended first beep) and 5 Red LED flashes. New Access Code Accepted: 6 beeps and 6 Red LED flashes. Programming Error: 2 sets of 5 beeps and 5 Red LED flashes. Return from Anti Tamper Lockout: 2 beeps with a Red LED flash. Low Battery: High/Low sounder with flashing Red LED for 5 seconds. (See below to replace batteries).Note: Keypress tones may be disabled using the ; 2 2 3 ; command (see Keypress SoundOptions, page 10).10** Required only if DL1200 is locked.
Battery ReplacementWhen a valid code is entered and the batteries are weak, thered & green LED's will light and the sounder will sound for 4seconds. The DL1200 uses two '123' Type Lithium batteries(Duracell P/N CR17345). The lock will function with weakbatteries; however be sure to replace them as soon aspossible.If the DL1200 is ever without power for less than 1 minute(such as when replacing batteries), the DL1200 will continue itsoperation undisturbed--programming remains unaffected dueto power provided by capacitors inside the lock. If the DL1200is without power for greater than one minute, you have twochoices--you can (1) retain the lock programming or (2) eraseall programming. If you choose to erase all programming, theDL1200 will revert to its original factory default configuration("out of the box").CAUTION: Do not press any keys while batteries are disconnected unless you intend to erase all programming.1. Insert key in cylinder and turn counterclockwise to allow access to the battery compartment screw. With thesupplied 5/64" Allen wrench, loosen the battery coverscrew only until the battery cover is able to slide off.2. Pull out the battery pack and quickly replace bothbatteries - within 1 minute.3. If you do not hear the 3 beeps when power is reapplied, all programming and settings have been retained, and the lock is ready for use. Go to step 5.4. If you do hear 3 beeps when power is re-applied, donot press any keys for 15 seconds. After the 15second period, the LED will flash red 6 times and 6beeps will sound. Reset the clock using functions 38, 39and 40.5. Slide the battery cover back in place and tighten thescrew.If you accidentally press a key (or fail to replace the batterieswithin 1 minute), use the Retain Lock Programming procedure below:Retain Lock Programming1. Re-install battery pack.2. Do not press any keys for 10 seconds.If you do not hear any beeps or if you hear 3 beeps (oneper second), the previous lock programming is retained andthe lock is now ready for use. If you test the DL1200 andfind the lock programming is lost, you may erase all programming and return the DL1200 to its original factory settings, as described below.Erase All ProgrammingRESTORE FACTORY DEFAULT (original "out of box" settingsthat were set at the factory will be loaded).1. Enter the current Master Code (if not known, proceed directly to ALTERNATIVE METHOD, below). Wait for thegreen light and press ; until multiple beeps are heard.You are now in Program Mode.2. Within 5 seconds (or current pass time interval),press ; 99 ; 000 :.3. Listen for 6 beeps. The lock will re-lock. All settings andprogramming have been erased. Proceed directly to page12, Quick Start, and follow the procedure "Enter ProgramMode and Change Factory Master Code".ALTERNATIVE METHODNote: This method requires the lock first be removed fromthe door.1. Insert key in cylinder and turn counterclockwise to allow access to the battery compartment screw. With thesupplied 5/64" Allen wrench, loosen the battery coverscrew only until the battery cover is able to slide off.2. Disconnect the battery pack.3. Remove the back plate by unscrewing the two Phillipshead screws. Note: Some models have four Phillipshead screws. Be careful not to damage the motor drivewires.4. Locate jumper header JP1 near the top of the printedcircuit board and install the jumper (provided) across pins1 and 2 of JP1.5. Press and hold down ; for 10 seconds (to ensureall power is drained from the lock) and release.6. Connect the batteries and--within 5 seconds--pressand hold ;. After hearing 6 additional beeps, release ;.If you do not hear these 6 additionalbeeps, you must start over at step 2. Failure to followthis exact procedure can result in erratic lock behavior.7. Test by pressing the default Master Code of123456 (a beep will soundand the lock will unlock).8. Remove the jumper from JP1 pins 1 and 2 and placejumper on 1 pin for storage.9. Carefully reinstall the back plate STRAIGHT onto thelock body. Be careful not to pinch or damage the motordrive wires. While inserting the back plate, be sure therear pin of the tailpiece inserts into the spindle hole-check this alignment after installation by pushing on thespring-loaded tailpiece to verify that it smoothly movesup and down. Replace the two (or four) Phillips headscrews to secure the back plate. Note: It may be necessary to tighten the battery screw previously loosenedin step 1.10. Re-mount the lock on the door. With the batteryback inside its compartment, slide the battery coverback in place and tighten the screw.All settings and programming have been erased. Proceed directly to page 12, Quick Start, and follow theprocedure "Enter Program Mode and Change Factory Master Code".11
Alarm Lock Limited WarrantyALARM LOCK SYSTEMS, INC. (ALARM LOCK)warrants its products to be free from manufacturingdefects in materials and workmanship for 24 monthsfollowing the date of manufacture. ALARM LOCK will,within said period, at its option, repair or replace anyproduct failing to operate correctly without charge tothe original purchaser or user.This warranty shall not apply to any equipment, orany part thereof, which
Your new DL1200 Alarm Lock Trilogy electronic digital lock is a manually programmable narrow stile entry trim for Adams Rite 4710, 4730 and 4900 deadlatch locks, and 1850, 1950, 4070, MS1850S and MS1950S series deadbolts for narrow stile aluminum doors*. The DL1200 is a rug-ged entry lock of advanced design with several programmable features.
