Transcription
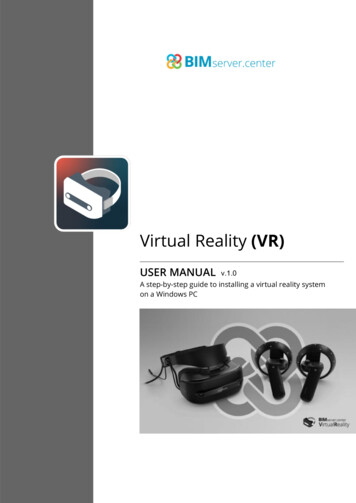
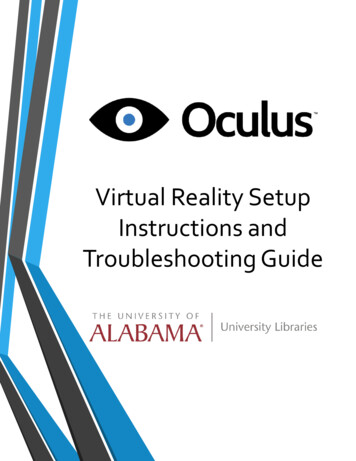
Virtual Reality SetupInstructions andTroubleshooting Guide
Table of ContentsWhat is the Oculus Rift?Pg. 3How Does the Oculus Rift work?Pg. 4What about Augmented Reality?Pg. 5Item Check ListPg. 6Item Check List Cont.Pg. 7Item Check List Cont.Pg. 8Cable SetupPg. 9Cable Setup Cont.Pg. 10VR Headset SetupPg. 11VR Headset Setup Cont.Pg. 12VR Headset Setup Cont.Pg. 13VR Headset Setup Cont.Pg. 14VR Headset Setup Cont.Pg. 15VR Application ConfigurationPg. 16VR Demo ListPg. 17TroubleshootingPg. 18CreditsPg. 192
What is the Oculus Rift?Invented by a VR enthusiast named Palmer Luckey, the OculusRift is a set of virtual-reality goggles that will work with yourcomputer or mobile device. After he showed a prototype at theE3 gaming convention in 2012, Luckey founded Irvine, Calif.based Oculus VR with Brendan Iribe, who became CEO. The twolaunched a Kickstarter project in August 2012 to sell prototypedeveloper versions of the Oculus Rift, raising 2.4 million. Sinceselling out of the original Oculus Rift development kit, thecompany has launched a revamped 350 Development Kit 2(DK2) model while continuing to work on its eventual consumerversion.On Mar. 25, 2014, Oculus VR was purchased by socialnetworking giant Facebook for a combined 2 billion dollars.Facebook CEO Mark Zuckerberg said that the headset "has thechance to create the most social platform ever," though wedon't know how exactly the website will utilize the Oculus Rift.In an interview with Polygon, Luckey said that Oculus VR willcontinue to operate in its Irvine headquarters, and will useFacebook's backing to create a better, more affordable product.3
How does the Oculus Rift work?Picture a set of ski goggles in which a large cellphonescreen replaces the glass. The screen displays two imagesside by side, one for each eye. A set of lenses is placed ontop of the screen, focusing and reshaping the picture foreach eye, and creating a stereoscopic 3D image. Thegoggles have embedded sensors that monitor the wearer'shead motions and adjust the image accordingly. The latestversion of the Oculus Rift is bolstered by an externalpositional-tracking accessory, which helps track headmovements more accurately. The result is the sensationthat you are looking around a 3D world.4
What about augmented reality?Augmented reality (AR) involves superimposing graphicsover a view of the real world, such as a cellphone's cameraor the prism display of Google Glass. Since Oculus Rift letsyou see only a 3D world, and not the real world, it can't doAR. However, the execs at Oculus VR have said that maybeone day, they will add cameras to the goggles, allowing youto see the real world when you're not in a game. Such asetup would let you add three-dimensional graphics on topof the camera feed and allow for augmented reality.Considering what Rift creators have indicated in the past,this is not likely to happen with the first consumer version.5
Item Check List Before Starting, check that all of the following itemshave been included with the cart. If anything is missing,immediately contact circulation.Logitech Wireless Keyboard andMouseC2G Display Port to HDMI AdapterOculus Rift HeadsetOculus Rift Tracking Camera6
Item Check List Cont.Oculus Rift Tracking Camera –Micro-USB CableOculus Rift Tracking Camera –Sync CableSony Wireless HeadphonesCharging DockSony Wireless HeadphonesMicrosoft Xbox – Wireless AdapterMicrosoft Xbox – Wireless Controller7
Item Check List Cont.Alienware Performance Computer(Optional) Oculus Rift TrackingCamera – Tri-Pod MountDVI to DVI CouplerDVI to HDMI Coupler If you are looking to use the Optional Tri-Pod Mount pleasenotify a Librarian at the Front Desk for more information.8
Cable Setup Step 1: Decide on your presentation screen (Projector, Flatscreen Television Cart, etc.) Step 2: Identify supported connector types on your presentationscreen Supported Connector Types include DVI and HDMI If your screen supports DVI (the first cable in the picture) moveon to Step 3A, otherwise proceed to Step 3B if you will be usingHDMI9
Cable Setup Cont. Step 3A: Locate the DVI to DVI Coupler inthe Cart Connect DVI Coupler to the DVIcable coming out of the cart Next, connect the coupled cableto the DVI cable coming from thePresentation Screen Verify that the PresentationScreen is on the right input andyou are doneStep 3B: Locate the DVI to HDMI Couplerin the Cart Connect HDMI Coupler to theDVI cable coming out of the cart Next, connect the coupled cableto the DVI cable coming from thePresentation Screen Verify that the PresentationScreen is on the right input andyou are done10
VR Headset Setup Step 1: Identify the location of the AudioHeadset and Dock Remove Headset and Dock andplace on Top of the Cart Connect the Power AdapterCables shown to the right withthe Audio Dock Make sure that the Headset andthe Dock are on the same audiochannels and also that theHeadset is turned on Verify that sound is coming fromthe computer using a Video or anAudio fileStep 2: Identify the location of theOculus Rift Tracking Camera This step is where we will decidewhether or not to use a Tripod orthe Presentation Screen Depending on the limitations ofthe Presentation Screen usagewithout a Tripod may or may notbe possible If you are using the Tripod moveon to Step 3B11
VR Headset Setup Cont. Step 3A: Remove Camera from Cart andplace directly on top of thePresentation Screen In doing this you will want to openthe rubber mounts that arecollapsed on the Camera’s arm sothat the mount will be stableStep 3B: Identify the location of the Tripod Note: Circulation will havethe Tripod and you will haveto request it in addition tothe cart as we do not includeit unless asked Remove Camera from Cart makingsure to note the circular indentionon the bottom that will match upwith the top of the Tripod Gently begin to screw the cameraonto the Tripod and stop once youhave reached the point where it issnug in place making sure not toscrew it on too tight Note: Depending on yourheight you will want toadjust the Tripod height sothat it is at or above eye levelso that the Headset will beable to detect the Camera12
VR Headset Setup Cont. Step 4: Identify the location of the SyncOut and Tracking Camera Cables Connect the ends of the cablesto the Tracking Camera where itis mounted Identify the location of theTracking Camera USB Input onthe top of the cart Connect the Tracking CameraUSB cable to the USB Input13
VR Headset Setup Cont. Step 5: Identify the location of theOculus Rift VR Headset Connect the Sync Out Cable fromStep 4 into the Oculus on the Top Take the HDMI and USBConnection Cables from the endof the Oculus Rift VR Headsetand connect them to theremaining cable ends on the topof the cart14
VR Headset Setup Cont. Step 6: Before beginning to use the VRSetup verify that you have armslength space between you andany obstructions After doing this and setting upwhatever demo you have turnedon (covered in a differentsection) you are clear to put theVR Headset on For additional setup andtroubleshooting please view theconfiguration section of thisguide15
VR Application Configuration All demos have been pre-testedon the Oculus Rift 0.8 SDK Versionand are assured to work uponopening the applications In order to use the demos pleasefollow the next set of instructionsto execute them correctly: On the Desktop there will be afolder called VR Demos wherethere will be two folders named“Application Demos” and“Videos” Depending on the folder chosenthere will be a different set ofinstructions for each, but bothare relatively the same in termsof troubleshooting andconfiguration For Application Demos: Chose your selected demowithin the folder and launchthe executable within thedirectoryFor Video Demos: Chose your selected videowithin the folder, right click thevideo, and click “Play WithVirtual Desktop16
VR Demo List: Included, the following demonstrations that have beenpreloaded for your convenience: As a user of the Oculus, you are permitted to load yourown software as well keeping in mind that the cart is apublic utilityApplication Demos:360 Video Demos:Apollo Experience360 Medical Operating RoomBlack BoxAelst Historic CityBlocked InAtmosphaeres - Real Estate PresentationDeep Space VRBlue Angels Flight ExperienceGoogle StreetviewBlue Whale Educational ExperienceGravitas VRCoral Reef - West Hawaii IslandHenry VR TrailerCustom Patio Build VR How Its MadeMythos of the World AxisGoPro Spherical - Drifting Jump VRThe EyelandJourney to the Centre of the Milky WayTitans of SpaceKids Clinic of Tampa BayVan Gogh - The Night CafeKuroshio SeaWelcome to OculusNASAs Goddard Space Flight CenterNatural Selection TrailerPatton Veterinary HospitalSpace FreefallSubway Flash Concerts17
Troubleshooting If for any reason you are having issues working with theOculus feel free to either let Circulation know or you mayfollow these included steps: Hardware Error – Oculus Rift Not Attached Software Error – Virtual Desktop is either frozen/hasstopped responding Open Task Manager and Close the Virtual Desktop ApplicationRe-Open Virtual Desktop from the shortcut on the DesktopSoftware Error – “Application Demo” is either frozen/hasstopped responding Ensure that all cables are connected by following the setup atthe beginning of this guidePress CTRL-ALT-DEL and close the “Application Demo” that isopenHardware Error – Computer is completely frozen or isgoing extremely slow Press CTRL-ALT-DEL and attempt to close the application orvideo that was running on the Oculus If this does not work and the computer is completely frozeninduce a Forced Shutdown18
Credits This Guide was designed and written by Cody Garrett, forfurther contact please feel free to email him atcody@garrett.ms Additional Credits Include the Following: Kurt Anderson Stand In Model for VR PresentationOculus Rift Background Information Tom’s Guide ws-18026.html19
Step 1: Identify the location of the Audio Headset and Dock Remove Headset and Dock and place on Top of the Cart Connect the Power Adapter Cables shown to the right with the Audio Dock Make sure that the Headset and the Dock are on the same audio channels and also that the Headset is turned on Verify that sound is coming .
