Transcription
THIS EQUIPMENT COMPLIES WITH FCC REQUIREMENTSPURSUANT OF PART-15This device complies with Part 15 of the FCC Rules. Operation is subject to thefollowing two conditions: (1) this device may not cause harmful interference, and (2)this device must accept any interference received, including interference that maycause undesired operation.WARNING: Changes or modifications to this product not expressly approved by the partyresponsible for compliance could void the user’s authority to operate this equipment.NOTE: This equipment has been tested and found to comply with the limits, pursuant toPart 15 of the FCC Rules. These limits are designed to provide reasonable protection againstharmful interference in a business installation. This equipment generates, uses, and canradiate radio frequency energy and, if not installed and used in accordance with theinstructions, may cause harmful interference to radio communications. However, there is noguarantee that interference will not occur in a particular installation. If this equipment doescause harmful interference to radio or television reception, which can be determined byturning the equipment off and on, the user is encouraged to try to correct the interference byone or more of the following measures:- Reorient or relocate the receiving antenna.- Increase the separation between the equipment and receiver.- Connect the equipment into an outlet on a circuit different from that to which thereceiver is connected.- Consult the dealer or an experienced radio TV technician for help.This Class A digital apparatus complies with Canadian ICES-003.Cet appariel numerique de la classe A est conforme a la norme NMB-003 du Canada.Lathem Time Corporation210 The Bluffs, Suite 107Austell, Georgia USA 30168(800) 241-4990(404) 691-0400www.lathem.comCopyright 2017 Lathem Time Corporation. All rightsreserved. Revised 3-5-2019 Document Number: USG0092J
CONTENTSQUICK START STEPS . IVWELCOME. 1PACKAGE CONTENTS. 6SYSTEM REQUIREMENTS . 7INSTALL THE PC600 SERIES TERMINAL . 8USING THE PC600 SERIES TERMINAL . 10INSTALL THE PAYCLOCK SOFTWARE. 33SETTING UP PAYCLOCK . 40EDITING TIMECARDS . 50GLOBAL SCHEDULING. 65SETTING UP YOUR TERMINAL . 68ACTIVATING LIVE SYNC . 75HARDWARE TROUBLESHOOTING . 77SOFTWARE TROUBLESHOOTING . 79APPENDIX A - PC600 SERIES WAN INSTALLATION . 80APPENDIX B - INTEGRATING PAYCLOCK WITH QUICKBOOKS. 83APPENDIX C - CONNECTING THE PC600 SERIES DIRECTLY TOTHE COMPUTER’S NIC . 85APPENDIX D - BELL RELAY CONNECTIONS. 88APPENDIX E – DOOR ACCESS RELAY CONNECTIONS . 94APPENDIX F - ADD/EDIT/DELETE BELL EVENTS . 96COPYRIGHT 2011 LATHEM TIME CORPORATION. ALL RIGHTS RESERVED.REPRODUCTION OF THIS DOCUMENT IN WHOLE OR IN PART IS STRICTLYPROHIBITED. THIS DOCUMENT MAY CONTAIN TYPOGRAPHICAL OR COPYERRORS. PAYCLOCK, LATHEM, THE LATHEM LOGO, AND ALL OTHER LATHEMPRODUCT NAMES MENTIONED IN THIS DOCUMENT ARE REGISTEREDTRADEMARKS OF LATHEM TIME CORPORATION. ALL OTHER PRODUCTS,BRAND NAMES, OR COMPANY NAMES MENTIONED IN THIS DOCUMENT AREPROPERTIES AND TRADEMARKS OR REGISTERED TRADEMARKS OF THEIRRESPECTIVE COMPANIES.
Quick Start StepsCarefully follow each step of these instructions for a troublefree experience.Note: It is recommended to install and mount the PC600 seriesterminal before installing the PayClock software. With the terminalpowered up and connected to the network (LAN), the software willsearch for it on the network and automatically configure the terminal.12Verify the contents of your system. Formore detailed information turn to page6.Select a location that will be convenient toemployees punching In/Out. Also keep inmind that a 115vAC power outlet shouldbe within 6 feet as well as a connection tothe network (LAN).For more detailed information turn topage 8.3Use masking tape to hold the includedmounting template onto the wall. Drillthe holes using the template as a guide.Note: The bottom of the terminalshould be about 45 inches from thefloor.Remove the template and install themounting screws, using the plastic wallanchors if needed. Leaving about 3/16”of the screw exposed.
45Plug the RJ45 network cable into theEthernet port and the Power Adapterplug into the Power Adapter port whichis located in the compartment on backof the terminal. Route the cablingthrough the available channels to bestsuit your installation.Hang the terminal on the wall, aligningthe three keyholes on the rear of theterminal with the protruding screwheads, and then press downward untilthe terminal lowers onto the screws.Align the “L” - shaped security bracketinto the slot at the bottom-rear of theterminal and screw it into place. Thiswill fasten the terminal to the wall.Remove the plastic cover from thedisplay and plug the Power Adapter intoan AC wall outlet.For more detailed information turn topage 8.6Verify your computer meets theMinimum System Requirements listed inthis User Guide, turn to page 7.Install the PayClock Software. For moredetailed instructions turn to page 33.Important Notes7Make sure your screen saver is notshowing before inserting the installationCD’s.Open and close the CD-ROM drawer if theCD is not recognized when inserted.
891011Open the PayClock software byclicking on the PayClock Icon. Thedefault password is lathem. For moredetailed instructions turn to page 37.Click Setup Now from the GetStarted window to configurePayClock. For more detailedinstructions turn to page 40.Add employees as well as createsupervisors using the Employeesbutton under the Setup tab.To add a new employee, click Newand then enter the employee data.To create a supervisor, select thedesired employee and check AllowSupervisor Functions underOptions.For more detailed instructions turnto page 45.After adding the employees click onthe Terminal Manager tab.Activate Live Sync and update yourterminal(s).For more detailed instructions turnto page 68.
P A Y C L O C K&P C 6 0 0S E R I E SU S E R ’ SG U I D EWelcomePurpose of this User’s GuideThe purpose of this user’s guide is not meant to be a completemanual for the product. It is a quick reference to get you started.Please refer to the PayClock Help for detailed product information,setup guidance, and operation information.Product OverviewReliability, functionality and ease of use are trademarks of thePayClock software and terminals. With the PC600 terminal,employees can use a badge or PIN to punch in and out, viewmessages or benefit time balances – it’s that simple. In addition thePC600 has an on-board relay which can be used to controlbells/signaling devices, or security access.The PayClock software and PC600 series terminals are the idealsolution for businesses that want to track employee time andautomate payroll.The terminal connects to your network for communications with thePayClock time and attendance software. The terminal utilizes apowerful Windows CE based application and a touch screen displayfor inputting data by employees, supervisors or administrators. Theterminal validates that the employee is in the database beforerecording the transaction.The can operate in “Live Sync” (online mode). When operating withLive Sync enabled (online mode), communications with the pc are inreal-time. For example, when an employee punches at the terminal itis immediately added to the database and is available for viewing orediting. Another example is if the employee does an inquiry, theterminal will initiate communications with the database and retrievethe inquiry information and display it on the screen.1
P A Y C L O C K&P C 6 0 0S E R I E SU S E R ’ SG U I D EWhen operating with Live Sync disabled (offline mode), alltransactions are held in the terminals memory until the terminal ispolled, and then the data will be added to the database.The terminal offers a large color LCD touch screen that displaysemployee information along with an audio prompt. Upon asuccessful transaction with live sync enabled, the display will showthe employee’s name, total worked time, In / Out status and anaudio/text prompt. With live sync disabled, the display will show theemployees name and Punch Accepted.Features and Specifications Windows CE 6.0 - The power of embedded Windows CE toprovide fast and dependable operation. LCD Color Touch Screen - Use the large easy to read touchscreen for set up and data entry. On-Board Relay - The on-board relay can be used to controlbells/signal devices, or security access.Two Operating Modes - The terminal is functional with LiveSync enabled (online) or Live Sync disabled (offline). WhenLive Sync is enabled the terminal is real-time with thecomputer.PC600 series Idle Screen - Easy to read time/date screen willdisplay after 2 minutes of inactivity on the terminal.User friendly design - Large easy to read touch screen.Comprehensive support agreements minimize technicaldifficulties.Numerous accessory options to enhance the functionality.2
P A Y C L O C K&P C 6 0 0S E R I E SU S E R ’ SG U I D EUpgradesIf you find that you need to accommodate more employees in yoursystem or if you would like enhanced software capabilities, considerpurchasing a software upgrade for your system. A number ofaccessories are offered to further enhance your PayClock system. Increased employee capacityUpgrading is as easy as visiting http://shop.lathem.com or openPayClock and click on the PayClock orb in the upper left corner andselect Upgrade PayClock. Then select the options you would like topurchase and download your software upgrade. Options are instantlyactivated upon receipt of online payment.AccessoriesA number of accessories are offered to further enhance yourPayClock system. Visit http://shop.lathem.com to purchaseadditional accessories like the ones listed below. Badges Badge Racks Annual Support AgreementsGetting HelpThe purpose of this user’s guide is not meant to be a completemanual for the product. It is a quick reference to get you started.Please refer to the PayClock Help for detailed product information,setup guidance, and operation information.You can access the help desk and answers to your issues in a numberof different ways. In addition to resources within the PayClocksoftware, assistance may be accessed online, via email, via telephone,or through your dealer. Don’t forget annual support contracts arealso offered.3
P A Y C L O C K&P C 6 0 0S E R I E SU S E R ’ SG U I D EPayClock HelpThe PayClock Help allows you to search through an index of helptopics to locate the answer you need. To launch the Help, click theHelp button on the ribbon bar.TroubleshootingFor answers to Frequently Asked Questions, refer to theTroubleshooting sections of this User Guide on page 77 and 79.Online and Email SupportLathem.com provides access to numerous support resources that willallow you maximize your use of PayClock. Help may be accessed byvisiting the following link:http://kb.lathem.comOn the Support page, you may also submit a question through ouronline knowledgebase and one of our technicians will respond toyour inquiry within 24 hours. Email support is free to all registeredusers.Telephone SupportThe help desk is available between the hours of 8am and 6pm ETMonday through Friday. Please call (800) 241-4990 to speak withour help desk. You will receive free technical support for the first 30days after your initial call. After that period, you may purchase anAnnual Support Agreement which will cover all calls for one year oryou may pay a per-call fee.Annual Support AgreementsAnnual support contracts are designed to keep your terminal andPayClock software working seamlessly. For a single annual fee, yourSupport Agreement offers the following advantages: Unlimited toll-free telephone support (versus a per-call fee)and priority status for calls4
P A Y C L O C K &P C 6 0 0S E R I E SU S E R ’ SG U I D EUnlimited access to the extensive library of web-based tipsand FAQsFree software updates and version upgrades during theSupport Period, giving you free access to the most currentsoftware featuresQuick exchanges for damaged or broken terminal, therebyreducing downtimeExtended parts and labor warranty helps you to save moneyon repairs needed after the regular product warranty hasexpiredTo learn more about annual support contracts and to make apurchase, contact us at (800) 241-4990 or -plans5
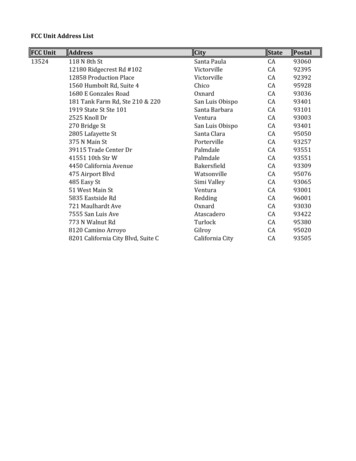
P A Y C L O C K&P C 6 0 0S E R I E SU S E R ’ SG U I D EPackage ContentsPlease verify that your package includes ALL of the following items.If your package is missing an item, please call the help desk at 1-800241-4990.Recommended Installation ToolsPencilTape MeasurePhilips HeadScrew DriverOptional-PowerDrill & Drill Bits6
P A Y C L O C K&P C 6 0 0S E R I E SU S E R ’ SG U I D ESystem RequirementsYou must verify that your system meets ALL of the minimumrequirements listed below in
PayClock and click on the PayClock orb in the upper left corner and select Upgrade PayClock . Then select the options you would like to purchase and download your software upgrade. Options are instantly activated upon receipt of online payment. Accessories A number of accessories are offered to further enhance your PayClock system. Visit http .


![[ANS AQT80] - FCC ID](/img/3/user-manual-pdf-2735955.jpg)

![Ticket: # 3011470 - Re: [FCC Complaints] Re: Billing](/img/9/fcc-complaints-from-alabama-residents-2.jpg)