Transcription
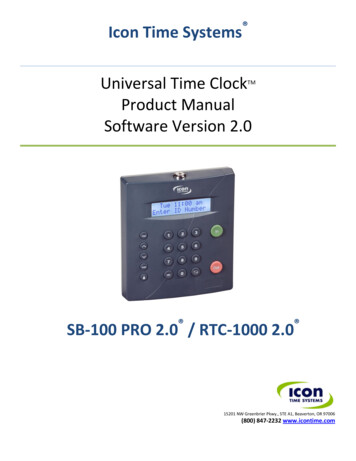
Icon Time Systems Universal Time ClockProduct ManualSoftware Version 2.0TMSB-100 PRO 2.0 / RTC-1000 2.0 15201 NW Greenbrier Pkwy., STE A1, Beaverton, OR 97006(800) 847-2232 www.icontime.com
Table of ContentsTable of Contents .2Introduction: Welcome .5Universal Time Clock Features . 5System Requirements . 6Connection / Setup . 6Support and Troubleshooting . 6Accessories and Upgrades. 6Chapter 1 Getting Familiar with Your Time Clock .7Navigating Through Your Time Clock Software Interface . 7Using the Home Page . 7Current Alerts . 7The Reports Menu . 8Files Menu . 8Settings Menu . 8Help Menu . 8Using Your Time Clock Terminal . 9Time Clock Key Functions. 9Employee Functions at the Clock . 9Signing IN and OUT . 9Tracking Paid Breaks . 11Department Change (Sign IN and Transfer) - Optional Add-on . 11Chapter 2 Setting Your Time Clock Preferences . 13Setting Your Pay Preferences . 13Setting Your Overtime Preferences . 14Setting Your Punch Preferences . 14Setting Your Device Preferences . 16Setting Your Alert Preferences . 17Alert Setup . 18Setting Your User Fields . 18Chapter 3 Setting Up Your Employees . 20Customizing Your Employees . 20Chapter 4 Running Reports . 22Printing Reports . 22Roster Report . 22Timecard and Attendance Reports . 22Adding a Punch . 23Editing a Punch. 24Using Batch Edits . 24Viewing Additional Reporting Details . 25Using the Attendance Report. 26Using the Timecard Report . 26Creating Custom Reports - RTC-1000 2.0 Only . 27Chapter 5 Maintaining Your Time Clock. 28Creating a Backup of Your Time Clock Data . 28Removing Unneeded Data from Your Time Clock . 28Creating a Backup Directly to a USB Flash Drive . 29Restoring a Time Clock Data Backup . 29Restoring a Backup Directly from a USB Flash Drive . 302 Page
Updating Your Time Clock . 30Updating Your Time Clock Using a USB Flash Drive . 31Resetting Your Time Clock Passwords . 31Resetting the Software Interface Password . 31Changing Your Time Clock Software Interface Password . 31Resetting the Supervisor Mode Security Code . 32Chapter 6 Accessories and Upgrades . 33Software Upgrades Overview . 33Advanced Pack Upgrade - SB-100 PRO 2.0 Only . 33Employee Capacity Upgrades . 33Management Plus . 33Rules Plus . 34Mobility Pack. 34Web Punch Time Clock . 34Installing Software Upgrades . 34Advanced Pack Upgrade - In Detail . 35Employee Capacity Upgrades. 35Management Plus - In Detail . 35Setting Up User Permissions . 35Logging In Using Multi-user Access . 36Using Departments . 36Customizing Your Departments. 37Assigning/Changing Departments . 37Rules Plus Pack In Detail. 38Revision Zones . 38Setting Your Revision Zones . 38Enhanced Overtime Preferences . 39Non-worked Hours and Benefit Tracking and Accruals . 39Customizing Benefit Accrual Rules . 39Using Accrued Benefit Hours . 41Mobility Pack In Detail . 42SMTP Server Settings . 42Common SMTP Server Settings . 43Setting Up Email Alerts . 44Enabling SSL Server - Data Encryption . 44Web Punch Time Clock - In Detail . 44Setting Up Your Employees - Web Punch Time Clock. 45Web Punch Time Clock Employee List. 45Punching IN/OUT Using Web Punch Time Clock . 45IP Address Restriction. 46Running Reports with the Web Punch Time Clock . 47Using Proximity Badges . 48Assigning Proximity Badges to an Employee . 48Locking the Time Clock Terminal Keypad . 48Punching IN/OUT Using Proximity Badges. 48Chapter 7 Multi-clock Configuration - RTC-1000 2.0 Only . 49Getting Started - Setting Up your Multi-clock System . 49Configuring your Multi-clock System On a Local Area Network (LAN) . 49Setting Up the Parent Clock On a LAN. 49Configuring Your Child Clocks On a LAN . 50Configuring your Multi-clock System on a Wide Area Network (WAN) or through the Internet. 503 Page
Setting Up the Parent Clock On a WAN . 51Configuring Your Child Clocks over a WAN . 51Enabling the Child Clock from the Time Clock Software. 52Additional Child Clock Options Available In Supervisor Mode . 52Updating the Child Clock Software . 53Multi-clock Software Settings and Optimal Configuration . 53Chapter 8 Troubleshooting and Frequently Asked Questions . 55Frequently Asked Questions . 55Warranty Information . 58FCC Part 15 . 60Copyright 2009 Icon Time Systems, Inc. All rights reserved.Reproduction of this document in whole or in part is strictly prohibited. This document may contain typographical or copy errors.Universal Time Clock, Icon Time Systems, the Icon Time Systems logo, and all other Icon Time Systems product names mentioned inthis document are registered trademarks Icon Time Systems.All other products, brand names, or company names mentioned in this document are properties and trademarks or registeredtrademarks of their respective companies.4 Page
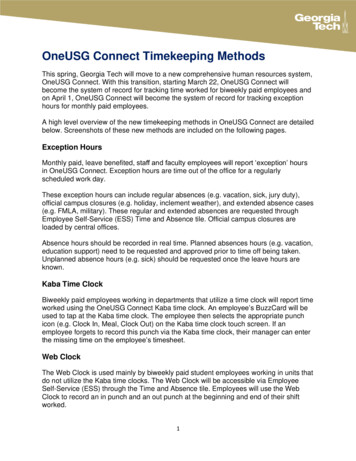
Introduction: WelcomeWelcome to the Universal Time Clock 2.o! Universal Time Clock 2.0 is our latest release and includes many new featuresand improvements to the Universal Time Clock product including; paid break tracking, create custom reports, exportprograms to ADP and QuickBooks and more!Use this guide to learn how to use your Universal Time Clock to perform essential tasks that will make tracking employeetime and your payroll processes more efficient.The Universal Time Clock system offers breakthrough web-enabled technology that brings the simplicity of embeddedsoftware to your time and attendance system, all without requiring Internet access. With the Universal Time Clock, youwill be able to track and manage your employees’ time and attendance, add employees, edit timecards, run and exportreports, and much more directly from your Web browser.Your Universal Time Clock can be connected directly to your computer via USB, serial, Ethernet connection, or to yournetwork via Ethernet. For instructions on connecting your employee time clock, please refer to the Quick Start Guidethat came in your employee time clock package.Universal Time Clock FeaturesThe Universal Time Clock product line is one of a kind, available with features that cannot be found on any other timeclock in the market. We are certain that you will be pleased with your new time clock purchase.The Universal Employee Time Clock can be found in two distinct models, the SB-100 PRO 2.0 and the RTC-1000 2.0. The SB-100 PRO 2.0 Universal Time Clock offers a basic set of features at an entry level price and is designed forsmall companies that do not require a lot of features. The SB-100 PRO 2.0 comes standard with 25 employeesand is upgradeable up to 250 employees. The RTC-1000 2.0 Universal Time Clock is the perfect fit for a growing business that requires a time clock thatcan keep up with changing needs. This time clock is ideal for those companies looking for a feature-rich productthat is fully supported by a nationwide network of experts. The RTC-1000 2.0 comes standard with 50 employeesand is upgradeable up to 250 employees.Most of the information in this User Guide is applicable to both the SB-100 PRO 2.0 and the RTC-1000 2.0. In instanceswhere the information is only applicable to one of the time clock models, look for the following labelsRTC-1000 2.0 Only - If the information is only applicable for users of the RTC-1000 2.0 Time Clock.SB-100 PRO 2.0 Only - If the information is only applicable for users of the SB-100 PRO 2.0 Time Clock.5 Page
System Requirements-Any machine that uses a Web browser (Mac, PC, iPhone etc.)-Ethernet and Internet connection are required for remote Internet accessOne available Ethernet, USB or Serial portUsing USB or Serial Connection requires Windows Operating System (XP and above)QuickBooks Plug-in and ADP Export programs require Windows Operating System (XP and above) and can befound on the Configuration and Documentation CD included with your time clock package.Note: If you are using your Universal Time Clock with a Macintosh computer, you must connect your time clockto your network using Ethernet.Connection / SetupRefer to the Universal Employee Time Clock Quick Start Guide for instructions on setting up your employee time clock'sconnection and logging into your time clock for the first time.You can find a copy of the Quick Start Guide on the Configuration/Documentation CD supplied with the time clock pr onour website at the link below.http://www.icontime.com/support/ search.asp?search quick start guide&table ManualsFor instructions on connecting your time clock over the Internet, refer to the Chapter 8 Troubleshooting andFrequently Asked Questions.Support and TroubleshootingFor your convenience, troubleshooting tips and how-tos can be found in Chapter 8 Troubleshooting and FrequentlyAsked Questions. In addition, our technical support site lists more troubleshooting tips and how-tos to assist you withthe Universal Time Clock. You can reach this site at www.support.icontime.com.Upon product registration, you receive a complimentary 30-day trial of our Gold Technical Support Plan, which includesunlimited telephone support and remote assistance. For those subscribers of our technical support plans, yourdedicated support team can be reached Monday through Friday from 7:30am to 4:30pm (Pacific coast time) at(800) 847-2232 option 1.We highly recommend that you register your employee time clock to ensure that you receive email notification of freesoftware updates, instate your manufacturer’s warranty, and 30 days of free technical support.Register Your Time Clock at - www.icontime.com/universal time clock registration.aspAccessories and UpgradesThe Universal Time Clock offers basic features to meet most small to mid-sized businesses needs. For companies thatrequire additional features and functionality, upgrade packs and accessories are available for your employee time clockincluding; employee capacity upgrades, proximity badges, browser based Web Punch Time Clock, benefit accruals, andmore. For a list of available upgrades and instructions on enabling these upgrades go to Chapter 6 Accessories andUpgrades.6 Page
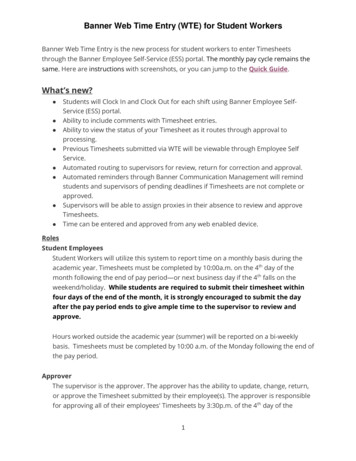
Chapter 1 Getting Familiar with Your Time ClockThe Universal Time Clock interface is designed to allow you to quickly and easily complete your tasks and run yourreports. For this reason, the time clock is divided into sections to make navigating through your time clock interfaceintuitive and easy. In this chapter you will learn how to navigate through your time clock.Navigating Through Your Time Clock Software InterfaceTime clock navigation is done through five distinct menus; Home, Reports, Files, Settings, and Help. Place your cursorover the appropriate icon in the Navigation menu (shown below) to view menu options. Moving your mouse cursorover each of the icons will display the individual drop-down menu items.Using the Home PageWhen you first log into your time clock, the Home page will display automatically. The Home page providesa quick glance at the activity on your time clock including notifications of custom alerts. More on this inChapter 2 Setting Your Time Clock Preferences. The Home page also provides you with helpful links toconfigure your software.Current AlertsThe Home page is designed to display important system alerts or alerts that you have setup in the program along withthe time and date they occurred.7 Page
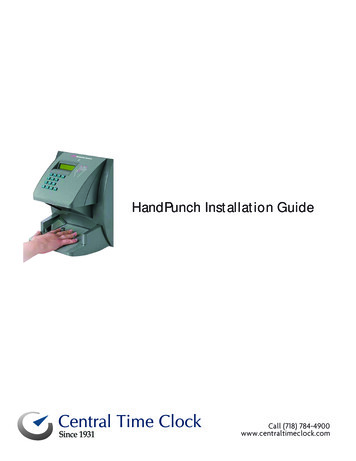
Note: For instructions on customizing your alert settings, go to Chapter 2, Alert Preferences.When you no longer want to be notified of a particular task or alert, simply select the checkbox next to that item in theIgnore column and click the Submit button.If you would like to see the past alerts that have been set to "ignore", select the Show all option.To view the details of the alert, click on the alert link in the ALERT/TASK list.The Reports MenuThe Universal Time Clock has three basic report types that make it quick and easy to get theinformation you need to complete your work. Use the Report menu to access your Timecard,Attendance and employee Roster reports. It is important to set up your time clock settings andpreferences before generating reports so that the data is accurate and customized for thecompany needs.Later in Chapter 4 Running Reports, we will discuss generating and customizing reports.RTC-1000 2.0 Only - The RTC-1000 2.0 model includes an additional Create Report option. The Create Report optiongives more flexibility when running reports and allows you to select a time range for one or more employees. If you havethe Management Plus upgrade, you can also select one or more Departments for a report.Files MenuThe Files menu is used for backing up data, restoring data back-ups, and updating youremployee time clock. Time clock maintenance is discussed in Chapter 5 Maintaining Your TimeClock.Settings MenuThe Settings menu is used to customize your Payroll, Overtime, Punch, Device, and AlertPreferences. Before running any reports, set your preferences as described in Chapter 2 Setting Your Time Clock Preferences.Help MenuThe Help menu gives you the option to view this User Guide and to view the About Your Clockpage for your time clock.About Your Clock lists important information about your employee time clock such as the SerialNumber, Software Version, and enabled and available upgrades.8 Page
Using Your Time Clock TerminalIt is important for you to understand the features and functions available on your time clock terminal. Take the time tofamiliarize yourself with these features. In this section, we will give a brief overview of the features available.Time Clock Key Functions In/Out - used by the employee to punch IN or OUT.Break/Department Transfer - used by the employee to transfer into a Department or Paid Break.Info - displays daily and weekly hourly totals for the employee.Supervisor Mode - allows supervisor to access advanced employee time clock terminal options.Up\Down - used to scroll through menu options.Enter - selects and saves menu options.Clear - returns user to the previous menu option.Employee Functions at the ClockSigning IN and OUTThe procedure used by the employee to punch IN and OUT at the employee time clock may vary depending on the EntryMethod selected in the Customizing Your Employees section of the program. Refer to Chapter 3 for more information.The punch Entry Method and procedure is described below.Validated Entry MethodThe Validated Entry Method is the most common and recommended method for employee sign IN/OUT when using onlyone time clock.1. Employee enters their employee ID number on the time clock terminal.9 Page
2. The employee's Display Name will appear on the time clock. Beneath the display name, the employee will see INand OUT. One of these options will be flashing. The employee must press the corresponding key on theemployee time clock for the entry to be accepted. Once the punch has been accepted the employee will see themessage stating that they have signed IN or OUT.3. Showing Total Hours - after an employee signs OUT, the total hours worked by the employee for the shift willappear on the time clock display. The employee can see additional hour’s information by pressing the Up orDown key to view total hours for the day and the week.Note: This option is activated in the Device Preferences tab as discussed in Chapter 2. If you are using a Multiclock system, we recommend that you turn this feature OFF to increase system performance.Non-Validated Entry MethodThe non-validated entry method is most often used with multiple time clocks. This allows the employee to sign IN onone clock and OUT on a different clock.1. Employee enters their employee ID number on the time clock terminal.2. The employee's Display Name will appear on the time clock. Beneath the display name, the employee will see INand OUT.3. The employee must press either the IN or OUT key on the keypad depending on whether they are starting orending their shift.4. Showing Total Hours - after an employee signs OUT, the total hours worked by the employee for the shift willdisplay on the time clock display. The employee can see additional hours information by pressing the Up orDown key to view total hours for the day and the week.Automatic Entry MethodThis method is also known as "Swipe and Go."1. Employee enters their employee ID number on the time clock terminal.2. The time clock will simply display their Display name and Entry Recorded. The employee will not be allowed tomake any other selections at the employee time clock terminal. This provides a simple and quick method forsigning IN and OUT at the employee time clock.The employee time clock will automatically determine whether the punch is to be assigned as an IN or OUTpunch.Note: You cannot use the 'Show Hours' at the clock or make any lunch override or hours adjustments to these type ofpunches. See the Adding a Punch section in Chapter 4 for details.Web Punch Time Clock Entry - Optional Add-onThe Web Punch Time Clock allows you to capture your employees time punches anytime, anywhere using a browserbased time clock that runs on LAN, WAN, or Internet. Web Punch Time Clock is offered in packages of 5 licenses and willallow a maximum of 25 employees to clock IN using the Web browser interface. For more detailed information on theWeb Punch Time Clock, refer to Chapter 6 Upgrades and Add-ons.10 P a g e
Proximity Badge Entry - Optio
The Universal Time Clock product line is one of a kind, available with features that cannot be found on any other time clock in the market. We are certain that you will be pleased with your new time clock purchase. The Universal Employee Time Clock can be found in two distinct models, the SB-100 PRO 2.0 and the RTC-1000 2.0.