Transcription
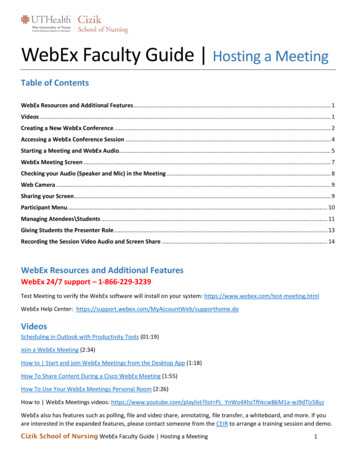
WebEx Faculty Guide Hosting a MeetingTable of ContentsWebEx Resources and Additional Features . 1Videos . 1Creating a New WebEx Conference . 2Accessing a WebEx Conference Session . 4Starting a Meeting and WebEx Audio. 5WebEx Meeting Screen . 7Checking your Audio (Speaker and Mic) in the Meeting . 8Web Camera . 9Sharing your Screen. 9Participant Menu . 10Managing Atendees\Students . 11Giving Students the Presenter Role . 13Recording the Session Video Audio and Screen Share . 14WebEx Resources and Additional FeaturesWebEx 24/7 support – 1-866-229-3239Test Meeting to verify the WebEx software will install on your system: https://www.webex.com/test-meeting.htmlWebEx Help Center: .doVideosScheduling in Outlook with Productivity Tools (01:19)Join a WebEx Meeting (2:34)How to Start and join WebEx Meetings from the Desktop App (1:18)How To Share Content During a Cisco WebEx Meeting (1:55)How To Use Your WebEx Meetings Personal Room (2:26)How to WebEx Meetings videos: https://www.youtube.com/playlist?list PL YnWo4XhzTfhkcwB6M1a-wJ9dTlz58yzWebEx also has features such as polling, file and video share, annotating, file transfer, a whiteboard, and more. If youare interested in the expanded features, please contact someone from the CEIR to arrange a training session and demo.Cizik School of Nursing WebEx Faculty Guide Hosting a Meeting1
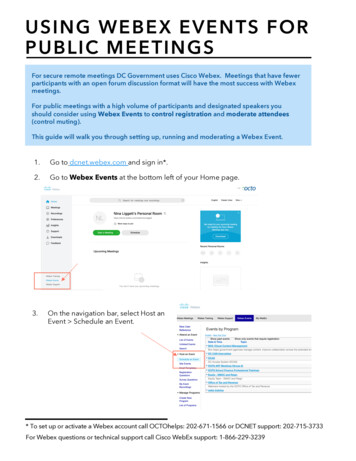
Creating a New WebEx ConferenceIf you are in your office, you can create a new meeting using Microsoft Outlook. Once you are in Outlook, you will seethe WebEx Tools installed under the Home tab.You can click on “Meet Now” to open up your personal room. The web address uses the following iddleinital.lastnameExample: his room is good for ad hoc meetings and conferences or for faculty hosting online office hours.You can also click on the “Schedule Meeting” button to schedule an upcoming meeting.Once you click on “Schedule Meeting”, an Outlook schedule window will open. From here, you can set the date and timeof the WebEx meeting and send the invite to attendees. (See screen shot below)Cizik School of Nursing WebEx Faculty Guide Hosting a Meeting2
If you are scheduling a meeting, simply type in an email addresses for the attendee (this could be your own) andproceed with scheduling the meeting. The meeting invitation will be sent with the WebEx links and connectioninformation. If you just want to create a web conference to post in Canvas, you can type in your own email address asthe only attendee (Note: for classes you will want to select a reoccurring appointment that does not end so that you canuse the same web address for every web conference.) This meeting link should be posted in Canvas for students toaccess.Below is an example of a recurring meeting:This is how the link will look after the meeting is scheduled in Outlook:Cizik School of Nursing WebEx Faculty Guide Hosting a Meeting3
Accessing a WebEx Conference SessionThere are various ways to access a WebEx Conference session *It is not recommend that you use WebEx with a VPNconnection, as this could affect performance. Also be aware that if you are using RDP to remote into your officecomputer and you start a Webex session it will be on your office computer. The mic, camera, and speakers used for theWebEx will actually be in your office so you cannot be seen, heard, or hear anyone. It is best to just exit the RDP andVPN before using WebEx.1) Login to the WebEx system by going to the webpage: https://uthealth.webex.com (click “Sign In” on the upperright-hand side of the webpage) Use your UT-Houston account and password to login. Once logged in, you canview your meetings on the home page.2) You can also click on the web address (URL) of the meeting you will be hosting. When WebEx meetings arecreated, typically a meeting request will be sent so you can access the URL from your Outlook calendar. Themeeting URL is also usually posted in Canvas for online classes. Sign in and click on “Start Meeting” to launchyour meeting.Cizik School of Nursing WebEx Faculty Guide Hosting a Meeting4
3) Another option is to open the WebEx Meeting application and open the scheduled WebEx meeting. If you do nothave the application on your computer, you have the option to download it from the WebEx website. (Note themeeting on the top is always your personal room meeting and may not be the WebEx meeting you scheduledwhich will be below) You can always join a meeting using the meeting number if available. The meeting numberwill go in the meeting information window shown below.Starting a Meeting and WebEx AudioWith WebEx, there are two options for audio: (1) connecting via phone (every web conference created in WebEx has aphone number associated with it) or (2) your computer mic and speakers (recommended).When you first connect to a Webex conference, you will see this screen:Cizik School of Nursing WebEx Faculty Guide Hosting a Meeting5
Select (1) “Use computer for audio” to speak and listen through your computer, (2) “Call Me” to have the system callyour phone, (3) “Call In” to call into your conference with a phone, or (4) “Don’t Connect to Audio.” Your camera shouldautomatically be activated on the meeting connection screen (see below). You can change the mic, camera, and speakersettings by clicking on “Settings” on the bottom right.You should test you microphone and speakers before clicking on “Start Meeting” by clicking on “Settings” on the bottomright. (This area will scroll through your currently selected mic, speaker, and webcam and change to settings when youhover over it.) Once you click on “Settings”, you will see the mic is picking up by watching the mic level bar move as youspeak. You can test your speakers by selecting test.Click on this totest yourspeakersThe audiolevel will goup and downas you speakinto your micOnce you have tested your mic and speaker click on “Start Meeting”.Cizik School of Nursing WebEx Faculty Guide Hosting a Meeting6
WebEx Meeting ScreenThis button willturn on and offyour web CameraUsed to shareyour screenand othercontentOpens andcloses theParticipantwindowOpens and closesthe chat windowClick here to mute and unmute your mic– when your mic is muted it will be redas shown aboveOpens the moreoptions menu, whichis used to test yourmicCizik School of Nursing WebEx Faculty Guide Hosting a MeetingCloses thewebconferenceChat window7
Checking your Audio (Speaker and Mic) in the MeetingAfter you get into the meeting, you can check to see that the mic is picking up by clicking on the “More Options” buttonrepresented by a circle with three dots and selecting “Speaker Microphone and Camera.”Click on this totest yourspeakersThe audio levelwill go up anddown as youspeak into yourmicYou will be able to see the settings of the mic and speaker. If the mic is set all the way to the left, slide it to the right toturn up your mic. You can see if the mic is picking up by the mic level bar by clicking on “Change settings”. You will alsobe able to test your speakers by clicking on the “Test” button.When your mic is muted, it will be red.Cizik School of Nursing WebEx Faculty Guide Hosting a Meeting8
Web CameraWhen your webcam is active, you will see your “self-view” image on the bottom right. You can minimize it this self-view,but students will still see you unless you click on “Stop my video” by clicking on the camera Icon. The camera icon willturn red when the camera is stopped.Sharing your ScreenTo share your screen, click on the Share content icon in the middle of the WebEx program.The WebEx screen will disappear, and your desktop will be showing with the WebEx meeting controls panel at the top ofyour screen.During the screen sharing, the meeting controls panel is partially hidden at the top of your screen. To open the fullmeeting controls panel, hover over the orange section of the panel (shown below).Cizik School of Nursing WebEx Faculty Guide Hosting a Meeting9
The WebEx meeting controls panel will always be on top of your screen when sharing your screen, even if you displayPowerPoint full screen. You can open the WebEx meeting controls panel and click on Chat, Participants, and other toolsto access these options and move the windows around if needed. (see chat window below)Close the chat tool (sends it back to theWebEx Meeting Controls panel Meeting)Controls panelParticipant MenuThe Participant menu is where you can adjust what Participants or students are able to do. You can set everyone’s micsto mute when they login by selecting “Mute on Entry”. You can turn the entry and exit tones off by clicking on the“Entry and Exit Tone” so that it is not checked. You can turn on and off the ability for students to share their screen orother documents by clicking on “Anyone can Share”.Cizik School of Nursing WebEx Faculty Guide Hosting a Meeting10
Managing Atendees\StudentsTo mute all participants/students open the Participant menu and select “Mute All” to mute all Participants. Be awarethat students can unmute themselves, but you can always just mute them or click “Mute All” again. It should bestressed that students should mute when requested. Another useful setting is “Mute on Entry”. With this selected, allstudents / ateendees will be muted automatically when they enter the meeting. This is useful for large meetings sincesome atendees may not be aware that their mics are active. Phone users can always mute and unmute using “*6”.Select “Mute All”to mute allParticipantsControls panelThis will unmute allattendees/studentsThis will mute allattendees/studentswhen they first getinto the meetingThe audio lineswill indicatewhose mic isbeing pickedup at any pointYou can mute anyone individually byclicking on his or her microphone iconCizik School of Nursing WebEx Faculty Guide Hosting a Meeting11
Participants/students may also activate their cameras. You can ask participants/students to turn the camera off if it maycause a disruption or disable the cameras for everyone. (This includes your web camera as well). You can turn camerasoff in the “Meeting” menu under “Options” in the general tab.Unchecking this will remove all active webcameras and will disallow the ability toturn a webcam onYou may also want to disable the ability for students to share their screens (you can give participants/students access asneeded or give a certain participant/student presenter rights). To remove share rights click on the Participant menu anddeselect “Anyone Can Share.”Click to take away the ability forparticipants (except presenters) to share.Cizik School of Nursing WebEx Faculty Guide Hosting a Meeting12
Giving Students the Presenter RoleYou can give students/participants the presenter role by clicking on the student’s icon/initials in the circle on the left oftheir name and clicking. A box will pop up asking if you want to give them rights. If you select yes, the student will havethe ability to share their screen.Click on the studentsinitials in the circle togive them presenterrightsClick on your initials orpicture to take awaythese rights and getthe presenter abilitybackWhen you click on a student to give them present rights the box below will open.Students can also perform this function and give the presenter rights back to you. Student’s mics and webcams may stillbe active, but you can mute the student’s mics independently in the Participant’s section if needed.If you want to remove a disruptive student from the conference, you can right-click on the student’s name in theparticipant window and select “expel” to remove them from the conference. You will see a warning before proceeding.This will remove them from the meeting, but they can always reconnect unless you lock the meeting from the meetingmenu.Cizik School of Nursing WebEx Faculty Guide Hosting a Meeting13
Recording the Session Video Audio and Screen ShareTo record WebEx systems you will use Panopto. This will allow you to save the recording directly into your coursefolder, which is accessible from Canvas. Remember to select “Capture Computer Audio” so students and/or attendeesare recorded. If you are recording from home, you will need to download the Panopto Software. If you need help withthis process, we have help documents available and can assist as needed.In Panopto Click“Capture ComputerAudio” to capturestudents orattendeesCizik School of Nursing WebEx Faculty Guide Hosting a Meeting14
Closing the WebEx MeetingTo close the meeting, simply click on the X in the upper right corner. You can end the meeting or leave it active whenyou leave with another host.Click to leave orend meetingThe End Meeting / Leave Meeting dialog box will pop up. If you select “Leave Meeting,” a random participant receivesthe Host rights (this could include students). If you would like to continue the meeting after you leave, it is better tochoose a host before you exit. If you simply want to end the web conference, select “End Meeting”. This will forceeveryone to exit.Cizik School of Nursing WebEx Faculty Guide Hosting a Meeting15
Also be aware that if you are using RDP to remote into your office computer and you start a Webex session it will be on your office computer. The mic, camera, and speakers used for the WebEx will actually be in your office so you cannot be seen, heard, or hear anyone. It is best to just exit the RDP and VPN before using WebEx. 1) Login to the WebEx system by going to the webpage: https .
